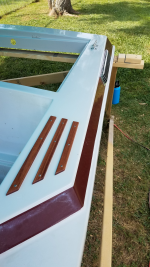
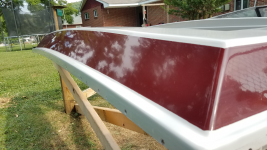
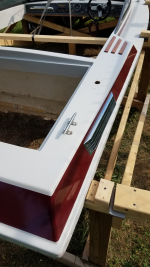
1987 Power Play XLT-185 - floors, stringers, and upholstery

Meames1

Petty Officer 2nd Class
Joined
Dec 14, 2020
Messages
157
A little advice if I may. If you have the time to wet sand and buff the cap before you put it on, your arms will thank you.
I was in too much of a rush to get my cap on, and I sure wish I did my sanding and buffing with the cap at waist-height.
Glad you're back to making progress !
 

todhunter

Canoeist
Joined
Sep 15, 2020
Messages
1,311
A little advice if I may. If you have the time to wet sand and buff the cap before you put it on, your arms will thank you.
I was in too much of a rush to get my cap on, and I sure wish I did my sanding and buffing with the cap at waist-height.
Glad you're back to making progress !
Thanks for that. I had thought it may be nice to wet sand and buff while it's low, but you're right - I've been in a rush to get the cap back on! I just hate that it's outdoors. But I can set up a 10x10 canopy over the area I'm working.

Would you recommend removing the windshield and other hardware on the cap to get better access to all the areas for wet sanding and buffing?
 

Reserector_

Chief Petty Officer" & 2021 Splash of the Year Win
Joined
Oct 15, 2019
Messages
607
I worked on my cap before final installation as well. Windshields were off, which in my case was a huge advantage when it came to buffing that area.
I remember propping it up with tires because I didn't build a sweet stand like yours. But being able to stand right against it inside and out is key to comfort...and safety.
 

Meames1

Petty Officer 2nd Class
Joined
Dec 14, 2020
Messages
157
Would you recommend removing the windshield and other hardware on the cap to get better access to all the areas for wet sanding and buffing?
Personally I would. I did because mine was so oxidized and faded it would have been obvious where I didn't sand. So, in my case I had everything off even the snaps for the covers.
 

todhunter

Canoeist
Joined
Sep 15, 2020
Messages
1,311
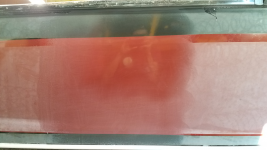
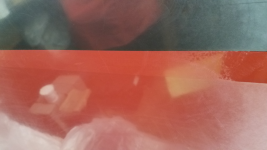
Never been a body guy so this will be my first time wet sanding and buffing. I'm being timid at first and this was about 10 minutes of playing around with a new-to-me process. What you see here is a larger (~2x2) area that I wet sanded with 800 grit. The smaller area in the upper right I hit with Aqua Buff 1000 then again with Aqua Buff 2000. I've got higher grits than 800, but wanted to see what it would do to just go straight from 800 to the Aqua Buff 1000.

My question is - you can still see in the red where the pinstripe was, as it's a different shade of red. Do I just need more/longer time with 800 grit until I can't see a difference in color? I don't want to burn through the gelcoat, but tell me if I'm being too timid.

20210622_180912.png

20210622_180948.png
 

Reserector_

Chief Petty Officer" & 2021 Splash of the Year Win
Joined
Oct 15, 2019
Messages
607
I went as course as 500 and still worked my butt off on the really dull areas. Then 1000. and then McGuires liquid cutting compound on a wool buff at low RPMS. I found that low RPMs worked better than high.

I'm sure others will have great recommendations on products and ways to apply, so cherry-pick the recommendation that you like and draw your own conclusions.

There is no way to know how thick the gel coat is, so you might just have to pick a not-so-noticable spot and get after it. Start course and work your way to compounding to see how well each step (finer) removes the scratches from the previous step.
While experimenting like this, always push your luck by going finer than you think will actually work. You might surprise yourself.

Based on what I see, I think you should try another step courser. Courser can level out stripe edges better than fine. Courser can save you a ton of time if you find the ideal grit.

The courser you go, the more steps you will have to go through to get to polish, but on the other hand, if you try to do it all with paper that is too fine, it could take much longer.

Use some Dawn dish soap in your sanding water as a wetting agent and to reduce drag. Your arms will thank you. Dip often to keep the paper from clogging.
 

chevymaher

Commander
Joined
Mar 29, 2017
Messages
2,921
Yes sand till it is the same color. I went 600 800 1000 1500 3000 buff. And here is how bad mine was.
 

Attachments

  • beforeafter-640x640.jpg
    beforeafter-640x640.jpg
    101.6 KB · Views: 22

todhunter

Canoeist
Joined
Sep 15, 2020
Messages
1,311
I spent some time this weekend pulling the steering cable, shift cable/remote, and wiring harness out of the cap. I also pulled all the hardware off the back half so I could wet sand and buff. I've still got to pull the dash and windshield.

I spent some time wet sanding through different grits on the bench seat back-rest - a non-conspicuous place that won't be seen normally. I need more practice, because I was not able to get all the sanding marks out - guess I need to spend more time at each next step. Anyhow, I also tried just using the buffer with Aqua-Buff 1000 and following that up with Aqua-Buff 2000, and was happy with the results. I think I'm going to just do that for most of the places on the cap and then worry about wet sanding this winter if I have spots that need more work.

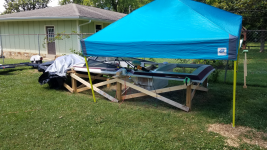
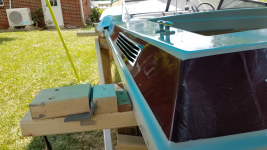
Here's the setup I'm working with to try to keep the sun off me while I work.
20210628_120534.png


Here's how it looks after Aqua-Buff 1000 and 2000 on a wool pad. Not glass, but not bad either. It'll be good enough for getting it on the water this year. I had already reinstalled the hardware after buffing in this picture.
20210628_134220.png
 

Reserector_

Chief Petty Officer" & 2021 Splash of the Year Win
Joined
Oct 15, 2019
Messages
607
That looks great!
I'm petty sure that no one will ever look as closely at the finish as you and the next person to buy it. For everyone else, if it looks shiny from three feet away, it is shiny. Ghost stripes and the Phantom of Eventus are worth conducting an exorcism, though. That stuff will keep haunting you if you don't make it disappear.
 

todhunter

Canoeist
Joined
Sep 15, 2020
Messages
1,311
That looks great!
I'm petty sure that no one will ever look as closely at the finish as you and the next person to buy it. For everyone else, if it looks shiny from three feet away, it is shiny. Ghost stripes and the Phantom of Eventus are worth conducting an exorcism, though. That stuff will keep haunting you if you don't make it disappear.
Thanks...and yes, I definitely will be wet sanding on the hull to eliminate both ghost stripe and phantom Eventus. It seems easy to get down the rabbit hole of trying to make the whole thing look perfect though, and I would definitely not get it on the water this year if I chased that rabbit.
 

todhunter

Canoeist
Joined
Sep 15, 2020
Messages
1,311
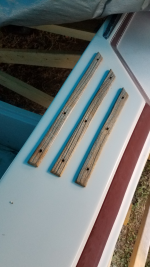
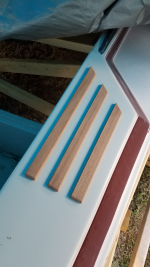
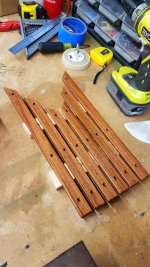
Can't find any teak locally so I'm just going to replace the worn wood trim pieces with mahogany. Tonight I made new step treads for both sides of the cap. The originals were too thin/worn to survive a trip through the planer. I still need to drill the screw holes and oil the wood. Here's a comparison of the old and new ones, just set on the cap loosely:

old
20210630_202612.png


new
20210630_202532.png
 
Top