1987 Evinrude 200hp outboard resto/rebuild

j_k_bisson

Lieutenant Junior Grade
Joined
Oct 6, 2010
Messages
1,082
Re: Update 02-06-2011

Re: Update 02-06-2011

nice job so far sorry had built new office at home new contertops, floors wifes happy as heck so computers been down awhile but now back on it ill send those petals next week

I was wondering what happened to you. I though I pissed some people off here or something. LOL.... I hope your project turned out great. I probably will not get into that part of the project for two or three weeks so no rush.
 

j_k_bisson

Lieutenant Junior Grade
Joined
Oct 6, 2010
Messages
1,082
Re: Update 02-06-2011

Re: Update 02-06-2011

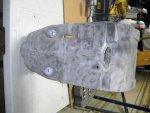
Well last night I got the pivot shaft housing blasted. That was a pain in the you know what. Here is a pic.

DSCN1429-1.jpg

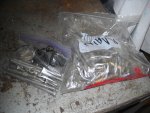
Then it was on to cleaning bolts. I was able to clean half of the bolts up. Will need to replace some of the main housing to block bolts that are hardened steel. They are a bit rusted and corrodid. Here is a pic for the guys that are addicted to pics.

DSCN1427-1.jpg

Tonight I will finish the bolts. Then is on to the motor again. Here is my list of things to do before honing next weekend.

1) Finish cleaning all the bolts.
2) Replace all missing and damaged bolts, washers, nuts, and stubs.
3) Finish cleaning pistons and oil them for reassembly.
4) Rework the intake side of crank case for Faztbullet idle fix.
5) Clean up all casting flash on both halfs of crank case.
6) Go thru all motor parts and make sure they are ready for paint. Clean up remaining oil old paint.

Then we are ready for honing, washing, and reassembly. Starting to see the middle of this project. The fun part for me!:D
 

nymack66

Petty Officer 1st Class
Joined
Aug 5, 2009
Messages
356
Re: Update 02-06-2011

Re: Update 02-06-2011

Jeff you are doing a phenomenal job with this engine restoration. I use a media blasting company to clean my engine parts up, I hate the mess and dust.
Are you going to use a Zinc Chromate primer? I did on mine, time will tell if it was worth the extra dollars..
 

j_k_bisson

Lieutenant Junior Grade
Joined
Oct 6, 2010
Messages
1,082
Re: Update 02-06-2011

Re: Update 02-06-2011

NYMACK66 yep I am going to use the Zinc chrommate primer. I am also planing on going through the correct process of etching with Alumiprep 33 and then coating with the Alodine 1201 before the primer stage. I have never done it and it is cheap from what I have found. I do not want to have to do the paint and prep stage again in a couple of years again.

Last night watched a movie out in the garage with the wife while I scrubed the last of the bolts. Talk about romantic!!!!! LOL Did get her drunk though... Or it could have been the fumes! lol

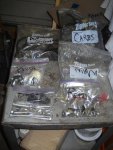
Here is a pic of all the nice and clean stainless bolt scrubed and ready for assembly. What a pain in the ***** to get all the old loctite off. Need to find a better chemical to eat that stuff up. Does MEK work better than vasol?

DSCN1431-1.jpg

All nice and organized per part/plate that goes together. Saves alot of trying to figure out wat size and grade goes where.

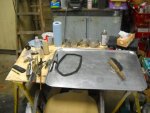
I also thougt I would share a pic of my work area with everyone. I'm posting it for all you guys out there that are addicted to pics.... I had just thrown out my varsol container from the dollar store. I keep dumping the used varsol into a old container I have. It keep the area clean and fume free. I will have fire starter for the summer with all the old varsol I am collecting. :eek: Here is the pic of the area. I am starting to get quite a collection of scrub brushes!

DSCN1432-1.jpg

Seeing tonight the wife has to work, I get out of the whole valintines thing today. I plan on finishing the piston scrubbing tonight after the kids go to bed. Then cleaning up the garage putting the sand blaster away ad cleaning up the grit/dust. Just need to pic up some more dollar store zip lick bags for the clean piston to go into after cleaning and a new varsol container. I'll post my progress tomorrow.
 

Willyclay

Captain
Joined
Sep 8, 2006
Messages
3,260
Re: Update 02-10-2011

Re: Update 02-10-2011

What is the best media for blasting alumium? Remember the air compressor it a bit under rated so the media will need to be supper sharp to over compensate.

Will anti-sieze help with the corosion issue in the aluminum parts when I come to reassemble things? What kind is the proper one? Cooper or silver? Never asked before.

What blasting media did you use and have you decided on an anti-seize yet? I did some searching and found that Loctite has several "non-metallic" anti-seize compunds for marine applications depending upon the strength needed. Just curious, always trying to learn from others.
 

j_k_bisson

Lieutenant Junior Grade
Joined
Oct 6, 2010
Messages
1,082
Re: Update 02-10-2011

Re: Update 02-10-2011

I used aluminum oxide fro Harbour Freight. It black and in a nice sealable plastic jug. Will keep the moisture out of it. It seamed to work nicely, ut My compressor struggles to keep up with the cabinet blaster.

As to the anti sieze, I have not heard back from anyone here reguarding that question. If I use anything I'll probably use the Loctite Mairne anti sieze. Just becuse it is equivalent to the OMC brand. I'm still hoping to hear from anyone on that questio though.

My thoughts on that anti-sieze was for example the housing bolts that get submerged all the time. I broke two of them take them out. The heads broke off them an the shaft was still glued with corosion to the housing hole. When I start reasembling this thing I was going to use thread locker where directed to on the treads only and then coat the shaft of the bolts with anti-sieze. That way the bolt shaft will not sieze in the holes and break the next time I need to remove these bolts.
 

BoatingCop

Chief Petty Officer
Joined
Aug 28, 2007
Messages
407
Re: Update 02-10-2011

Re: Update 02-10-2011

Just wanted to let you know, you're doing an AWESOME job on this engine! Seeing this thread is what got me wanting to do a resto project. I just got an old outboard and I don't have a small boat to put it on! I just like working on things. I'll probably have some questions for you about sand blasting and paint. Anyways, keep up the good work! Can't wait to see it fire up!!
 

j_k_bisson

Lieutenant Junior Grade
Joined
Oct 6, 2010
Messages
1,082
Re: Update 02-10-2011

Re: Update 02-10-2011

Just wanted to let you know, you're doing an AWESOME job on this engine! Seeing this thread is what got me wanting to do a resto project. I just got an old outboard and I don't have a small boat to put it on! I just like working on things. I'll probably have some questions for you about sand blasting and paint. Anyways, keep up the good work! Can't wait to see it fire up!!

I'm no expert, but ask away. I can oly tell you what I do and learnt, but hey some times thats good enough. :D There are a ton of experts here thought. I love this site.
 

j_k_bisson

Lieutenant Junior Grade
Joined
Oct 6, 2010
Messages
1,082
Update 02-15-2011

Update 02-15-2011

Was able to finish cleaning, oiling, and bagging the pistons for reassembly. Still need to assemble the new ring to them when they come in. After I check the end gaps that is. What a pain to get all the carbon off from in the ring grooves. Its done now thank god! I was able to find dollar store ziplock bags big enough to seal up the pistions so oiled them up nice and good then packed them away for the day when everytig starts going back together.

After that I really cleaned up the garage. Putting back the blast cabinet and cleaning up all the grit from everywhere. Also packed up all the parts in nice organized boxes. Then set up my grinding/rework table for tonight's work. I want to start into the cleaning up the flash in the crank cases and itakes. The idle rework the faztbullet has instructed me to do. Then hone the block. Hope to have all this done by Thrusday night. Then Friday and Saterday is scrubbing everything down, even the blasted parts.

Possibly paint and block reassembly this weekend. Depending on what gets done first. Might wait on the paint until after the block is assembled. Seeing the Block needs a bit of paint as well. We'll see when the time comes though.
 

jrs_diesel

Chief Petty Officer
Joined
Mar 3, 2010
Messages
552
Re: Update 02-10-2011

Re: Update 02-10-2011

My compliments to you on your rebuild. Much larger scale than the one I am doing (a little 6 HP) :)

Here's a thread I had started on the anti-sieze issue, most people recomending Permatex non hardening gasket sealer.
http://forums.iboats.com/showthread.php?t=380536

The main issue is that most anti sieze compounds contain metal (copper, nickel, or silver), and become reactive with the aluminum, and stainless steel on the motors. More so in salt water. Now, that loctite anti sieze that you mentioned has none of those metals, which makes it an interesting candidate. It contains:

Petroleum grease 30-60%
Calcium oxide 10-30%
Graphite 10-30%
Calcium stearate 5-10%
Boron nitride 1-5%

Might finally have an anti sieze than can be used on outboards!
 

Faztbullet

Supreme Mariner
Joined
Mar 2, 2008
Messages
15,920
Re: Update 02-10-2011

Re: Update 02-10-2011

Good job so far!!! And dont even thing about antisieze,use Triple guard grease...
 

j_k_bisson

Lieutenant Junior Grade
Joined
Oct 6, 2010
Messages
1,082
Update 02-16-2011

Update 02-16-2011

Thank god I did not buy the anti-sieze yet. I will use the 2-4-c Merc grease like you said. Got home early yesterday and had a good run at working out in the garage.

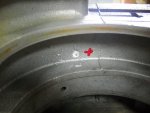
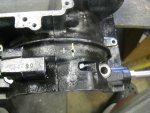
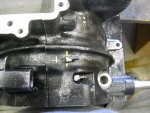
First I completed the idling rework that Faztbullet instructed me to do. I put the hole up from the bottom of the casting 2.0" even. The hole size was 3/16" Dia. Finished up with a bit of chamfering the hole oth sides. Here are the pics after I was done even with the new fitting installed.

DSCN1433-1.jpg

DSCN1434-1.jpg

DSCN1435-1.jpg

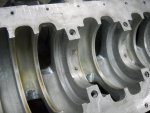
Next I did the porting/flash clean up on the intake side of the crank case. Here is a pic of the before.

DSCN1436-1.jpg

Here is the after. Did not take very much off at all. just cleaned up the air ways of restrictions. Do not want to change the flow rates.

DSCN1437-1.jpg

Cont'd next post.......
 

j_k_bisson

Lieutenant Junior Grade
Joined
Oct 6, 2010
Messages
1,082
Re: Update 02-16-2011 Con'd

Re: Update 02-16-2011 Con'd

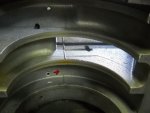
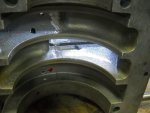
After the intake was done I started in on porting the block half. Again just cleaned up the flash. did not make the openings bigger. Just made them the same size through out the lock. I used a cheap inside protractor to check every one.

DSCN1438-1.jpg

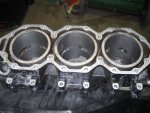
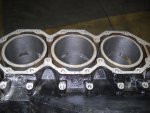
After I got the flex hone (Monkey Balls as my buddy likes to call it) out and deglazed the cylinder walls. Deffinately not as hard as I was worried about. Will have not reservations about doing that again. Here the pics of that done.

DSCN1440-1.jpg

DSCN1441-1.jpg

Two lessons learned while doing that last night.

First one was when cleaning up the flash in the block, you will want to stuff rags into the cylinder after whiping away all the oil on the walls. If not then the shavings will stick to everything. That was and still is a huge mess to clean up.

Second one is stuff a piece of cardboard or metal cut to the same size as the bore diameter down each cylinder before honing. Again to keep the rest of the block clean of used honing juice. And second is to protect the hone and block from getting the hone stuck in the bottom of the block.

Tonight I get to scrub clean the block and intake. I plan on picking up a wash tub as my wife stated in very firm terms that I am not allowed to use her laundry tub in the basement at ALL! Any suggestions on soap to use. I was planning on laundry soap. Seeing it is not that bubbly.

Need to pick up today nylon scrub brushes from harbour freight, and shop towels. This is going to be a fun wet night. With all the transfer passages to clean out. No power washer available to use. So it is old fashion elbow grease tonight! Wish me luck! I am sure my kukles will never be the same again!
 

dehydrated

Petty Officer 1st Class
Joined
Dec 25, 2009
Messages
299
Re: Update 02-16-2011 Con'd

Re: Update 02-16-2011 Con'd

that really looks like great progress .its pretty fun stuff to put them togather in the middle of winter what else has a guy got to do? oh yeah you already did that ha ha get back to work
 

nymack66

Petty Officer 1st Class
Joined
Aug 5, 2009
Messages
356
Re: Update 02-16-2011 Con'd

Re: Update 02-16-2011 Con'd

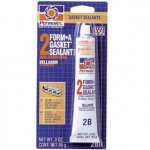
My personal preference for anti seize is permatex gasket sealer, I use it on my prop splines never fail to amaze me the prop slides right off every time.
I am using this on my restoration project also.
 

Attachments

  • Gasket.jpg
    Gasket.jpg
    12.4 KB · Views: 1

j_k_bisson

Lieutenant Junior Grade
Joined
Oct 6, 2010
Messages
1,082
Re: Update 02-16-2011 Con'd

Re: Update 02-16-2011 Con'd

I like the triple guard grease idea the best for anti-sieze. Deffinately will not use the Loctite marine anti-sieze. That Graphite issue scares me.

Last night it was scrub-a-dub-dub two people (wife and myself) in a tub! What a mess cleanig a engine block is. My wife helped me clean that pre cleaned engine block of mine. I needed two baths after to get the grease/oil off myself! But the block it spotless! Ready for assembly.

Now it is time to figure out where the h*ll is my piston rings are! I hope they will be in tomorrow for the weekend. I would love to start putting this thing back together this weekend. If not there will be a ton of painting going on in my garage for all the transom brackets.

Found on Ebay yesterday a 25" mid section for cheap. Around $125 delivered out of Flordia. Yes it is salt water application. But it is way cheaper that the Bay Mfg 5" extension kit for $680 I need. The guy is going to send a few pics today. So might need to put that (mid section painting) on hold as well. Will know more later this afternoon.

How hard is it truely to dissassemble the lower unit on these things? If I go with the new housing, I will need to change out the drive shaft and the shift rod. I've rebuilt mercruicer alpha one upper unit before. So I have some experience with this type of work. But how seized do these lower unit bolts get? Or do they come appart fairly easy?

Might have to get into that to change out the **** rod and drive shaft for the longer length 25". Also I will be nice to re-seal the lower unit while I am at it too. I'll start that analysis today.....

Also trying to figure out how to get a temp sender and gage hooked up to this motor. Would be nice not to have to rely on the horn for the over heat warning. Anyone ever use the other sender hole in the heads for a temp sender? If so what was the part number for the sender unit you used? I plan on using a Faria 240 omh's guage 100'F-250'F. I'm trying to stay way from the bracket mounted sender unit. I would love to mount this sender unit right into the head to help protect it from when the hood gets removed.

Sorry not pics of last night work.
 

j_k_bisson

Lieutenant Junior Grade
Joined
Oct 6, 2010
Messages
1,082
Re: Update 02-16-2011 Con'd

Re: Update 02-16-2011 Con'd

Well the rings just came in from USPS. So the weekend is set, full steam ahead for the reassembly of the rotating assembly!

Also just got back from picking up the Alumiprep and Alodine from the local Painter's Supply Co. So the painting of the mid section and stuff can move forward as well!

I love it when a plan comes together!!!
 

j_k_bisson

Lieutenant Junior Grade
Joined
Oct 6, 2010
Messages
1,082
Re: Update 02-16-2011 Con'd

Re: Update 02-16-2011 Con'd

Question, been sitting heer thinking about putting the power head together. Is there anything not covered in the factory manual that I should do, or watch out for? Anything at all. Treat me like an idiot, and tell me everything. Its better to know now before I start than after I'm finished.

I plan on starting to assemble it tomorrow evening. So let the sugestion/tips rip!
 

nymack66

Petty Officer 1st Class
Joined
Aug 5, 2009
Messages
356
Re: Update 02-16-2011 Con'd

Re: Update 02-16-2011 Con'd

Rod Caps, Rod Caps make sure you have them mated absolutely perfect, remove and tighten as many times necessary. Triple check your wrist pins clips and follow the recommend position. Connecting rods make sure the oil hole is facing up, Pay attention to those use seal rings you are re-using make sure no binding and rotated correctly. Do not over use the gasket sealer on the mating surface...Use compress air to clean out all oil hole passages especially upper and lower bearing caps.
Its all I can think of at the moment ..
 

Faztbullet

Supreme Mariner
Joined
Mar 2, 2008
Messages
15,920
Re: Update 02-16-2011 Con'd

Re: Update 02-16-2011 Con'd

Make sure block is clean, wipe each cylinder wall and ports with a clean white rag, if any grey/black material is on rag reclean that cylinder. To clean exhaust I tie a short piece of twine to a nut and drop thru exhaust till it comes out bottom of block and tie and pull rag thru it. Make sure pistons are on correct sides(port & starboard) and the other things nymack posted.Use only a band type ring compressor and not screwdrivers to install pistons. If your using the Loctite or Gelseal for sealing the crankcase halves, use the primer/activator also to prevent any chance of a blowout or air leak. Also wipe a small amount on center main bearing races to quieten engine down(this is a ficht mod). Do not use any thread locking sealer on rod bolts and torque in 4 steps 10/20/30/42 ft lbs.Also do the upper bearing mod as it consists of replacing bolts with a tad longer and case hardened bolt to prevent breakage.(dealer item)
 
Top