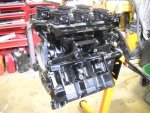
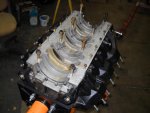
1987 Evinrude 200hp outboard resto/rebuild

Faztbullet

Supreme Mariner
Joined
Mar 2, 2008
Messages
15,902
Re: Update 02-04-2011

Re: Update 02-04-2011

Do I need to completely disassemble the throttle bodies or just spray them down.
Spray and clean only, the throtte plate screws are "staked" and will strip the shaft if you dont grind off the rear of screw. These rarely need much service unless plate or shaft is worn and has extremely excessive side to side play.
Wondering if there is a spec for flatness on these.
Nope... You can tweak them with you hands with a slight wrist twist, try it on a old one to get the feel of it as they are sort of brittle.
If I can get the proper fitting from the dealer that is.
Pm me you shipping address and will send ya one!!!
 

Willyclay

Captain
Joined
Sep 8, 2006
Messages
3,256
Re: Update 02-04-2011

Re: Update 02-04-2011

Anyone know if there is a continuity check I can do on the compressor?

Will scan and send you two pages of compressor motor testing procedures for GE/Hotpoint if you are interested. I cannot imagine it being significantly different from your Whirpool brand. It is resistance value checks not continuity. You will need to refer to your unit's wiring diagram for test values. Send me a PM with your email address and I will reply with them as an attachment. Good luck!
 

j_k_bisson

Lieutenant Junior Grade
Joined
Oct 6, 2010
Messages
1,082
Re: Update 02-04-2011

Re: Update 02-04-2011

The fridge is fixed. It was the relay. Thank god!! Now on to more important things. Like a motor rebuild!!!! LOL
 

dehydrated

Petty Officer 1st Class
Joined
Dec 25, 2009
Messages
299
Re: Update 02-04-2011

Re: Update 02-04-2011

always good to have the food ready and cool when working on a rebuild project mine of course is liquid at the moment lets get back to engine rebuild 101 lol glad we got that out of the way next
 

j_k_bisson

Lieutenant Junior Grade
Joined
Oct 6, 2010
Messages
1,082
Re: Update 02-04-2011

Re: Update 02-04-2011

Yes it is nice to be able to put my beer back into the garage fridge. Had to take it all out to make room for all the stuff from the house fridge. Also it is not fun cleaning the really old garage fridge because my wife will not allow anything in it because I had worms in it this summer. That was not fun!
 

j_k_bisson

Lieutenant Junior Grade
Joined
Oct 6, 2010
Messages
1,082
Update 02-05-2011

Update 02-05-2011

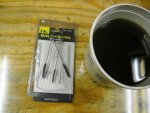
Well last night rebuilt all my carbs. Basically took them down to bare housings and screws. Soaked and washed them in a larger butter container of varsol and compressed air dried them after. Then reassembled oll of them with OMC carb kits. I noticed where the common failure mode was for these carbs while cleaning them. One common pluged tube that extends down into the bowl. Second the air idle orfice was a bit dirty/gummed up (The #14 jet). A good way I found for cleaning them is by using a Harbour freight paint gun cleaning kit. It only costs $1.99 Here is a pic.

DSCN1399-1-1-1.jpg

Also notice the vasol. I only cleaned the six carbs. It was clear non tinted before I started.

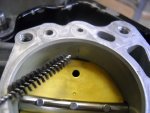
After cleaning the carbs I soaked and scrubbed with a firm tooth brush the trottle bodies. They where easy enough to clean. Also noticed one other area of concern if you are having idleing problems. The throttle bodies have orfices in them too. One on every carb orfice had crap in it. You will want to clean these as well when rebuilding the carbs. Here's a pic of the holes.

DSCN1404-1.jpg

I believe these are idle jet openings. But I am sure someone will correct me if I am wrong.

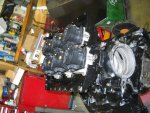
Here is a pic of all the carbs done and sitting on the throttle bodies.

DSCN1401-1-1.jpg

This afternoon I will rebuild the VRO pump. I will only be rebuilding the fuel side. I'll be blocking off the oil injection. I rather know for sure I am getting enough oil then assuming I am with a oil pump.

Also a question to all. I am going premix, do I still need the fuel pressure switch. Or can I remove that from the fuel system? My thinking is two less fuel line conections that cause an air leak.

I had a second question last night when I was feeling good from all the low oder varsol fumes, and beer, but I can not remember it now. If I do I'll post it.

Hope this helps someone.
 

j_k_bisson

Lieutenant Junior Grade
Joined
Oct 6, 2010
Messages
1,082
Update 02-05-2011 afternoon

Update 02-05-2011 afternoon

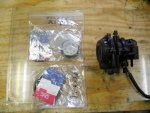
This afternoon I was able to get to rebuild the VRO fuel pump. I used the "Maxrules" method for dissassebly and assembly. On his website you can buy the rebuild parts. This is only for rebuilding the fuel side. I only plan on using premix with this motor so this worked out great for me. I was originally planning on converting over to the old style pumps. But when I had to buy two pumps and put them inline I decided to go this way. Here is a pic of the rebuild kits and the pump before starting. Those are the part numbers you will need.

DSCN1406-1.jpg

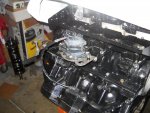
Here is a pic of the finished pump roughly installed on engine.

DSCN1405-1.jpg

Will start geting into the all the linkages for the motor. Cleaning off all the old sticky grease. And get them ready for paint and stuff.

Question will the OMC triple guard grease get gummy like these linkages are? Or should I use a moly lube with lithium?
 

j_k_bisson

Lieutenant Junior Grade
Joined
Oct 6, 2010
Messages
1,082
Update 02-06-2011

Update 02-06-2011

Last night finished scrubbing all the linkages and minor switches. Here is a pic of all the parts back into place. The reason I do this rough assembly is so that I can make sure I got all of them. I also can figure out how they go back together. Here is a pic.

DSCN1409-1.jpg

I found another possible source of rough idling. The tube linkage that connects the timer base (trigger) to the trottle linkages was seized with old sticky grease. Took that apart and cleaned and it now moves/springs back and forth like it should. Deffinately another maintence item to keep a watch on. Here is a pic of the tube thingy I'm talking about.

DSCN1410-1.jpg

I also cleaned and rebuilt the fuel primer solinoid. Went through and cleaned up the wiring. Is it just me or was there such a thing as heat shrink tubing back in the 80's? Will need to get the liquid electrical tape out and fix a wire coming out of the unit. The coating is minorly cracked on one wire.

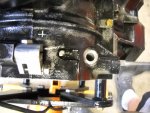
The last thing I did last night was clean and reassemble the shift interupt switch. Went through the wire on that too. They had a couple of wear thru points in the insulation. Fixed them by cutting, striping, soldering, and marine heat shrink. Then I sat there and tried to figure out where I want to put Faztbullet idling rework in at. I have the cross block location now. Just need to know is do I want to come out even with the bottom of the journal or above the bottom by an 1/8" so oil does not fly out of the tub all the time. Hoping Faztbullet chimes in and lets me know where to put it. Here a pick of the area.

DSCN1412-1.jpg

It's super bowl Sunday, not that I watch football. I'm more of a fisherman/mechanic than anything else. If I had cable TV, fishing channel would be on all the time. Not any other sports! Don't even know who's playing today. I can tell what I will be drinking though!!!!! LOL:D
 

Faztbullet

Supreme Mariner
Joined
Mar 2, 2008
Messages
15,902
Re: Update 02-06-2011

Re: Update 02-06-2011

Shift it to the right about a 1/8 inch and stab it when you get elbow, it just a vent no oil involved...PS put your parts in mailbox today. When you had VRO pump apart you did disconnect and throwaway the oil pump piston rod??
 

j_k_bisson

Lieutenant Junior Grade
Joined
Oct 6, 2010
Messages
1,082
Re: Update 02-06-2011

Re: Update 02-06-2011

Shift it to the right about a 1/8 inch and stab it when you get elbow, it just a vent no oil involved...PS put your parts in mailbox today. When you had VRO pump apart you did disconnect and throwaway the oil pump piston rod??

Yes I did throw it away. my new kits came with two new rods. So I put one of them in. Why?
 

j_k_bisson

Lieutenant Junior Grade
Joined
Oct 6, 2010
Messages
1,082
Re: Update 02-06-2011

Re: Update 02-06-2011

Last night finished cleaning the end caps/bearing carriers. Also finished scrubbing three pistions. Still have three more pistions to go. Tonight I plan on moving my boat over to my buddies house seeing I have that By Law Infraction to take care of. If I get back early enough I will start into cleaning all my nuts, bolts, washers, and screws. A nice varsol dip then some compressed air. They will come out like new again. Then its all eletrical components to go through. I am planing on replacing the rectifier and stator already. So I hope I do not need to replace anything else. Only inspection and testing will tell.

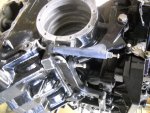
Seeing my hone and new pistion rigs will not be in until the end of next week. I was planing on doing the rework to the intake half of the crank case this weekend. I was also thinking of cleaning up the ports on the cylinder half of the block. I am not trying to make the openings any bigger or anything. Just trying to clean up the flash and make them a consistent opening size. Here is a pic of the area I was talking about. The arrows point to the webs I plan on cleaning up. Any thoughts from anyone on this idea would be appreciated? I have a tendancy to over think things and need a reality check every once and a while.

DSCN1353-1.jpg

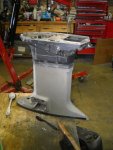
After this I was going to start ripping into the lower unit and mid section. I plan on stripping the old paint and grease off ad pait everything. I have a couple of questions on the lower unit.

How does one know that you need to rebuild the lower unit. Is there a back lash spec (5-15 deg) or some play (lateral movement) spec? I have not found anything in the factory manual yet on this.
Second question for the day, is it really hard to reseal a trim unit. And would it be in my best interests to do so right now?
 

Faztbullet

Supreme Mariner
Joined
Mar 2, 2008
Messages
15,902
Re: Update 02-06-2011

Re: Update 02-06-2011

Yes I did throw it away. my new kits came with two new rods. So I put one of them in. Why?
I only rebuild the pumps to run premix only and have seen the the oil piston rod bind up and limit stroke of fuel pump.
Just trying to clean up the flash and make them a consistent opening size.
Have at it ,they are a lot of places the flash can be ground off on intake also.
How does one know that you need to rebuild the lower unit
Water in gear oil,milky gear oil or large metal pieces on magnet that will stick you when rubbed between fingers. Water in oil over time wears the propshaft bushing and shifter cradle and also etches the bearings and races.
is it really hard to reseal a trim unit.
Check the fluid for water(milky) if OK leave it alone now....
 

j_k_bisson

Lieutenant Junior Grade
Joined
Oct 6, 2010
Messages
1,082
Update 02-09-2011

Update 02-09-2011

Last night I did not get the boat moved like I had planned. The spot where I was planning on moving it to, had to have some snow removed first. Tonight is the night it gets moved.

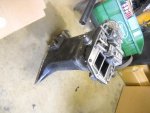
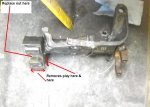
Instead I played with the mid and lower sections of the motor. I fist removed the lower unit. Had a quick look at it then started playing with the trim unit. I wanted to find out what kind of shape the trim unit was in. I discovered that the the wiring going into the unit was all cracked straight thru to the wire and the housing for the motor very rusted. So hooked up a batery an jumped it to see if it worked. The motor did work the pump up and dow, but with a hell of a racket. Think the motor needs brushed and bushing. Will know more when I tear into that unit.

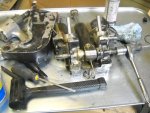
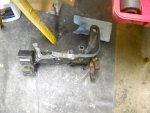
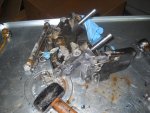
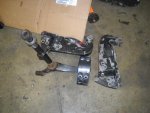
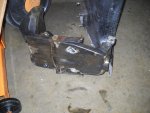
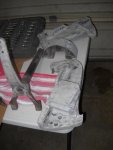
I next started tearing down the the mid section and transom bracket to get at the trim pump unit. Broke two bolts getting it appart. Then spent 2 hrs trying to get the last roken bolt out from the side brack to the trim unit. Eventually got it apart but only after damaging the lower pivot pin/shaft for the hydralics. Only sqished the threads on the end a bit. Will need to get a 5/8" die to chase the threads again.

Here are a few pics of the untis apart.

DSCN1415-1.jpg

DSCN1413-1.jpg

DSCN1414-1.jpg
 

Faztbullet

Supreme Mariner
Joined
Mar 2, 2008
Messages
15,902
Re: Update 02-09-2011

Re: Update 02-09-2011

Since your gone this far go ahead and replace the nut on bottom of swivel shaft as it will eliminate the lower end play. All these older motors suffer this fate as the nut and collar wears. It takes a 1-7/16 socket if I remember correctly and a 6 ft cheater pipe and do not reuse the old nut.

DSCN1414-1.jpg
 

j_k_bisson

Lieutenant Junior Grade
Joined
Oct 6, 2010
Messages
1,082
Re: Update 02-09-2011

Re: Update 02-09-2011

Since your gone this far go ahead and replace the nut on bottom of swivel shaft as it will eliminate the lower end play. All these older motors suffer this fate as the nut and collar wears. It takes a 1-7/16 socket if I remember correctly and a 6 ft cheater pipe and do not reuse the old nut.

View attachment 82563

That is why I took it apart. I thought there was a bearing in there that need to be replaced. No bearing. Do I only replace the nut or the collar as well? Yep it was a 1 7/8" socket.

Dropped the trim cylinder system tonight. Broke the motor housing. So a new motor assembly will be needed. No rebuilding there.

This week end I will pick up a bag of sand blaster grit. Any recomendations for what type? I was thinking either glass bead or aluminum oxide. My blaster is not the best so I like to over compensate with the harder sharper grit. Air compressor can not keep up.
 

j_k_bisson

Lieutenant Junior Grade
Joined
Oct 6, 2010
Messages
1,082
Update 02-10-2011

Update 02-10-2011

Last night finished taking apart the mid section pieces. Had to buy a 1 7/8" socket to get the nut off the pivot shaft. I will purchase a new one, but will the collar/bushing also need to be replaced at the same time. Also should the teflon bushing in the top of the pivot arm be replaced while I have it all apart? I do plan of replacing the seals for the pivot shaft. After gettting everying apart I started washing the grease off everything. That way they will be ready to go in the cabint sand blasted. Need to know what type of media I should buy for blasting aluminum ad steel. Glass Bead or aluminum oxide?

After washing everything down I started in on removing the pivit shaft in the trim assembly and remove the cylinder. I plan on getting the lift cylinder rebuilt professionally at the same time as the trim cylinders. I also removed the broken bolt in the unit. Nothing like a little heat from a propane torch after 24 hrs of penetrating oil.

Here some pic of the the parts when I finished last night.

DSCN1422-1.jpg

DSCN1418-1.jpg

DSCN1419-1.jpg

Tonight a bit of cleaning and organizing of the garage. Need to make room for the cabinet blaster. Need to pull it out of the corner and clean it up. Also need to put some tools away.

Questions for today;

1) What is the best media for blasting alumium? Remember the air compressor it a bit under rated so the media will need to be supper sharp to over compensate.

2) Do the bushings on the pivot shaft need to be replaced with the nut?

3) Will anti-sieze help with the corosion issue in the aluminum parts when I come to reassemble things? What kind is the proper one? Cooper or silver? Never asked before.
 

j_k_bisson

Lieutenant Junior Grade
Joined
Oct 6, 2010
Messages
1,082
Update 02-11-2011

Update 02-11-2011

Cleaned up the garage last night, organized the parts, and pulled out the sand blaster. Had to do some maintence work to the blaster seeing I could not see thru the glass anymore due to over spray. Suprising what carb cleaner takes off. All ready to go now!:D

Recieved the elbow for the idleing rework that Faztbullet sent. After I get done all the blasting of the parts I'll get into this block work. Thank again Faztbullet.

Ordered the rings and honing stuff today so they should be in for next weekend.

Tonight I'll be killing my back testing the durability of my air compressor with the sand blaster. We'll see how it makes out. Changed the oil in it last night so we should be good to go.
 

j_k_bisson

Lieutenant Junior Grade
Joined
Oct 6, 2010
Messages
1,082
Update 02-12-2011

Update 02-12-2011

Well the air compressor did not die last night. I was able to get almost all the transom brackets blasted with exception of the trim system. Will get in to that when I come to rebuild it. I ordered the seal kit yesterday. Here is a pic of the parts after blasting. Still need a wash to get off the grit and ready for paint.

DSCN1424-1-1.jpg

After 11pm (noise bylaw) I switched over to chemically stripping the housing. Alot less noise, and the air compressor needed a break after running continious for 3 hrs. That Loctite chisle and gasket remover really works nicely. Here is how the housing came out.
What are these housings made out of? Brass or bronze?

DSCN1426-1.jpg

This afternoon I will attempt to blast the pivot housing. Then only the little componets to the pivot housing.

Tonight, if I get everything stripped I start working on the block mods. Then after 11 I'll start washing all my bolts and stuff. They still need to be cleaned before reassembly of the motor.
 

milliesdad

Petty Officer 2nd Class
Joined
Dec 20, 2010
Messages
168
Re: Update 02-06-2011

Re: Update 02-06-2011

Last night finished scrubbing all the linkages and minor switches. Here is a pic of all the parts back into place. The reason I do this rough assembly is so that I can make sure I got all of them. I also can figure out how they go back together. Here is a pic.

View attachment 82274

I also cleaned and rebuilt the fuel primer solinoid. Went through and cleaned up the wiring. Is it just me or was there such a thing as heat shrink tubing back in the 80's? Will need to get the liquid electrical tape out and fix a wire coming out of the unit. The coating is minorly cracked on one wire.

The last thing I did last night was clean and reassemble the shift interupt switch. Went through the wire on that too. They had a couple of wear thru points in the insulation. Fixed them by cutting, striping, soldering, and marine heat shrink. Then I sat there and tried to figure out where I want to put Faztbullet idling rework in at. I have the cross block location now. Just need to know is do I want to come out even with the bottom of the journal or above the bottom by an 1/8" so oil does not fly out of the tub all the time. Hoping Faztbullet chimes in and lets me know where to put it. Here a pick of the area.

View attachment 82273

It's super bowl Sunday, not that I watch football. I'm more of a fisherman/mechanic than anything else. If I had cable TV, fishing channel would be on all the time. Not any other sports! Don't even know who's playing today. I can tell what I will be drinking though!!!!! LOL:D

Packers and Steelers. Packers won, Steelers did not.
Mike In Green Bay
 

dehydrated

Petty Officer 1st Class
Joined
Dec 25, 2009
Messages
299
Re: Update 02-06-2011

Re: Update 02-06-2011

nice job so far sorry had built new office at home new contertops, floors wifes happy as heck so computers been down awhile but now back on it ill send those petals next week
 
Top