1987 Evinrude 200hp outboard resto/rebuild

Faztbullet

Supreme Mariner
Joined
Mar 2, 2008
Messages
15,670
Re: Update 01-30-2011 Rev-2

Re: Update 01-30-2011 Rev-2

Could this be a counter rotation flywheel?
No as the 1986 was the only engine that ran backwards for CR. Yes there are to part #'s for manifolds as the uppers are used on the V-4 models. Your cylinder measurments are fine and if the scuffing /scoring are on the intake port side and looks like engine injested fine sand,open the front air box as the foam liner may be falling apart and engine ingesting it. Also if any of the seal rings has a "step" worn on them replace them.
I will post picture of crankcase vent mod tomorrow...
 

j_k_bisson

Lieutenant Junior Grade
Joined
Oct 6, 2010
Messages
1,082
Re: Update 01-30-2011 Rev-2

Re: Update 01-30-2011 Rev-2

Thanks Fastbullet for the response. Just to confirm this is not a counter rotation flywheel then. Still can not identify it by either number, casting or stamp. Could it be a merc number for after market part?

I'll be wainting for the post on the rework. It will give me something to do while I figure out what to do.

I do plan on replacing three of the seal rings as they have the groove worn in them.

I am not sure which side is exhast and which is intake. Reguardless I do plan on honing them. If I do get the cylindes honed do I need new rings? Not sure. Second Can I go out and buy a hone and drill hone this out myself? Seeing I have the measurement tools And the taper spec is not in violation. Could I just put the cross hatching hone marks back in and call it a day? If so what stone grit would I use?

Also going through all my numbers today. Still need to measure the ring gap to the piston groove. But if I need to replace the rings due to honing then it is pointless. After looking at the pisation number I'll post them later today.
 

j_k_bisson

Lieutenant Junior Grade
Joined
Oct 6, 2010
Messages
1,082
Re: 1987 Evinrude 200hp outboard resto/rebuild

Been looking up the flywheel casting number 583146. It appears to be from a 1987 225 J225TXCUB. There is one o ebayright now with the same casting number. So I think my ingition system is in good shape. Just need the carbs figured out. Jetting, identification (1987-1990), and stuff.
 

Faztbullet

Supreme Mariner
Joined
Mar 2, 2008
Messages
15,670
Re: 1987 Evinrude 200hp outboard resto/rebuild

It appears to be from a 1987 225 J225TXCUB.
There ya go, same model as I posted earlier.
Just need the carbs figured out. Jetting, identification
They are 1987 225hp also, just pull the main to see what size it is.
I am not sure which side is exhast and which is intake
Exhaust ports are next to exhaust hump(middle of block)
If I do get the cylindes honed do I need new rings?
Yes!! You will also need to identify which brand piston you have as some aftermarket /pistons/rings will not interchange.
Second Can I go out and buy a hone and drill hone this out myself?
As close as the measurment you postbe ,just take to a auto machine shop and have "ball honed" to break glaze and add new crosshatch . It shouldnt be over $20 a cylinder.
 

Willyclay

Captain
Joined
Sep 8, 2006
Messages
3,244
Re: 1987 Evinrude 200hp outboard resto/rebuild

I'm just an old geezer who never worked a day as a professional in the marine industry but continue to learn from others so keep up the great work. You are getting super advice and guidance from some of the forum "experts" and I know they will not let you go wrong. My two cents is based on bad personal experiences with outboard motors having vague/unknown history. Here it is: you might consider having the powerhead halves Zyglo tested for cracks before you put another penny into saving it. Good luck!
 

Faztbullet

Supreme Mariner
Joined
Mar 2, 2008
Messages
15,670
Re: 1987 Evinrude 200hp outboard resto/rebuild

032.jpg031.jpg033.jpgHere are pic's of venting lower bearing....
 

j_k_bisson

Lieutenant Junior Grade
Joined
Oct 6, 2010
Messages
1,082
Re: 1987 Evinrude 200hp outboard resto/rebuild


Thanks for this rework. But a couple of questions. Can I get a zoomed out shot to be absolutely sure where this is on my block. Does this hole go right through block? Chamfer the other side? Tap with 1/8 NPT thread? Can you show where this hole comes out at on the inside cavity of the block? Lastly you say to wire it off. So is it vented straight to atmosphere? Nothing to protect the line from getting a spider in it? Or is it tapped/tee'd into the other line before the top fitting?
 

dehydrated

Petty Officer 1st Class
Joined
Dec 25, 2009
Messages
299
Re: 1987 Evinrude 200hp outboard resto/rebuild

Faztbullet, thank you!!! learned something new to me vent hose i will try that on my 2.7 for sure
 

Faztbullet

Supreme Mariner
Joined
Mar 2, 2008
Messages
15,670
Re: 1987 Evinrude 200hp outboard resto/rebuild

Can I get a zoomed out shot to be absolutely sure where this is on my block
Its on the front crankcase half below the last carb,the pic below shows the front mounting studs.
031.jpg
Does this hole go right through block?
Yes...
Chamfer the other side?
If you want to,its just a vent.....
Tap with 1/8 NPT thread?
No ... The hole size and if it needs tapped depends on elbow type used, the one in picture is factory elbow as I save them from discarded blocks
Lastly you say to wire it off. So is it vented straight to atmosphere? Nothing to protect the line from getting a spider in it?
100% correct.....you are basicly updating you block to later model design
Or is it tapped/tee'd into the other line before the top fitting?
No...Its just a lenght of hose that runs up next to the upper main fitting elbow and stops
 

j_k_bisson

Lieutenant Junior Grade
Joined
Oct 6, 2010
Messages
1,082
Update 02-02-2011

Update 02-02-2011

Seeing today is a snow day. After I shoveled the drive I went out to the garage and started cleaning parts. I started with the heads. Totally torn down the heads. Then sprayed them with brake cleaner and scrubed them with a brush. Next I scraped off all the old gaskets. Then the mill file came out and did a basic rub down on them to ensure that there was no highs or nics on the gasket faces. Checked them after I was all done with my 2' Starrett rule and a 0.004" feeler gauge. Them babies are flat! Could not even put a 0.001" feeler under it. And yes I flip the rule over and recheck to ensure that the rule is not bent/curved. Here is a pic of the cleaned surfaces.

DSCN1364-1.jpg

Next I cleaned one of my pistions. Fazbullet stated somewhere here that the rings needed for this block/piston need to be specific to the piston manufacture. So here is the pic of the top of one. If you need the bottom let me know.

DSCN1371-1.jpg

Next I cleaned the intake or other half of the crankcase. I still need to run a tap down all the threaded holes. But she is cleaned. Even used the flange cleaner. Wow is that stuff powerful. I'm a bit light headed right now, yes I wore the proper vapour mask. Here is a pic of the cleaned part.

DSCN1377-1.jpg

DSCN1378-1.jpg

Cont'd next post.
 

j_k_bisson

Lieutenant Junior Grade
Joined
Oct 6, 2010
Messages
1,082
Update 02-02-2011 cot'd

Update 02-02-2011 cot'd

Next I layed out the rough spot for the drilled hole that Faztbullet directed me to do. Is this right place? I was wondering if I sould make it so the the hole lines up with the edge of the crank seal ring flange. Or do I want to raise it up a bit. Right now I can put it anywhere. Here is the pics.

DSCN1374-1.jpg

DSCN1376-1.jpg

Look for the yellow cross and the red one. This is where I plan on drilling them.

The piston look like they are original OMC pistons. Is this correct?
 

dehydrated

Petty Officer 1st Class
Joined
Dec 25, 2009
Messages
299
Re: Update 02-02-2011 cot'd

Re: Update 02-02-2011 cot'd

it would seem that way
 

Faztbullet

Supreme Mariner
Joined
Mar 2, 2008
Messages
15,670
Re: Update 02-02-2011 cot'd

Re: Update 02-02-2011 cot'd

Is this right place?
Need to move them a tad to clear shifter, see edited pic's below.
Your pistons are OEM .030 overs and the rings are part #431844. Be careful when replaceing rings as these pistons have a 7? taper on top ring and a rectangular bottom ring and its easy if not paying attention to reverse them.

DSCN1374-1.jpgDSCN1376-1.jpg
 

j_k_bisson

Lieutenant Junior Grade
Joined
Oct 6, 2010
Messages
1,082
Re: Update 02-02-2011 cot'd

Re: Update 02-02-2011 cot'd

Need to move them a tad to clear shifter, see edited pic's below.
Your pistons are OEM .030 overs and the rings are part #431844. Be careful when replaceing rings as these pistons have a 7? taper on top ring and a rectangular bottom ring and its easy if not paying attention to reverse them.

View attachment 82084View attachment 82085

Thanks for both tips. Seeing the shifter is easily accessable right now, I'll pull it out before I drill the hole. How much room should I have between the shifter asm and the elbow? Do I need to leave any driver clearence?

Thanks about the tapered ring. I did not notice them I did notice one was thin than the other. But not the taper. How are Seirra rings? Ar they just as good? Or should I stick with OEM?
 

j_k_bisson

Lieutenant Junior Grade
Joined
Oct 6, 2010
Messages
1,082
Update 02-02-2011

Update 02-02-2011

Last night went back out to the garage and finish cleaning up the intake manifolds and the reeds. Cleaned up the old gaskets and ran taps thru every threaded holes. Here are the pics of the completed parts.

DSCN1382-1.jpg

DSCN1381-1.jpg

A question about reeds. I had one pedal on all six reed assemblies that was not sitting perfectly. It looked to be up about 0.004"-0.005". What is the tolerence for reeds. The coatings look good and no cracks or discoloration.

Tonight I plan on gettting into the carbs. May as well start into them while I wait for money to come in.

Also just as a note, Some higher being is pushing me to just reassemble the motor with the rings as is. No new rings and deglazing. The fridge when out last night around 2am. Need to investgate what went wrong and get it fixed. If I need a completely new fridge then it goes the way it is.

Anyone a whirlpool repair man? Need some help with that project.
 

dehydrated

Petty Officer 1st Class
Joined
Dec 25, 2009
Messages
299
Re: Update 02-02-2011

Re: Update 02-02-2011

jeff pm me your address ill send you some reed petals i have a bunch, would tell ya to go fiber reeds but ..............get on craigslist and find a fridge way cheaper than repair
 

Faztbullet

Supreme Mariner
Joined
Mar 2, 2008
Messages
15,670
Re: Update 02-02-2011

Re: Update 02-02-2011

What is the tolerence for reeds.
That will be ok as long as it closes under a light touch.
Tonight I plan on gettting into the carbs.
Dont do it untill you have kits in hand and do not reuse old gaskets. You need to use the Viton kits for the ethanol base fuels and your carbs only have the Vition side covers as bowl gaskets are black. To save some $$$ cancel the powerhead gasket kit and order only gaskets/seals you will need as most kits are overkill. You wont need but 9 gaskets for powerhead and 2 crankseals and 4 O-rings
Anyone a whirlpool repair man?
If the compressor is running check to see if condensor fan is running or condensor is blocked. Also check to make sure fan inside fridge is running as most draw the cold air from freezer area and if its not running lower part of fridge will not get cold.(fan only runs with door shut) If compressor is not running check or jumper across the t-stat and some have a defrost timer and that may be bad.
 

j_k_bisson

Lieutenant Junior Grade
Joined
Oct 6, 2010
Messages
1,082
Re: Update 02-02-2011

Re: Update 02-02-2011

Dehydrated I sent you that PM.

Faztbullet. The pedal does push down with the slightest touch. So it could be ok. I'll take a pic tonight and post tomorrow.

I have been looking online at the parts for the fridge compressor. It appears for this model that the compressor motor has a started relay and overload kill switch. So I'm going to start there. The web site says this is a comon problem. A repair kit with all the relays and switches is only $50. Is there anyway to tell if the compressor motor is fried?
 

dazk14

Ensign
Joined
Jul 22, 2008
Messages
966
Re: Update 02-02-2011 cot'd

Re: Update 02-02-2011 cot'd

Thanks for both tips. Seeing the shifter is easily accessable right now, I'll pull it out before I drill the hole. How much room should I have between the shifter asm and the elbow? Do I need to leave any driver clearence?

Thanks about the tapered ring. I did not notice them I did notice one was thin than the other. But not the taper. How are Seirra rings? Ar they just as good? Or should I stick with OEM?

The Sierra's are good. Last time I ordered(Qty 6) for looper it was well under a 100. It's still a must, even if it takes a little longer with the dough.

Here's a quick honing class I'm sure there's a hundred more out there. http://www.youtube.com/watch?v=QtJAuDZXmiU

Post your model number of fridge and the symptoms and we'll see what we can do. A meter and a voltage sniffer go along way.
 

j_k_bisson

Lieutenant Junior Grade
Joined
Oct 6, 2010
Messages
1,082
Update 02-04-2011

Update 02-04-2011

Well last night ripped into the throttle body and carbs. Did not actually get into rebuilding the carbs. Just took a ton of pics of the hose routing before taking the whole system apart. If anyoe needs to see the pics of the hose routing then shoot me a PM. I'll send them to you.

Lesson Learned: If you are having idling problems with a similar motor. I would seriously think about going thru and replacing all the fuel, vacum/recirculation lines, and fuel primes system lines. You would not believe the amount of air leaks and cracked hoses I found just taking it apart. Deffinately not reusing any of the old lines that they had on it. Fuel line is cheap enough at Murray's discount that I am not worried about replacing them.

I kept all the old lines and put them into the same bag as I put the bolts into. That way I have the routing and lengths for when I rebuild them. "Hint"

Here is a couple of the pics after disassembling everything.

DSCN1392-1.jpg

DSCN1393-1.jpg

The carbs and throttle bodies are lined up for cleaning/rebuilding. The carb/air box plate was cleaned last night of oil and then the taps where out cleaning every threaded hole.

First Question: Do I need to completely disassemble the throttle bodies or just spray them down. I did notice that there are small holes that the fuel system uses. These will be clean properly. Just wondering if I need to take apart the flaps and linkages.

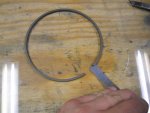
Second Question: Recieved my new crank seal rings yesterday. Did not like how they where packaged. Just an envelope. Wondering if there is a spec for flatness on these. I checked them and they are 0.007" off flat on a piece of glass. But I went and checked the ones I pulled out of the motor and only two of them where pefectly flat. The others where just as warped. Are they ok? Did not see anywhere a spec for this in the manual. Just a thickness spec.

On the fridge front. Got into that first thing after work last night. Don't know if the compressor is good. Did not try any kind of metered test across the three contacts extenting out from the compressor. But I did notice the relay asm that snaps onto the compressor had the tell tale sign of black smoke. So I am going to buy that part for $50 and try it out. We'll see how I make out with that one. Anyone know if there is a continuity check I can do on the compressor?

This weekend will be all about rebuilding the carbs, fuel pump, and possibly drilling the Faztbullet modification to the crank case. If I can get the proper fitting from the dealer that is.
 

Attachments

  • DSCN1397-1.jpg
    DSCN1397-1.jpg
    140.9 KB · Views: 1
Top