1984 Starcraft 16ft Glutton for Punishment [Splashed July 2019]

Status
Not open for further replies.

SHSU

Lieutenant Junior+Starmada Splash Of The Year 2019
Joined
Mar 8, 2017
Messages
1,725
Howdy All,
Been awhile since I posted anything. Been a busy last couple of months.

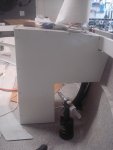
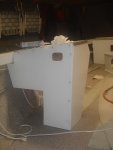
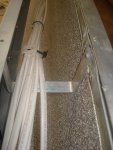
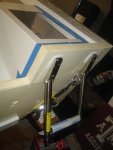
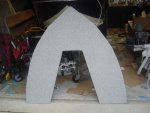
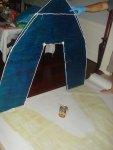
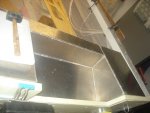
Got the splashwell from my welder and dry fitted into the boat. Took a couple times for my welder and I to get it to fit right. Didn't account for some slant in the floor or the transom. Nothing is ever perfectly square. LOL
DSC03986.JPG

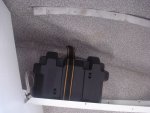
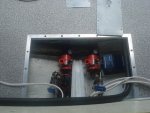
Did final placement of the bilge pump and livewell pumps. Still have to wire it in, but everything has been placed
DSC03991.JPG

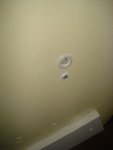
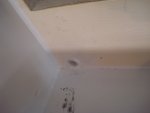
Here is a close up of the bilge pump. I decided to secure it via a blind rivet with Velcro. That will allow for easy adjustments and fixes in future
DSC03994.JPG

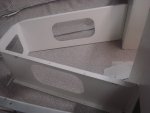
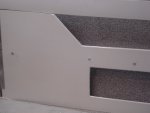
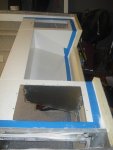
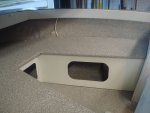
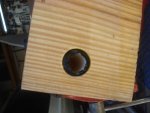
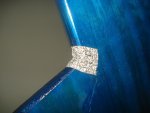
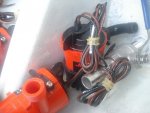
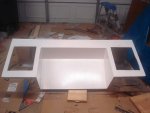
Hear is the splashwell with the livewell holes cut. I made the mistake of not cutting the holes first.... :facepalm: So I have a couple scratches that will need to be touched up.
DSC04000.JPG

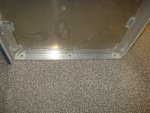
Next steps will be to do final wiring in the bilge area before putting in the splashwell. Then the splashwell will be installed.

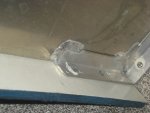
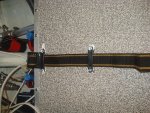
Also as a lesson learned, don't use the self adhesive to hold up multiple wires. After first falling off under weight, I secured it with JB Weld. That didn't hold either (Plastic pulled away from self adhesive that was glued with JB Weld). Going to add some velcro straps that are secured via blind rivets. Should have done that in the first place

Till Next Time
 

Watermann

Starmada Splash of the Year 2014
Joined
Jan 12, 2013
Messages
13,787
OH yeah that SW looks great, nice layout in the bilge is always a huge plus when or if a guy needs to get in there down the road.

I used the zip ties that have the hole for mounting them for a bunch of my wiring, the SS had vinyl coated AL straps riveted under the gunnels for the wiring so I reused them.
 

66Holiday924

Chief Petty Officer
Joined
Aug 21, 2017
Messages
578
I also used the zip ties with mounts. The mounts call for a number 8 screw, I used rivets instead. I ran some pretty heavy duty battery cable on my boat, Instead of fighting the sag, I ran it where you'll never see it. I ran it under the side compartment and fastened it to the bottom side with the mounted zip ties. I'm thinking the battery cable might swing around a little bit and smack the side of my boat while it's moving, so I'm going to go back and put foam padding that they use in plumbing to stop that.
 

SHSU

Lieutenant Junior+Starmada Splash Of The Year 2019
Joined
Mar 8, 2017
Messages
1,725
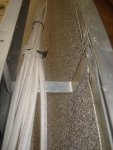
Well after ya'lls comments on the mounts, I decided that was the best way to go. I created some and added them along the gunwales (5 in total). 5200 and solid rivets through them to keep them in place

DSC04006.JPG
DSC04007.JPG
 

Attachments

  • DSC04004.JPG
    DSC04004.JPG
    70.6 KB · Views: 8

SHSU

Lieutenant Junior+Starmada Splash Of The Year 2019
Joined
Mar 8, 2017
Messages
1,725
Is that wiring? It almost looks like conduit.

Ya, I kind of went overboard, each one is two wire 14 gauge marine tinted wire. Decided that I didn't want a single point of failure that would stop everything on the boat if I did a single negative.
 

FIGMO

Petty Officer 1st Class
Joined
Jun 18, 2017
Messages
321
I really like the idea of installing hangers under the gunnel to support the wiring. Very clever!
 

Watermann

Starmada Splash of the Year 2014
Joined
Jan 12, 2013
Messages
13,787
SC figured that wire hanger need in the V5 models, soft AL coated with plastic blind riveted to the sides of the hull under the gunnels on both sides.

y4mESE9p_tle045xW47Fnpct8UOuRBP01eOGY-KrmSYk5-tkZHtCSqW3ifxEaA67v3zpgGZNBRZ6W7AtZjI16_vTJ9VFnip8-_e-bPxOpol8Ya37jiszEfI3BMlAxWZu_Te4KenFVDMqGk7kvPhl_XRL25rqiL2ehHxXJl1b1LAit2_T-axUh2q-0urK2Cz4j4I-aF4F_MagwbIQbOJmBWmQQ
 

classiccat

"Captain" + Starmada Splash Of The Year 2020
Joined
Dec 20, 2010
Messages
3,412
SC figured that wire hanger need in the V5 models, soft AL coated with plastic blind riveted to the sides of the hull under the gunnels on both sides.

[IMG2=JSON]{"data-align":"none","data-size":"full","src":"https:\/\/ffnbqw.bn.files.1drv.com\/y4mESE9p_tle045xW47Fnpct8UOuRBP01eOGY-KrmSYk5-tkZHtCSqW3ifxEaA67v3zpgGZNBRZ6W7AtZjI16_vTJ9VFnip8-_e-bPxOpol8Ya37jiszEfI3BMlAxWZu_Te4KenFVDMqGk7kvPhl_XRL25rqiL2ehHxXJl1b1LAit2_T-axUh2q-0urK2Cz4j4I-aF4F_MagwbIQbOJmBWmQQ?width=1024&height=577&cropmode=none"**[/IMG2]

What's NOT awesome about the V5 Hull!?! :madgrin:
 

FIGMO

Petty Officer 1st Class
Joined
Jun 18, 2017
Messages
321
SC figured that wire hanger need in the V5 models, soft AL coated with plastic blind riveted to the sides of the hull under the gunnels on both sides.

[IMG2=JSON]{"data-align":"none","data-size":"full","src":"https:\/\/ffnbqw.bn.files.1drv.com\/y4mESE9p_tle045xW47Fnpct8UOuRBP01eOGY-KrmSYk5-tkZHtCSqW3ifxEaA67v3zpgGZNBRZ6W7AtZjI16_vTJ9VFnip8-_e-bPxOpol8Ya37jiszEfI3BMlAxWZu_Te4KenFVDMqGk7kvPhl_XRL25rqiL2ehHxXJl1b1LAit2_T-axUh2q-0urK2Cz4j4I-aF4F_MagwbIQbOJmBWmQQ?width=1024&height=577&cropmode=none"**[/IMG2]

Its funny, they came up with a good solution to deal with the wiring requirements after the fact, but I think that SHSU hit the nail on the head with his idea. Had I pulled my gunnels, I would hoped that I would have had his good sense to come up with that solution. I really do like how he over came the problem of supporting the wiring under the gunnels. As I said before, very clever!
 

Watermann

Starmada Splash of the Year 2014
Joined
Jan 12, 2013
Messages
13,787
That boat cable looks like a bundle of romex house wire, that's a whole lot of wire runs

fetch?id=10653038&d=1536775969.jpg
 

SHSU

Lieutenant Junior+Starmada Splash Of The Year 2019
Joined
Mar 8, 2017
Messages
1,725
That boat cable looks like a bundle of romex house wire, that's a whole lot of wire runs

Yep, its 14 guage 2 wire marine tinted wire. I didn't want entire sections to go out because of a short on a single negative or positive wire daisy chained together.

This is practice for the next rebuild I do. Will see if it was worth it or just way overkill :rolleyes:
 

SHSU

Lieutenant Junior+Starmada Splash Of The Year 2019
Joined
Mar 8, 2017
Messages
1,725
Howdy All,
Its been awhile, got burned out and took a break for a couple months. Starting to get back into the swing of things. See updates below from the last couple of weeks:

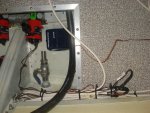
Completed the wiring in my Bilge. Two live well pumps, bilge pump, and an auto switch that will be hot wired to the starter as a backup. Picture of my wire management. Left plenty of slack for future repairs if needed.


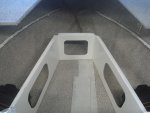
Installed the splashwell. You will notice that I predrilled all of the holes for the livewells. Wanted to limit the amount of shavings I would be removing later. 5200 was liberally applied to L brackets before it was drawn tight against the transom. Also note, the Fasco White has yellowed even though the boat hasn't been outside. The Fasco Dark Blue still looks good on the hull, but you really only notice the white yellow when compared against something that is really white. Will have to do something in the splashwell....


I premeasured the distance for this ladder, so the bolts that run into the splashwell support also were used to secure the ladder. Added some HDPE as a backer to create a space since the ladder bracket has a lip


Inside of the transom showing the L bracket that the bolts go through and the extra "washers" I made to distribute the weight. All liberally covered with 5200.


Front of splashwell was screwed into the deck. Thought about doing Blind rivets but opted against it since they would have been popped against the wood. Decided that if the screws do give out over time I can retap and don't have a potential unsealed point underneath.


Installed the side panels. Used large flange rivets with 5200. Also riveted it to the splashwell as well. Made another "washer" for the rivet to pop against.


Installed the motorwell drains. Had to order an extra one as I broke one while trying to install it. Couldn't get the plastic tubes to line up and eventually split the outer flange from banging on it.... You can also see the bolts that go through to secure the splashwell and a stern saver I installed for the fish finder


Covered the front seating area with Nautolex. I used stainless steel staples and a bead of 5200. Also some contact cement. The 3M 80 spray adhesive wasn't doing a great job of holding long term. The other stuff I got from the big box store seems to be working much better. Time will tell.
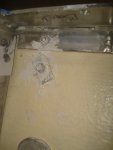
You will note that I had two inside corners. I watched a lot of videos and read multiple sites trying to figure out the best way to install. I practiced on some scrap I had and below method was what I thought looked the best. Just adding a piece underneath from the get go and then splitting the top layer. I used 5200 to make sure it stayed watertight.


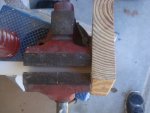
Did a side project on the boat for the livewell. The drains I got for the livewell measured just under an inch. Nobody makes a drain tube for them that I could find, so I improvised. Drilled a 1 inch hole with my hole saw in a piece of scrap wood. Fit a 3/4 pvc pipe (with electrical tape to try and keep it centered) through it and then redrilled using the hole as a guide to only cut off some of the exterior to the 3/4 pipe. Not exactly centered, but it works and fits nice and snug. If I had a lathe I could make it really pretty.


I added the strapping down for the three battery boxes. Two under the front seating area and one back at the splashwell. I originally got Size 27 boxes, but when I tried to install through the access holes I made, the fuel fill was in the way. So i changed to Size 24 which work just fine. I practiced installing the boxes and doing the straps with the seat in place. Its a pain in the a**, but it will keep them out of the way and more weight upfront. Also, I ran wiring and lights at the same time for charging and running the two front batteries in parallel.


Installed the front bench area with rivets and 5200. The large flange rivets (inside area) were installed every 7 inches and the normal rivets in the back were every 5 inches. Front bow section in very rigid now!


I decided I needed to add some additional backing under my front consoles. Need more wood then 1/2 to secure the battery charger and electrical boards into. I cut up and routed two pieces of 3/4 and epoxied them. I will be securing them with screws through the front of the console. As before, used JB weld and JB waterweld to seal up holes before sanding and epoxying. I also forgot to account for the horn hole I have on one of the consoles, so I will have to cut up one of the pieces to make room and epoxy again.


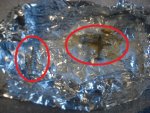
Decided the screws that I would secure the backer with would be stainless steel snap headed screws. That way, the admiral can make a cushion for people to lean against that ride up front. Wasn't entirely confident that the snaps/screws were both stainless steel. So did a quick test with salt and hydrogen peroxide. You can see the results of a brief time of exposure for a galvanized nail and a kreg screw vs the stainless steal snap. Feel much better about it.


So that is the latest updates for me. Until next time....
 
Last edited:

Watermann

Starmada Splash of the Year 2014
Joined
Jan 12, 2013
Messages
13,787
Lots going on and happening there, no pics came through on my end though.
 

sopwithcamel74

Petty Officer 1st Class
Joined
Aug 15, 2018
Messages
203
Dunno if it's just my browser, but it doesn't look like your pics uploaded correctly. Can't wait to see your progress!
 

SHSU

Lieutenant Junior+Starmada Splash Of The Year 2019
Joined
Mar 8, 2017
Messages
1,725
Ok, let me try this again.


Howdy All,
Its been awhile, got burned out and took a break for a couple months. Starting to get back into the swing of things. See updates below from the last couple of weeks:

Completed the wiring in my Bilge. Two live well pumps, bilge pump, and an auto switch that will be hot wired to the starter as a backup. Picture of my wire management. Left plenty of slack for future repairs if needed.
wAAACH5BAEKAAAALAAAAAABAAEAAAICRAEAOw==

wAAACH5BAEKAAAALAAAAAABAAEAAAICRAEAOw==


Installed the splashwell. You will notice that I predrilled all of the holes for the livewells. Wanted to limit the amount of shavings I would be removing later. 5200 was liberally applied to L brackets before it was drawn tight against the transom. Also note, the Fasco White has yellowed even though the boat hasn't been outside. The Fasco Dark Blue still looks good on the hull, but you really only notice the white yellow when compared against something that is really white. Will have to do something in the splashwell....
wAAACH5BAEKAAAALAAAAAABAAEAAAICRAEAOw==

wAAACH5BAEKAAAALAAAAAABAAEAAAICRAEAOw==


I premeasured the distance for this ladder, so the bolts that run into the splashwell support also were used to secure the ladder. Added some HDPE as a backer to create a space since the ladder bracket has a lip
wAAACH5BAEKAAAALAAAAAABAAEAAAICRAEAOw==

wAAACH5BAEKAAAALAAAAAABAAEAAAICRAEAOw==


Inside of the transom showing the L bracket that the bolts go through and the extra "washers" I made to distribute the weight. All liberally covered with 5200.
wAAACH5BAEKAAAALAAAAAABAAEAAAICRAEAOw==

wAAACH5BAEKAAAALAAAAAABAAEAAAICRAEAOw==


Front of splashwell was screwed into the deck. Thought about doing Blind rivets but opted against it since they would have been popped against the wood. Decided that if the screws do give out over time I can retap and don't have a potential unsealed point underneath.
wAAACH5BAEKAAAALAAAAAABAAEAAAICRAEAOw==

wAAACH5BAEKAAAALAAAAAABAAEAAAICRAEAOw==


Installed the side panels. Used large flange rivets with 5200. Also riveted it to the splashwell as well. Made another "washer" for the rivet to pop against.
wAAACH5BAEKAAAALAAAAAABAAEAAAICRAEAOw==

wAAACH5BAEKAAAALAAAAAABAAEAAAICRAEAOw==


Installed the motorwell drains. Had to order an extra one as I broke one while trying to install it. Couldn't get the plastic tubes to line up and eventually split the outer flange from banging on it.... You can also see the bolts that go through to secure the splashwell and a stern saver I installed for the fish finder
wAAACH5BAEKAAAALAAAAAABAAEAAAICRAEAOw==

wAAACH5BAEKAAAALAAAAAABAAEAAAICRAEAOw==
 

Attachments

  • DSC04048.JPG
    DSC04048.JPG
    38.5 KB · Views: 10
  • DSC04044.JPG
    DSC04044.JPG
    69.9 KB · Views: 11
  • DSC04043.JPG
    DSC04043.JPG
    122.6 KB · Views: 11
  • DSC04040.JPG
    DSC04040.JPG
    85.1 KB · Views: 11
  • DSC04047.JPG
    DSC04047.JPG
    42.1 KB · Views: 12
  • DSC04039.JPG
    DSC04039.JPG
    80 KB · Views: 12
  • DSC04046.JPG
    DSC04046.JPG
    74.6 KB · Views: 12
  • DSC04036.JPG
    DSC04036.JPG
    131.1 KB · Views: 10
  • DSC04041.JPG
    DSC04041.JPG
    55.9 KB · Views: 10
  • DSC04035.JPG
    DSC04035.JPG
    129.6 KB · Views: 9
  • DSC04045.JPG
    DSC04045.JPG
    114.9 KB · Views: 10

SHSU

Lieutenant Junior+Starmada Splash Of The Year 2019
Joined
Mar 8, 2017
Messages
1,725
Part 2


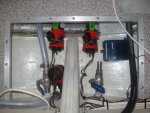
Covered the front seating area with Nautolex. I used stainless steel staples and a bead of 5200. Also some contact cement. The 3M 80 spray adhesive wasn't doing a great job of holding long term. The other stuff I got from the big box store seems to be working much better. Time will tell.
wAAACH5BAEKAAAALAAAAAABAAEAAAICRAEAOw==

wAAACH5BAEKAAAALAAAAAABAAEAAAICRAEAOw==


You will note that I had two inside corners. I watched a lot of videos and read multiple sites trying to figure out the best way to install. I practiced on some scrap I had and below method was what I thought looked the best. Just adding a piece underneath from the get go and then splitting the top layer. I used 5200 to make sure it stayed watertight.
wAAACH5BAEKAAAALAAAAAABAAEAAAICRAEAOw==

wAAACH5BAEKAAAALAAAAAABAAEAAAICRAEAOw==


Did a side project on the boat for the livewell. The drains I got for the livewell measured just under an inch. Nobody makes a drain tube for them that I could find, so I improvised. Drilled a 1 inch hole with my hole saw in a piece of scrap wood. Fit a 3/4 pvc pipe (with electrical tape to try and keep it centered) through it and then redrilled using the hole as a guide to only cut off some of the exterior to the 3/4 pipe. Not exactly centered, but it works and fits nice and snug. If I had a lathe I could make it really pretty.
wAAACH5BAEKAAAALAAAAAABAAEAAAICRAEAOw==


wAAACH5BAEKAAAALAAAAAABAAEAAAICRAEAOw==


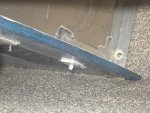
I added the strapping down for the three battery boxes. Two under the front seating area and one back at the splashwell. I originally got Size 27 boxes, but when I tried to install through the access holes I made, the fuel fill was in the way. So i changed to Size 24 which work just fine. I practiced installing the boxes and doing the straps with the seat in place. Its a pain in the a**, but it will keep them out of the way and more weight upfront. Also, I ran wiring and lights at the same time for charging and running the two front batteries in parallel.
wAAACH5BAEKAAAALAAAAAABAAEAAAICRAEAOw==

wAAACH5BAEKAAAALAAAAAABAAEAAAICRAEAOw==


Installed the front bench area with rivets and 5200. The large flange rivets (inside area) were installed every 7 inches and the normal rivets in the back were every 5 inches. Front bow section in very rigid now!
wAAACH5BAEKAAAALAAAAAABAAEAAAICRAEAOw==

wAAACH5BAEKAAAALAAAAAABAAEAAAICRAEAOw==


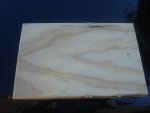
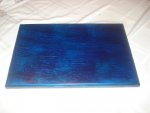
I decided I needed to add some additional backing under my front consoles. Need more wood then 1/2 to secure the battery charger and electrical boards into. I cut up and routed two pieces of 3/4 and epoxied them. I will be securing them with screws through the front of the console. As before, used JB weld and JB waterweld to seal up holes before sanding and epoxying. I also forgot to account for the horn hole I have on one of the consoles, so I will have to cut up one of the pieces to make room and epoxy again.
wAAACH5BAEKAAAALAAAAAABAAEAAAICRAEAOw==

wAAACH5BAEKAAAALAAAAAABAAEAAAICRAEAOw==


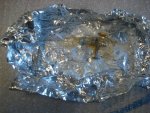
Decided the screws that I would secure the backer with would be stainless steel snap headed screws. That way, the admiral can make a cushion for people to lean against that ride up front. Wasn't entirely confident that the snaps/screws were both stainless steel. So did a quick test with salt and hydrogen peroxide. You can see the results of a brief time of exposure for a galvanized nail and a kreg screw vs the stainless steal snap. Feel much better about it.
wAAACH5BAEKAAAALAAAAAABAAEAAAICRAEAOw==
​ ​​​​​​​
wAAACH5BAEKAAAALAAAAAABAAEAAAICRAEAOw==


So that is the latest updates for me. Until next time....
 

Attachments

  • DSC04080.JPG
    DSC04080.JPG
    128.6 KB · Views: 9
  • DSC04087.JPG
    DSC04087.JPG
    51.6 KB · Views: 9
  • DSC04081.JPG
    DSC04081.JPG
    112.4 KB · Views: 8
  • DSC04072.JPG
    DSC04072.JPG
    46.9 KB · Views: 11
  • DSC04079.JPG
    DSC04079.JPG
    114.4 KB · Views: 11
  • DSC04075.JPG
    DSC04075.JPG
    113.5 KB · Views: 12
  • DSC04065.JPG
    DSC04065.JPG
    34.8 KB · Views: 11
  • DSC04082.JPG
    DSC04082.JPG
    116.6 KB · Views: 11
  • DSC04061.JPG
    DSC04061.JPG
    91.9 KB · Views: 12
  • DSC04074.JPG
    DSC04074.JPG
    167.4 KB · Views: 11
  • DSC04059.JPG
    DSC04059.JPG
    106.6 KB · Views: 10
  • DSC04060.JPG
    DSC04060.JPG
    67.3 KB · Views: 10
  • DSC04050.JPG
    DSC04050.JPG
    75.1 KB · Views: 9
  • DSC04055.JPG
    DSC04055.JPG
    76.5 KB · Views: 10
Status
Not open for further replies.
Top