1984 Starcraft 16ft Glutton for Punishment [Splashed July 2019]

Status
Not open for further replies.

ab59

Ensign
Joined
May 10, 2017
Messages
979
in my SS the consoles are attached to the gunnels and you might need the gunnels to locate the consoles in the rite place.
 

Watermann

Starmada Splash of the Year 2014
Joined
Jan 12, 2013
Messages
13,798
Yeah that's looking real nice so far, and yeah you'll need the gunnels in to place the consoles correctly.
 

SHSU

Lieutenant Junior+Starmada Splash Of The Year 2019
Joined
Mar 8, 2017
Messages
1,744
Thanks for stopping by all

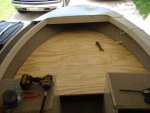
Sorry I wasn't more clear, on the gunwales I meant the tops. The side part is permanent installed. Since I will be topping the top with vinyl, wasn't sure how I wanted to finish the edge, have a section that is exposed without any trim up by the consoles. Ultimately, decided to install the side brackets already for the consoles. With Father's Day didn't really get anything done.

Hope Ya'll Dads had a good Father's Day as well.
 

BWR1953

Admiral
Joined
Jan 23, 2009
Messages
6,201
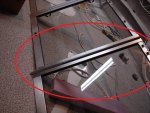
My Kingfisher has trim on both sides of the gunwale. Isn't your boat similar?

On mine, it would be possible to put the vinyl neatly under the trim.

20180224_194908-1170x2080.jpg
 

SHSU

Lieutenant Junior+Starmada Splash Of The Year 2019
Joined
Mar 8, 2017
Messages
1,744
BWR1953
Mine is similar; however, I don't remember it running the full length of the gunwales. It stopped at the console and then continued again on the other side. I don't know if this was a previous mod by original owner during a restore or if factory. I will have to go back and look at pictures

All,
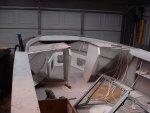
Well got some more stuff done this weekend and got the consoles installed!!!!! Admiral said its finally starting to look like a boat. LOL. Now I need ya'lls guidance on what to do with the windshield. Started looking at it and am having a difficult time getting it to line up. Debating on just removing the center window.... Thoughts?

Consoles installed with solid rivets
DSC03888.JPG

Picture of center window. Don't know if i should remove center window and just grind/cut off the wing. Thoughts???
DSC03887.JPG
 

Watermann

Starmada Splash of the Year 2014
Joined
Jan 12, 2013
Messages
13,798
All,
Well got some more stuff done this weekend and got the consoles installed!!!!! Admiral said its finally starting to look like a boat. LOL. Now I need ya'lls guidance on what to do with the windshield. Started looking at it and am having a difficult time getting it to line up. Debating on just removing the center window.... Thoughts?

Consoles installed with solid rivets

Picture of center window. Don't know if i should remove center window and just grind/cut off the wing. Thoughts???

No don;t go cutting.

You have to put the windshield up on the consoles to properly fit the sections, the only adjustment you have is with the legs. I squared mine up and had to shim the port side to get it lined up right. I could see it was out of whack from the beginning from the wear on the stop.

I put the rubber stripping on the bottom of the windshield and 2 T bolts through into each console so they would not wander. Once I had the leg adjustments done then it was time to screw the legs into the deck. Remember nothing about this will ever be PERFECT, only decent looking and workable.
 

SHSU

Lieutenant Junior+Starmada Splash Of The Year 2019
Joined
Mar 8, 2017
Messages
1,744
Thanks Watermann

I wont cut it. Figured someone would have some good advice and true words on "Nothing about this will ever be PERFECT". So much easier to say to myself and hear then to actually let go. LOL
 

SHSU

Lieutenant Junior+Starmada Splash Of The Year 2019
Joined
Mar 8, 2017
Messages
1,744
Got some more work done this weekend

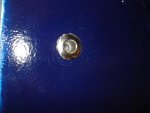
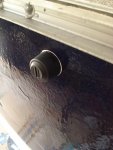
Installed the bilge outlet. Didn't quite get the squeeze out i wanted from the 5200 to make a nice circle, but know it is in the areas that count to prevent water intrusion
DSC03890.JPG

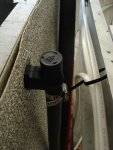
Installed the Attwood Fuel vent. Got the right amount of squeeze out on this one
DSC03893.JPG

Internal view, this one has P trap built in
DSC03892.JPG

Cut out the side panels. Took longer then I expected for these too, but happy with how they turned out
DSC03894.JPG

Hoping to start sealing and painting the side panels tonight. Going to have to go back to the Big Box store for more wood..... Didn't realize that I wouldn't have enough scrap from the panel piece to do the front of the consoles
 

Watermann

Starmada Splash of the Year 2014
Joined
Jan 12, 2013
Messages
13,798
Don't do the console front panels until the windshield is on for good and the legs are secured to the decking..

Looking real good to me so far, nice work :thumb:
 

ab59

Ensign
Joined
May 10, 2017
Messages
979
Don't know if you have modified the bow area but I used the A shaped piece of aluminum that creates the storage areas up front as a guide to where the front of the consoles are located. If you have not changed where the nose of the storage aluminum piece goes it should show you exactly where the consoles are located once it is screwed down as far as forward or aft.
Anyway that is what I did and the oddest thing happened , when I set the windshield back on and located the screw holes the center windshield walkthrough lined up . Go figure.
 

SHSU

Lieutenant Junior+Starmada Splash Of The Year 2019
Joined
Mar 8, 2017
Messages
1,744
Thanks Guys,

Watermann
I went ahead an secured the console to the floor. Figured I was going to need to start somewhere and go from there. I will shim the windows as suggested to get the right fit. Might have to cut out some large enough shims, but will get it done.

ab59
Thanks AB, I tried that but realized my "upgrade" from 1/2 to 3/4 for the floor messed up the angle of the consoles. Going to have to follow Watermann's suggestion and shim it.
 

SHSU

Lieutenant Junior+Starmada Splash Of The Year 2019
Joined
Mar 8, 2017
Messages
1,744
I got some time to work on the boat before the party on the 4th


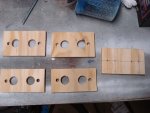
Created a jig and then made back plates for the cleats I will be installing. Will be coating with epoxy to protect them
DSC03904.JPG

Sample of the four cleat placements
DSC03901.JPG

Also, the picture of the LED's I have installed. They are much brighter in person. Decided on the red as bugs have more difficulty seeing the color (or so I read).
DSC03903.JPG
 

oldrem

Commander
Joined
Nov 7, 2013
Messages
2,002
I like the idea of the ply back plates. What thickness are you using?
 

SHSU

Lieutenant Junior+Starmada Splash Of The Year 2019
Joined
Mar 8, 2017
Messages
1,744
I like the idea of the ply back plates. What thickness are you using?

They are only 15/32 BCX. Thought about using 23/32 BCX, but had perfect size scrap of the 15/32, so decided on using that. Just wanted something to help disperses the force over a wider area then just a washer...
 

SHSU

Lieutenant Junior+Starmada Splash Of The Year 2019
Joined
Mar 8, 2017
Messages
1,744
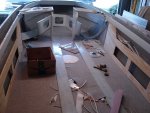
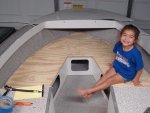
Still working slowly but surely. This is a combination of two weekends to cut everything out and dry fit. Did a lot of measuring and remeasuring to get everything as close as possible.

Made a template out of cardboard for the front of the consoles.
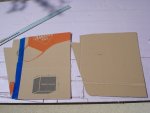
DSC03906.JPG

I was happy with how they came out. I added the holes so I could place my deep cycle batteries under there and still be able to get to them.
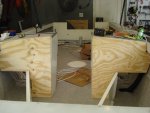
DSC03908.JPG


Don't remember whose thread I saw this one, but remember another Starmada Member doing this to get the lengths for the front seating area. Printed out a protractor and measured every 10 degress to get the distance to the Hull and inner support. This idea worked OK, but still had some areas that weren't quite right.
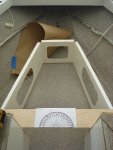
DSC03911.JPG


Dry fitting
DSC03913.JPG

Final Design with mini Admiral giving her approval
DSC03918.JPG

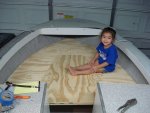
Been kicking around a front pedestal mount and how i would get it in. Took the scrap from what I cut out and added another board on top with a 2 inch lip. Will have to figure a way to secure it for travel, but know that wont be to hard. It gives a strong base for anyone fishing up front
DSC03917.JPG

Currently have my Welder working on the custom splashwell and hope to have that this week. Once I got that, I will be moving the boat to my folks so I have room in my garage to Seal/Epoxy all the wood.

Question,
For the front deck and the front of console, what are people's opinions on using stainless steel screws vs rivets to secure them to the Hull/Console?
 

Monmouth00

Petty Officer 2nd Class
Joined
Nov 26, 2017
Messages
198
Question,
For the front deck and the front of console, what are people's opinions on using stainless steel screws vs rivets to secure them to the Hull/Console?

I used SS screws, but wouldn't do it again if I had the chance. I pre-drilled, but maybe not large enough. I lost at least 3 screw heads securing my floor. Had I known they were available, I would have bought longer SS rivets and popped those in instead.

Screws will work though. I used finish washers under the heads with a small bead of 5200.
 

Candutch

Chief Petty Officer
Joined
May 8, 2015
Messages
637
Looking good SHSU, great idea with the cover up front for the pedestal seat. I was throwing around the same idea until I decided to put a permanent deck in.
 
Last edited:

Watermann

Starmada Splash of the Year 2014
Joined
Jan 12, 2013
Messages
13,798
I'm not a fan of using wood/metal type screws on a boat as they will sooner or later loosen due to the vibration and if used in thin AL, only a few teeth are actually hanging on. Either rivets or SS machine screws with nylocs. If screwing the console legs into wood deck then the SS wood screws are fine there. Even the guys who have to use wood screws on the SW find they are all loose, SC changed that to machine screws with nuts in later years to attach the SW to the transom.
 

ab59

Ensign
Joined
May 10, 2017
Messages
979
Funny thing about the consoles and windshield . I replaced 3/4 " deck with what they now call 3/4 " but is thinner marine ply and my consoles also sit about 1 to 1 1/2 " taller . I figured it was because of the 20 # carpet that I put under it .
 

SHSU

Lieutenant Junior+Starmada Splash Of The Year 2019
Joined
Mar 8, 2017
Messages
1,744
Thanks All,
So it sounds like rivets it is. Will be limiting my screw usage. Sometimes I think I can take a short cut, but then ya'll set me straight :D
 
Status
Not open for further replies.
Top