1984 Starcraft 16ft Glutton for Punishment [Splashed July 2019]

Status
Not open for further replies.

classiccat

"Captain" + Starmada Splash Of The Year 2020
Joined
Dec 20, 2010
Messages
3,412
My boat had rivets at the tips of the ribs. I'm not putting them back in. My boat has a trim piece that ties the side panel into the floor. That piece has a dual purpose. Besides trim, it helps secure the flooring in along the perimeter of the boat.

If you're referring to an < = '78 Starcraft, that side panel isn't intended to hold the floor down but rather lock the spray rail and outer-chine.

Unless you've added additional supports, allowing that part of the structure to "float" can lead to stress cracks down the road; those outer rivets are pretty critical in SC's poor early design.
 

66Holiday924

Chief Petty Officer
Joined
Aug 21, 2017
Messages
578
Unless you've added additional supports, allowing that part of the structure to "float" can lead to stress cracks down the road; those outer rivets are pretty critical in SC's poor early design.

Thanks! I'm glad I mentioned it. I haven't done my flooring yet. I will change the plan. :thumb:
 

classiccat

"Captain" + Starmada Splash Of The Year 2020
Joined
Dec 20, 2010
Messages
3,412
Thanks! I'm glad I mentioned it. I haven't done my flooring yet. I will change the plan. :thumb:

You're welcome! That's the beauty of this forum...collectively fixing-up each other's floppy tin!

Here's how I perceive the forces working out at the outer chine:
x6YwCN0.jpg
 

66Holiday924

Chief Petty Officer
Joined
Aug 21, 2017
Messages
578
It is a great visual... I don't know what it is about pictures but when I look at that it's pretty obvious that the rivets holding the side panel on aren't going to be sufficient for holding the floor down also.
 

SHSU

Lieutenant Junior+Starmada Splash Of The Year 2019
Joined
Mar 8, 2017
Messages
1,725
Thanks guys, looks like I will be using option 2 and countersinking.

classiccat Thanks for the visuals!!!! Mine boat is an 84' so slightly different side piece, but visual proves the point of needing to have it replaced
 

Watermann

Starmada Splash of the Year 2014
Joined
Jan 12, 2013
Messages
13,787
I'm puzzled that your 84 doesn't have the rib end braces that also bridge the sprayrail isolating it. From what I've seen they started that in the mid 70's. Was it just for the larger 18'+ boats maybe?

fetch


My 79 SS

y4mwExjqi5Pslo3GBb9SVIsdT6Z8ibcXm_o6WDatUwllVwX7gGVfWeQ9nRASLXlZh7huF8X9LCO1UsxTvguxtxcWsugKZY_UoCGmooQUvBrjPVNR3qpgAZGZCJ2F_hMcuysiqxwuObHalLN3Ba1-uoO1N_0hHxjirYN0EOgrQgaxgf5uv0Ix8A79_3zP0xxdZN5tLBu6uxz-2V76WDd06orvA
 

MNhunter1

Lieutenant Junior Grade
Joined
May 12, 2014
Messages
1,053
I'm puzzled that your 84 doesn't have the rib end braces that also bridge the sprayrail isolating it. From what I've seen they started that in the mid 70's. Was it just for the larger 18'+ boats maybe?

I think this is the case. I don't recall ever seeing or hearing about any factory braces on anything less than the 18ft's.
 

BWR1953

Admiral
Joined
Jan 23, 2009
Messages
6,178
Yeah, must be for the larger boats. My 16' Kingfisher doesn't have them.

14.jpg
 

Watermann

Starmada Splash of the Year 2014
Joined
Jan 12, 2013
Messages
13,787
This would make the side panels important as ever then.
 

SHSU

Lieutenant Junior+Starmada Splash Of The Year 2019
Joined
Mar 8, 2017
Messages
1,725
Got some work done over the last couple days.

After a lot of debating with myself, I decided not to go with the self contained ratchets that others have used. I really liked the idea of having them, but couldn't figure out a good way to properly mount them on this trailer. My next build will I will definitely keep it in mind. :D

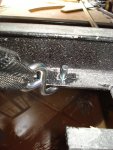
Drilled a 1/2 hole through the C channel so that I could hook my tie down to the trailer. DSC03830.JPG

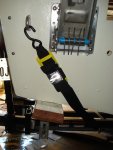
Tie down installed. Can't see it in the picture, but used a left over piece of rubber from the fuel tank to prevent any chaffing where it curves under the boat toward the trailer.

DSC03826.JPG

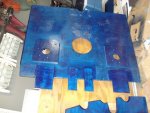
Did some final cutting on the floor. Made the cut needed for the fuel fill line and vent line to come up:
DSC03831.JPG

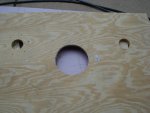
Also cut out the hole to install my access hatch to get at my fuel tank
DSC03835.JPG

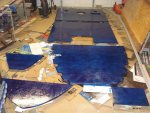
Took the boat over to the folks for the week while I sealed the deck. Each side has two coats of epoxy. After I sealed it all in, I realized I didn't cut the transom brace whole in my cover..... :facepalm:. Not a big deal, but will have to cut that and reseal before I can install it.

DSC03838.JPG

Now I just have to bring the boat back and start to install. Any suggestions on how to install the aluminum tie piece that is used between each sheet? Trying to figure out best way to get all the holes to line up.
 

MNhunter1

Lieutenant Junior Grade
Joined
May 12, 2014
Messages
1,053
Any suggestions on how to install the aluminum tie piece that is used between each sheet? Trying to figure out best way to get all the holes to line up.

Skip the stock aluminum pieces and use some plywood doublers...glue and screw.
 

MNhunter1

Lieutenant Junior Grade
Joined
May 12, 2014
Messages
1,053
You can see the doublers that also served as added support for the pedestal mounts
 

Attachments

  • photo288131.jpg
    photo288131.jpg
    196.2 KB · Views: 8

Watermann

Starmada Splash of the Year 2014
Joined
Jan 12, 2013
Messages
13,787
Yeap toss those little flimsy joiner strips and either use plywood to join or 2" angle AL.
 

SHSU

Lieutenant Junior+Starmada Splash Of The Year 2019
Joined
Mar 8, 2017
Messages
1,725
Thanks Watermann and MNhunter1 that is a much better idea. Wish I had incorporated that before I did all the epoxy. LOL. Well I will go back and add. Did ya'll just use SS screws to secure them together?
 

Watermann

Starmada Splash of the Year 2014
Joined
Jan 12, 2013
Messages
13,787
Thanks Watermann and MNhunter1 that is a much better idea. Wish I had incorporated that before I did all the epoxy. LOL. Well I will go back and add. Did ya'll just use SS screws to secure them together?

Yeah and throw some Titebond on there too, or you could use epoxy instead.
 

nrf414

Chief Petty Officer
Joined
Feb 16, 2008
Messages
573
I 2nd this approach on joiners. Glue and screw. Makes a perfect seam.
 

MD28

Petty Officer 1st Class
Joined
Sep 1, 2016
Messages
222
I also used deck screws and titebond. Make the joiners or gussets whatever you want to call them big enough to double as backers for your pedestals. Another bonus is you will have some scrap aluminum laying around now for other use.
 

SHSU

Lieutenant Junior+Starmada Splash Of The Year 2019
Joined
Mar 8, 2017
Messages
1,725
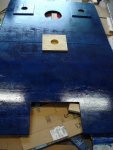
Thanks guys, following the recommendation and spent time making the joiners. Also, made a change to the seating arrangements. Decided to use one of the joiners as a seat pedestal near the aft. So we will seat 3 in the back vs the 4 originally planned. Will also be used as an adjustable fishing seat.

New pedestal mount/floor joiner (Dry Fitting/Drilling)
DSC03843.JPG

After putting a coat of epoxy and securing the Deck Joiner/Pedestal backer to one side I realized the holes didn't line up the way I wanted them.... I drilled from the bottom up instead of the top down. So the pedestal wasn't going to be oriented the way I wanted. :frusty: Debated for a while about leaving it, nobody would notice, but I would know.. Eventually decided to drill new holes. The ones circled are the new ones... Will fill all the bad holes with 5200 to seal them
DSC03847.JPG

Secured the bow section together so it will be one piece during install
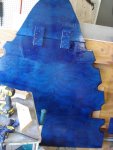
DSC03848.JPG

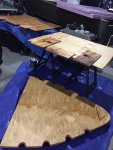
Front Section joiners with epoxy
DSC03849.JPG

Aft section with joiner/pedestal mount epoxied
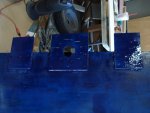
DSC03850.JPG

So remember when I said I had replaced all the rivets. I realized I missed six on the consoles. LOL Decided to take apart the consoles during my sanding/cleaning before primer and paint.
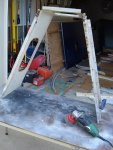
DSC03841.JPG

Hanging for additional cleaning with vinegar and wipe downs
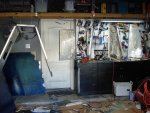
DSC03842.JPG

Two coats of SE primer as I will be using Tractor Paint
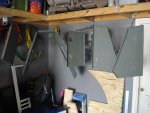
DSC03851.JPG

I shot two coats of the Tractor Enamel pain, but didn't take pictures. Will take those and upload later.

Next steps, plan on getting the boat from my parents place today. Then doing a final cleaning of the interior hull, re-installing the foam, the gas tank, and finally the floor.
 
Status
Not open for further replies.
Top