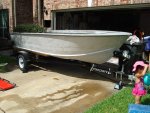
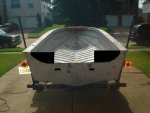
1984 Starcraft 16ft Glutton for Punishment [Splashed July 2019]

Status
Not open for further replies.

SHSU

Lieutenant Junior+Starmada Splash Of The Year 2019
Joined
Mar 8, 2017
Messages
1,744
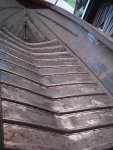
So that Admiral and I put in an entire weekend. Sent the kido off to the grandparents and started with a vengeance on finishing up the ribs. Happy as Hell to say that 99% of all the riveting that will need to be done has been completed. YA!!!!!!!! Still have to do a couple things like the transom rest, the knee brace, the side shelf and 8 rivets under the rub rail; however, calling it close enough. I can at least start to move on and tackle other parts now. As a note for anyone that is thinking about re riveting a hull here are a couple stats:

Number of Rivets on 16ft Starcraft Supper Sport: ~1700 (I ordered 2000 3/16 and 100 ?)
Waste you need to account for: ~170 (Or 10%)
Tubes of 5200: 3-4
Rivet Gun: Harbor Freight/Amazon specials will not work?. Need a true Aircraft Rivet gun
Bucking Bar: 2 (2lb and 6LB)
Rivet Set: 3/16 and ? brazier head
Helpers: 1 willing helper or a pissed off admiral because of the noise/sweat/mental toll/physical toll (Sometimes one and the same)
Drill bits: 7 (You will break them and dull them out) or have a Drill Doctor
Hearing Protection: Admiral and I had some cheap ear muffs from HF with our Bluetooth headphones and audio books going to help reduce the noise. Even then, when riveting you could barely hear the book
Time: 2 Months? worth of weekends.

As an example: prep time for 5 ribs took 3-4 hours before riveting began. That includes: drilling out each hole, using grinder with wire brush to clean underside of rib and hull, realigning, vacuuming and clean up before moving on to next rib. Each rib had 21 rivets per side. Meaning 42 rivets per rib and there were 13 ribs.

Estimating 30 seconds (high side if just riveting only) a rivet that is ~15 hours? worth of riveting. Doesn?t seem too bad until you consider: drilling out each rivet, cleaning the hole, prepping hole, adding 5200 to each hole, placing rivet, setting rivet. Verifying its good, if not, repeat previous process. Or, doing an entire rib and the realize that you forgot to do the rivets under the rib that you can?t get too without the rib removed?

In the end, I would estimate 100 - 120 combined man hours of work being done to re rivet the entire hull

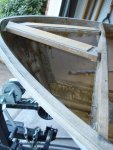
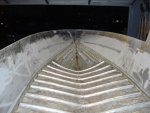
If you can get through all of that, you can have a completely re riveted boat (99%) DSC03496.JPG
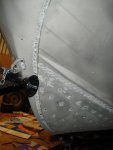


Interior DSC03586.JPG


Update: 08/17/2017

I have taken off the gunwales and redone all of the rivets there as well. I realize that I will need additional 3/16th rivets. I ordered 2,000 and am now looking at ordering an additional 100-200 to finish everything out and have some extra. So anyone that is tracking:

Initial Order of Solid Rivets: 2,000 3/16 x 1/2
Additional Order of solid rivets: 100-200 3/16 x 1/2
Initial Order of Blind Rivets (200 Hundred each for a total of 600):
3/16 x .626-.750 Dome Head
3/16 x .876-1.00 Large Flange Head
3/16 x .126-.250 Dome Head

Additional Order : 100-200 5/32nd x .126-.250 Dome Head
 
Last edited:

SHSU

Lieutenant Junior+Starmada Splash Of The Year 2019
Joined
Mar 8, 2017
Messages
1,744
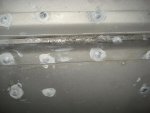
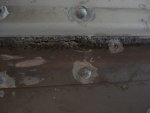
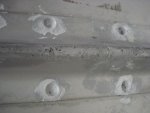
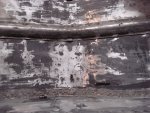
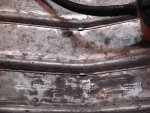
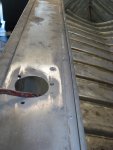
So while under the boat, I saw the below damage on the keel. I have two spots and they both align with the keel support on the trailer. I am 99% sure the old keep support was made out of pressure treated wood and the keel just sat there soaked in saltwater. Not sure how to tackle going about repairing this. The smaller area I think I can repair with JB weld. The larger one with the gaping hole, I am not so sure about... Any advice is appreciated

Middle keel support
DSC03589.JPG

Another picture of the middle keel support
DSC03598.JPG

Front keel support (Second spot)
DSC03596.JPG
 

Watermann

Starmada Splash of the Year 2014
Joined
Jan 12, 2013
Messages
13,798
It would've been best to do the repairs with the keel strips off to where you could clean the inside and apply the JB on the inside as well. As it is now, clean well and apply the JB on top, sand it smooth and call it good. It's the bottom and won't be seen anyway. I don't know why anyone would position bunks to where the keel strips would sit on them.

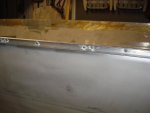
I have a question, why did you let all that 5200 cure on the outside of the hull around the rivet heads?
 

SHSU

Lieutenant Junior+Starmada Splash Of The Year 2019
Joined
Mar 8, 2017
Messages
1,744
It would've been best to do the repairs with the keel strips off to where you could clean the inside and apply the JB on the inside as well. As it is now, clean well and apply the JB on top, sand it smooth and call it good. It's the bottom and won't be seen anyway. I don't know why anyone would position bunks to where the keel strips would sit on them.

I have a question, why did you let all that 5200 cure on the outside of the hull around the rivet heads?

See its comments like that that require me to go and take something off I have already riveted. LOL I think the Admiral would kill me if I told her we were going to take the keel off to repair it. Would you use the JB Weld WaterWeld Epoxy putty?

As for the keel I don't know why, the previous owner actually cut grooves into the 2x4 for the keel to rest in. I kind of duplicated the idea but used PVC board and didn't cut the grooves. So you are saying I should not have my keel rest on the center braces? If so, I will need to adjust my bunks to raise them one more notch.

As for the 5200, truthfully it wasn't something I thought about at the time when I first started the project. Then when I did start to think about it, we had done so much that it wasn't something I was going to go back and fix at that time. Thinking about it later I figured the paint would help hide it. I did notice that when cleaning up on the interior in a couple spots with the wire wheel cleans it up really easy, so I can run it over it to clean it. You think its worth cleaning off the 5200? Not a whole lot of work needed to remove it.
 

Watermann

Starmada Splash of the Year 2014
Joined
Jan 12, 2013
Messages
13,798
Sorry about that but I wouldn't bother taking the keel strip off now that it's on. It's not a big issue other than it's there and you want to repair it :lol:

You could use the JB WW but it's need some help to shape it and get it into the pitting. What I've done is use some xylene in a small bowl to dip my fingers in and work it into the ball after it's mixed. That really softens it up good so it's not so stiff and you can dip your finger in the xylene as you work the WW into the area or form it. Once the xylene gasses out of the WW it hardens like it should.

I just know how easy the 5200 is to remove when wet with some solvent like xylene or acetone not so much when it's cured. It will stand out pretty badly under paint and is not an optimal surface for paint to lay down on.

I set my bunk trailers up so that the 2x6s are on either side of the keel and on the outside of the outer chine. Looks like this. My boats are 18'rs with big heavy motors and belly fuel tanks so I use 4 bunks but a 16'r it isn't really needed.

y4mrDy0NXMkyB6SejO3ONt3qmbBv5Yq5Y92ejw9fhCk1-9BW6milFJ1FLu3uA4n2BvzLV4KroR83Wswe7xtGmWIDq-1_ghEHr2zmukTQxjU1oKUzyYlJrnK5pxsu5-zzNRcXgIhABBW3HjeEDDU90JZbjOtbmvfSZY43hEZXwozDYW1wzFjDGb6MGT-moi5PWOCu0XxF4hf0atIsxlGYzMoeA
 

SHSU

Lieutenant Junior+Starmada Splash Of The Year 2019
Joined
Mar 8, 2017
Messages
1,744
Sorry about that but I wouldn't bother taking the keel strip off now that it's on. It's not a big issue other than it's there and you want to repair it :lol:

You could use the JB WW but it's need some help to shape it and get it into the pitting. What I've done is use some xylene in a small bowl to dip my fingers in and work it into the ball after it's mixed. That really softens it up good so it's not so stiff and you can dip your finger in the xylene as you work the WW into the area or form it. Once the xylene gasses out of the WW it hardens like it should.

I just know how easy the 5200 is to remove when wet with some solvent like xylene or acetone not so much when it's cured. It will stand out pretty badly under paint and is not an optimal surface for paint to lay down on.

I set my bunk trailers up so that the 2x6s are on either side of the keel and on the outside of the outer chine. Looks like this. My boats are 18'rs with big heavy motors and belly fuel tanks so I use 4 bunks but a 16'r it isn't really needed.

Really appreciate your advice WM

I don't think I will be removing it. I mentioned it to the admiral last night as a joke and surprised her glare didn't vaporize me on the spot. LOL Just using the WW and forming it into the holes like you said. Don't have xylene so will be using Acetone. The pitted areas going to use some normal JB weld to mix up and spread over. That will allow me to get into it better, I think, and smooth it out a little better before it dries and need to sand. Looking at the JB Weld website says you can add a touch of acetone to thin it out. Think I will do that to help it pour in a little better to the pitted areas/reduce air bubbles.

The few screw holes I have below the water line, I plan on using the WW to fill those and sand them smooth to hid them. Should I also use a dab of 5200 as well or WW will do the trick? I am guessing I need to leave a larger piece on the interior to help keep the strength of the WW?

Also plan on filling in the holes on the bottom of the Hull from the KB originals holes with WW and then redrilling them. Since I am going to have a backing plate underneath slathered with 5200 to sandwich the Hull I think it should be fine, but any comments/concerns are always welcome.

For the 5200 on the exterior I will look at using my angle grind with wire wheel cup brush to remove the extra 5200. It came off really easy when I had a couple spots on the interior that I re did. Also, plan on painting the boat with the Fasco Steelflex so the Epoxy should hold pretty well, but as pointed out, it would stick out with 5200 under it.

As for the bunks, I will lift the boat and increase the bunk height by a notch or two to get the keel off the trailer.

Other notes, I ordered 200 of each 3/16 sizes you recommended. Rather have to many then not enough. The few pop rivets I can replace with solid rivets I will, but figure most pop rivets will be replaced with pop rivets.

This up coming week I plan on cleaning up the holes and filling with WW so I can water test this weekend. Hoping to make a nice bathtub in the drive way. Will see how it works and what kind of leaks I have. Then a nice cleaning and sealing of seams. Let it dry and test again. Hopefully it will be good and I can move on to painting and decking.
 

SHSU

Lieutenant Junior+Starmada Splash Of The Year 2019
Joined
Mar 8, 2017
Messages
1,744
Nothing exciting but figured I would post below pics. Took some water weld and JB weld to holes and bad pits. Then sanded smooth. For those wondering why i filled in the knee bracket holes, I will be adding an additional support plate and the holes on the KB were filled in by my welder. That is why I figured I might as well fill up the original holes and then drill all knew ones through the KB, hull, and additional support plate all at one time. Plus it allows me to water test this weekend.
DSC03602.JPGDSC03603.JPGDSC03607.JPGDSC03610.JPG
 

SHSU

Lieutenant Junior+Starmada Splash Of The Year 2019
Joined
Mar 8, 2017
Messages
1,744
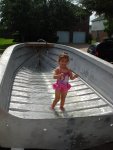
Water tested this weekend, and found a couple points on seams and one or two rivets that we will re-buck. Daughter loved playing in the boat with the water and used it as a little pool. Also, swung the boat around on the driveway to move the water around to cover the seams on different sides. Overall very happy after all the rivets replaced that the boat wasn't leaking like a sieve. LOL

I am not sure if she enjoys it more as a boat or as a boat pool... DSC03615.JPG


Swung up the driveway to test the seams. I forgot how much water weights and it was an effort to move her from side to side to test seams. The large wet spot is from moving her around and the water splashing out of the transom bracket holes that I hadn't filled. DSC03616.JPG


Trying to figure out my next steps. I am thinking I am going to take the boat to my welder and have him add additional aluminum on the transom to close it up so I can have a smaller splashwell fabricated. Also, have the scuppers cut out into ovals. I found out that they are off by about an inch from side to side. Something that will bug me, but probably not notice.... So that one is still being mulled over, as cutting them into oval scuppers I can fix the off center issue. Thinking this way as it will allow me to paint all at one time and not have to go back and fix anything later. Thoughts?
DSC03611.JPG
 

Watermann

Starmada Splash of the Year 2014
Joined
Jan 12, 2013
Messages
13,798
The ever important leak test is a must, I see too many not doing this. Make sure to do another test after repairing the leaks you found. Sealing the seams up 100% can be a bit tough but gluvit and coat it epoxies are about products we have going for us.

Looks like you want to remodel your SW to something more like my V5 model has. Were you planning on shortening the SW too? I don't know about scuppers, nobody has used them to shut off the drain tubes at least that I know of. Personally I don't think I would want anything that could slow or stop up the direct flow of the water out through the tubes. I don;t know how much pressure from the water is needed to open them?
 

SHSU

Lieutenant Junior+Starmada Splash Of The Year 2019
Joined
Mar 8, 2017
Messages
1,744
The ever important leak test is a must, I see too many not doing this. Make sure to do another test after repairing the leaks you found. Sealing the seams up 100% can be a bit tough but gluvit and coat it epoxies are about products we have going for us.

Looks like you want to remodel your SW to something more like my V5 model has. Were you planning on shortening the SW too? I don't know about scuppers, nobody has used them to shut off the drain tubes at least that I know of. Personally I don't think I would want anything that could slow or stop up the direct flow of the water out through the tubes. I don;t know how much pressure from the water is needed to open them?


Thanks, we plan on using gulvit to get into the seam and then Fasco over it. With all of the pitting that I have found, I feel I need an extra layer to prevent future corrosion in addition to the JB weld.

Will do another leak test after we have added the Gulvit/fixes. Original plan was to do a pretest before adding Gulvit and Fasco as I wanted to see how well the rivets we did held without the extra sealant.

Something I hadn't thought of before, but I did notice during the leak test is that the current position of the drain hole doesn't allow all the water to drain out of the bilge. It is so high up that approximately a gallon to a gallon and a half still remains. So now I am thinking about again adding a new drain hole behind the KB so I can get 98% of the water out. It helps explain all the pitting I found on under the KB, you couldn't get enough of the water out and it would just sit there. The old drain hole, I think I can mod to use as my livewell intake and have two pumps off of that.

As for the SW, yes I wanted to create something similar to your V5 model. I feel to much space is wasted with the original design. I plan on adding two Tempress 13 x 17 baitwells on either side of the SW. With that addition, not sure if it will increase the SW into the boat yet, but it will provide useful compartments that can also be used as coolers when not fishing.

The drain holes would be oval and increase from 1 inch diameter to a 1 1/2 x 5 1/2 creating a much larger drain hole. The scupper themselves I don't think would restrict to much flow, but would have to purchase first to verify... The description does say that it may stay partially open unless pushed closed by a wave.
 

SHSU

Lieutenant Junior+Starmada Splash Of The Year 2019
Joined
Mar 8, 2017
Messages
1,744
Added Gulvit last night to the seams. First took a wire wheel to scuff up the seams and then cleaned it up. I used a couple 10 ml syringes to measure out and then apply the Gulvit in a nice bead along the seams. Went down really easy with very little waste and have about half left for a second coat tonight. The only spot I will have to fix is where i stepped in to a pool at the bottom of the bow section. I have epoxy shoe prints in a couple spots.... :facepalm:.

DSC03618.JPG
 

Watermann

Starmada Splash of the Year 2014
Joined
Jan 12, 2013
Messages
13,798
Hey that syringe is a really good idea to limit waste of the epoxy sealer. Think I would still coat all those rivet buck tails on the seam for added insurance.
 

SHSU

Lieutenant Junior+Starmada Splash Of The Year 2019
Joined
Mar 8, 2017
Messages
1,744
Hey that syringe is a really good idea to limit waste of the epoxy sealer. Think I would still coat all those rivet buck tails on the seam for added insurance.

Yep, that syringe made it really easy to apply and in the corners/bow I just started a nice constant stream and watched it run all the way down along the seam. Made it really clean looking. When I started to use the brush, that is when it started to get messy.

Thought the same thing on the buck tails, I did a coat last night with a brush over all the internal rivets. Still will cover with another layer of Fasco as well. I know you said that coating the rib rivets doesn't really do anything, I understand the logic, but there is something to say about it just feeling right. :rolleyes:
 

SHSU

Lieutenant Junior+Starmada Splash Of The Year 2019
Joined
Mar 8, 2017
Messages
1,744
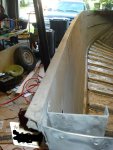
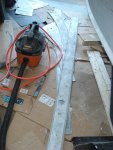
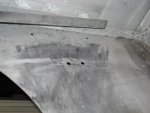
Took the gunwales apart last night. Glad I did, the rivets in them were falling apart/off as well. I went through and added all new rivets on the port side and will start the starboard side tonight.

Thinking I will use solid rivets when I put this back together instead of the pop rivets that are there. It is not shown in this pic, but i found additional pop rivets under both the rubrail and water catch caps. Looked like they are used to secure the gunwale to the hull and support. Does anyone else have these or was this a PO mod?
DSC03620.JPG


Gunwale taken apart DSC03621.JPG
DSC03626.JPG


Bad rivets barely holding it on or completely gone DSC03624.JPG


Took the front cap off and the supports fell. Rivets were pulled out and bad DSC03627.JPG


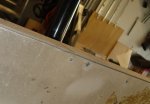
New rivets installed (Admiral was happy since she wasn't needed to help). Realized after I did all the rivets, that some of the holes were for the rubrail.... Figure I will just fill the rubrail holes and make new ones to maximize holding power. DSC03637.JPG


Port side done, Starboard tonight DSC03639.JPG


Also as a side note, updated Post #258 to include a color chart that I got from Fasco as I haven't been able to find any chart online for their specific pigments. Plus you can thin 5% with xylene to have it lay better when applying
 
Last edited:
Watermann

Starmada Splash of the Year 2014
Joined
Jan 12, 2013
Messages
13,798
Yeah the gunnels are fastened with 5/32nd blind on my boats, I added more too.

y4m7KFYVN3DYEmWbDkaRPbyMNFl-J17leBNxh-gYxRORHhptXIXXv7fp7vWpw0fP6Tfee6-SXdYSXg5GA6di9Zr8qsKFsg_CZhFZ02cJCvhd7kgfPdsEib8hyAqcDMbaQ-f9S6lS0I8GfDswsLDR4CWhI4ptEbSpn2kc7z9PhbmAKsk7LWssmFofgWbOSXlp0JwManEairgI8jpFJIFEbNV-w
 

SHSU

Lieutenant Junior+Starmada Splash Of The Year 2019
Joined
Mar 8, 2017
Messages
1,744
Yeah the gunnels are fastened with 5/32nd blind on my boats, I added more too.

y4m7KFYVN3DYEmWbDkaRPbyMNFl-J17leBNxh-gYxRORHhptXIXXv7fp7vWpw0fP6Tfee6-SXdYSXg5GA6di9Zr8qsKFsg_CZhFZ02cJCvhd7kgfPdsEib8hyAqcDMbaQ-f9S6lS0I8GfDswsLDR4CWhI4ptEbSpn2kc7z9PhbmAKsk7LWssmFofgWbOSXlp0JwManEairgI8jpFJIFEbNV-w


I guess I will be buying some more rivets... LOL. Do you think I can get away with 3/16th or I need to get the 5/32nd? Think the 3/16th might be to big to properly fit under everything.
 

Watermann

Starmada Splash of the Year 2014
Joined
Jan 12, 2013
Messages
13,798
The only issue would be height of the blind heads, I really don't know if that will be an issue or not so there's only one way to find out. Pop a hole bigger, set a 3/16" and test fit. :happy:

My guess is the 5/32" were good enough for SC and a penny cheaper than 3/16" rivets per 100. :rolleyes: I pre-ordered my rivets knowing what size they'd be and that all of them would be needing replaced. I'm thinking you'll have a rock solid boat when your done. There's none other I've seen that needed to replace every rivet, not just the solids but few guys ever take that step of removing the RR's and replacing those loose steel mandrel blinds lurking under there.
 

SHSU

Lieutenant Junior+Starmada Splash Of The Year 2019
Joined
Mar 8, 2017
Messages
1,744
The only issue would be height of the blind heads, I really don't know if that will be an issue or not so there's only one way to find out. Pop a hole bigger, set a 3/16" and test fit. :happy:

My guess is the 5/32" were good enough for SC and a penny cheaper than 3/16" rivets per 100. :rolleyes: I pre-ordered my rivets knowing what size they'd be and that all of them would be needing replaced. I'm thinking you'll have a rock solid boat when your done. There's none other I've seen that needed to replace every rivet, not just the solids but few guys ever take that step of removing the RR's and replacing those loose steel mandrel blinds lurking under there.


Thanks Watermann,

Truthfully, I knew it I was going to have to replace a lot, but I didn't imagine it would be all of them when I first purchased the boat. After finishing the the edge rivets for the starboard side tonight, I realized.... I WILL NEED TO ORDER SOME MORE 3/16th SOLID RIVETS!!!! :jaw:

After ordering 2,000 I have almost run out!!!! I have ~ 25 left and need an additional ~50 to get through everything that was installed with a solid rivet initially. Plus I will have to decide how I plan to secure some additional panels. If I will use blind rivets, solid rivets, or bolts.

Updated post #361 to reflect new number of rivets required in complete re-rivet of 16' Starcraft Super Sport
 
Last edited:
SHSU

Lieutenant Junior+Starmada Splash Of The Year 2019
Joined
Mar 8, 2017
Messages
1,744
Well, an update for anyone that is following. Admiral and I were at a couples retreat in the remote part of CA for the last week. No access to cellular service and only some data when in the main lodge. Got to do some steelhead fly fishing and had a blast doing that, but had to watch from a distance as Hurricane Harvey formed in the Gulf of Mexico. We flew back into Dallas TX on Sunday and spent the night there. Drove back to Houston on Monday and wasn't able to make it home because of street flooding. Tuesday we finally made it back and thankfully have been unscathed by the Hurricane. With that being said, please continue to pray and support the relief effort in Houston. We have had more rain dropped on us then at any other time. Enough water to raise all of the great lakes by a foot!!!!! Really wish the boat was in some shape I could use here to help support the relief effort. More parts of Houston are flooded then ever before and we are truly seeing an event that is Once in a Life Time. Thanks in advance to anyone that prays or supports the relief effort for Hurricane Harvey.
 

Watermann

Starmada Splash of the Year 2014
Joined
Jan 12, 2013
Messages
13,798
Glad to hear you guys were spared, that sure is some good news. I think you were super lucky from what I've seen on TV. Thoughts, prayers and some relief money is heading there from my family.
 
Status
Not open for further replies.
Top