1982 Glastron Hpv165 bass boat restoration.

GT1000000

Rear Admiral
Joined
Jul 13, 2011
Messages
4,916
Re: 1982 Glastron Hpv165 bass boat restoration.

Hey everyone. I've been looking at small electric grinders in the 4.5 inch disc diameter variety for grinding the hull with. Can you guys give me some suggestions on a decent brand of grinder to get this job done. Especially which ones to stay away from. I also need some info on what brand, type and cut of disc to use and if they gum up real bad or I can get just a few to get the job done.
I have also spent some time looking at different tools for seperating the stringers from the hull leaving them somewhat intact and also seperating what's left of the floor from the sides where there is such a tight cutting angle. Underneath that bit of remaining floor there is almost no room for a blade to cut through the edges without further damaging the hull.
Any other little secrets or suggestions as to stripping and prepping it would also be greatly appreciated.
Thanks freinds!

JC's got you covered on the grinder...I think Woodonglass has a good tip for them to help them last a little longer...if my feeble memory serves me right, cover the air intake with a scotchbrite pad to act as a filter of sorts...keeps the glass particles from destroying the bearings, too soon...
Oscillating tool should work, also a reciprocating saw with a flexible blade...get it started and it should follow the curve of the hull...just go slow and careful...you could also use a piece of tin on the other side of the stringer, where the blade comes through to help keep it pointed in the right direction...
You might want to use some good heavy duty work gloves to protect your paws in case the tool you are using decides to grow a mind of its own...

Don't recall off hand if the hull is sitting on a proper support system, but if it isn't, it definitely will need to be, they become real flimsy and can easily become deformed when the structure is removed...
Also make sure you have plenty of pics, notes and measurements of how it was, so you don't have to rely on memory for the put back...

PS- nice score on the new toy hauler!:D

PPS- Nissan Titans are actually more American made than a lot of American named cars...

Nissan Titan: Engine,
United States; Transmission,
Japan; Assembled in
Canton, Miss.
 
Last edited:
jbcurt00

Moderator
Staff member
Joined
Oct 25, 2011
Messages
24,996
Re: 1982 Glastron Hpv165 bass boat restoration.

I prefer cut-off discs on an angle grinder for removing stringers, deck & cutting thru fiberglass in general.

A flap-wheel or sanding disc, 36Grit+/- to grind down to good glass, perhaps a 24G & 40G too, and removing the lip left when using a grinder.

If you have an old pair of rubber soled shoes, you can hit the sole w/ the sander, and get the resin build up off the discs....

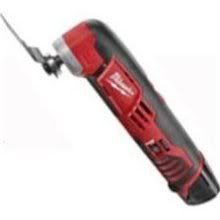
I also like the multi-tool for trimming back the lip & cutting in & around tight areas:
Multitool.jpg
 

maryhannaj

Chief Petty Officer
Joined
Sep 22, 2013
Messages
422
Re: 1982 Glastron Hpv165 bass boat restoration.

I went out today to harbor freight and picked up the 4.5 chicago electric grinder($18.89), the oscillating multi-tool($14.89w/add), with a few different cutters. Some flap wheels, cutting wheels and grinding discs . A set of rotary tool saw wheels, a filtered respirator, air blower for my air tank and a box of nitrile gloves. I got the warranty on both multi-tool and the grinder and they were nice enough to give me another one of their little LED flashlights for coming out for the purchase.
Hey GT1M, I searched for sawsall blade that was considered flexible by design. I couldn't find anything that said that on the package. Can you give me a type of blade specific for that purpose? And thanks for the comp on my new truck. I'm pretty happy about it. As for the hull being supported. I posted a pick of the brace that I put underneath the bow area and the boat is supported pretty darn good by the 4 bunk trailer from a few feet behind the bow brace all the way back to about 3 inches in front of the stern. I have put 3 pretty evenly spaced crossbraces across the top from side to side and will probably add one more at the stern just before I cut the transom out. Do you think it needs more? The only way I think I could add more would be to build a whole new fixture.
Hey jbcurt00, thanks for the info on the tools and supplies too. If there is anything else that anyone can give me the heads up on, I would appreciate it. Cause im about to start cutting again. Ha-ha!:)
 
Last edited:
GT1000000

Rear Admiral
Joined
Jul 13, 2011
Messages
4,916
Re: 1982 Glastron Hpv165 bass boat restoration.

Nah, you are good to go on the hull support, I went back and took a look and you should be just fine...
I said a flexible sawzall blade, but what I really meant is one of the long ones instead of the short ones...I think they are about 9-12" long and they are flexible enough...if you bend them too much they tend to break ...
Here is one example....Have fun!
12" 18 TPI Thin Kerf SAWZALL Blades | Milwaukee Tool
 

maryhannaj

Chief Petty Officer
Joined
Sep 22, 2013
Messages
422
Re: 1982 Glastron Hpv165 bass boat restoration.

Hey, thanks again GT1M. much appreciated!
 

jc55

Senior Chief Petty Officer
Joined
Nov 3, 2006
Messages
665
Re: 1982 Glastron Hpv165 bass boat restoration.

I am soooo sorry!!! I meant circular saw NOT sawall! Circular saw for deck cuts with the blade set...and as JB mentioned, flapper discs! You will find what works best for you and you'll carry that knowledge to the next project:)
 

jigngrub

Fleet Admiral
Joined
Mar 19, 2011
Messages
8,155
Re: 1982 Glastron Hpv165 bass boat restoration.

Yeah, circular saw set at 5/8" deep. Make a short cut to see if it's deep enough, if not adjust 1/16" at a time until you just barely cut through the bottom of the decking.

Reciprocating saw blade depth set is determined by the length of the blade you put in the tool.
 

maryhannaj

Chief Petty Officer
Joined
Sep 22, 2013
Messages
422
Re: 1982 Glastron Hpv165 bass boat restoration.

It's not a problem at all jc. Not like I went out and bought a $100 sawsall with an adjustable foot after you told me that's what I need to get the job done! Just kiddin. I didn't and it's all good.
Thanks jigngrub. I only have a small piece left of the floor that I'm going to use the circular on and then I'm going to use the multi tool to cut around the rest of the edges where it's glassed in and I hope that should do it.
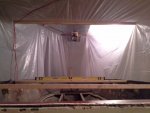
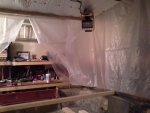
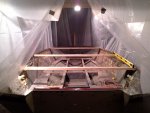
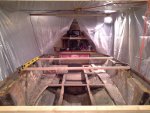
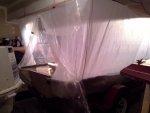
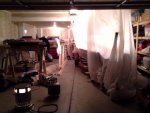
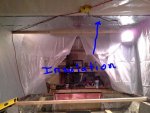
Today I finally got the dust shelter put up and decided to go a bit extra on it, as it seems like I allways do. But that's ok I suppose. I bought a sheet of 20x25 plastic, a few 2x2's, a surge protected 5 way electrical splitter and two $13 halogen 500 watt lamps. After I put the two lamps up, I realized I needed one more so I will probably add it soon. And I used a roll of some kind of shiny insulated bubble wrap that I had lying around from an old project.
So a freind came over and helped me get the plastic hung up and here's how we did it. I drilled a hole in each end of two 8 ft. 2x2's and then started screws in each hole. Next I layed the boards over the boat hull from one side to the other and then we draped the plastic sheet over the top of the hull leaving the excess of the material toward the bow. Next, I climbed up underneath of the plastic inside of the hull and lifed one of the boards to the ceiling. While my buddy helped me hold and line up the board, I ran a screw through each end into the ceiling sandwiching the plastic between the ceiling and the board. Next we moved to the next board and did the same thing and then once more with a smaller one. Then I tucked and taped where I could to eliminate the dust from flying.
I then stapled up the sags and draped a piece across the back, stapled it up and cut a slit for an entry spot. After I cut the entry slit, I draped another small piece over the entry area and stapled it up, but I also stapled an old broom handle to the bottom of it so I can roll it up toward the ceiling and put each end of the broom handle through a loop on each side that I made out of two pieces of electrical wire and hooked to the cieling. That way I can have it open or closed if I choose.
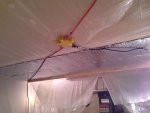
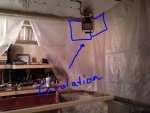
I then stapled up the shiny insulation to the ceiling where I was planning to mount the halogen lamps to both keep them from melting the plastic and reflect more light under the cover. It worked pretty darn good too, so I plan to hang even more when I install the third halogen.
Next I assembled and mounted the halogen work lamps to the ceiling. I then drilled some holes through the electrical splitter and screwed it to the ceiling as well. This way I can run the main power into and under shelter to the electrical splitter. From the splitter, I can run the three halogen lamps plus two more power tools etc...and then cut the power by pulling one plug.
I intend to leave the the shelter up throughout as much of the rebuild as I can to help keep the both the mess and the fumes in. I will probably also at some point add a fan with a duct going out of the shelter and under the garage door.
Here's how it ended up...

DSC_0012.JPGDSC_0014.JPGDSC_0007.JPG
 
Last edited:
maryhannaj

Chief Petty Officer
Joined
Sep 22, 2013
Messages
422
Re: 1982 Glastron Hpv165 bass boat restoration.

And here it is all lit up. I am going to put up one more light on the opposite side over the stern area of the shelter. I hope these halogens will also help maintain some warmer temperatures while the resin cures.

DSC_0003.JPGDSC_0004.jpgDSC_0011.JPGDSC_0009.JPG
 

Daniel1947

Petty Officer 1st Class
Joined
Sep 22, 2010
Messages
267
Re: 1982 Glastron Hpv165 bass boat restoration.

Looking good, but I want to share something with you about those halogens. I have a couple that look an awful lot like yours. I know mine put out a lot of heat....I won't swear :censored: to it, but I would bet that mine would melt the plastic if they were as close as yours seem to be to yours. You might just check it after they have been on for awhile....or move them a little farther away from the plastic. I don't think it is a fire hazard, but burnt plastic stinks. :D
 

Daniel1947

Petty Officer 1st Class
Joined
Sep 22, 2010
Messages
267
Re: 1982 Glastron Hpv165 bass boat restoration.

Just another comment about all the threads on Iboats....it is truly amazing at all the ingenuity guys can come up with. The engineering that goes into so many projects, just to construct something or manufacture something to get us to the next step to get the actual project started. Truly a tribute to everyone that ventures down this road.
 

maryhannaj

Chief Petty Officer
Joined
Sep 22, 2013
Messages
422
Re: 1982 Glastron Hpv165 bass boat restoration.

Hey daniel. I get what you mean about the heat from the lamps. I did insulate above them with some tinny type of insulation roll though. I did that just because of the heat that comes from a halogen. I plan to watch it pretty close anyways though. I would rather the plastic stay in descent shape. Thanks man. Im trying to dig up some time to get out there tonight and do some more cutting but I keep running into road blocks. I'll post later for any headway I may make.
 

Woodonglass

Supreme Mariner
Joined
Dec 29, 2009
Messages
25,926
Re: 1982 Glastron Hpv165 bass boat restoration.

Plasticized!!!! Looks Good, but...Do be careful with the Halogens, they do get HOT!!!!
 

maryhannaj

Chief Petty Officer
Joined
Sep 22, 2013
Messages
422
Re: 1982 Glastron Hpv165 bass boat restoration.

Thanks for the warning on the lights guys. Turns out it those lights got DANG hot as supected and warned of, but the insulation worked good. I worked in there tonight for about 3 hours and the plastic stayed intact. Here's a pic again of that insulation.

PhotoDesk131111011550.jpg

This is where I plan to hang a bit more of the same stuff. It really worked pretty good so I will try to remember to post the brand in case anyone reading wants to build a dust shelter like this.

PhotoDesk131111012410.jpg
 

maryhannaj

Chief Petty Officer
Joined
Sep 22, 2013
Messages
422
Re: 1982 Glastron Hpv165 bass boat restoration.

I have mentioned in a few of my previous posts that I worked for a few years with fiberglass, carbon fiber and kevlar. We used to suit up in the tyvek suits every day to keep the itchiness and burning of the dust off of our skin. I was talking to my buddy that I worked there with and told him about the baby powder trick that GT1M told me. He then reminded me of another way we used to keep the dust out. I had completly forgotton this method.
So for anyone reading this and for you guys already with me on this, here's a little trick for you for future referance in case you dont already know it. It works REALLY GOOD!

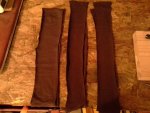
1. Cut an old t-shirt into strips.

DSC_0015.jpg

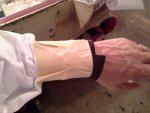
2. Wrap the strips around your wrists and secure it with some 1.5 or 2 inch tape.

DSC_0016.JPG

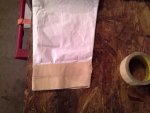
3. Lay out the tyvek suit and wrap the cuffs all the way around with the tape.

DSC_0017.jpg

4. With the suit on, fold the cuff over onto itself so that it will seal flat and then tape the suit to the tape on the wrist wraps. This way, it will seal the dust out of the suit. Just untape the cuff from the wrist wrap when you want to take the suit off and this wiill keep the cuff from tearing apart. Which is nice because they are not cheap.

DSC_0019.JPG

With all of the good information you guys have shared with me, I hope you have a chance to try this method with your future glass work, and that it saves you from burning through $13 tyvek suits and helps keep the glass out.
 

maryhannaj

Chief Petty Officer
Joined
Sep 22, 2013
Messages
422
Re: 1982 Glastron Hpv165 bass boat restoration.

Ok. I'm going to get back to the restoration now. I am having a serious problem with my tools burning up while trying to cut the floor out.
I put my Craftsman circular saw back to the floor and it lasted about 2 minutes before overheating and popping the surge protector. I next tried the jigsaw with aggressive cutting blades and the floor would round off the teeth on the blade within about 10 inches of cut. Then I broke out the brand new 4.5 inch grinder with a 40 grit cutting disc and again it only cut through about 10 inches of deck before it completly burned up.
So I sat there and scratched my head. Being pissed off about the whole thing, knowing that I have to drive back out to Harbor freight again in the morning to get another grinder, I decided I was just going to try my sawsall to trim up what I could before the batteries ran out.
That thing smoked right through everything I threw its way. I even managed to successfuly cut through some of the most shallow parts of the deck by using the shortest nail cutter blade and tipping and angling the sawsall very carefully while cutting.
So this part is for you Jc55. I did in fact go out just tonight and buy that $100 reciprocating saw with the adjustable foot and electrical cord instead of batteries.:laugh: If I have time tomorrow to do more work, I have high hopes that this saw will do the job!:) It's kind of funny some times how things work out like that.
I did however manage to get the last little piece of floor out and trim some of the edges before the batteries needed re-charge. And another quick thing about the dust shelter... Safety glasses do not cut it in such an enclosed area. As the dust cloud built up, my eyes began to burn and sting, so I will also be investing in some good safety goggles tomorrow.

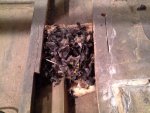
Here's something kind of cool too. I already discovered a 20 year old bottle of Coppertone underneath of the fuel tank but this is what I discovered under the last small piece of floor that I cut up.

DSC_0020.jpg

A mouse or some kind of rodent had built his home underneath the floor. He got inside of there by going through where the stringer had rotted out and broke the tabbing away from the transom. I like finding stuff like this. I'll bet that there are a lot of guys out there that have discovered some great stuff while doing their rebuilds too.:eek:
Thanks again to everyone for hanging out with me on this. Every day I look forward to reading up on everyones tips, info and advice. I couldn't be doing this without you all.:)
 

Woodonglass

Supreme Mariner
Joined
Dec 29, 2009
Messages
25,926
Re: 1982 Glastron Hpv165 bass boat restoration.

2 Things. 1.) Keep a air gun handy and blow out the motors of your tools reqularly. 2.) Duct tape a scotch Brite pad over the vents on your tools. Kinda acts as a filter to keep the dust out. You might be able to salvage the tools by replacing the Brushes. If you know anyone that has a Woodworking dust collector, Borrow it. I can show you how to use it and really help keep the dust down.
 

Daniel1947

Petty Officer 1st Class
Joined
Sep 22, 2010
Messages
267
Re: 1982 Glastron Hpv165 bass boat restoration.

Hey man, I forgot to wish you a Happy Birthday yesterday man. Marine Corps, 238 years old. And since it is Veterans day....many thanks to you and all my brothers (and sisters) that have served and are presently serving. From an old Jarhead...."Semper Fi."
 

maryhannaj

Chief Petty Officer
Joined
Sep 22, 2013
Messages
422
Re: 1982 Glastron Hpv165 bass boat restoration.

Hey woodonglass, I went out today and picked up another grinder. I have some scotchbrite pads handy and I will be taping them on. What do you think about using some cut up pieces of an old facemask filter to do the same thing? Have you ever tried that? I wonder if it would be too restrictive? Let me know what you think.
Hey daniel1947. Thank you and same back to ya brother!
 

maryhannaj

Chief Petty Officer
Joined
Sep 22, 2013
Messages
422
Re: 1982 Glastron Hpv165 bass boat restoration.

Hey again everyone. My new grinder with the scotchbrite pads taped over the vent worked out great today woodonglass. Thank you very much for the tip! The new grinder is s 7 amp Dewalt 4.5 inch. It really likes to cut but I dont think my surge protector can handle the draw with the long extension cord going into it, the two halogens on and a vacuum running at the same time. It just wants to pop off. It did it about 4 times in about 3 hours tonight while doing structure removal. As soon as I stopped running the vacuum continuously, it stopped amping out.
I have been running the vacuum to help filter the air inside of that confined space. It doesn't work but I thought I would give it a try anyway. I dont have access to a dust collector without buying one. I appreciate the offer on that one though woodonglass. The dust in there just becomes overwhelming. With the fogging of the goggles and the dust building up in there it makes it nearly impossible to work. And it is definatly creating an unsafe work environment for sure.
So at this point, I will just have to re-think my dust shelter before I continue to use any type of powered cutting tools. I found on a favorite tool stores website a blower fan with an optional 8 inch diameter, 16 foot attachable duct that I will be trying to engineer into the the dust shelter before any further use. I hope it will keep the air inside the shelter a bit closer to a safe level for working in. I intend to route the hose underneath of the garage door and then out onto the side yard.
That dust is very fine and it stays airborn for a long period of time. It has still managed to coat everything inside of the garage in a very light layer of dust even with the shelter in place. I suspect that it isnt just dropping and sticking to the floor around the the bottom of the hull like I had hoped that it would. Instead, it's just staying airborn and seaping out to everything around it. So for that, I will also be picking a an air compressor to periodically blow out the entire garage. Plus, I've just really wanted a compressor for a while now. You know, its a kind of a, " a guy just has to have one" kind of thing.:D
I think im going for a 2.5 hp 21 gallon model that the same favorite tool store has a special on for $159 right now with the online coupon. It has quite a few good reviews and I believe it will serve it's purpose for what I will be using it for. That's just kind of a heads up to you all right now just in case you don't already have one, and I'm pretty sure you all know which favotite tool store I'm refering to.
Oh yeah, by the way guys. I also managed to instal FOUR MORE high speed water intakes tonight due to lack of visibility and just plain old overzealousness if thats even a real word. Either way, that just sucks REAL BAD.
I also discovered that the stringers are all pretty darn solid except for about 10 inches or so forward of the transom on both sides and in the spots that I have cut into. I have been using that sweet new sawsall to try and trim whats left of the floor from the top of the stringers horizontally but I have managed to trim too deep in a few spots. The spots that I have trimmed too deep into have exposed perfectly preserved stringer material. The only thing is, they're made of solid one piece hard wood of some kind. I was under the impression that stringers should be made of two 3/8 resin laminated boards.
I have made a complete mess of this so far guys!:facepalm:

Should I keep gutting out all of the old structure and start over new?

Is there a good, solid and safe repair that can be done on the existing well preserved structure to save time and money?

What should I do at this point guys? As you know, I have really tried to express how valuable your opinions are to me, and I sure could use some more of that guidance right now!
Thanks again everyone!:)
 
Last edited:
Top