1981 Sportcraft 270 repair underway - transom, stringers, & repower

Status
Not open for further replies.

70marlin

Cadet
Joined
Aug 11, 2021
Messages
24
Oh, yeah, I'm definitely using marine ply for all the stringers (unless sourcing, wait times, or some other unseen issue gets in the way. But that's unlikely, as we already have a few sheets of 3/4" and 1/2" already now).

When I was saying "debating using a 2x4" I was just saying that the current dimensions are around 2" wide by 4" tall, like an actual 2x4 was used, for at least 4 out of my 6 stringers. So, I'm not sure if I should still follow that schematic and keep them at the same dimensions 2"wide and 4" tall (using marine ply of course)... Or, if I should just make them as tall as I can all the way up to the sole/deck in every position possible, except for the fish boxes?

(My fish boxes are on each side of the deck and directly above the two outside stringers. Those are 2 of the 6 stringers that are 2x4 size, and then the two inner stringers with engine beds on top of them are also 2x4 size).

It's weird because only TWO of the stringers are actually up to deck height. Looking at a cross section of my boat, the 6 stringers are setup like this:
| |
| |
| | | | | |

I just wasn't sure if there was some unknown design reason for this being setup that way by the factory? Or, it was just done to save time and costs while still being "boat-able" for the average user and I am just overthinking it/second guessing the design importance for no reason, lol.
From personnel experience I've had marine grade rot just as quick a cabinet grade plywood. I've found that you need to wet out your replacement boards completely especially end grains. before you lay it up.
 

WalleyeSniper

Petty Officer 2nd Class
Joined
May 15, 2018
Messages
108
From personnel experience I've had marine grade rot just as quick a cabinet grade plywood. I've found that you need to wet out your replacement boards completely especially end grains. before you lay it up.
You ain't lyin'! The transom core I just did soaked up TONS of resin when I did the pre-wetting. So, wetting everything out generously is definitely a must prior to everything else.
 

70marlin

Cadet
Joined
Aug 11, 2021
Messages
24
You ain't lyin'! The transom core I just did soaked up TONS of resin when I did the pre-wetting. So, wetting everything out generously is definitely a must prior to everything else.
A mistakes that I have been living with 😵‍💫
actually if you have any voids they should be filled. Just saying. But at least you get the concept and the xtra step to do it right!
How do you fill voids in plywood?
 

kcassells

Fleet Admiral
Joined
Oct 16, 2012
Messages
8,707
Pb or things like pl or a wood filler. Pl needs to gas of prior to glassing. I liked using this because it sets up in fast time and can be diluted with acetone to bring it back when it starts to look dry in the can. Not cheap. Acetone based.
1628724647365.png
 

WalleyeSniper

Petty Officer 2nd Class
Joined
May 15, 2018
Messages
108
Pb or things like pl or a wood filler. Pl needs to gas of prior to glassing. I liked using this because it sets up in fast time and can be diluted with acetone to bring it back when it starts to look dry in the can. Not cheap. Acetone based.
View attachment 347618
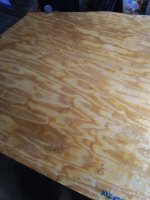
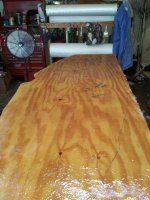
Welp, just put our first layer of 1708 on the core, and it went pretty good. Used about 6pints of ISO resin.

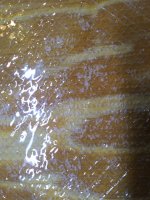
It was looking good, but I got some of these little micro air bubble things here and there randomly throughout the first layer and not sure if that's normal or not. Or if I didn't use enough resin throughout, OR maybe I kept working it too long and it might've Gelled and I didn't realize it. Just my first layer that big.

20210812_000217.jpg
Those bright areas that look like air pockets are just because of the lights above it.

20210812_000428.jpg
Averagely close look.

20210812_000257.jpg
Extremely close look from about 3" away. These are the little random "micro bubbles" I was talking about. Is that normal? They're like IN the 1708.
 

WalleyeSniper

Petty Officer 2nd Class
Joined
May 15, 2018
Messages
108
All looks great to me. What bubbles? Only rework them when they are @ the size of a dime or is it a quarter?
Whew!!! That's a relief. I thought I did something really wrong or something lol. I guess from videos and pictures online it looks SUUUPER clear everywhere with not a single micro-blemish to be found. I guess the cameras aren't usually only an inch away from the glass either typically. Lol

The only air pockets I had, were initially upon wetting it all out and there were 2 of them like the size of my fist, but then I just used my roller tools to push them out the edges and it kinda just moved and stretched the entire sheet of 1708 until it was nice and flat/uniform.
 

todhunter

Canoeist
Joined
Sep 15, 2020
Messages
1,299
To me those do look like tiny bubbles - maybe from the wood soaking some resin out of the cloth in spots where it didn't take in enough resin from the first pass. Or, it could be from not getting the mat wet enough. For big 1708 layups onto wood (big = too large to pre-wet the mat side first), I like to seal the wood with resin and let that cure, and usually follow it up with a 2nd coat, paying attention to where the dry areas are after the first coat and giving them more resin than the rest. Then, before laying the cloth, I'm pretty generous with the resin on the wood...this way the mat can soak up plenty of resin from the bottom, and the biaxial strands on top will get wet from the roller/resin that you apply from the top.

Regardless, I wouldn't be thinking of re-doing the transom, especially being your first layup. You'll get better the more you do.
 

70marlin

Cadet
Joined
Aug 11, 2021
Messages
24
I read the pin on fiberglassing and picked up on the lingo. What is 1708 does anybody have a cheat sheet for fiberglass verbiage?
 

todhunter

Canoeist
Joined
Sep 15, 2020
Messages
1,299
It's a cloth made up of two layers of non-woven roving that total 17 oz with a 0.8 oz CSM mat stitched to the back side. Each layer of roving fibers is laid 45 degrees to the direction of the roll/stitching. Since it's not woven and since the fibers are at an angle, the fibers can more easily change orientation relative to each other and conform to complex shapes. The stitching holds the mat to the roving and keeps the two layers of roving from just coming apart since they aren't woven together. Since the roving is 17 oz and the mat is 0.8 oz, it's commonly referred to as 1708. It's also called biaxial or double bias.
 

WalleyeSniper

Petty Officer 2nd Class
Joined
May 15, 2018
Messages
108
I read the pin on fiberglassing and picked up on the lingo. What is 1708 does anybody have a cheat sheet for fiberglass verbiage?

1708 = 17ounce Biaxial woven cloth, w/8oz CSM on the back side. (You will also see others like 1808, 1908, and virtually every other size and combo you could think of or order. 1708 just seems to be the most popular as it provides a great middle ground of the strength needed VS added weight to the boat VS number of layers needed VS ease of use VS number of uses and areas it can work for across an entire boat's platform). Biaxial weave is a weave that's usually in a diagonal fashion to the fabric, such as one weave pattern going 45degrees up to the right and another weave going 45degrees up to the left, crossing over each other at 90degrees to one another. You'll see them marked or referred to as 45/45 or +/-45 etc... They can also be ordered in 90/90 where one weave goes from left to right and the other weave goes up and down, instead of diagonally like with 45/45 weaves.
 

WalleyeSniper

Petty Officer 2nd Class
Joined
May 15, 2018
Messages
108
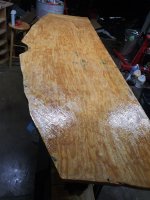
Got two layers of CSM put down on the back side of the core. Now onto the edges, and my encapsulating will be done!

20210812_143225.jpg
 

WalleyeSniper

Petty Officer 2nd Class
Joined
May 15, 2018
Messages
108
To me those do look like tiny bubbles - maybe from the wood soaking some resin out of the cloth in spots where it didn't take in enough resin from the first pass. Or, it could be from not getting the mat wet enough. For big 1708 layups onto wood (big = too large to pre-wet the mat side first), I like to seal the wood with resin and let that cure, and usually follow it up with a 2nd coat, paying attention to where the dry areas are after the first coat and giving them more resin than the rest. Then, before laying the cloth, I'm pretty generous with the resin on the wood...this way the mat can soak up plenty of resin from the bottom, and the biaxial strands on top will get wet from the roller/resin that you apply from the top.

Regardless, I wouldn't be thinking of re-doing the transom, especially being your first layup. You'll get better the more you do.
That's what I did actually. I put 3 layers of neat resin (two days apart on each side) and let harden. Then I wiped with acetone the next day, and laid the 1708... What I really think it is, was the insane humidity we had here yesterday! Because today I did the two layers of CSM on the other side and didn't have the slightest issue. But it's also not sky high humidity today either.

I'll just have to keep that in mind and make sure it's not happening again and use more resin maybe. I used 2gals on these 2 layers of CSM JUST to ensure it as all good, lol. Then waited for about 15mins, and rolled the excess off and coated the edges with it right before it gelled. :)
 

kcassells

Fleet Admiral
Joined
Oct 16, 2012
Messages
8,707
That's what I did actually. I put 3 layers of neat resin (two days apart on each side) and let harden. Then I wiped with acetone the next day, and laid the 1708... What I really think it is, was the insane humidity we had here yesterday! Because today I did the two layers of CSM on the other side and didn't have the slightest issue. But it's also not sky high humidity today either.

I'll just have to keep that in mind and make sure it's not happening again and use more resin maybe. I used 2gals on these 2 layers of CSM JUST to ensure it as all good, lol. Then waited for about 15mins, and rolled the excess off and coated the edges with it right before it gelled. :)
Perfecto! period. It's a learning curve and with what I saw for your 1st laydown you are in the 99.99%. Try not to stretch out the glass too much cause you can lose the strength but it can be Worked. Second coat wet on wet is the shiss.
I can say I ripped off some glass at times that got me mad.
 

kcassells

Fleet Admiral
Joined
Oct 16, 2012
Messages
8,707
That's what I did actually. I put 3 layers of neat resin (two days apart on each side) and let harden. Then I wiped with acetone the next day, and laid the 1708... What I really think it is, was the insane humidity we had here yesterday! Because today I did the two layers of CSM on the other side and didn't have the slightest issue. But it's also not sky high humidity today either.

I'll just have to keep that in mind and make sure it's not happening again and use more resin maybe. I used 2gals on these 2 layers of CSM JUST to ensure it as all good, lol. Then waited for about 15mins, and rolled the excess off and coated the edges with it right before it gelled. :)
Sometimes I say the neighbors cat came by and pissed on my glass.
 
Status
Not open for further replies.
Top