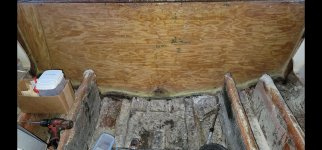
1981 Sportcraft 270 repair underway - transom, stringers, & repower

Status
Not open for further replies.

WalleyeSniper

Petty Officer 2nd Class
Joined
May 15, 2018
Messages
108
I read it, I think I should download it and study it. I’d like to talk the talk properly and understand the abbreviations.
The main ones you're gonna hear or see used:

- CSM/Mat

- 1708

- Woven/Roven/Roving/Quilt

- Cloth (sometimes referring to 1708, sometimes referring to woven roving by others)

- MEK or MEKP (some will refer to it as hardener/ catalyst, accelerator, etc)

- Peanut Butter/PB (thickened resin)

- Hairy Peanut Butter (PB with short strands in it)

Those are really the main ones that I see all the time and etc. Of course there's tons of other terms that some others might not know (like Stringers, Bulkheads, Fillets, Sole, Deck, Floor, etc) that are used and may be pertinent to some others. But, for the most part it seems like those main terms above are the main ones I always see and learn.
 

WalleyeSniper

Petty Officer 2nd Class
Joined
May 15, 2018
Messages
108
Looks to me like you’re doing a fine job!
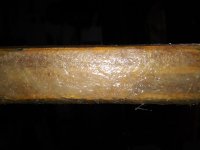
Thanks man, I'm trying. Definitely probably some room for improvement. But, I'm getting the hang of the mixtures now.

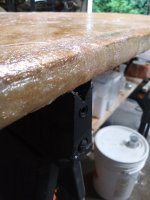
I forgot to round over my corners on the core, so when doing the edges this heavy CSM was giving me issues of air pockets here and there. Then I realized that they sent me 7oz CSM and not 1.5oz like I had ordered lol.

So, I stopped in my tracks, let it cure and ground the area back out. Wiped it all down with acetone, and decided to go about the edges in a different manner...

I stretched the CSM a little bit more to slightly make it more malleable like a thinner mat, and wetted it all out with neat resin on the first pass and rolled it out with an aluminum roller to ensure no air pockets or voids.

Then, after that kicked and hardened, I came back an hour or two later and made up a thickened resin using ISO resin, Cabosil, Milled fibers, and added a liberal amount of 1/2" strands to create a hairy and strong peanut butter. I capped off the entire edges again with a moderate to thin layer of that to ensure waterproofing and to create more purchase for the PB and fillets to grip onto when I put the core in the boat.

When I say this Peanut Butter/Ketchup type consistency is strong... It is CRAZY strong, it's like a put a bulletproof coating on around the edges πŸ˜‚.

20210813_073257.jpg

20210813_073416.jpg
I'm thinking this should work good for waterproofing, and for the peanut butter I set it into and use for fillets, to have something really good to bond to... I think.

PS: those aren't air voids, it's just the color of the PB when I mix in 50/50 blend of Polyfiber and Cabosil, with two tablespoons of 1/2" fibers per 16oz of resin.
 

WalleyeSniper

Petty Officer 2nd Class
Joined
May 15, 2018
Messages
108
Patched the little slice in the boat bottom using OOPS! method of v-notching and using his structural PB formula. But, I still put on 3 layers of 1708 thereafter jusssst to be safe. Started small, and went a 1/4" bigger on each layer using ISO resin.

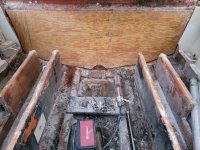
Transom core is now installed too!

Mixed up some very hairy ketchup consistency PB with ISO resin. Put on the PB decently thick onto the transom skin, sat the transom into place with CSM side touching the transom skin, then clamped the entire thing in with 2x4's and used cedar shims on each side to smash the skin and transom core together.

Then, put screws in from the back as well just for extra security in case the shims or 2x4's weakened overnight or something. Now that it's set and good to go, I'm ready to move onto fillets and tabbing it in. πŸ™‚

20210817_202710.jpg
I put the 1708 on great I think, because I have 2 layers on here and they went totally clear. Finally got the hang of the process.

20210817_202753.jpg
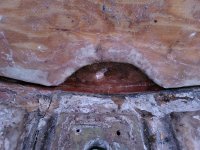
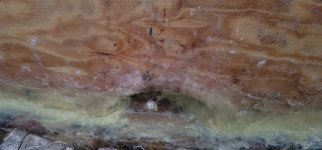
I measured and cut my moon for the drain plug area a little off center. But, other than that, turned out real good!
 

WalleyeSniper

Petty Officer 2nd Class
Joined
May 15, 2018
Messages
108
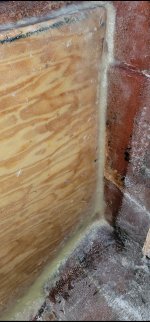
Just added my fillets and used a 1.25" washer to radius them out. Seemed like all went well, and I may have overdid it with the 1/4" fibers I added into the peanut butter. But, all in all seems like it went well. It was a really hot day, so that stuff was kicking off like no one's business!

Screenshot_20210818-232436_Gallery.jpg
Port side fillets

Screenshot_20210818-232512_Gallery.jpg
Full transom fillets

Screenshot_20210818-232645_Gallery.jpg
Now... my question is, do I want to use just super hairy thickened peanut butter to fill out the entire area where the drain plug is going to go? And do I pack in tons of PB until it's just as thick as the 1.25" transom core and fillet that as well? Or, does it just have to be decently connected via thickened resin, and not necessarily have to be as thick as the entire core?

Just trying to get together a good understanding and gameplan of what to do, use, and how to overall go about that Drain plug area to finish it off. And, any tips or tricks when installing the thru-hull tube or etc? Or, should I just stick with the threaded style garboard/drain plug type? Any suggestions or input is VERY welcomed, lol.
 

JASinIL2006

Vice Admiral
Joined
Feb 10, 2012
Messages
5,678
I learned a trick here about putting down fillets (I forget who told me) that helps you avoid β€˜craggies’ that make it hard to lay the tabbing down smoothly. Just brush the fillets, before they kick off and harden, with some catalyzed resin. Makes the fillets nice and smooth without sanding.
 

WalleyeSniper

Petty Officer 2nd Class
Joined
May 15, 2018
Messages
108
I learned a trick here about putting down fillets (I forget who told me) that helps you avoid β€˜craggies’ that make it hard to lay the tabbing down smoothly. Just brush the fillets, before they kick off and harden, with some catalyzed resin. Makes the fillets nice and smooth without sanding.
You know, I kept having all those little scragglers and saggy divot dot things, and etc. Then I just kinda lightly brushed over them to smooth them out with a little 2" chip brush. But I was afraid I was gonna cut into the radius or mess up that perfect curve, so I may still need to go in and do some final touch ups before tabbing.

I finally ate up my entire 5 gallons of ISO resin. So now I'm down to 55gals of ORTHO resin. But, I think we're gonna order another 5gals of ISO and used that as the first wet layer on everything. Then use ORTHO for all the other layers in the laminations. That ISO stuff is some rock hard, sticky, gooey stuff compared to the ORTHO.

What should I do with the area around the drain plug where I cut out a crescent to keep the encapsulated wood away from the drain? Should it be entirely filled in with structural thickened resin, and to the full thickness of the wood core? Like, with nice fillets all pointing into the drain hole be area to help water smoothly exit?

I'm sure KCassels is gonna have some good advice on that part. He seems to have a lot of knowledge on all the fine details, especially given he's been restoring one kinda similar.
 

kcassells

Fleet Admiral
Joined
Oct 16, 2012
Messages
8,732
For the fillets you can also keep a spoon handy to smooth out everything.
For you transom bilge drain fill solid with hairy pb. and flush. look into bilge drain examples you may use.
Eventually you drill it out and install it. The bene is there is NO wood in contact with water when stern is sitting below water .
 

JASinIL2006

Vice Admiral
Joined
Feb 10, 2012
Messages
5,678
For the fillets you can also keep a spoon handy to smooth out everything.
For you transom bilge drain fill solid with hairy pb. and flush. look into bilge drain examples you may use.
Eventually you drill it out and install it. The bene is there is NO wood in contact with water when stern is sitting below water .

I think this is the way to go, too.
 

WalleyeSniper

Petty Officer 2nd Class
Joined
May 15, 2018
Messages
108
For the fillets you can also keep a spoon handy to smooth out everything.
For you transom bilge drain fill solid with hairy pb. and flush. look into bilge drain examples you may use.
Eventually you drill it out and install it. The bene is there is NO wood in contact with water when stern is sitting below water .
Makes total sense (and obviously why I did it after you had mentioned it, so thanks for that!).

What do you think the best style and type of garboard drain to use is?

I hate all the plastic style ones that a lot of people seem to gravitate towards near me. I like the idea of a metal one that also has a little tether on the inside of the boat. But, don't know what all's out there and what is really the best type to go with. What do you guys think is the best style/brand out there that you like the design style of?
 

kcassells

Fleet Admiral
Joined
Oct 16, 2012
Messages
8,732
I'd have to go back and look what I used. Mine unscrews to let water out but it stays in place and doesn't come out unless I use add'l turns for such. Also chrome or stainless with rubber O rings that can get replaced.
On another note because of it being stainless you need to drive 1 bolt thru to inside bilge and ground/bond it so it doesn't corrode. Bonding is another whole topic that needs researched.
 

WalleyeSniper

Petty Officer 2nd Class
Joined
May 15, 2018
Messages
108
I'd have to go back and look what I used. Mine unscrews to let water out but it stays in place and doesn't come out unless I use add'l turns for such. Also chrome or stainless with rubber O rings that can get replaced.
On another note because of it being stainless you need to drive 1 bolt thru to inside bilge and ground/bond it so it doesn't corrode. Bonding is another whole topic that needs researched.

Yeah, I definitely need to learn about electrical bonding/electrolysis/etc, because it confuses the hell out of me. So, definitely need to bond the garboard, got it. (that may explain why so many guys around us go to plastics and etc, maybe?)
 

WalleyeSniper

Petty Officer 2nd Class
Joined
May 15, 2018
Messages
108
I'd have to go back and look what I used. Mine unscrews to let water out but it stays in place and doesn't come out unless I use add'l turns for such. Also chrome or stainless with rubber O rings that can get replaced.
On another note because of it being stainless you need to drive 1 bolt thru to inside bilge and ground/bond it so it doesn't corrode. Bonding is another whole topic that needs researched.
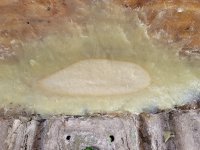
Uh oh... I think I used too much peanut butter at once, because it's curing hot right in front of my eyes (about 30mins after laying it now)... Do I need to put a fan on it, or am I already screwed, or is this normal? Lol20210819_183453.jpg
 

kcassells

Fleet Admiral
Joined
Oct 16, 2012
Messages
8,732
Oh... lol... Maybe in batches to final. Forgot about that. Yup just check for hairline cracks/fractures.. Might have to redo.
Been there done that. If its too deep or wide for the fill then you get the heat. If you have fractures then knock it out and fill back in layers not as deep.
Ohhh the memories.
 

WalleyeSniper

Petty Officer 2nd Class
Joined
May 15, 2018
Messages
108
Oh... lol... Maybe in batches to final. Forgot about that. Yup just check for hairline cracks/fractures.. Might have to redo.
Been there done that. If its too deep or wide for the fill then you get the heat. If you have fractures then knock it out and fill back in layers not as deep.
Ohhh the memories.
🀣🀣🀣🀣

Yeah, that **** got SMOKIN hot. Lol

I just put a fan on it and it seemed to settle down and settle out ok. But, guess we'll see the next couple days. Lol
 

JASinIL2006

Vice Admiral
Joined
Feb 10, 2012
Messages
5,678
This is what I used. Simple, effective, lasts forever. I keep a spare plug in the boat and in the truck.


WalleyeSniper

Petty Officer 2nd Class
Joined
May 15, 2018
Messages
108
This is what I used. Simple, effective, lasts forever. I keep a spare plug in the boat and in the truck.

I have a couple of those in stock here still, so I may just use one of those. My boats stay in the water really though, and I guess this one is a little big to be trailering much anyways. So, probably go with one of those. Just have to keep a spare in the boat and in the glovebox for those rare one-off occasions.
 

todhunter

Canoeist
Joined
Sep 15, 2020
Messages
1,316
This is what I used. Simple, effective, lasts forever. I keep a spare plug in the boat and in the truck.

Where do you get the spare bronze plugs from? Never mind - I see that iboats also sells spares.
 
Status
Not open for further replies.
Top