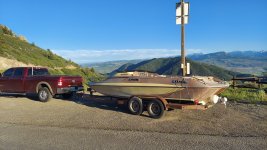
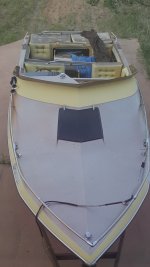
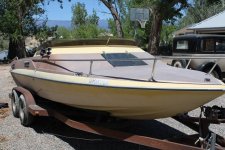
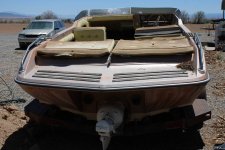
1979 Glastron Carlson CV-23 restoration

docmirror

Petty Officer 3rd Class
Joined
Jun 22, 2022
Messages
94
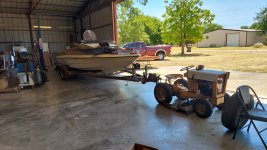
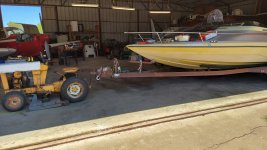
HI boaters, I just joined the forum. I have just bought a very rough 79 Glastron Carlson CV-23. It has the BBF 460 with Berkeley jet drive. The boat has always been in fresh water, and kept in NM or CO most of its life. The last registration is from 1997, so it hasn't been wet for 25 years! The tires are brand new, with the nips still on and date code from 1996.

The boat is complete except for the alt and carb. Trailer is aged, but in good shape. If not familiar with the CV-23 it is the same boat that Roger Moore used to fly off on a hang glider, but his was the 'hard top' version.

These boats are quite well built, with hand laid hulls and a quite thick gel coat. They also are a well designed hull and will exceed 80MPH with some work on the engine, and a B impeller in the pump.

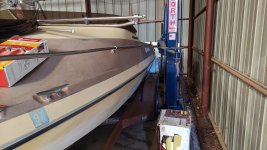
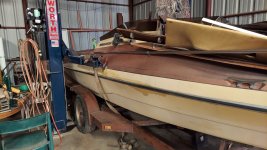
My boat is in pretty bad shape having sat in the NM sun for 25 years. The int is completely thrashed. One intake runner shows evidence of water ingress, so I will need to take off the head and see if the cyl is compromised. I checked it is not locked up before buying it. I will need to do catch up maint on the jet of course, and I'm sure some wiring and trim work. The engine and jet are pretty bulletproof and I'm sure it'll be in the water in a month or two.

After the summer, my plan is to take the engine out, and do some modest perf improvements, refurb the jet and change to a B impeller, and add a Place Diverter so I can do roosters! This is the boat I will have through my coming retirement and planning to set it up right. I may come back with some questions, and hope there's someone out there with the Berkeley and BBF that can help. May get some pics on later this week, I need to drain off my phone.
 

Wildey

Petty Officer 1st Class
Joined
Nov 24, 2021
Messages
202
One cool boat !
Nice clip too.
Love Jaws' "hard landing" at about 2:25-2:30 !
Bet that jarred the heck out of his berries.
A well built hull there, for sure !
Sounds like a nice project, be sure post those pics ... and progress.
Thanks
 

todhunter

Canoeist
Joined
Sep 15, 2020
Messages
1,318
My brother has a CV-19 with the 455 / berkeley combo but the furthest he's gotten on it is pulling the engine and jet pump, and is about halfway through the gutting process on the hull. He's been too busy to touch it for about a year. But, if interested, send me your contact info in a private message and I can forward it to him. Maybe yall can motivate each other. :)
 

fibersport

Petty Officer 2nd Class
Joined
Jul 18, 2010
Messages
103
I'm a Century guy but those Glastrons were awesome back in the day, especially the Carlsons. Please show us some pictures!
 

docmirror

Petty Officer 3rd Class
Joined
Jun 22, 2022
Messages
94
Whelp, I got the heads off today, and it's pretty grim in there. I'm going to ball hone the cyls and have the heads done and put it all together to get it in the water soon. Still need to demo the interior, and put in a floor, and some seats. It's hot out there to work on and got a lot done today. Will work more sun am, and take a few more pics. The first pick is at Black Canyon of the Gunnison in W CO. I was on one of the windy roads and stopped to check out the vertical walls of the canyon. Pretty spectacular.

I think the gel coat is beyond saving. I'll use it as is this summer and paint with aircraft Jet Glo or maybe gel coat in the fall.
 

Attachments

  • 20220620_193114.jpg
    20220620_193114.jpg
    5.3 MB · Views: 79
  • 20220621_072739.jpg
    20220621_072739.jpg
    600.6 KB · Views: 76
  • frt rite.jpg
    frt rite.jpg
    158.5 KB · Views: 72
  • 00p0p_lJZPDFAPJ9lz_0CI0pO_1200x900.jpg
    00p0p_lJZPDFAPJ9lz_0CI0pO_1200x900.jpg
    125.7 KB · Views: 78

docmirror

Petty Officer 3rd Class
Joined
Jun 22, 2022
Messages
94
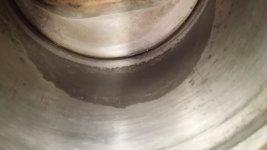
Bad news on one cyl. I have FeO2(rust) in a cyl that had an open int valve. I'm taking it with 800 grit and carb cleaner. It's slowly coming off. I might have to go down to 600. This jug is always going to be low comp and maybe a bit of oil consumption. It'll do until fall when I can pull the whole engine and have a bore job done. Thinking of going out to 496 without stroking it.
 

Attachments

  • 20220627_135317.jpg
    20220627_135317.jpg
    422.7 KB · Views: 16

docmirror

Petty Officer 3rd Class
Joined
Jun 22, 2022
Messages
94
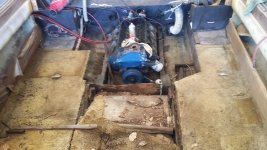
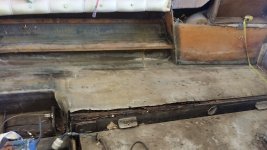
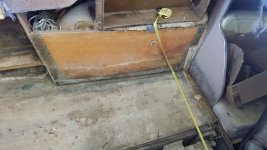
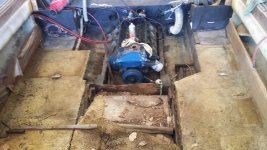
Tearing out the floor, inspecting the stringers. Will need to replace the two inner stringers against the fuel tank. Outer stringers look good. The FG is very solid and very heavy in this old boat. Inner stringers and crossbeams will need to be replaced. There is one crack in the inner left stringer I can see already. Still a lot of clean up to do sub-floor before I have new stringers and cross beams put in.

The heads are off. They are getting the smog notch ground out of the exh port, new int valves all new springs and seals. 3 angle valve cut and will deck the heads about 30 thou. the quench area will be 0.040, and comp ratio targeting 8.86:1 run on 87 pump gas.

I hope to have it in the water in mid-Aug with engine back together, jet cleaned and lubed, simple floor and two captain bucket chairs put in. The rest of the interior and trim will be delayed until Oct when summer boat season is over.
 

Attachments

  • 20220701_133905.jpg
    20220701_133905.jpg
    786.7 KB · Views: 53
  • 20220701_135434.jpg
    20220701_135434.jpg
    816.5 KB · Views: 51
  • 20220701_145023.jpg
    20220701_145023.jpg
    682.1 KB · Views: 51
  • 20220701_145013.jpg
    20220701_145013.jpg
    711.7 KB · Views: 51

docmirror

Petty Officer 3rd Class
Joined
Jun 22, 2022
Messages
94
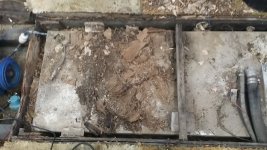
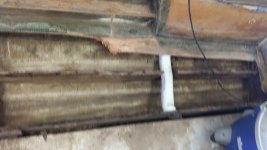
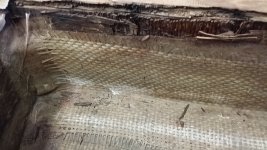
Doesn't appear too much interest, but I have the fuel tank out now, and the under-deck pulled out, down to the keel and base hull. Starting to figure out the repairs needed. Looks like I have four vertical plywood stringers, no box structure just the plywood sticking up two per side. The tops of the plywood were not glassed in, so they rotted down. I'm hoping I can cut back about 5 inches from the top and get good wood. Then, I'll use some sister boards adjacent to the stubs of the current stringers and that will be plenty strong enough. the FG on the stringer to hull is massive woven roving. It's not compromised, and no cracks or delamination.

The heads are off the engine, and rebuilt. I have new pushrods on order, and will be assembled once the stuff all gets in. I have a 750 carb on an Edelbrock dual plane manifold.
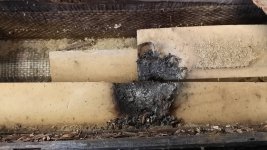
I have a FG specialist coming over next week to see the damage and advise on how much stringer to cut. We'll put in a subfloor with marine plywood, and sealed with FG and epoxy. Once we get the stringers made up, will put in outboard flooring to the inner stringer, and removable floor over the tank in case of service needs. The box stringers under the engine are good, and it has a very strong transom. I'm lucky there. Couple pics of the mess under the center structure. Last picture is of an almost fire. There was a cig dropped and it got down into the flotation foam. They were minutes away from an inferno next to the gas tank. Yikes.
 

Attachments

  • 20220701_133905.jpg
    20220701_133905.jpg
    786.7 KB · Views: 37
  • 20220713_115039.jpg
    20220713_115039.jpg
    629.7 KB · Views: 38
  • 20220713_115110.jpg
    20220713_115110.jpg
    628.3 KB · Views: 37
  • 20220713_114048.jpg
    20220713_114048.jpg
    790.9 KB · Views: 38
  • 20220713_114037.jpg
    20220713_114037.jpg
    801.2 KB · Views: 39

docmirror

Petty Officer 3rd Class
Joined
Jun 22, 2022
Messages
94
Looking good so far. I really wonder it sistering stringers to the stubs will really save you that much work... if it were me, I'd want to get those old stringers out completely. Too much chance the rot process has started, even if not apparent, to leave them in.
The old stringers might have to be cut down to the hull and redo completely. The FG at the hull-stringer joint on all four look perfect. That led me to trying to save some stringer stubs and do a tie-in with a new stringer on the side. I'm mechanical, not FG skilled, so will let the expert decide.

I also have a concern with the hull sitting on the braced boards of the trailer, if we cut all four stringers out at once, the shape of the hull may deform with a cup, and then it would be a huge mess. If we do cut down to the hull, would only do one at a time, and insure the hull doesn't move in process. It's over 100F every day down here, and things get pretty soft in that kind of heat. I have a 2 post lift, we could strap the hull at the transom and up near the pilot station and lift it off to work. I could even put it on the ground, and use some wood stack at the hull strakes. I want to make sure the hull doesn't deform while we are doing the stiffening.

I'll let the hull FG expert decide how we go with that. I know my limitations.
 

docmirror

Petty Officer 3rd Class
Joined
Jun 22, 2022
Messages
94
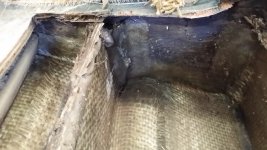
OK, in the spirit of documentation, I'll keep producing. The jerkwad PO of course left a bunch of 25 year old fuel in the boat when he forgot about it. I tried to blow out the supply port, and found there's a ball check valve fitting at the exit from the tank. Of course, I didn't learn that until I'd taken the fitting off. Sigh,,, Anyway, I got some fuel drained out and it started coming out like goop, 1/3 stale gas, 1/3 some sort of glue, and 1/3 greasy lube gung. Rather than fight it off, I pried up both ends of tank and got some straps around it, used the post lift and got it out of there. First pic is my DIY expand the fill hose job. A little PB blaster in the gap and it came free. Straps ready to lift.

Since it was 109F in the middle of the day, I took the tank out to the concrete deck flipped it upside down and let it sit there for the rest of the day. The glop that came out was nasty, gooy yuch. But, I bet my tank is pretty clean inside now.

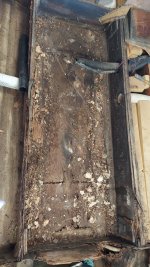
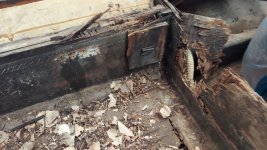
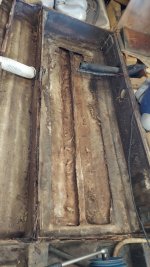
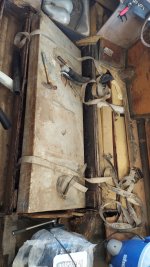
The next pic shows the dis-assed-her found under the fuel tank. It was some kind of plywood, without a bit of FG coating. Just - bare - wood, which of course was rotted to hell. I got the wrecking bar, and the big wet/dry vac and got all that crud out of there. And then found a rather stout, and very serviceable keel heavily glassed into the hull. There were some rubber shims between the junk ply and the tank so I saved those.

The stringers on the inside of the fuel tank area look remarkably good. No delam and no cracked FG anywhere on the big heavy FG and resin. This gives me a warm fuzzy that my hull integrity is very good and with some reinforcing and a new sub-floor and new deck floor, it's going to be a stout boat once again. Third pic is the stringer to fuel tank section with corner of the compromised rear bulkhead just in front of engine. Last pic is all cleaned out.

At this point, I'm all done with hull destruction. Wait for the experts to figure out the restoration of the hull. I'm cleaning the fuel tank with varsol and it'll be ready for a new line, filter, and I have a new fuel pump with the fancy sediment bowl(metal) designed for boats. I have the heads in the shop working on those, and hope to put the engine together maybe next Mon. Pushrods were not in stock and I will not use std pushrods with new springs. I'll wind up out on the lake with 16 pushrod-pretzels and no way to get to the marina.

Did I mention it's --- hot!? :)
 

Attachments

  • 20220718_110924.jpg
    20220718_110924.jpg
    1.7 MB · Views: 37
  • 20220718_111744.jpg
    20220718_111744.jpg
    2.3 MB · Views: 36
  • 20220718_111752.jpg
    20220718_111752.jpg
    3.4 MB · Views: 37
  • 20220718_114639.jpg
    20220718_114639.jpg
    1.7 MB · Views: 37

docmirror

Petty Officer 3rd Class
Joined
Jun 22, 2022
Messages
94
Well, I post up my progress. The heads are done, and will pickup from the shop this wknd. I also have a schedule to get the boat to the hull repair guy on Mon. Right now, I'm working on the trailer and it's been a complete pain. Almost everything on the trailer has or will need renovation. It's always harder to renovate than build from new, but I'm getting there. New master cyl on the surge brakes, new wheel cyl, new lines, and new bearings, and seals.

The bunks on the risers will need replacement but I can't do that until the hull is off and I have access to the trailer without the boat on it. I could lift it off with the winch, but I want to get it up to the hull guy first. All the lights are new, the only thing that worked right from the seller are the tires, and the front trailer jack. No pics this trip.
 

docmirror

Petty Officer 3rd Class
Joined
Jun 22, 2022
Messages
94
Ok, Laydeez and germs, it was a very good couple days in the CV23 renovation job. Very good indeed. After 4 trips to Napa, and 2 trips to Duncan trailer, I finally, with much effort got all the bits for the hubs, and brakes. New slave cyl, new actuators, new master, new line, new special order races, new bearings, new special order inner seals.

I have bearing buddies with the zerk on the nose and I have a full grease gun so it all came together on Friday with the trailer. If you know what the first picture is, you are a Man among Men(or a Lady among Women!). NO googling!!! :) The only thing left is a 2 person bleeding job will be done Sun am. After that, I have some bunk frame welding and paint.

Now, on to the boat. Sometimes, work is done, detail or inside panel, or under the floor, and there's no visual indication of the hours spent. Well, today a lot of Big Metal Parts went on and it really stands out as progress. Each BBF head weighs 88Lbs loaded, and my old ass humping them over the gunwale, and setting it on the block, and getting a bolt in the head without dropping it on my foot is a joyous thing. I took my time, and cleaned all the jugs again, and lubed up with asm lube, and some 90wt gear oil.

What? Why pre-assemble with 90wt gear oil? Well, it's something I learned a long time ago from an old guy who had built dozens of engines. His thinking was - 90wt gear has more zinc in it to protect from shear wear. Also, it sticks where you put it, and on cold start up the first time, clearances are pretty loose until things expand under heat, and the heavier oil provides some cyl wall lube until the pressure comes up. Yes, I will use a shaft and prime up the pump before starting, but still it got some gear oil along with asm lube on all the valve train.

Now, I gotta give some free endorsement to the American Gasket people of Dallas TX. Fel-Pro, and Dorman are now ALL made in China. I refuse to do biz with Chinese unless it's the only thing avail. The last bastion of US made gaskets is the good folk at American Gasket in Dallas TX. I don't get any money, or discounts for this, but my set fit flawlessly, and were very competitively priced. If they don't have it, get a sample and they can make it.

On to assembly. I cleaned everything well, and used generous asm lube. Heads went on dry, all bolts looked good and lubed them lightly with gear oil(shear strength). torqueing to 30, then 70, then 105 wasn't too bad. But that last round of torque to 140 made me grunt - a LOT! I am not a young man, and it's 101F out there in the hangar. I have a fan running and keep drinking fluid but it's still yeoman work getting all those bolts down. I found two stuck lifters, and cleaned with some Berrymans then tapped them a few times and they floated back up.

I used the original pushrods(was going to change but head shop said to stay with them), and did my maths to get the pre-load around 60-75 thou. 1/24th inch per bolt rev, div by 1.71 ratio from pedestal gives 2.5 rotations for around 60 thou pre-load. Each rocker got at least 2 rotation from the take-up contact point. Each pushrod was blown out, and I got some crud out of several that was leftover from 25 years ago, last run. With the pre-lube on the pump, hoping for not too much clatter until the lifters fill, but expecting some. With the open exh, I won't be able to hear it much anyway.

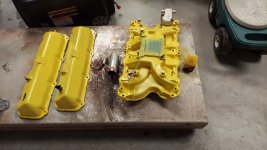
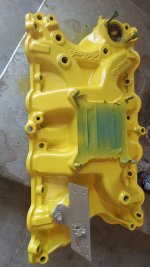
My intake was CO2 blasted(no residual mess) and I'm leaving it bare for now. I may paint it before final asm. I'm going with a taxi yellow engine paint. the heads and block were not painted. So, why did I set it all together? One reason it looks further along that makes me feel more accomplishment. But the big reason is more complex. And so starts a side-story. Skip ahead for boating work.

Years ago, I bought an older Lamborghini, and when I found the cost of a 'tune up' on that engine, I decided I would become a DIY Lamborghini engine tune up artist. I bought a Uni-Syn and a Gunson Color-tune(duckduckgo them), and a dwell tach with very accurate scale. I also got friends with the local speed shop that had jets for both DelOrto and Weber Italian carbs. And off I went. Things were going swimmingly, and I was really getting the hang of it until dis-assed-her struck. I had all 12 plugs out to evaluate, and was going to change the idle jets for one notch leaner. As I remove the idle jet from the front of the carb, it slipped from my fingers, off the screwdriver - tink, tunk, choink - right into the #9 cylinder! OBTW, it's brass, non-magnetic. Removing the head from the engine is a $800 job.

Well, that's going to leave me with at least a six-pack to consider my options. I have one of those little flex cable grabber tools, and I spent a few useless hours trying to scoop it up from inside the cyl without success. Next, I tried a rubber tubing taped to a vac hose, and snaked down in there, but the vac just wouldn't collect the jet and bring it out. I was always off to the side, or the top, or some way the vac wouldn't suck on it enough. After a while, I thought about glues. So, I started with a 7 inch section of pliable solder wire. Put a loop at the end, bent the loop 90deg, and put a dab of gorilla glue on the loop. Then - very slowly, very carefully, lowered the solder and glue down, and gently rested it on the jet. I let it sit, and got another six-pack to consider my odds of success. Night become late night, and six-pack became a case, and it was next day before I went fishing.

As luck would have it, the solder was stuck - to something. I pulled, wiggled gently then a bit more, and finally it popped loose. Lifted it up, and there was the jet, in a glob of green goo, happy as can be. Yes, I put the plugs back in after that. I got pretty good at tuning those engines, and actually made some money along the way tuning old Ferraris with carbs, and also Lambos.

Back to regularly scheduled programming. Once all the pushrods were in, I lubed the rocker bolts, and set all of those. The torque for the 1/2 in bolts was no trouble, and everything cinched up well. the gaskets for the valve covers fit perfect, and I set and tightened them down as well. There's a one piece pan cover, and intake gasket that I must custom bend at the head to block mate surface. I just set the intake and carb on for now, and made a list of parts needed to complete the engine tasks.

I have a Holley 750 with vac secondaries that has been rebuilt and turned into a marine carb. The heads were repaired properly now and they should flow very well. I'm thinking of port-matching my intake gasket and intake manifold as that side of the air flow is most important. Port matching only requires some gooey gasket maker for the witness mark on the intake. The only downside is I will need to tighten it gently and then remove. I think the new intake gasket can take this ok.

There are a few little hardware bits I need for final asm. I have an electric as well as the mech fuel pump as losing a fuel pump on the lake is a real pain. I'll start with the electric so I can control the fuel flow with a switch just in case. I bought two new fire extinguishers today, and will have then ready. Do a good leak check with 9PSI fuel pressure and we may see if it lights on Mon. Couple fun pics to cheer us on. Next update mid-week.
 

Attachments

  • 20220730_100721[1].jpg
    20220730_100721[1].jpg
    5.5 MB · Views: 35
  • 20220730_101048[1].jpg
    20220730_101048[1].jpg
    2.3 MB · Views: 29
  • 20220730_103146[1].jpg
    20220730_103146[1].jpg
    2.5 MB · Views: 28
  • 20220730_105836[1].jpg
    20220730_105836[1].jpg
    3.9 MB · Views: 30
  • 20220730_113416[1].jpg
    20220730_113416[1].jpg
    3 MB · Views: 29
  • 20220730_120115[1].jpg
    20220730_120115[1].jpg
    4 MB · Views: 28
  • 20220730_120750[1].jpg
    20220730_120750[1].jpg
    3.7 MB · Views: 32
  • 20220730_123823[1].jpg
    20220730_123823[1].jpg
    4.3 MB · Views: 36

Baylinerchuck

Commander
Joined
Jul 29, 2016
Messages
2,726
If not by land, if not by sea, it appears you might be able to get there by air!! Really like following the progress on this build and the commentary. Thanks for the updates, canā€™t wait until your mid week update. šŸ¤™šŸ¼
 

docmirror

Petty Officer 3rd Class
Joined
Jun 22, 2022
Messages
94
Mid week update. Things have taken a dark turn. Not going so swimmingly now. Sigh,,, I was ready to tow over to the hull guy for wood and epoxy, but took one more look under the trailer. That - was my mistake! I have 14 total bunk supports welded to the framing at the crossbraces. Two up front and twelve on the main section. Of those 12 important support flanges, six of them are rotted and broken away from the crossbrace. So, I'm lucky I towed it safely home. It's not going anywhere until I get those ground clean and welded. All in good time.

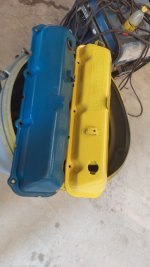
I took the intake and valve covers back off and cleaned again, then decided what the hell, I will paint them. Picked the brightest yellow I could find, and maybe I'll regret that, but it looks better, if a bit Hollywood. I was able to get a long ext and 5/16" socket on the oil pump drive and got to pumping out the 25 year old oil. It was kinda rough. I removed the oil pressure sender and put a barb fitting on, then a hose to the catch can. I pumped about 6 qts out and the pump started to run dry. Then I cracked and opened the drain port with a trashbag under the pan. I'm letting the goo slurp out overnight. It is not pretty. The oil filter is off, and looks ok inside, was glad not to see any water in the lower end or rust down there. The dipstick is also free of rust which typically indicates the block of the engine has not suffered corrosion much.

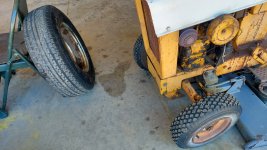
So, by the end of the short days, in 104F heat I got my old Cub Cadet from 1963, and tried to get the thing in my 2 post lift so I can raise it up and grind and weld. (don't try this at home. Professional backyard goober at work) Now - you have to picture this, because I had no one to take a photo, but I got the trailer sitting on a post on the rear spring loaded hitch piece, and I have the engine running, but I can't see back there when sitting on the seat. So - I'm smarter than the average bear, I switched around and sat on the white 'hood' facing backwards, and steered backwards, and operated the clutch with my RIGHT foot(barely).

Hold my beer! This arrangement actually worked quite well once I got the hang of driving left to go right, and driving right to go left. Or, since I was sitting the wrong way, maybe it was driving left, to steer right, backing up to go left. I don't know, but it seemed to work. Rube - ole buddy it was in your honor. I bent up one of the rear fenders smacking it into the base frame of the lift a few times, but I got it back there. The rear set of tires came off so I could get closer to the post and not interfere with the bottom post flange. And - stopped. Too hot, no helper/spotter, no breeze and I am not going to grind and weld in +100 weather. I know, I keep complaining about the temps, but I'm old(get off my lawn whippersnapper!). A man's got to know his limitations. Again, don't try this at home.

I laid down for a while, and decided it was 5PM somewhere in the universe and cracked open a FMB(frosty malted beverage). My hangar office is air conditioned with a wall unit that was doing it's yeoman best and not really doing a lot to cool me down. After my FMB(or three), I went out and took a look at the hangar and decided I needed to do some cleaning. I put some thing away, and swept the floor, ran the magnet picker on the ground and collected some FOD, then I took a more careful look at the bottom of the hull, while re-checking the trailer repair.

This boat has been beached - a LOT. Plenty of gel coat missing from where the boat has been up on the sand bar for hours/days at a time. I have an interesting sticker in the corner of the windscreen I will take a pic later of San Diego Marine Sales. I strongly suspect this boat has done serious time on the lower CO river, over in Imperial valley from maybe Laughlin on down to Ferguson lake. I found a ton of sand in the block when I took out the drain plugs, and the leading edge of the impeller has the typical stone chips found in boats that spend quality time around a lot of stones and sand.

My next plan is to get the frame pads from the lift under the trailer runners and pick the whole mess up and grind and weld to my satisfaction. The lift is the 10,000 Worth(made in US) lift, and I've had my 1 ton crew RAM truck up on it, so I'm not worried about the weight, but it is going to be awkward. Once I get the trailer welding done, then finally, I can get it over to the FG guy. Maybe next week. Out of town some of this wknd in Katy to see the grandkids.
 

Attachments

  • 20220802_143737.jpg
    20220802_143737.jpg
    3 MB · Views: 25
  • 20220731_121631.jpg
    20220731_121631.jpg
    1.3 MB · Views: 26
  • 20220731_121640.jpg
    20220731_121640.jpg
    1.2 MB · Views: 27
  • 20220802_130410.jpg
    20220802_130410.jpg
    4.2 MB · Views: 27
  • 20220802_143757.jpg
    20220802_143757.jpg
    4 MB · Views: 27
  • 20220802_130351.jpg
    20220802_130351.jpg
    3.5 MB · Views: 26
  • 20220802_143719.jpg
    20220802_143719.jpg
    3.1 MB · Views: 24
  • 20220802_130341.jpg
    20220802_130341.jpg
    3.3 MB · Views: 25
Top