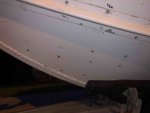
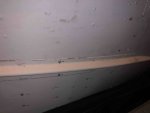
1978 Starcraft 22 ft SS v5 restore

Status
Not open for further replies.

mojoso72

Petty Officer 3rd Class
Joined
Aug 15, 2017
Messages
83
Copy that @66Holiday924

I bought marine grade 1/2 ply from a local company for $51/sheet. I'm all set and will seal it with Spar Urethane.
Thanks for keeping me on track!
 

mojoso72

Petty Officer 3rd Class
Joined
Aug 15, 2017
Messages
83
@Watermann
There was not a sheet of aluminum just "L" brackets with wood across them. It wasn't even attached with rivets, most all of them had broke. I'm planning to use square or rectangle tubing to brace it on the bottom instead of the wood.

The tank was replaced a few years back, but it looks like there were just L-Brackets. The reason I say that is that they were held in with solid rivets and this is the first time the floor is being replaced. If y'all know any different let me know.

Also, I do plan to put the same padding you added so it doesn't squeek
 

bob johnson

Rear Admiral
Joined
Feb 25, 2009
Messages
4,306
dont mount the tank metal to metal... I think they always had an insulator....rubber is good....shock absorber basically.......
 

66Holiday924

Chief Petty Officer
Joined
Aug 21, 2017
Messages
578
dont mount the tank metal to metal... I think they always had an insulator....rubber is good....shock absorber basically.......

Nitrile rubber doesn't break down as easy when exposed to gas. I would use it, if you go that route.

That's an awesome price for 1/2" marine grade ply. I think I paid about $80.
 

mojoso72

Petty Officer 3rd Class
Joined
Aug 15, 2017
Messages
83
Watermann so I’m not sure if there was a flat piece in there, but I’m gonna put one in there. That’s a great idea. I’m actually at my metal place right now and they are gonna cut it while I’m here. Thx!
 

mojoso72

Petty Officer 3rd Class
Joined
Aug 15, 2017
Messages
83
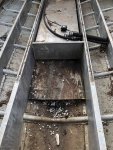
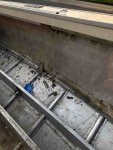
So I think I figured out what was supporting the fuel tank. If you look at the pic attached you see the plywood there. Well I think it was a plywood support because when I pulled out the tank I found rivets with plywood attached to them and a very deteriorated 2x4 in the middle under the tank.

Whoever replaced the tank put in a really nice tank, yet the workmanship was not good. Not only did I find the wood under it, but the hoses that were clamped on the fittings had wrinkles in them and the floor was hitting the spouts. That stinks. Glad I'm fixing them. I'll feel so much better about this. No wonder there is gas staining in the bottom.
 

Attachments

  • photo290141.jpg
    photo290141.jpg
    1.1 MB · Views: 4

mojoso72

Petty Officer 3rd Class
Joined
Aug 15, 2017
Messages
83
Update from today:

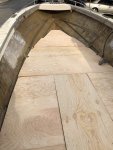
I got most of the floor cut out. I got lucky because the floor pieces were in tack enough so I could trace them and they fit great! I need to finish cutting wood tomorrow for the last bow piece, the bow seats and console supports. Then, I'll drill out the mounting holes and start sealing them. I'll post pictures tomorrow. It got too dark, so my son and I had to stop.

I did get my wife in on the action too holding wood as I cut it...needed 3 sets of hands. Glad to get the family in on this! :)
wAAACH5BAEKAAAALAAAAAABAAEAAAICRAEAOw==


Watermann thanks for the tip on the aluminum tray for the tank. It's gonna work out great! It'll also give me the extra 1/2 inch I need so the floor will not be resting on the fuel vent spout.

Also, started getting the glue off the sides. I found a wire wheel worked really well. I tried MEK, but it didn't do nearly as well as the wire wheel. Any input on this would be great.

@66Holiday924 I ordered the Nitrile for the bottom of the tank pan. Thanks for the recommendation!

Also, the picture Watermann posted was amazing, so I got inspired!

Thanks for the help guys!
 
Last edited:

mojoso72

Petty Officer 3rd Class
Joined
Aug 15, 2017
Messages
83
I didn't get to leak testing tonight, but will tomorrow when I get done cutting the wood.
The next few days will be filled with sealing wood, removing rivets and prepping to put new rivets in and maybe buck a few.
We also need to remove the old adhesive and make a few braces for the gas tank area.

It is sooooo nice to be able to stand in the boat and not hear wood crunching under my feet!

Ok, sorry about the marathon posts, BUT this is super fun!!!
 

BWR1953

Admiral
Joined
Jan 23, 2009
Messages
6,178
You're making good progress! :encouragement:

That Starcraft logo/emblem is awesome. :nod:
 

mojoso72

Petty Officer 3rd Class
Joined
Aug 15, 2017
Messages
83
Leak test in underway! It's not as bad as I thought. I had to go to work, so I'll send pic's later!

My son and I got the last of the floor cut and the front bow seat wood too.

We also started removing the adhesive from the sides. Tried MEK and it didn't work that well. But, I found an older post with a recommendation from Watermann for Klean Strip
http://www.kleanstrip.com/product/premium-sprayable-stripper

This stuff is working great! Let it sit for 10-15 min and it scraps right off. Then, we'll clean up any tough spots with the wire wheel.
 

oscarvan

Petty Officer 3rd Class
Joined
Mar 28, 2018
Messages
87
Also, started getting the glue off the sides. I found a wire wheel worked really well. I tried MEK, but it didn't do nearly as well as the wire wheel. Any input on this would be great.

My brain is suddenly flagging a "note" here, but I can't remember exactly. When using a wire wheel, parts and pieces of wire, most too small to notice fly around. The wheel is steel... is it healthy to spread little steel pieces in the Al hull? I seem to recall you needed to use a specific material wheel..... copper sounds like a bad idea too....

Anyone?
 

66Holiday924

Chief Petty Officer
Joined
Aug 21, 2017
Messages
578
King's Starboard Material seems like it would be a really nice alternative to using wood in some place as supports. It might work good under your tank for support vs. the plywood. It's a useful material to keep in mind that doesn't rot, but it is heavy.
 

Watermann

Starmada Splash of the Year 2014
Joined
Jan 12, 2013
Messages
13,787
I used fine steel wire wheel on the AL, yeah the bristles fly out when the wheel starts getting worn out so afterward vacuum out the hull. Even so nothing could be worse than the factory leaving dozens of steel mandrels all over the bottom.

Some guys freak out over using steel with AL but the AL has been with steel from the time it was dug out of the ground as ore until it was put together with the rivets.
 

mojoso72

Petty Officer 3rd Class
Joined
Aug 15, 2017
Messages
83
Thanks for the tips guys, and looking out if I'm making a mistake. Had to take Mothers day off. I'll be back at it tomorrow drilling out rivets and prepping the wood for sealing.

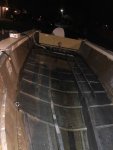
Crazy having all this water in my boat! Took about 3 1/2 hours to fill.:watermelon:
I was outside at about 11 with a flashlight on my back checking for leaks. Actually the flashlight and night time worked good as I could see the water reflection. Not sure if I'd recommend it, but it worked.

Questions: Anyone know where I can get the T-bolts shown in the attached pic? They are for attaching the windshield to the consoles.

Thanks!
 

Attachments

  • photo290412.jpg
    photo290412.jpg
    533.6 KB · Views: 7
  • photo290413.jpg
    photo290413.jpg
    322.3 KB · Views: 7

bob johnson

Rear Admiral
Joined
Feb 25, 2009
Messages
4,306
i bought my last package off ebay.... they are hard to find... the package was about 30 years old!.....
 

mojoso72

Petty Officer 3rd Class
Joined
Aug 15, 2017
Messages
83
Thanks guys. I ordered the 5/16 ones. I saw these before, but the head is a little different, however it should work.
 

mojoso72

Petty Officer 3rd Class
Joined
Aug 15, 2017
Messages
83
A little more progress tonight.

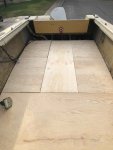
I got the wood dry-fitted tonight. Everything looks good and fits nice. It's nice to stand on a floor that doesn't crack under your feet:)
I'll start sanding the edges, drill rivet holes (got lucky, I can use the old wood as a template), and start sealing wood tomorrow.

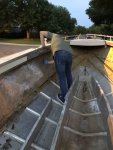
Also, my kids helped by getting the adhesive off the hull. We used caution and rubber gloves as that Klean Stripper is powerful stuff! It's working great. In fact, we had some drip on the paint and yup, took it right off! I'll use that stuff when I strip it later this year.
 

Attachments

  • photo290503.jpg
    photo290503.jpg
    479.6 KB · Views: 18
  • photo290504.jpg
    photo290504.jpg
    643.2 KB · Views: 19
  • photo290505.jpg
    photo290505.jpg
    526.5 KB · Views: 19
  • photo290506.jpg
    photo290506.jpg
    445.6 KB · Views: 18
  • photo290507.jpg
    photo290507.jpg
    168.4 KB · Views: 18

mojoso72

Petty Officer 3rd Class
Joined
Aug 15, 2017
Messages
83
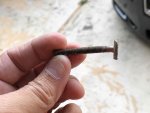
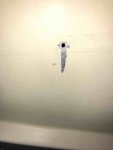
Also, started removing rivets tonight. Got about 20 out and several more tapped. I have one elongated hole, so glad I read the advice about getting some 1/4 rivets. Thanks Watermann :D

The old rivets came out pretty easy. The ones that were replaced with aircraft rivets, not so much. I might have to cut them off from the inside and punch them out. I'll work more on that tomorrow night. The metal is just harder and even though they have a dimple in the middle I believe the shaft is tougher than the rivet so it pushed the drill bit to the side. I got luck with a few of them and was able to punch out the middle pin. That worked good, but most don't come out easy.

Any tips on those rivets would be helpful.

Thanks guys!
 

Attachments

  • photo290508.jpg
    photo290508.jpg
    177.6 KB · Views: 9
  • photo290509.jpg
    photo290509.jpg
    145.7 KB · Views: 9
Status
Not open for further replies.
Top