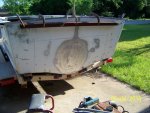
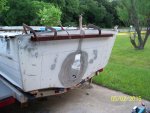
1977 StarCraft 18' SS restore

Decker83

Commander
Joined
Apr 5, 2011
Messages
2,592
I will check on that waterman ^^^. It looks like the mounts are higher at the transom and get shorter at the bow end.
Doesn't the V6 use side mounts instead of the front post mount?
 

Watermann

Starmada Splash of the Year 2014
Joined
Jan 12, 2013
Messages
13,753
Yeah the V6 does use 2 side mounts and I thought I still had my old 4 banger MC120 mount here to measure for you. Maybe we can get Dozer to measure his 140 mount. What I was thinking was if that OMC front mount would work on the MC then that would be a far better way to front mount yours. The MC way the 120/140 mounts is a board that bridges 2 of the ribs with a tall mount bolted to the board.
 

Watermann

Starmada Splash of the Year 2014
Joined
Jan 12, 2013
Messages
13,753
So does your donor front mount also mount to the bottom of the hull or is it supported differently in a glasser? Sorry man I'm really not trying to confuse you. :lol:
 

dozerII

Admiral
Joined
Oct 25, 2009
Messages
6,527
Let me know if you need some measurements, I can can get what you need.
 

Decker83

Commander
Joined
Apr 5, 2011
Messages
2,592
Yeah the V6 does use 2 side mounts and I thought I still had my old 4 banger MC120 mount here to measure for you. Maybe we can get Dozer to measure his 140 mount. What I was thinking was if that OMC front mount would work on the MC then that would be a far better way to front mount yours. The MC way the 120/140 mounts is a board that bridges 2 of the ribs with a tall mount bolted to the board.

ON the OMC mount it has a electric motor used to adjust the height of the motor.. I guess I could just set the height without using the motor.. I am not sure I want to use it.. Like the way the merc is set up.. Also want to sell the OMC motor complete with out drive, wire harness, steering and shift linkage all in one lot..

So does your donor front mount also mount to the bottom of the hull or is it supported differently in a glasser? Sorry man I'm really not trying to confuse you. :lol:
It mounts a lot like the SS mercs do..
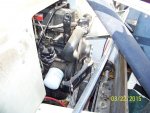
Here is a pic looking down at the front mount. It's a 2x6 firberglassed to the stringers..

100_3243.jpg

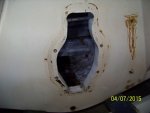
Here you can see it looking into the keyhole..

100_3281.jpg

I think I am going to use part of the mounts in the SS now, but will make some modifications to it..
 
Last edited:

Decker83

Commander
Joined
Apr 5, 2011
Messages
2,592
Let me know if you need some measurements, I can can get what you need.

I have found a link here to the mercruiser transom template layout.. Don S shared a link to it..
I have laid out a template on a piece of 26 ga galvanize metal.. I think it is right on the money..
My biggest concern is the crankshaft center line height.. I used the 90 deg method and came up the 13 9/16" height..
I also used the method with the transom angle deg. The best I could tell, my transom is 12 deg.. I measured up 14 1/16" from the bottom..
I was 1/8" difference in the x dimension.. How critical is this measurement.

How much did you come up from the bottom on your SS to the bottom of the keyhole..

I also do have the vertical center line exact and not worried about this..
Thanks for your help..
 

Decker83

Commander
Joined
Apr 5, 2011
Messages
2,592
Sorry for the pics.. Can get some better ones this weekend..
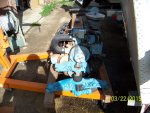
Here is a pic of the OMC front mount..

100_3235.jpg
 
Last edited:

Decker83

Commander
Joined
Apr 5, 2011
Messages
2,592
Thanks dozerll..
I plan on cutting the keyhole tomorrow if all goes well..
 

Watermann

Starmada Splash of the Year 2014
Joined
Jan 12, 2013
Messages
13,753
Looking forward to seeing the transformation from gaping WLOD hole to plugged and finally an MC keyhole!

I know it's going to be some nice work Decker, the challenges you've faced are above and beyond what most guys have to deal with. :encouragement:
 

dozerII

Admiral
Joined
Oct 25, 2009
Messages
6,527
I got in to late yesterday to get the measurements, as soon as the sun comes up I will be in there with a tape measure.
 

dozerII

Admiral
Joined
Oct 25, 2009
Messages
6,527
Just pulled this Achris quote out of a new thread in the Mercruiser section.

As for it putting the Mercruiser gimbal housing in the right place, all I can suggest is you measure the distance from the bottom of the adapter to the centreline of the crankshaft and transfer that measurement to the hull and make sure it's 13.625" vertically up fro the bottom of the hull...
 

dozerII

Admiral
Joined
Oct 25, 2009
Messages
6,527
KO Suns up, give or take a /16 from bottom of hull to center of crank is 13 5/8, the same as Achris posted. The center of the front mountwood beam is 5.25 off the bottom of the hull where the motor mount bolts to.
Hope that helps.
 

Decker83

Commander
Joined
Apr 5, 2011
Messages
2,592
Looking forward to seeing the transformation from gaping WLOD hole to plugged and finally an MC keyhole!

I know it's going to be some nice work Decker, the challenges you've faced are above and beyond what most guys have to deal with. :encouragement:

Thanks watermann.. So far welding the plug was harder than I thought.. Glad that part is over..
Just hope I can do as good of job as you have done..:faint2:
Going to get some jig saw blades today and cut the hole..

Just pulled this Achris quote out of a new thread in the Mercruiser section.

As for it putting the Mercruiser gimbal housing in the right place, all I can suggest is you measure the distance from the bottom of the adapter to the centreline of the crankshaft and transfer that measurement to the hull and make sure it's 13.625" vertically up fro the bottom of the hull...

Thanks for taking your time and sharing this information with me.. From what you are saying and what I have laid out. I should be very close.. Less than 1/16"..


KO Suns up, give or take a /16 from bottom of hull to center of crank is 13 5/8, the same as Achris posted. The center of the front mountwood beam is 5.25 off the bottom of the hull where the motor mount bolts to.
Hope that helps.

Thanks again dozerll.. Gives me the confidence to cut the keyhole out today..
Wish me luck..
 

Decker83

Commander
Joined
Apr 5, 2011
Messages
2,592
After seeing dozerll post ^^^ I got excited and ran down to HD.. It was so busy I couldn't find a parking spot..
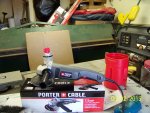
Went to Lowe's and found a nice Porter Cable 4 1/2" grinder for under $40.00.. That went into the cart..
Also bought some metal cutting jig saw blades and a 1 3/4" hole saw.. Looked all over the store for some 3m 5200.. Asked
a sales person and he said What is That.. (lol) So had to go back to HD.. They had it..
So now I start home and fight all the Dallas traffic all excited to cut the hole.. Get home and the power is out.. Didn't come back on until 6:30..
Did get the hole cut out..
Here are some more pics..


100_3311.jpg
Nice little grinder..

100_3312.jpg
The hole lay out..

100_3314.jpg
And finally the hole cut out.. Got little off on the top starboard radius.. The hole saw drifted on me..
Put the gimble in place and it looks like everything will seal ok..

Hope everyone had a great Saturday and a better Sunday.
 
Last edited:

Watermann

Starmada Splash of the Year 2014
Joined
Jan 12, 2013
Messages
13,753
Nice score on the PC grinder, I need one of those so I don't having to keep borrowing my buddies Makita.

When you put the outer transom assembly up run some bolts into the holes so it hangs where it's supposed to and check to see if the inset ring where the round gasket goes is showing at all. It looks like to me in the pics that there's more than enough meat left to seal it up.

Also a tip for when you put the transom assembly together use super glue on that big seal to hold it in place all the way around. I didn't use anything wet either just the seal, some guys use 5200 and the seal but the gurus in the MC forum say not to do the 5200.
 

Decker83

Commander
Joined
Apr 5, 2011
Messages
2,592
Nice score on the PC grinder, I need one of those so I don't having to keep borrowing my buddies Makita.

When you put the outer transom assembly up run some bolts into the holes so it hangs where it's supposed to and check to see if the inset ring where the round gasket goes is showing at all. It looks like to me in the pics that there's more than enough meat left to seal it up.

Also a tip for when you put the transom assembly together use super glue on that big seal to hold it in place all the way around. I didn't use anything wet either just the seal, some guys use 5200 and the seal but the gurus in the MC forum say not to do the 5200.

I did have 4 bolts in place and it looked ok.. Need to get inside the hull and check again tomorrow..

Do you put the super glue all the way around or just in a few places to hold it in place?

I was wondering about the 5200 on the transom.. I think Friscoboater did his that way..
Does the 5200 mess up the rubber seal?
 
Top