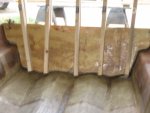
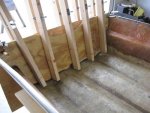
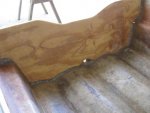
1976 Tom Boy Boat, 1976 40 HP Johnson Outboard and who knows what Trailer

gm280

Supreme Mariner
Joined
Jun 26, 2011
Messages
14,604
Was there wood in the keel area that you want to fill ? No real stringers from the factory ?

Actually the area I'm talking about didn't have any wood or anything else in that valley area. The two stringers were positioned on the two side ridges of the two outer ridges in the red lined areas. And there was a little wood at the side of the hull that the floor was attacked too, and that's were I was going to replace them at as well. But this valley (in the yellow section) would seem like a good area to fill with PB and then smooth over with CSM and/or 1708. I was just wondering if there is any reason to not do that. While it seems like a easily doable thing, I don't know if there is a good reason not too... So that's why I stopped and asked. CSM-9m.jpg

The two red lines was where the two stringer were attached, and the two sides had some supporting wood for the floor there too. So the center keel section was never filled or had anything in there before... ?
 

gm280

Supreme Mariner
Joined
Jun 26, 2011
Messages
14,604
Okay I get to post a little more progress again....YEA!

I attached the transom today. After mixing up about a half a gallon, actually 1400ml of resin (~48 ozs, not quite a half gallon) before the Cabisol and 1/4" chop strands mixed in, I took a notched troul and applied the PB to the transom skin on the boat. Then the fun began. For those of you that have done this before, you know what I am going to talk about. For the rest, here's a little learning curve. For starters, you really should have at least 4 to 6 hands. Because trying to hold the new transom at the exact place it need to go, and then hold the plywood backer plate on the outside of the transom to eliminate any waviness when clamping and then apply the clamps and then try to tighten them up, is a three ring circus. Honestly, I really don't know how I actually did it now that I think about it. But it is on there and curing as I type this posting. I'll know more about how it came out later on. Here are a few pictures to prove I actually did something... Progress folks progress!
Transom-7.jpg

Now before everybody gets all excited, I know I left a fairly large area around the transom and the hull. And that is because I set the transom a little bit high. So a lot more PB will go into the space now... :facepalm:
Transom-8.jpg

You can see it more in this blurred picture
Transom-9.jpg

And still another angle.
Transom-10.jpg

Here is that backer board I was referring too. I read about some new transom inslalls that looked wavy because of the clamps, so I used this plywood to help keep that from developing.. IDK!
Transom-11.jpg

Not sure it this will work to solve any waviness but I had it laying around and so I used it? Again IDK!
Transom-12.jpg

And finally from the other side. In this picture you can see the large area I will be filling... It is about an inch wide!

And I actually mixed a little more PB then need for this job, but no PB goes to waste so I filled in the last of the valley area...
CSM-10.jpg

You can see the fillet with the PB here...

So until next time... You all have a wonderful day... :D
 
Last edited:

sphelps

Supreme Mariner
Joined
Nov 16, 2011
Messages
11,462
Nice ! The plywood on the back was a good idea .. As far as the extra big gap around the edges just make the pb extra hairy .. :afro: :D
Congrats on a job well done !
btw, I guess it's too late to suggest drilling some ooze holes before installation ..
 

gm280

Supreme Mariner
Joined
Jun 26, 2011
Messages
14,604
Nice ! The plywood on the back was a good idea .. As far as the extra big gap around the edges just make the pb extra hairy .. :afro: :D
Congrats on a job well done !
btw, I guess it's too late to suggest drilling some ooze holes before installation ..

Yea, I guess drilling now is out of the question. But It looks really solid and amazingly better and solider then the crap the OP had on it. I don't know if you seen the original transom, but I have to give the OP some points for using metal roof rafter joinery on it. He had some 2 x 6's with metal rafter jointers to hold it all together. Surely this has to be better... We'll see!
 

gm280

Supreme Mariner
Joined
Jun 26, 2011
Messages
14,604
Here is another update to this boat project. Coming along nicely and I am getting a many lesson learned experience(s). Yes I installed the transom a bit high and that made for a wider gap around the transom. However I mixed up a lot of PB today (a lot) and added a little more 1/4" chopped fiberglass to the mix. Then I spooned all that into a large zip-lock bag and cut the corner out to use as a type of pastry bag. Well believe it or not, that works truly amazing. Not only do you squeeze the PB into every little corner, but is goes really quick too. After squeezing the PB in all the way around. I took an old spoon and filleted it nice and concaved ready for the tabbing. So I now have the PB fillet done on the transom and when it finally cures up, I'm ready for the CSM tabbing.
Transom-13.jpg
Here is a front to back shot.
Transom-14.jpg
A close up shot where you can see the concave fillet. Not bad if I have to say so myself...
Transom-15.jpg
Here is one of the sides. You can see the large gap in this shot but also the good fillet.
Transom-16.jpg
Here is a shot from the other side and bottom. I didn't completely cover over the center section because I have to install the drain tube yet.
Transom-17.jpg
And finally a closer up shot of the transom. As you can see, there is a shiny spot on the far right-hand side. It is actually covered over with two pieces of CSM AND the PB but you can see the old hole that was there. Once I install the tabbing, it should become a little fainter and after painting both inside and out, it will be all put a memory... It was one of my Uh Oh's with the flapper grinder... :facepalm:

Again, I have to admit, I really like this part of the project thus far... :smile: :thumb:

Now back to work on this boat for me... YEA!
 

Attachments

  • Transom-17.jpg
    Transom-17.jpg
    24.6 KB · Views: 3

Woodonglass

Supreme Mariner
Joined
Dec 29, 2009
Messages
25,927
Uhmmm, I'd say you're PB recipe is SPOT ON!!! Looks really good although a bit BIG!!!:D As you say, your final tabbing and layers will bring it all together. The "Go Back" is ALWAYS more enjoyable than the nasty demo and grinding. Soooo much more rewarding when you can stand back and say "Look what I created!!!"


gm280

Supreme Mariner
Joined
Jun 26, 2011
Messages
14,604
Uhmmm, I'd say you're PB recipe is SPOT ON!!! Looks really good although a bit BIG!!!:D As you say, your final tabbing and layers will bring it all together. The "Go Back" is ALWAYS more enjoyable than the nasty demo and grinding. Soooo much more rewarding when you can stand back and say "Look what I created!!!"


Thanks Wood for the kind words. I really needed four hands (six would have been better) when clamping the transom to the boat with the backer plywood plate. And as you can see I installed it about 1/2" too high. Looking back I should have used some spacers under it and that would have solved that problem. So yes the fillets are large but now covered very well and like you said, the tabbing will make it all right. The only other person available at the time was my wife and I honestly didn't want her to be breathing in those fumes. So I managed to do it all myself. Since then I bought her, her own 3M face masks and fume and vapor filters. So if I need more hands in the future I can get her assistance... Now that that part is installed, I can work the hull in prep for the stringers and flooring.

I didn't make this crappie spawning season (again) but I will work towards the next one...
 

sphelps

Supreme Mariner
Joined
Nov 16, 2011
Messages
11,462
All looks great ! Are you using the standard brass type drain hole ?
If so , I would go ahead and fill the spot at the bottom solid . Then drill your drain hole and flare your new tube in with 5200 ..
I think Woody has a plan for a home made flaring tool if you can't find one that size ..
 

Woodonglass

Supreme Mariner
Joined
Dec 29, 2009
Messages
25,927
Did you do any "Dry Runs" on the transom Install? Duct Tape is sometimes a good Second Pair of Hands. Spacers on the bottom of the hull to hold it at the correct height once set in place as well as taped to the sides of the hull??? Plywood backer Taped to the back of the Hull?? Hot Glued??? Screwed? Two screw holes are EASILY repaired. Ask and you SHALL receive....:D;)
 

gm280

Supreme Mariner
Joined
Jun 26, 2011
Messages
14,604
All looks great ! Are you using the standard brass type drain hole ?
If so , I would go ahead and fill the spot at the bottom solid . Then drill your drain hole and flare your new tube in with 5200 ..
I think Woody has a plan for a home made flaring tool if you can't find one that size ..

sphelps, Not sure yet if brass or stainless steel for the drain tube. I have access to some SS and I may go that way. As far as a flaring tool, I think I have a drawing on how to make one if need be. I have a metal lathe and can turn one out... It is getting exciting now!
 

gm280

Supreme Mariner
Joined
Jun 26, 2011
Messages
14,604
I have a brass 1" ID drain tube coming in presently and have taken about a 2" drum sander on my straight line pneumatic grinder tool and concaved and smoothed the PB fillets to the transom and hull. WOW, I would never on my wildest days thought how nice those fillets and transom would come out. I haven't even applied the CSM/1708 tabbing yet and it is amazingly solid. That boat never has such a solid transom in its entire life. However, I have also gotten a few fiberglass/resin splinters from the boat now that I've started the actual rebuild portion. And boy do those things hurt. The resin goes clear and are hard to see. And then stupid me slides my hand across to fell if everything is smoothed over to apply the CSM covering on the remaining hull and SHAZAM, a resin splinter. I can't be the only one that has done that... :facepalm:

Looks like this is going to be a lot more solid then I could have even imagined. But again I like this now. I can picture this finished and we (wifey and I) seating in it trying to catch fish. I am a professional fisherman by the way, but haven't mastered the actual catching portion of it yet... Post pictures later on...
 

gm280

Supreme Mariner
Joined
Jun 26, 2011
Messages
14,604
WOW Wood, I would have thought you would have had a few resin splinters, guess not... :heh: :facepalm: :pound:

Got a question for those that have gone before me. I am going to use mix and pour foam on this boat...of course. Is it better to totally seal the chambers the foam will be poured into or not? I can see both side of this idea but I haven't convinced myself which way is the better. I could easily cut a 2" or 3" diameter PVC plastic pipe down the center and drill tiny little holes all over the two halves and install them on each side of the empty center section and foam over them to allow water drainage. And I believe some of the holes will not be sealed over from the foam allowing drainage. But then I wonder can water also seep in from bilge water flowing in as well as out. So I can't determine which way to go... Any ideas and reasons?

I need to post this again because I serious need opinions and suggestion to help me determine the best way to go. I will be cutting plywood out and the way I decidee to go will have an impact on how I cut the wood. So post your ideas and suggestions and reason for them. I really do need those ideas...
 

Mikeopsycho

Senior Chief Petty Officer
Joined
Feb 6, 2014
Messages
738
I decided to seal the foam chambers in my boat because that's the way it was originally, and for my boat I figured bilge water would be able to enter through the drain holes, so it would be counter productive to have them. The water that did get in under my deck was from a rotted out potable water tank. A modification I made was to isolate the water tank compartment and install a tube with a plug for drainage, if needed, and a small inspection plate for access to the outlet fittings. The deck of my boat is completely inside the cabin, so what's right for me might not be right for you. I think if the bilge of your boat is the lowest point when at rest on the water, drain holes would be the way to go. If you choose to seal it all up, seal it really well. Not much help but its all I got.
 

Woodonglass

Supreme Mariner
Joined
Dec 29, 2009
Messages
25,927
This "Drainage" issue has been debated "Ad Infinitum" here on the forum. My opinion is that If you build the deck properly and seal it up correctly, and then maintain it correctly, there's no need for drainage. I'd foam every nook and cranny and call it done!!! But then again, I AM an Old Dumb Okie soooo you should take that into consideration!!!:D;)
 

bonz_d

Vice Admiral
Joined
Apr 22, 2008
Messages
5,276
gm, I've been watching and admiring your work. Another very well done and impressive! I give you glassers a lot of credit with the work you but for now I'll stick with the tin. For one reason I spend a lot of time in my boat with the bow on the beach and I'd have a hard time doing all that work and then have to beach the boat. That to me would be like stickin myself with a hypo needle, just couldn't do it!!
Can't hardly wait to see you finish it up.
 

sphelps

Supreme Mariner
Joined
Nov 16, 2011
Messages
11,462
I am not a big fan of drain holes in the bilge which would allow water back up under the deck . If there is room I think a better plan is to have 2 drain hole though the transom . One for under the deck and one for above the deck ... That would require you to build a completely sealed bilge pocket so any water that might get under the deck could be drained . Every time I take my bottom/under deck plug out it's completely dry ....
 
Top