1976 Tom Boy Boat, 1976 40 HP Johnson Outboard and who knows what Trailer

gm280

Supreme Mariner
Joined
Jun 26, 2011
Messages
14,605
With the job your doing on the stringers the deck's gunna be a piece a cake !
A lot more fun after the grinding is done huh !! ;)

aphelps, the really tricky part about doing this boat, but probably any boat for that matter, is trying to get the stringers in straight and level from all angles. I mean this is truly three dimensional efforts on a tri-hull boat. And the only thing I have to work with is the rub rail along the top to get my measurement from to get everything installed properly. That is why I haven't remove that rub rail to finish off the CSM hull overlay around the top yet. I did take measurement before I removed anything and seems like the top rail is my reference to work from. So I am trying my best to install the floor level and straight as I can get it. But then I have to make certain that anybody I take with me fishing won't punch through the flooring either. My two adult sons are pretty big guys! That is why I decided to mount ribs, I mean bulkheads every 24" to help handle the stress on the flooring. But given that I will also use mix and pour foam should help a lot too... This building brings back my airplane building days. Very similar indeed. But I am loving it seeing how everything is fitting together now. I have to dream up unique ideas to cut the parts out to make sure they are correct. Thanks for the comment and looking at the updates. Comments and replies do keep projects going, that for sure!
 

bonz_d

Vice Admiral
Joined
Apr 22, 2008
Messages
5,276
At this pace you may be catchin fish before I am! River walleyes are already started.
 

gm280

Supreme Mariner
Joined
Jun 26, 2011
Messages
14,605
At this pace you may be catchin fish before I am! River walleyes are already started.

Oh bonz_d, I think you meant to say that I may be fishing before you. The catching parts is still questionable. I am a professional fisherman, but a catcherman is the real question that still eludes me. Heck I can fish all day and not even fill the live well with any water...there would be no need! :pound:
 

Woodonglass

Supreme Mariner
Joined
Dec 29, 2009
Messages
25,928
I'm not sure who's more anal about their precision craftsmanship...You or Nurseman!!!:D One things for sure, If the Factories did this kind of work, there would be no need for forums like this!!!!:eek:

But...a 16" fishing boat would cost $100,000 Grand!!!!!:faint2:
 
Last edited:

gm280

Supreme Mariner
Joined
Jun 26, 2011
Messages
14,605
I'm not sure who's more anal about their precision craftsmanship...You or Nurseman!!!:D One things for sure, If the Factories did this kind of work, there would be no need for forums like this!!!!:eek:

But...a 16" fishing boat would cost $100,000 Grand!!!!!:faint2:

Funny you mention that. I was thinking today, that IF I added up all the labor alone in this little tinny boat project, I probably could have bought it twice own new. But then I wouldn't have this project to work on now would I. Oh yes I will say over engineered, but I like it so we will continue... Working on the individual ribs, okay, bulkheads today... Pictures later. Such brings back my R/C plane building days........... :smile:
 

Woodonglass

Supreme Mariner
Joined
Dec 29, 2009
Messages
25,928
Please understand... I am in NO WAY knocking what you are doing!!! I for one TOTALLY appreciate the efforts and work you are doing on your project. I WISH everyone and every company did the same. (Of course we couldn't afford ANYTHING if they did) but our current "Throw Away" society has pretty much done away with this kind of craftsmanship. It IS all about the project and NOT about the time and effort we put into it. If it was, we wouldn't start!!! When she's all done and you're out there fishin and relaxin, you'll be proud of your efforts and be able to totally relax in the knowledge that she'll be "Good to Go" for decades to come!!!!:D;)
 

gm280

Supreme Mariner
Joined
Jun 26, 2011
Messages
14,605
Please understand... I am in NO WAY knocking what you are doing!!! I for one TOTALLY appreciate the efforts and work you are doing on your project. I WISH everyone and every company did the same. (Of course we couldn't afford ANYTHING if they did) but our current "Throw Away" society has pretty much done away with this kind of craftsmanship. It IS all about the project and NOT about the time and effort we put into it. If it was, we wouldn't start!!! When she's all done and you're out there fishin and relaxin, you'll be proud of your efforts and be able to totally relax in the knowledge that she'll be "Good to Go" for decades to come!!!!:D;)

Thanks Wood, don't worry, I didn't take it any way but good. I know my methods are sometimes overboard, but that is how I do things. And certainly not just this boat, but everything.

I get ideas in my head and can picture the finished product and then I work towards that picture. I think it is a good thing, but It is also a curse some times. Actually this is what I've done my entire career before retiring. I designed circuits and laboratory equipment and so many times my finished products looked so factory built that others would question where I got them. Then I would have to tell them I designed them. Others knowing how I designed them would vouch for them before some would believe it. I have lots of neat electronic built equipment that I've designed and built. :focus:

Today I hope to get the two side supports cut and dadoed for the side ribs, I mean bulkheads. Yes a little late getting started because I had to take my wife for her last physical therapy section for her neck. She actually got a graduation shirt... Oh boy that shirt only cost near $500 dollars... :facepalm: But I'm glad she is doing very well now so it was worth the cost!

You all have a wonderful day... :thumb:
 

sphelps

Supreme Mariner
Joined
Nov 16, 2011
Messages
11,468
Glad to here the Admiral is doing well with the rehab !
500 bucks is a small price to pay if it gets her back on track ... I guess ya need to stop being such a pain in the neck ! :rolleyes: :D
 

gm280

Supreme Mariner
Joined
Jun 26, 2011
Messages
14,605
Glad to here the Admiral is doing well with the rehab !
500 bucks is a small price to pay if it gets her back on track ... I guess ya need to stop being such a pain in the neck ! :rolleyes: :D

I think the neck wasn't the only place I am a pain in... :facepalm:

I worked on the side supports yesterday afternoon and came across a situation I'm dealing with presently. Seems I used the rub rail on the top edge of this tri-hull as my point of reference to install everything from. And I was sure that would allow me a nice clean straight floor. However, as I made a few templates trying to make cardboard patterns to cut the plywood, I noticed something a little strange. It seems every attempt at making a cardboard template yielded a curved top line instead of a straight line, and that didn't make any sense. I did this two times with the exact same results. So I took some string and stretched it from the back point of reference to the front point of reference and there was about a 1" rise in the center of the pattern. And being how the pattern was made directly from the top rail projections to the floor section, the top rail has to be raised in the center an equal amount as well. So if I use those patterns I made, the floor will have a 1" rise in the center of the boat from front to rear. Not sure I like that and therefore I plan on using a string to make the floor straight now... I still can use the two PORs at both sections and come out with a straight and level floor... I'm not even sure a 1" rise in the center of a 14' boat would be obvious, but I would know! So back to the salt mine...I mean boat work! Pictures later...
 

Woodonglass

Supreme Mariner
Joined
Dec 29, 2009
Messages
25,928
Uhmmm, that 1" rise, is prolly there for drainage back to the bilge. Boat floors/decks are usually not flat and level. They will flow to the center or sides and normally always flow to the bilge.;)
 

gm280

Supreme Mariner
Joined
Jun 26, 2011
Messages
14,605
Uhmmm, that 1" rise, is prolly there for drainage back to the bilge. Boat floors/decks are usually not flat and level. They will flow to the center or sides and normally always flow to the bilge.;)

I understand that but this is only raised in the center of the boat from front to rear. Meaning it would drain to both front and bilge areas, not left and right towards the sides. So I am correcting that and making it flat. So any water will drain to the rear when both fishing and boating. I didn't even see the rise in the rub rail until I stretched a string from front to back. It is higher in the center then either end. I have taken some pictures to post and I will later on today. I'm presently cutting the side supports and that should solve my floor levelness... There will still be maybe a slight tilt towards the back (maybe a 1/4"), but that is okay if it is level all the way. I know this sounds like nothing, but I'm not sure that a 1" rise would not be noticeable if I leave it. Just the way I am... :facepalm:
 

gm280

Supreme Mariner
Joined
Jun 26, 2011
Messages
14,605
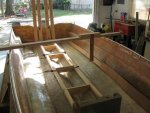
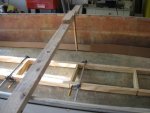
Here are some of those pictures I talked about. I initially made a simple slide around contraption so that anywhere on the boat I would have the same top to floor measurement to set both the floor supports (stringers and cross supports or bulkheads) and side supports at the exact same level. However, now knowing that the rub rail I was projecting all the mearusremnents from is indeed raised in center, that throws all that off now. So I will simply take a rear measurement and a front measurement and stretch a sight string to get the level floor setup and supports now. So from front to back and left to right level strings will be my yardstick. I know some are questioning why I don't simply use a good level. Well the boat isn't sitting on the cradle level and so that throws any such option out the window. To level the actual hull would take more time then it would be worth. And then I would also loose the support of the hull and take a chance of a twist as I installed things. Here you can see those pictures. But I have a workable solution as well. Never reading anything about this in the refurbishing threads before, I have to wonder if I am the only one that has had such issues... IDK

You can see the slide contraption I made to allow me the same measurement anywhere on the boat. But that isn't going to work now. You can also see the center stringers and bulkheads thus far. This center section will not be sealed or foamed to allow drainage. And those stringers are merely positioned there and not yet PBed in.
Floor-1.JPG

Floor-2.JPG
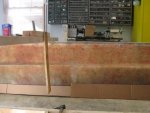
Another angle and you can see the side cardboard laying there for me to scrip the bottom to the hull first..

Floor-3.JPG
Here you can see the yellow string I stretched and see the raise.

Floor-4.JPG
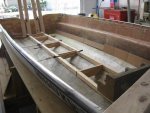
Her is a little better view of the rise. However, the camera angle makes it look a little worst then reality.

How do you all like my front weight to hold the stringers in place, and equally so the rear 2 x 4 clamps as well. Some times you have to use what you have on hand! Works for me... To coin a Hunter series show!

Well I broke for some lunch and posted these at the same time. Now back to work for me... new post later!

You all have a great day... :thumb:
 

Woodonglass

Supreme Mariner
Joined
Dec 29, 2009
Messages
25,928
So, Use your string line and some C-Clamps and clamp some 2x4's on the inside of the hull on the level line. Then you can still use your leveling jig to ensure your stringer assembly is level and true at the time of installation. Heck you could even screw it to the jig using drop down boards to suspend it off the hull at 1/4" to allow for the PB to go under the assembly at all points.:eek:;)
 

gm280

Supreme Mariner
Joined
Jun 26, 2011
Messages
14,605
So, Use your string line and some C-Clamps and clamp some 2x4's on the inside of the hull on the level line. Then you can still use your leveling jig to ensure your stringer assembly is level and true at the time of installation. Heck you could even screw it to the jig using drop down boards to suspend it off the hull at 1/4" to allow for the PB to go under the assembly at all points.:eek:;)

Yes I actually thought of that as well. Boats are so difficult because they are not straight plumb or level by any measurement. It is a weird three-dimensional (maybe even forth dimensional) puzzley thing to work with and nothing is a good starting point. Standard woodworking is so much easier and predictable. But this IS a challenge I have to say... Probably making a lot more out of all this then necessary, but I will learn for the next project I'm sure... Thanks Wood for the suggestion. I can always use suggestions all the time. I certainly won't ignore them that's for sure!
 

gm280

Supreme Mariner
Joined
Jun 26, 2011
Messages
14,605
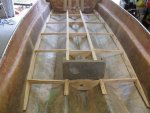
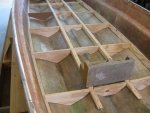
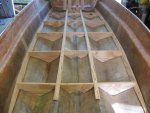
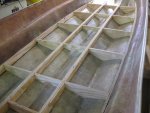
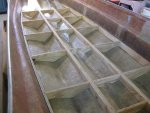
A little more update of todays efforts. While it really doesn't look like much, it took a long time to make each cross brace, or bulkhead because no two were the same. So I had to hand script each one and cut and sand and do it again and again before getting the fit I needed to seal each section. The outer sections on each sides will be filled with mix and pour 2lb foam from the front to back. So each section has to fit pretty good to be able to seal them before installing the floor. I know you can see light under some of them and that's because after I fitted it, I simple slid them into place and moved to the next bulkhead. So some aren't pushed in tight for the pictures. The center section is not going to be filled with foam and therefore I made some little arches to allow water drainage IF any gets in. So now I start filling all the voids that the plywood has. And there are a lot of them. Some really sorry exterior grade wood I'd say. And that was supposed to be their best too. And then I have to poly and CSM all of those pieces as well before assembling this jigsaw puzzle in the hull. Oh boy fun fun fun. I still have to cut the circles out in the center section for the PVC piping to allow for all the wiring and such from the battery to the helm. So still a little bit to go. But it is getting there and starting to look like it may work... SO here is today's pictures of this project.

FLoor-5.JPG
I first cut little support sticks to make sure the side wood stays in place. There are not going to stay there but only for fitting the cross supports.
Floor-7.JPG
You can see a few that I've finished this far and the cardboard template that still has to be customized...
Floor-11.JPG
Okay here is a front to back shot of the puzzle.
Floor-12.JPG
Her is a pretty much finished setup.
Floor-13.JPG
And from a different angle.

Now I know it looks like a lot of work, but I did have help.
This guy was with me most of the day
Friend (1).JPG
Odd how he (or she IDK) was within a few inches while I was cutting some of the wood. He even let me within about two inches of him and all he did was turned his head while I was talking to him like he was listening. And then he just closed his eyes and looked like he went to sleep... I think he was over seeing my work to tell me if I did anything wrong..

Well there is todays efforts and update. Hope to have more done for next update. Happy Easter everybody... :smile:
 

gm280

Supreme Mariner
Joined
Jun 26, 2011
Messages
14,605
Yea this project boat could be certified "Zilla" with all the floor supports I'm installing. But knowing the way any floor for any building effort goes in and the amount of weight it has to support without flex makes me over design instead of just maybe good enough. The cross supports, ribs, or bulkheads which ever you like to call them, are places every 24" to help in that support. Of course the mix and pour foam should also firm it up a lot. I designed this section using 3/4" ( or really 23/32" like they make these days). But the actual floor is going to be 1/2" (or actually 15/32"). and the rod box sections will be either 3/8" or even 1/4", I'll see as I get to that point. . Because everything will be covered in poly and cloth, there shouldn't be any weak spots at all... I can tell you nearly two sheets of 3/4" exterior ply has added a lot of weight already. Even those little pieces start to add up after a while.

So until next time, you all have a wonderful Easter... :thumb:
 

gm280

Supreme Mariner
Joined
Jun 26, 2011
Messages
14,605
New update. Today I took all the bulkheads and side wood and used a 1/2" round over router bit on the backside of the side pieces so that they will fit tighter against the hull. Then I sanded all of them on all sides and mixed up some PB and filled all the voids in the plywood. I also mounted the front eye mount so when I redrill the new holes for the bow eye, it will now go through new solid material and then an aluminum backer plate to give a better hold. So not much to actually see but an important part to get everything ready to install the wood supports for the floor now... Getting there a little bit closer each day... You all have a great day!
 

gm280

Supreme Mariner
Joined
Jun 26, 2011
Messages
14,605
Okay some good news to report. Well maybe just good new for me, but I like good new anyway so here goes. Yesterday I waterproofed the two outside runners/stringers or whatever you call them. They are not like the normal stringers that go down the center sections of most boats but the very outside wood that will support the edges of the flooring. They are not sitting straight up and down but at about a 12 degree angle because of the angle of the hull. And they are not straight but also curved or bowed to fit the curvature of the hull as well. And they are dadoes to fit the bulkheads and chamfered on the back lower edge to allow a closer fit due to the hull design. But they had to be straight from front to back so the floor would be level. So much effort went into making them and being such narrow pieces (in height), it was a lot of effort too. Well There were water proofed with CSM polyed in to the back side of them. Today a sanded all the fuzzes off and mixed up a peanut butter mixture and polyed those two side support in for a final. And while that isn't really Earth shattering, it actual sets up the entire layout of the floor supports, stringers, bulkheads and of course the flooring it self. So now, after it cures, I can fillet those sections and start installing all the other pieces in this jig-saw puzzle. And since all those other pieces are also cut out and ready, I see this as a huge jump in this project. I spend tons of time and materials to get to this section and now it is going in... Yea me! :whoo: Hopefully, after I cut, trim, edge and blow all the grass clipping off the drive way and walkway, I can get back to the floor structure again... But I am exceedingly glad for this install today... If others were here to see the fit and trim and fit again and sand and fit again and adjust those two outer supports over and over and over, you too would know why I'm excited now! I will post pictures but honestly previous shots show as much as the polyed in supports now because there are just installed and really nothing that would show in pictures at this point. But I had to post anyways.

You all have a wonderful day...you all deserve it! :thumb:
 
Top