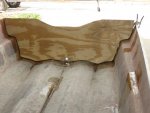
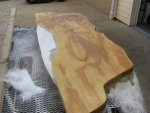
1976 Tom Boy Boat, 1976 40 HP Johnson Outboard and who knows what Trailer

gm280

Supreme Mariner
Joined
Jun 26, 2011
Messages
14,605
Sooooooo where's the motor???:eek::D

Darn...I actually thought one of those pictures showed the OB in the background (again). The engine is still sitting on the engine stand waiting on the boat to get prettied up. I could install the Motor Guide III trolling motor on it! And now we are having warm enough days (with possible rain of course) to mix and pour poly. So I start with that today... I'm excited and a little cautious all at the same time having never taken on this big a fiberglassing project before. But I will learn or be regrinding again... :facepalm:
 

gm280

Supreme Mariner
Joined
Jun 26, 2011
Messages
14,605
Okay progress has happened. I finally did my first polyester work today. I cut cloth and used up the older poly resin and then switched to the new stuff I bought as I ran out of the old. And I put patches over all the Uh OH's I made while grinding. And except for the smell, I actually liked doing that. Of course there were so many holes, that it looks like I already covered the entire hull. :facepalm: I can see this going really nicely now. Both resins seem to be kicking off good, so next is a total layup of the entire hull to strengthen it up. That comes tomorrow now with 1708.... :high5:

Pictures will be posted at that time...
 

gm280

Supreme Mariner
Joined
Jun 26, 2011
Messages
14,605
Okay I manage to cut the transom wood and make the two copies and glued them together. It is dry/cured and there is no way they are ever coming back apart ever again. I used TiteBond III and a few clamps....okay a lot of clamps...

Transom-1rs.jpg

I understand that you shouldn't cut to the absolute exact size so you can fillet in with Peanut Butter (poly resin, Cabisol and 1/4" chop strand fiberglass mat). So it is a little smaller then the transom areas and I will be filleting the surrounding gap with PB. In this picture, the wood hasn't been glued up yet.

Transom-2rs.jpg

Next I clamped the transom with the home-made wood clamps. But not done yet.

Transom-4rs.jpg

More clamps but not done yet!

Transom-5rs.jpg

Okay now I have enough clamps to keep the glue from escaping... I'm allowing it the dry/cure for two days before I start applying the poly water-proofing coat and then CSM on the finished product... Yea!
 

gm280

Supreme Mariner
Joined
Jun 26, 2011
Messages
14,605
Looks really good gm !!;)

Thanks sphelps for the nice words!

Actually I was fighting my poly mixtures for the last few days as well. When I was grinding the hull in prep for the rebuild, I made a couple...okay...a lot of Uh Oh's that went through the hull with the grinder. So I thought I would patch over those Uh Oh's before covering the hull with 1708 cloth to make the boat a little more rigid. Well using the initial mixtures suggested by the manufacture just didn't work like planned. It took almost three days to cure and it still is a little suspect. So I mixed up a second batch doubling the MEKP ratio. That worked but it still took over night to get hard. So in between all that, I cut out and glued the transom wood. Once I get the proper poly mixtures down. I will start coating the wood with poly and CSM cloth. I have to say this is really interesting to me. I actually enjoy doing this thus far! More to come now...
 

gm280

Supreme Mariner
Joined
Jun 26, 2011
Messages
14,605
With a few more Poly/MEKP mixes and tests, I think I finally got the hang of it now. I managed to mix a Poly/Filler (PB Cabisol) to fill in voids on the transom wood and it actually kicked off in a reasonable time. And now it is extremely hard and I will sand and go over them with CSM in prep for installation. I didn't want to try something too big until I convinced myself I can make the stuff kick off correctly. I think I can now! As for the plywood voids, it is sad what they sell as supposed to be quality exterior plywood these days. Even the best stuff they offer has voids and divots in it... SMH! Hence I had to fill in such spots...

I also had to make a modification to my home made copy of WOG's wood clamps. Seems if I reverse the outer screw assembly to tighten the lower section of the clamps, I was applying so much force the I actually broke off the little cotter pins. So I disassembled them and put 1/2 x 13 nuts on up pretty close to the wood 2 x 4 and welded them there. Now I could use a torque wrench and they still work. So that gives me a lot more tightening capability.

Until next time....you all have a great day!
 

sphelps

Supreme Mariner
Joined
Nov 16, 2011
Messages
11,468
When you glue the new transom in you don't want to tighten it down too much.. Just snug it up good . Squeeze it down too much and it will push out all the pb ...
 

Woodonglass

Supreme Mariner
Joined
Dec 29, 2009
Messages
25,928
This ^^^ is very good advice. If you broke the cotter pins you were definitely apply WAY to much pressure.:eek:
 

gm280

Supreme Mariner
Joined
Jun 26, 2011
Messages
14,605
The first thing I will say is, I have a whole different appreciation for those of you that have gone before me with their transom repairs and fiber-glassing efforts. Today. actually this after noon, I did my first CSM layup with my transom. I mixed up 300mls and covered one side and the ends with that mixture and basically used it all up. I waited about 45 minutes and then started with the next mixture. I mixed up 200mls and started with the CMS layout. I started and knew before I made even a little headway I was going to need so much more. That CSM was soaking up the poly quite fast. So after getting about a quarter of the way with that mixture I mixed another 500mls. I started to roll the poly on and seen that was not a great idea. So I switched to a chip brush and that seem to work better. The roller was pulling up the CSM fibers and plugging up the roller. The brush seemed to work way better so I used it. However, making the CSM fold over the edges was a nightmare and that's when I got the appreciation for all you guys that were able to do it and look so easy and come out flawless. I could get the CSM laid down and then when I came back and looked, yep there was a bubble or ridge at the very edges. So I worked them down again, and again, and again, and again...you get the picture! Here is what my first effort looks like.

CSM-1.jpg

Ha, the pictures actually make it look better then reality...

CSM-2.jpg

Believe me it really isn't as good as it appears on these pictures

CSM-3.jpg

I guess tomorrow I can cut the edges of the unused CSM and flip the transom over and do the other side. I am learning so much in the little time I've been doing this. Interesting to say the least...

I have to ask. I bought enough CSM to cover the entire hull, and all the substructures on both sides as well. I actually want to do that to add some strength to it being how it presently is pretty flimsy. Should I do the actual hull with CSM or 1708. I plan on covering the rod boxes and floor and such with 1708 as the final covering because the undersides were going to be CSM. But should I also do the hull with the CSM before covering over with the flooring? I got 10 yards of 1708 and 20 yards of CSM and 15 gallons of 435 poly... Oh, the boat is 14 foot tri-hull with 63 inch width...
 

sphelps

Supreme Mariner
Joined
Nov 16, 2011
Messages
11,468
gm don't beat yourself up with your glassing .. It looks fine and the more you do the better your gunna get at it ! ;)
On the edges just grind off the bubbles then tear up some csm by like pulling it apart . Should look like bunny tails or something .. :rolleyes: Mix a small batch and cover the edges using the chips brush with about a half inch or so cut off the ends ..I like useing the small 4" cheap peanut roller cover from H/F ..
No doubt you'll get the hang of it .. :)
 

gm280

Supreme Mariner
Joined
Jun 26, 2011
Messages
14,605
Thanks sphelps, Between you and WOG, I will be using the "hair coat" suggestion from now on. The fold over the edge is not getting it. So your ideas are much better and very common sensish. Thanks for following and making suggestions. Being a newbi with poly I actually can use everybody's ideas. But I have to say I honestly enjoy this portion of this boat project and am really getting excited to move on now... Thanks again! more to come....today too...I hope!
 

gm280

Supreme Mariner
Joined
Jun 26, 2011
Messages
14,605
Alright, I just finished covering the second side of the transom after grinding off all the bubbles that formed on the edge and end of the transom. And I have to say that the second CSM worked perfectly. I actually think I can do this now. I coated the second side with poly, let it soak in pretty well and then after about 15 to 20 minutes laid the CSM on top and with a chip brush, went over it with a little more poly. As I saw it soaking in and turning transparent, I rolled it with a foam roller and everything works beautifully and there were zero bubbles this time... I like the way this side turned out. Looks really good...

CSM-4.jpg

Yes It looked like rain was coming , so I did this one inside my shop. But with the 3M respirator, I didn't smell any poly fumes in the least. I don't know how the make those filters, but I can tell you they work very well. When wearing one, you can't smell any fumes at all, not even a little bit...

CSM-5.jpg

A little minor clean up of the frizzes and this transom may even work... The grayish looking streaks were actually voids in the plywood that I filled. But they still show up after the poly and CSM is laid on... Oh and I used an old vinyl shower curtain to do this layup on so the poly didn't get on the table. I took two blocks of 2 x 4's and screwed two screws through each of them to support the transom on so I could work even the edges without any issues...

I like this now... :smile:
 

sphelps

Supreme Mariner
Joined
Nov 16, 2011
Messages
11,468
Looks good !
I have grown fond of these for glassing . http://www.harborfreight.com/pack-of-six-4-inch-mini-paint-roller-covers-97810.html
Never tried the foam rollers .. you will get better and better at it .. But eventually there will be a a layup when your dead tired and didn't really feel like glassing but ya did it anyway . Ya won't be able to get things to go your way . Bubbles everywhere and not wetting out right . Then you'll get mad and pull it all back off glass flying everywhere on you the dog and anything else within a 5 foot radius . Ask me how I know ! :facepalm:
Just remember it happens to all of us at one time or another . Then the next lay up will come out perfect ! ;)
 

Woodonglass

Supreme Mariner
Joined
Dec 29, 2009
Messages
25,928
Speak for yourself Sphelps!!! All my Glassin projects come out PERFECT as you can readily see...
DSC00945-1.jpg
 

gm280

Supreme Mariner
Joined
Jun 26, 2011
Messages
14,605
Okay WOG, I do see you point... Looks good to me...:facepalm:

sphelps, I have some of those cloth or cotton looking rollers too, but so far the foam ones seem to work better for my usage. But ha, I've only done a couple layups so far, so who knows. Thanks to the both of you for the moral support and replies. I am liking this so far and I can see the finished boat in my mind already. Hope to do the hull CSM layup tomorrow...weather permit...
 

Woodonglass

Supreme Mariner
Joined
Dec 29, 2009
Messages
25,928
Uhmm, wait till the Resin EATS and Melts your Foam Roller, You won't like it so much then.:eek::faint2::D
 

gm280

Supreme Mariner
Joined
Jun 26, 2011
Messages
14,605
Uhmm, wait till the Resin EATS and Melts your Foam Roller, You won't like it so much then.:eek::faint2::D

WOG, So far the foam rollers haven't shown signs of dissolving, even after removing them from the roller handle laying in the trash can. But I will watch for that and switch to the cloth looking rollers for the next poly secession. I have noticed that when I remove them with a rag wrapped around them and pulling them off, they are warm now. So I know the MEKP is working now as well. I will put one of them in some Lacquer and/or Acetone thinner and see what that does to them. If they survive those thinners, they will work... The reason I like the foam rollers better is because they seem to be firmer when rolling out bubbles. Otherwise, I could use either one with out any issues. But I also ordered a stacked disk bubble roller that should be in in a few days. That should solve the bubble issues...I hope! Oh WOG, it looks like 2% MEKP worked with my last mixture. So either the increase of temps is working or something else, because it took a long time for the mixtures to kick, up until these latest temps.
 

Woodonglass

Supreme Mariner
Joined
Dec 29, 2009
Messages
25,928
Yeah, when the temps get in the mid 80's and higher you'll be dropping back to 1.5% or lower I'm sure. It's all about temps and humidity!!!
 

gm280

Supreme Mariner
Joined
Jun 26, 2011
Messages
14,605
Okay a little more to post and a few questions for the experts as well. I did my first hull layup today and while the poly doesn't soak into the hull like it surely does with wood, it still take a substantial amount. Actually more then I first mixed up, so a little panic set in with me mixing more. But all ended well and it looks not bad. But then it turns invisible so everything underneath shows up still.
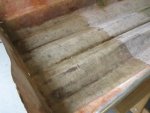
CSM-6.jpg

The first picture here shows that first CSM layup. I did the bottom of the hull with just a little turned up on the sides. I know it looks woven, but that's because the old woven matt glass is showing through.

CSM-7.jpg

Just another angle...As you can see I haven't installed the transom yet because I want the sides secured better before installing the transom to give it more substance material to tab in place on the sides.

CSM-8.jpg

With mixing a little more, I actually had enough to put two pieces of CSM at the bow section that the bow eye will eventually attach too. I plan on building this area up with more plywood and poly to make sure it can handle the stress it will receive... So far there is one woven glass and two CSM glass polyed there.

Now comes the question. I stopped laying up the CSM in the hull at this point because I have a question for those that know. The center of this hull, being a tri-hull, there is a pretty deep valley that actually going down a lot. I was contemplating mixing up some PB and applying in that valley to basically bring it up with the surrounding hull and then CSM over it. Does that sound like a good or bad idea? I was thinking that with a very good fill of PB, it would make that center section extremely durable to impacts and such. What do you all think? See the picture below...
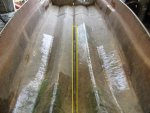
CSM-9.jpg

Does that sound okay or a big no no? This valleyed area start right after the bow eye area and goes all the way to the transom... It is about an inch or more deep and about an inch or more wide as well. Let me know so I can continue with the CSM covering and move on...

Oh, one other thing I did. WOG stated "Uhmm, wait till the Resin EATS and Melts your Foam Roller, You won't like it so much then.:eek::faint2::D "

So that did get me to wonder. So I took one new foam roller and put it in a jar filled with Lacquer Thinner and closed the jar and let it sit for over four hours. Results, not one thing happened to it. It still was in tack and still foam. I did this because I do know some thinners and such will dissolve foam real quickly. So I did this to see what would happen. However, it didn't bother the foam, there are actually called "dense foam replacement rollers" on their package from Lowes, BUT I did experience on thing with this last layup. The end of that roller actually came off because I was running it up against the side while rolling and so instead of a 4" roller, I now had a 3" roller. So the poly won't eat them. but you have to be careful not to scrub them against anything as well. So I now will switch to the cloth type because they would probably work better for this hull layup effort... Just wanted to let you know...
 

sphelps

Supreme Mariner
Joined
Nov 16, 2011
Messages
11,468
Was there wood in the keel area that you want to fill ? No real stringers from the factory ?
 
Top