1976 Tom Boy Boat, 1976 40 HP Johnson Outboard and who knows what Trailer

gm280

Supreme Mariner
Joined
Jun 26, 2011
Messages
14,605
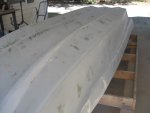
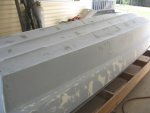
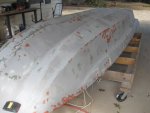
A little more sanding today. I have a little over half the hull sanded now. And it is coming out nicely. I still have some pin holes to fill and some low areas as well. But all in all not too bad. This initial primer coat is now my first guide coat to go by. And it will tell you easily where the low areas are. Lots of time, you can't fill the low areas with you hands, but you can see them with contrasting colors. And that is how guide coat works.
Primer Sanding (1).JPG
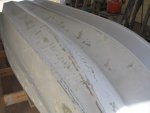
Easy to see the high areas. I really like how the contour of the keel came out. That was totally busted up when the PO hit something really bad and hard.
Primer Sanding (2).JPG
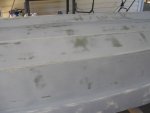
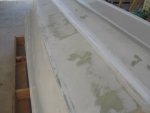
The side and part of the bottom with the cross-hatch sanding. It looks bad, but it is really smooth and nice. I do like how the primer sands.
Primer Sanding (3).JPG
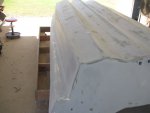
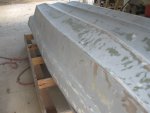
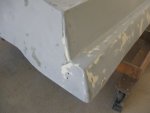
Here are those two areas that I had to grind out and fill and sand. I know from the picture they really look bad, but they are extremely smooth and very solid. The next primer coat will make them look perfect.
Primer Sanding (4).JPG
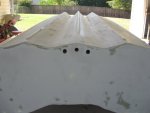
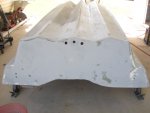
The transom really came out pretty flat. A few high areas but basically not too bad. The irregular transom top area (the lower section in the picture) will be cleaned up before I install the metal piece across it. It looks lope-side in the picture but it will look clean and blocked off straight. Some of the irregular look is the filler I extended below the transom itself to get everything to the same level. The left side section in this picture is more how the actual transom will look.

Primer Sanding (5).JPG
The darker gray area in this picture is a low area that will be filled. Easy to see once you sand.
Primer Sanding (6).JPG
And finally some remaining pin holes I still have to deal with. Yes even with a high build thick primer coat, the pin holes are still showing in some places. That is proof that if you think paint will cover over such things like pin holes, scratch marks and things like that, you would be wrong. If thick primer won't cover over pin holes, paint certainly will not. So if you can feel any imperfection or just see one, it will still be there after you paint if you don't take care of it during the prep work. You can't hope thing will cover over, you have to fix them. And that is why everybody says, the prep work is the most time consuming of any paint job. The better you do the prep, the better the finish will be.

Until next time, you all have a very nice day.
 

gm280

Supreme Mariner
Joined
Jun 26, 2011
Messages
14,605
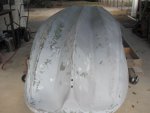
Well I managed to get the entire hull sanded now. It took a little longer then planned. But ins't that the usual way thing happen. I now can see the low areas very well and will start tomorrow filling each low area and the pin holes. But this will be sections at a time. Once I get them all filled and sanded back into the surrounding primer, then I'll shoot the next coat of primer.
Finish 1ST Sand (2).JPG
Easy to see the low areas with the primer now. And really not that bad. Of course this boat wasn't one of those top high end built boats, actually the opposite end of boat building quality spectrum, but I think it will be a nice looking boat when I finish.
Finish 1ST Sand (3).JPG
And Side and middle section view.
Finish 1ST Sand (4).JPG
And the transom area looking down the starboard side.
Finish 1ST Sand (5).JPG
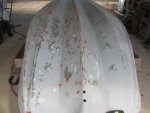
I actually like this shot because you can see how the three pikes came out. If you remember those were busted up pretty badly and the PO tried to fix them. Well now they are fixed the proper way.
Finish 1ST Sand (6).JPG
And the port side view. Now comes the fillers again.

Well that is all for today. But with the weather holding out nicely, seems I can get more done on it now.
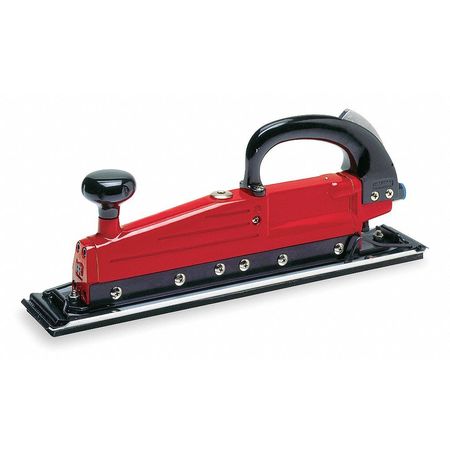
I will say one very good pneumatic tool I am using is helping out very well. It is a straight line sander.
Z3Lwuyfo5oy.JPG

Well worth the time and money for things like this. Makes sanding a heck of a lot easier and quicker too.
Until next time, you all have a great day...
 

sphelps

Supreme Mariner
Joined
Nov 16, 2011
Messages
11,468
I definitely want to get one of those sanders .... If I can just find the time to get my new compressor hooked up and running ...
 

gm280

Supreme Mariner
Joined
Jun 26, 2011
Messages
14,605
I definitely want to get one of those sanders .... If I can just find the time to get my new compressor hooked up and running ...

Sam, You would love one of them. It does so much work in such little time that it is amazing. And since you can get everything from 36 grit to 320 grit paper for them, it is versatile as well. They run between 2000 and 3000 stokes per minute. Talk about long board sanding...wow. I started doing the primer sanding with a manual long board. But honestly, my arms were killing me after one day. So I pulled out the inline and it was tons easier to long board sand the primer. Then followed up with the manual board and in the concave areas, I use hand sanding. So now I start the low area filings. But the inline will be put to work with that also.
 

89 resorter

Petty Officer 1st Class
Joined
Oct 3, 2013
Messages
287
Looking good GM. That is the same sander I got and I can't wait until I'm at the point where I get to use it for some finish sanding. Keep up the good work!
 

gm280

Supreme Mariner
Joined
Jun 26, 2011
Messages
14,605
Looking good GM. That is the same sander I got and I can't wait until I'm at the point where I get to use it for some finish sanding. Keep up the good work!

Thanks 89 resorter for those words. It is coming along pretty good now.

I didn't get to do much work on the boat yesterday. I did some more spot pin hole filling. The Ever Coat Easy Sand I am using cures so fast that I rarely can use up all of it before it is solid. It has a working time of 5 to 6 minutes. And I think their estimates are a little long. It works great and sand very easy, but you have to have everything ready and work fast to get anything out of a mix. I even tried reducing the hardener, but that didn't seem to help too much, maybe a little. The problem is there are so many little pin holes that I have to fill them in because they easily show through even thick primer coats. Obviously it wasn't one of those top end built hulls. But it is coming along nicely and I will get all the pin holes filled and then prime again.
 

gm280

Supreme Mariner
Joined
Jun 26, 2011
Messages
14,605
I continued filling in the pin holes and did a little sanding. But honestly my heart wasn't in that effort and I stopped early. Just one of those days I really didn't feel like working on the boat. I get them some times, but the next day I am back at it. We will see what today offers.
 

archbuilder

Vice Admiral
Joined
Sep 12, 2009
Messages
5,697
Hey GM, looks like you have been busy! I have the same complaint about the glazing putty, fires off to quick. Back when I worked in the body shop we sometimes used a glaze that came in a "toothpaste tube". No hardener, just squeeze a dab out and put it on. Dried in about 10 minutes. The only problem was it was basically really thick high build lacquer primer....which works great, but can shrink later. So I keep putting up with the fast fire off of the catalyzed products.
 

Patfromny

Lieutenant Junior Grade
Joined
Dec 2, 2012
Messages
1,197
I continued filling in the pin holes and did a little sanding. But honestly my heart wasn't in that effort and I stopped early. Just one of those days I really didn't feel like working on the boat. I get them some times, but the next day I am back at it. We will see what today offers.


I can understand not wanting to do the same thing everyday over and over. These pin holes must have made your last few weeks feel like that movie ground hog day. This is one of those things that will put a smile on your face once you are done. Take a day off, you're not on a dead line. The only problem with days off are they sometimes involve craigslist and the dragging home of another boat. Lol
 

gm280

Supreme Mariner
Joined
Jun 26, 2011
Messages
14,605
Yes the pin holes are a PITB. But once I do get them filled in, it should go smoothly there after...I hope anyway. :noidea:

I have found a better way to fill them in it seems and while it does seem to work, it takes a few hours to do them each time. I had a few cans of Rustoleum high build automotive sandable primer and after reading the components on the can, seem it is pretty compatible with what I am doing with the PPG 2K primer. So I got out my very flimsy wide blade putty knife and stray some primer and then putty knife it into the pin holes. It seem to fill them but you have to wait four hours before sanding. I did tried to sand after about an hour because it seems totally cured/dried, but it plugs the paper too bad so I have to wait longer. But when I sand after fully cured, it sand pretty easily and they are filled nicely. But it is a slow process anyway.
Pin Holes (1).JPG
Yea I know it looks pretty bad. But it is how things look when sanding things out.
Pin Holes (2).JPG
This side is pretty much ready for teh next primer coat now. But I will wait until I can prime the entire hull at one time.
Pin Holes (3).JPG
Here is the results of pin holes that I am working with. These are filled now. But there are a few that need filled there as well. The lighter spots are those pin holes. And they are all over the hull to about the half way point from the front back.
Pin Holes (4).JPG
Some pore of them. And a few that need filled. They are too big for the primer to cover over, but not big enough for body fillers like you would apply on large areas.
Pin Holes (5).JPG
More pin holes filled and some not filled. There are so many that you can't just ignore them
Pin Holes (6).JPG
This is an area that I just used the Rustoleum primer and putty knife on. You can see the pin holes are pretty much covered over. But once I sand, there may be some that still need attention. I'll get them all one way or the other. :spy:

That's all for today. More sanding and then more sanding. :eek:
 

mickyryan

Rear Admiral
Joined
Apr 18, 2016
Messages
4,214
I can understand not wanting to do the same thing everyday over and over. These pin holes must have made your last few weeks feel like that movie ground hog day. This is one of those things that will put a smile on your face once you are done. Take a day off, you're not on a dead line. The only problem with days off are they sometimes involve craigslist and the dragging home of another boat. Lol
^^ resembles that remark about a day off :)
 

Woodonglass

Supreme Mariner
Joined
Dec 29, 2009
Messages
25,928
Have you considered using Spot Putty?? Seems to me it would be the way to go. Drys fairly fast and then spray the primer. A heat gun or hair dryer will also aide in the drying time.
 

gm280

Supreme Mariner
Joined
Jun 26, 2011
Messages
14,605
Have you considered using Spot Putty?? Seems to me it would be the way to go. Drys fairly fast and then spray the primer. A heat gun or hair dryer will also aide in the drying time.

Actually WOG, I did think about Spot Putty. And after digging it out from the paint cabinet, I realized it was harden up and had to throw it away. I do plan on buying some today when I get out. It is usually a Lacquer base product but I think it will work. I think about a day or two more and I will have all the holes filled. If this were a car, I would have used a total thin applied body filler over the entire hull and then sanded everything down like you do on some surfaces on vehicles. But since it isn't a car, I have to be careful with the products I use. So filling and sanding everything down to basic hull surface is how it is going. It isn't hard to do, but it does take time with allowing the fillers to cure after each application. Funny part about all this is, this pat of the hull will never ever be seen. But I would know better if I didn't do this the correct way. :)
 

mickyryan

Rear Admiral
Joined
Apr 18, 2016
Messages
4,214
I was thinking what if you made some poly up with micro ballons and squeeged it across the entire surface ? that would fill pin holes yet wouldn't drive yourself crazy with the spot putty
 

gm280

Supreme Mariner
Joined
Jun 26, 2011
Messages
14,605
I was thinking what if you made some poly up with micro ballons and squeeged it across the entire surface ? that would fill pin holes yet wouldn't drive yourself crazy with the spot putty

I actually thought about that as well. But polyester and balloons (actually glass bubble for poly) are still harder to sand out then the spot putties. And since I did get some spot putty, we will see how that works now. Getting closer to having them all filled now. :high5:
 

gm280

Supreme Mariner
Joined
Jun 26, 2011
Messages
14,605
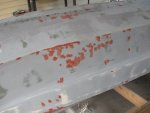
Okay, I got them pin holes on the run now. I sport puttied a lot of them and now my boat looks like it got some weird disease. I think it is call red pox.
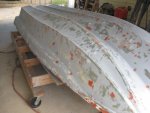
Red Spot Putty (1).JPG
And that is just the remaining pin holes too.
Red Spot Putty (2).JPG
Red Spot Putty (3).JPG
Red Spot Putty (4).JPG
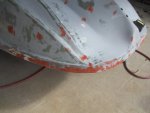
You can see a really bad case of red pox in the front edge.
Red Spot Putty (5).JPG
Also notice that the read section of the hull doesn't have hardly and red pox. And that is because who ever was working the back half of the hull when building, obviously did a better job.
Red Spot Putty (6).JPG
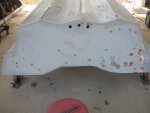
And the transom area. There wasn't actually pin holes here but merely some low areas and a nick or two.The transom actually is very nice and basically flat. It should look real nice after painting.

A couple of interesting things about the spot putty. Yes, it is basically a lacquer based putty, but it also has a lot of the same chemicals that are in regular two part mix spot putties and body fillers. So it will not be an issue with the primer or follow on paints. And since when you sand again, 99.999% of the spot putty is sanded off leaving only the pin holes, divots and low areas filled. And that is exactly what you want. Secondly, if you want to buy the spot putty, WalMart has it for literally one third the price of the auto parts stores. I know I just priced them. Just a little over $3 dollars for 3M spot putty.

I did sand off all the previous fillers again but didn't take any new picture of it yet. There are a few holes left to spot, but all in all, it is looking up now. :smile:
 

sphelps

Supreme Mariner
Joined
Nov 16, 2011
Messages
11,468
Maybe you should just clear coat right over that ! Looks kinda cool ! :lol:
 
Top