1976 Tom Boy Boat, 1976 40 HP Johnson Outboard and who knows what Trailer

Woodonglass

Supreme Mariner
Joined
Dec 29, 2009
Messages
25,928
Yup Here's how I mix filler. 500ml resin, 500ml glass bubbles, 60ml cabosil. 25ml Surfacing Wax and 5ml MEKP That should give you about 15-20 mins working time IF you're in the shade. I have Pre-mixed and added the hardener last A bunch of times. Stir for 30 -45 secs and you're good to go. If it's a bit to runny...add more bubbles. Like Sam says Don't add too much cabosil or it will be hard to sand 5% seems to work well for me. But again as Sam stated, play with it until you get what you like.
 

gm280

Supreme Mariner
Joined
Jun 26, 2011
Messages
14,605
Well the storm Hermine has come and gone through the state and actually only left some wet ground, thank goodness. I few trees toppled around the area, but not even one person hurt. That is good news. And seems we finally dropped out of those 95 degree days as well. So boat prep can begin now and I am looking forward to working on the hull again now. Me and heat and humidity don't get along anymore. Hope to have some progress pictures coming soon. :high5:
 

sphelps

Supreme Mariner
Joined
Nov 16, 2011
Messages
11,468
Nice breeze to go along with the temp change .. Just hope that storm don't head out and reorganize cause problems up north ...
I think Zool already sold his beach house after the rebuild from Sandy ..
 

gm280

Supreme Mariner
Joined
Jun 26, 2011
Messages
14,605
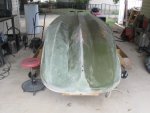
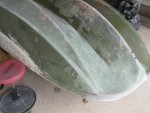
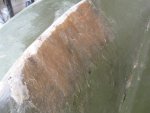
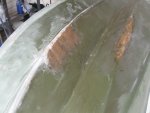
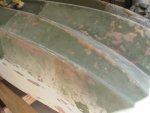
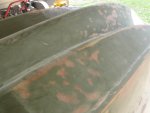
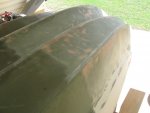
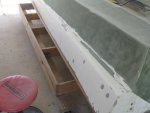
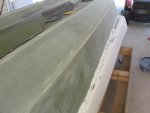
Okay a little progress. Since the Hermine storm came and went and basically cooled of the heat and humidity quite a bit, I was ale to start the hull prep. Lessons learn thus far. Sanding the hull in prep for painting isn't much different then grinding the inside of the hull for polyestering. And there are tons of flaws and drips from the original manufacture as well to clean up. It seem they used green poly to build the hull. Because as I sand, there seems to be a clear coat being removed but the greenish coat goes all the way to actual fiberglass material. So I am removing only the top clearish looking coat. But that is going slow and with the speed I am removing and feathering everything, I think it will take at least two full days or longer to get the first sanding effort done. I am use a DeWalt orbital sander with 60 grit paper and an angle grinder with either 36 grit or 40 grit flapper disk for really tough areas. I can see this is really going to be interesting.
001.JPG
Here is a few shots. You can see how far I got but the areas finish are basically smooth now and ready for teh next sanding with probably 180 or 220 grit in prep for the first primer shoot.
002.JPG
Just a different angle.


003.JPG
Anther lesson learned, if you use a heat gun to remove decals, when you scrap them off, they are HOT. :flame: DUH!

004.JPG
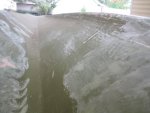
I added this shot in hopes you can see the many runs, flaws and what there is to straighten out. There are runs everywhere. Obviously this wasn't a very expensive boat initially and I know why.
005.JPG
This is where the previous owner trid a repair. If you remember, I had some large gouges inside to repair. This is that outside sloppy efforts I will fix now.
006.JPG
And you can see the other iffy repair the PO tried. It will all look new when I am finished. But it is going slow. However, I am now getting excited once again about this project.

Until next time, you all have a magnificent day... :thumb:
 

sphelps

Supreme Mariner
Joined
Nov 16, 2011
Messages
11,468
Gm knowing your painting and prep skill she will be way to pretty to to get all fishy ! ;)
 

gm280

Supreme Mariner
Joined
Jun 26, 2011
Messages
14,605
Gm knowing your painting and prep skill she will be way to pretty to to get all fishy ! ;)

Ha Sam, the only reason I am trying to make this "pretty" is because i was told the fishy's will come to the boat to get in for a ride. If that isn't true somebody better let me know now. :confused:
 

nurseman

Lieutenant Junior Grade
Joined
Jun 2, 2013
Messages
1,045
Ummm.....yeaaaa.....Save your self some work and don't worry about pretty. I spent WAY too much time and effort on the hull of mine, and I have already had to touch it up! Yep, hasn't even been in the water and I had the hull scratched in 3 or 4 places :facepalm:. So I filled them in, feathered them out, and rolled a new coat of paint on it, didn't even bother tipping or roll n' roll. And honestly, I can't see the difference unless I put my face right next to the transom. It's hard to fight the "get her pretty" bug, but in reality, if this is your fish'n rig...Just my $0.02 worth.

(I am still in favor of pretty topsides though) :D
 

kcassells

Fleet Admiral
Joined
Oct 16, 2012
Messages
8,737
Just make it as purty as you want. But like NM says... not too time consuming. So much to do so little time! :lol:
 

gm280

Supreme Mariner
Joined
Jun 26, 2011
Messages
14,605
Okay a progress post. Yea I'm pretty surprised too. :facepalm:

001 (2).JPG
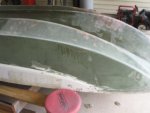
I go half the bow section sanded with 60 grit. I know you are looking at it and saying "that looks like crap". And well, I have to agree with you, but it is smooth crap now. Seems they make this hull with poly and then sprayed it after it was removed from the mold with the white and green. You can kind of see a mixture of both on the side area. Which brings me to a good question. Do I sand all the green and white off? I ask because when I get to an area where I do sand it all off, it is fiberglass material and nothing else. It actually is very hard to sand it off even with power DA sander using 60 grit. So I'm thinking (I know I really should do that with such limited equipment) That sanding off the semi-gloss top coat to the greenish/whitish lower coating would be a good substrate to start the primer/filler coats. What do you all think?

002 (2).JPG
I go about 2/3 the way back of the hull sanded now.
003 (2).JPG
You can see where I stopped....I hope. :eek:
004 (2).JPG
The center area is where the keel was badly damaged and either PO or someone tried to patch it. I grinded down that area so I can make it blend smooth into the hull now. The inside was well repaired and I don't have any issue with it now.
005 (2).JPG

005 (2).JPG
This is the other side of that damaged keel area that I also grinded smooth. This side of the hull hasn't been sanded yet.
006 (2).JPG
And here is a shot of the starboard damage was well. But it also was repaired and ready for the 60 grit sanding. I think one I get pass these areas, it will go a lot faster...I hope. :confused:

Util next time, yo all have a great day.
 

Woodonglass

Supreme Mariner
Joined
Dec 29, 2009
Messages
25,928
I'd only sand the stuff that looks bad and feather and blend the rest. If it's stayed adhered to the boat this long...It's NOT coming off under normal conditions. I also agree with NM. But...everyone I know that's done their hull, including me, takes TOO much effort in getting it perfect and then the first time out or before, it gets "Scarred". After the first week I quit caring and just wanted a dependable boat. I STILL don't have that but...I'm working on it. Have I ever told you guys how much I HATE Mek-A-Nek work!!!! I wish i knew someone needing some Glass work done that was a Good Mechanic. I'd propose a BARTER real quick.

Keep up the good work GM!!!
 

sphelps

Supreme Mariner
Joined
Nov 16, 2011
Messages
11,468
I'm with woody on the sanding ... Make it smooth fill in the low spots and let er rip !
No need in taking off all the gell .. Unless it's badly crazed or spider cracked ..
 

gm280

Supreme Mariner
Joined
Jun 26, 2011
Messages
14,605
Amazing, another progress report. I know, I am totally amazed as well. Three days in a row now.

Well we still are getting into the mid 90's, but the humidity is so low, I can hang with it a lot longer.

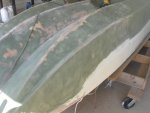
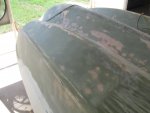
I sanded more of the hull today. And while it doesn't look like much again, I think I have the worst of the sanding/grinding efforts done. The rest of the hull will be a little quicker being how there are no sloppy repairs done from the PO. Seem whoever did the repairs, if that is what you want to call them, had the mentality that more is better syndrome. So they slopped on numerous coats of fiberglass and resin. And built it up quite high. And that was a lot of the effort to grind it down and fair it all in smooth. Even when I thought I could stop smoothing, I could see a lip on the edge of the repair. And a fingernail would lift up pieces of unattached glass. So more grinding and sanding until I couldn't see anymore delamination. And that took a long time to clean it all up. But the rest of the hull doesn't have any of those issues.
Sanding (2).JPG
This is the second side of the hull finished. You can see the remaining repair on the secondary keel. It will need some filler material yet.
Sanding (3).JPG
A different angle to show how the bow looks now after sanding. It doesn't look very nice, but it is smooth and ready for the first coat of primer.

Sanding (4).JPG
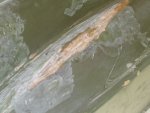
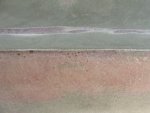
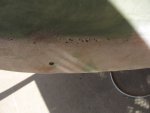
I notice as I do remove the top coat of gel coat I am seeing a lot more pin hols
As I sand the top gel coat off, I am seeing more pin holes in the resin. Not a huge problem because I can fill them with a mixture of poly and other material.
Sanding (1).JPG
More pin holes
Sanding (6).JPG
And yet more pin holes. I guess it wasn't a very quality effort in the building of this hull.

Until next time everybody have a nice safe day.
 

Attachments

  • Sanding (4).JPG
    Sanding (4).JPG
    89.6 KB · Views: 0

Woodonglass

Supreme Mariner
Joined
Dec 29, 2009
Messages
25,928
Thats indicative of a blown in glass hull as compared to a hand laid one. Air gets trapped and creates these voids.
 

gm280

Supreme Mariner
Joined
Jun 26, 2011
Messages
14,605
Thats indicative of a blown in glass hull as compared to a hand laid one. Air gets trapped and creates these voids.

Yes WOG, I am certain this wasn't one of those carefully hand laid hulls by any stretch of the imagination. A lot of smaller boat builders used the old chopper gun building methods. Quick and easy to turn them out for profit. But they didn't have the serious structural support like quality built hand laid hulls. But it is what it is and I can spot fill those pin holes and make them disappear. :eek:
 

gm280

Supreme Mariner
Joined
Jun 26, 2011
Messages
14,605
Yet another update. Who would have thought? :noidea:

I made a lot more progress today on the hull sanding and I think that is because I am now sanding the part of the hull that wasn't damaged and reworked by whoever. So that sanding is going a lot faster. I am basically using a DeWalt DW421 DA sander. And that little sander is amazing. It has been with me for years and still going strong. And I can tell you, I don't baby it when sanding, and it takes it all and keeps going. :thumb: Sanding More (4).JPG

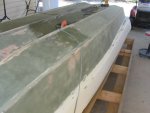
Not hard to see where I sanded and where I haven't. The entire starboard side is finished (remember it is upside down). There are places I will fill with poly mixture, but I though I would wait until I get the entire hull finished with the first sanding effort. Then I fill areas and finesse the next stage sanding before the sand-able primer. Sanding More (1).JPG

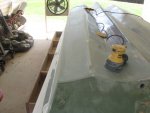
You can see that little DeWalt DA sander. It doesn't look like much, but it sure works. I would use my IR DA sander, but my compressor can't keep up with the demand. So pneumatics are out. I would get about 20 to 45 seconds of good sanding and then wait for at least 2 minutes for the compressor to cycle. So the little electric saves the day. Not as fast, but it keeps going. Sanding More (2).JPG

I'm figuring another day or two and it will all be ready for filler. Of course tomorrow is grass cutting morning. :eek: Sanding More (3).JPG

And the last shot for this update. I think this will come out nice.

Until next time, you all have a nice day. And remember fall IS on its way. :high5:
 

Woodonglass

Supreme Mariner
Joined
Dec 29, 2009
Messages
25,928
Looking forward to seeing your repair work!!! When you're done sanding, I recommend a good washdown with TSP!!
 

sphelps

Supreme Mariner
Joined
Nov 16, 2011
Messages
11,468
Sanding looking good ! It will be nice to have a little cooler weather thats for sure ..
 

gm280

Supreme Mariner
Joined
Jun 26, 2011
Messages
14,605
Well not an update today. But I did work all the same. :facepalm: I had one of those domino days. You know, where one thing leads to another. It all started of innocently enough with getting the edger ready to go. I had to change the blade, of course. :rolleyes: And after that it edged very well. Next the lawn mowing. I usually mow the yard each week on Thursday. The mower wouldn't crank because some brainiac (won't mention any names here) left the ignition on and the battery was toast and would not recharge again. So after jumping off the battery, I had the mower running. Time to get mowing now! :cool:

Well I was mowing and I noticed the water meter reader checking the neighborhood water meters. And as I was just about to finish up the mowing, I ran over the meter cover. Except this time the cover wasn't properly installed back on the water meter. And as luck would have it, I hit the cast iron cover. Oh yes that sound was awesome and one of the blades bent. That was the end of mowing and I had only three or four passes remaining to finish too. :blue: SOOOO, I had to remove the deck :eek: And of course the blade had to be reworked. So I thought while I was at it, I would completely service the entire mower. New air filter with cover, new oil filter and oil, and even a new battery since the old one had to be jumped off to crank. :facepalm:

Well I previously bought all the parts, and as usual, the oil filter was not the correct one. I had to drive around and get the correct one. The auto-parts store crossed referenced the oil filter and I guess they didn't get the right cross reference. So one thing lead to another and it took most of the day to get everything correct and back together again. I finally did finish mowing after many hours of driving around and working to get everything back to normal. Yes a domino day.
So no boat sanding today. But the lawn is nice until next week :sorry:

 

Patfromny

Lieutenant Junior Grade
Joined
Dec 2, 2012
Messages
1,197
Sorry to hear about your day GM. We've all been there. You are buzzing right along though. Can't wait to see the finished product. Been following this one for a bit. Ever since you recommended I read your engine rebuild thread actually. Keep on keeping on. I'd find the water meter guys house and throw your loose cover on his lawn. One good turn deserves another. Just kidding. I'd call and get him fired. :eyebrows:
 
Top