gm280
Supreme Mariner
- Joined
- Jun 26, 2011
- Messages
- 14,605
Okay a little update with some pictures as well. I finished CSM and poly'ing the rod and storage box covers and even the insides with the liquid pigment and CSM to finish with the water proofing. So here are a few pictures;
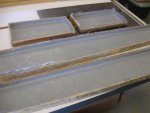
There are now CSM and poly'ed and need their hair cuts yet. But that is it for these covers until I finish them off with carpet.
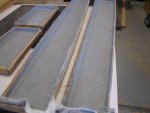
Another view.
I even took a few shots of the home-made live well. While it is waterproofed with the CSM and poly, both inside and out, I want to apply one more coat of colored poly on the inside to make certain everything is sealed perfectly. All the holes for the LED lights and the bottom drain and even the over flow drain at the top edge along with the spray bar are drilled and waiting for the final coating. Then I will cut the CSM and install the parts and fittings.
I didn't install the live well in/on the boat yet because I knew it would only add to the flipping weight effort and therefore I chose to wait 'til the painting was finished. I used thin plywood with sheet foam in between to help keep the water cooler and the teeny tiny miniature fish (singular :facepalm: ) that I may accidently catch, live longer. We'll see.
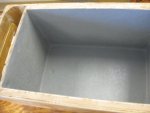
You can see the little dimples in the bottom and side for the inlet/outlet fixtures.
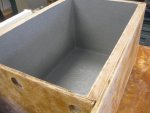
And the cutouts for the I/Os from the service side.
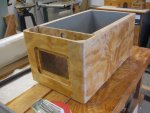
A general look at the live well. I have the top lip section ready and even the cover wood. But I need to find the vinyl that matches the seats and make the cushioned cover for it yet. You can even see the recessed area for the passenger's plate to allow a USB charger port or even a cigarette lighter type switched outlet for whatever else we may need when out on the water. The reason for the two end sides is to allow me access to the plumbing to the stray bar and overflow fittings and LED lights if need be.
I did order one more gallon of poly resin and 4 more ozs of gray liquid pigment so if there is anything else I may need to finish, I have the material on hand.
Until next time, you all have a magnificent day... :thumb:

There are now CSM and poly'ed and need their hair cuts yet. But that is it for these covers until I finish them off with carpet.

Another view.
I even took a few shots of the home-made live well. While it is waterproofed with the CSM and poly, both inside and out, I want to apply one more coat of colored poly on the inside to make certain everything is sealed perfectly. All the holes for the LED lights and the bottom drain and even the over flow drain at the top edge along with the spray bar are drilled and waiting for the final coating. Then I will cut the CSM and install the parts and fittings.
I didn't install the live well in/on the boat yet because I knew it would only add to the flipping weight effort and therefore I chose to wait 'til the painting was finished. I used thin plywood with sheet foam in between to help keep the water cooler and the teeny tiny miniature fish (singular :facepalm: ) that I may accidently catch, live longer. We'll see.

You can see the little dimples in the bottom and side for the inlet/outlet fixtures.

And the cutouts for the I/Os from the service side.

A general look at the live well. I have the top lip section ready and even the cover wood. But I need to find the vinyl that matches the seats and make the cushioned cover for it yet. You can even see the recessed area for the passenger's plate to allow a USB charger port or even a cigarette lighter type switched outlet for whatever else we may need when out on the water. The reason for the two end sides is to allow me access to the plumbing to the stray bar and overflow fittings and LED lights if need be.
I did order one more gallon of poly resin and 4 more ozs of gray liquid pigment so if there is anything else I may need to finish, I have the material on hand.
Until next time, you all have a magnificent day... :thumb:


