1976 Tom Boy Boat, 1976 40 HP Johnson Outboard and who knows what Trailer

bonz_d

Vice Admiral
Joined
Apr 22, 2008
Messages
5,276
gm that looks like it will work. Just be cautious and don't hurt yourself. I'd still think 2 or 3 more bodies would be helpful in the flip.
 

gm280

Supreme Mariner
Joined
Jun 26, 2011
Messages
14,605
gm that looks like it will work. Just be cautious and don't hurt yourself. I'd still think 2 or 3 more bodies would be helpful in the flip.

Yea bonz, I will have at least two others when I flip it. My two sons are huge and have the capability to probable flip it with out any come-along or engine hoist. Both are 6' 3" and 6' 5" and have their friends offering to help as well. But I think we will use the hoist and come-along to do it carefully. Nobody getting hurt IS the primary goal.
 

sphelps

Supreme Mariner
Joined
Nov 16, 2011
Messages
11,468
Some pics or vids are required :joyous:.... Flips are always a bit nerve wracking ... No matter the size of the boat ...
Good luck and be careful !
 

TruckDrivingFool

Lieutenant Commander
Joined
Jul 30, 2007
Messages
1,818
All that fancyness and it'll be like flipping hotcakes. :D

Glad you got the muscle lined up just in case.
 

gm280

Supreme Mariner
Joined
Jun 26, 2011
Messages
14,605
I really have to ask, because this is my first refurbished boat project. Do any of you worry about how heavy the boat gets when rebuilding it? I realize I tried to use the lighter side of the wood construction materials, but I've already used four 5-gallon buckets of 435 polyester resin. and with the wood, resin and fiberglass material it self, this boat got really really heavy. If fact a lot heavier then I would have ever expected. Did I goof with the rebuild? :noidea:

I am starting to worry the 40HP Johnson rebuilt engine will only plow this hull now, again I honestly don't know. :help:
 

nurseman

Lieutenant Junior Grade
Joined
Jun 2, 2013
Messages
1,045
I have had the same concerns as well. What I don't know is if the rotted, soaked hull was heavier or lighter than the new "beefier" hull. Time will tell.

One thing to watch for when you do flip the hull is that with the anchor point on the transom being down low, she will be really "tippy". I'm sure you have realized this, given the way you think things through, but I thought I would mention it. You will have to keep her from flipping on her own, and when you start to flip, she will flip really fast...(ask me how I know that). Anyway, I like your set-up. That looks like it will work slick. Good luck with the flip!
 

gm280

Supreme Mariner
Joined
Jun 26, 2011
Messages
14,605
I have had the same concerns as well. What I don't know is if the rotted, soaked hull was heavier or lighter than the new "beefier" hull. Time will tell.

One thing to watch for when you do flip the hull is that with the anchor point on the transom being down low, she will be really "tippy". I'm sure you have realized this, given the way you think things through, but I thought I would mention it. You will have to keep her from flipping on her own, and when you start to flip, she will flip really fast...(ask me how I know that). Anyway, I like your set-up. That looks like it will work slick. Good luck with the flip!

nurseman, yea, I do realize the physics concerning both the front and transom pivot points. But I certainly do appreciate you reminding me as well. In fact if anybody sees something like that, do tell. While I try to plan things out ahead of time, any suggestions and opinions are always welcome in any of my posts.

I know the transom pivot point, being so low to the center line of the hull, IS going to want to flip over trying to rebalance on the lower center of gravity when lifted up free from the boat cradle. But the bow pivot point will help to keep that at bay with a person, or three, easing the boat roll over. I actually thought about making a metal bracket to bring the transom pivot point up higher on the transom to off-set that above center of gravity as it presently sits. But I decided it would then make the actual flip that much harder to turn over if I didn't get it spot on.

So in a way the lower pivot on the transom can be a helpful idea IF we turn the hull purposely, instead of it flipping on its own. IDK. Thought is that with the bow pivot forcing the front to balance below the pivot point, basically as it presently sits, and the transom pivot point wanting to flip to rebalance the hull, I am hoping we can utilize both to our advantage. I do know how hard it is to flip engines on engine stands. And some times that gets real interesting as well.

As it presently sits, the actual center of balance line should be a diagonal line from the bow pivot to the transom pivot. And I can't tell where the heavier section of that line is. So if it is pretty much equal from front to rear, and I honestly don't know that, it will be easy to flip. However, if either the bow or the transom is way more heavier then the other, it will take some work to control it. So we will see... :facepalm:
 

gm280

Supreme Mariner
Joined
Jun 26, 2011
Messages
14,605
I sure wish somebody would turn off the oven in our area so I could possibly do more then an hour or two work outside in the morning. I think we have registered over 100 degrees for the last three weeks on our screened in back porch that is in the shade. And since I sweat just thinking about work, a few hours doing yard work or other things like that with extremely high humidity and I am soaked head to toe, and that is the end for the day. We either need some good rain and a cool front to move in for a while or something like that. Until seasonal temperatures change, The boat sits waiting for flipping to occur. :eek: :faint2:
 

Tnstratofam

Commander
Joined
Aug 18, 2013
Messages
2,679
The heat keeps me busy as peoples A/C systems tend to overwork then break which is good for my Heating and Air company, but it alao means like most people very little outside work gets done at home due to the heat and humidity sucking the life out of me.

However my shop has a good A/C system ( Perks of owning your own A/C bussiness ) so I am able to get some projects done. I feel for ya gm I know Ga is a whole lot hotter than the mountains here in East Tn. It only got up to 90 today and the humidity stayed around 70% so it was tolerable.
 

gm280

Supreme Mariner
Joined
Jun 26, 2011
Messages
14,605
The heat keeps me busy as peoples A/C systems tend to overwork then break which is good for my Heating and Air company, but it alao means like most people very little outside work gets done at home due to the heat and humidity sucking the life out of me.

However my shop has a good A/C system ( Perks of owning your own A/C bussiness ) so I am able to get some projects done. I feel for ya gm I know Ga is a whole lot hotter than the mountains here in East Tn. It only got up to 90 today and the humidity stayed around 70% so it was tolerable.

Yea tnstratofam, I grew up in the northeastern section of Pennsylvania in the coal mining region and moved here to Georgia when I was 13. While I like the summers better in PA, because of lower heat and humidity, I like the winters better in Georgia. So you have to take the good with the bad where ever you live I guess. I do like the mountains better then the beach myself.

Try to stay out of the heat even there in TN. It can creep up on you very quickly. I know that for a fact from last year. Heat exhaust did get me one day. But luckily our neighbor is a paramedic and managed to get me back to normal without an ER run. :thumb:
 

Tnstratofam

Commander
Joined
Aug 18, 2013
Messages
2,679
Yep I learned when I was in the middle east during the Gulf War to Hydrate. Even when you drink plenty of water heat exhaustion will sneak up on you.
 

sphelps

Supreme Mariner
Joined
Nov 16, 2011
Messages
11,468
Well a little further south it sure ain.t getting any cooler .. Funny tn mentioned the heat making ac's going out .. Walked into my house a few days ago and new something was up with mine ...
Took a while and a call to our ac guy to figure it out ... Days before I had my condensate line come apart where the idiot installers glued a joint with only about an 1/8 of the pipe pushed into the fitting .. Of coarse it flooded the place .. So as a quick fix I sanded some of the glue down and re glued it back together enough to hold till I can take it apart and fix it right ... ... Long story short .. Where I had glued it together it formed a thin layer of glue across the pipe opening ..:facepalm:. That kept it from draining properly and the safety float switch on the condensate line would shut down the unit .. Took a while to figure out but at least it was an easy fix ...
 

gm280

Supreme Mariner
Joined
Jun 26, 2011
Messages
14,605
Well a little further south it sure ain.t getting any cooler .. Funny tn mentioned the heat making ac's going out .. Walked into my house a few days ago and new something was up with mine ...
Took a while and a call to our ac guy to figure it out ... Days before I had my condensate line come apart where the idiot installers glued a joint with only about an 1/8 of the pipe pushed into the fitting .. Of coarse it flooded the place .. So as a quick fix I sanded some of the glue down and re glued it back together enough to hold till I can take it apart and fix it right ... ... Long story short .. Where I had glued it together it formed a thin layer of glue across the pipe opening ..:facepalm:. That kept it from draining properly and the safety float switch on the condensate line would shut down the unit .. Took a while to figure out but at least it was an easy fix ...

Oh wow Sam. Seems some times we cause our own problems and can't think what is going on. But glad you fixed it after all. Seems as I get older :facepalm: the heat seems to effect me more. :noidea: While my mind thinks I can still do anything, the body puts up opposition. Guess which one wins all the time. :eek:
 

gm280

Supreme Mariner
Joined
Jun 26, 2011
Messages
14,605
Okay I forced myself to poly a few last storage and rod box covers this afternoon. Yes even in 99 degrees, I figured I could at least do something towards the boat. And did I tell you how much a HATE doing rounded over corners with CSM and poly? :violin:

But I did get them covered. However, I had one poly batch go jelly on me before it was used up, and two others that just did make the cover before kicking. I know you use less MEKP with the heat, but even at that, it was a daunting task. And since the covers were all rounded over with a router, you would think the CSM would lay down easy. No it didn't. I had to fight forever to get the corners to lay down and stay. Glad that is finished. So a few inside CSM and poly efforts remains with some gray liquid pigment and most everything is covered then.

I need some decent cooler weather now! :eek: :flame:
 

Woodonglass

Supreme Mariner
Joined
Dec 29, 2009
Messages
25,928
Are you tuggin, and pullin, and scrunchin' the CSM before attempting to overlay dem dere corners??? It makes it Soooo much easier if you "Loosen" up the fibers by doing this. Or...tear it into multiple pieces and overlap the pieces as you "DAB" on the resin. ;)
 

gm280

Supreme Mariner
Joined
Jun 26, 2011
Messages
14,605
Are you tuggin, and pullin, and scrunchin' the CSM before attempting to overlay dem dere corners??? It makes it Soooo much easier if you "Loosen" up the fibers by doing this. Or...tear it into multiple pieces and overlap the pieces as you "DAB" on the resin. ;)

Yea Wood, I did cut the "wet" CSM a little to help get it to lay down. But being left-handed and using a right handed scissors make those efforts just that more interesting. I can take the best scissors in the world and try cutting with it in my left hand and it won't cut. My wife can take the same scissors and cut without any troubles. And After examining why, I see left handers actually apply just enough force on the two cutting segments to open them up enough for the sharing action to stop. So I need to buy a few pairs of left-handed scissors it seems.

However, they are done now and I will "force" myself again today to do the under sides. And that should be the end of the polyestering with the exception of some very minor things that will need to be done after the paint job is finished. Looks like I may get away without buying any more 435 resin. YAY! :whoo::cheer2:

I'll snap up a few pictures today for folks to at least see something. Words are not as fun as pictures.

Oh, I have to tell you all about this as well. Yesterday around 5PM, we here in middle Georgia got 1.20" of RAIN! We haven't had any rain in easily a month. So that was amazing to see the water coming out of the sky instead of our of the ground via sprinklers.

Until next time, you all have a wonderful day and stay cool and out of the heat. :thumb:
 

gm280

Supreme Mariner
Joined
Jun 26, 2011
Messages
14,605
Here is an update for those rod and storage box covers. Again did I tell you how I hate doing corners. :deadhorse: IMG_0001 (2).JPG
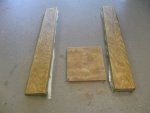

First picture here is the rod box covers and the front storage lid that I covered yesterday. You can see the hair hanging off then yet. IMG_0003 (2).JPG
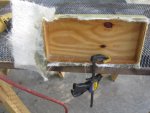
And here is one of the rear storage covers waiting for its hair cut. I usually clamp them onto my outside work table and then use an angle grinder with a 36 grit flapper disk to remove the over hanging fiberglass. IMG_0004 (2).JPG
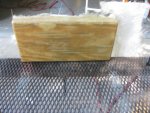
Another shot from the other side before the hair cut. IMG_0005 (2).JPG
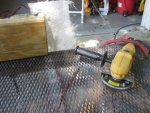
An a shot of the angle grinder. This angle grinder is the basic cheapest DeWalt angle grinder you can buy. But thus far it has done all the grinding work on this entire boat, trailer and engine project. I actually bought two others that are the better models DeWalt makes, but I haven't used them because this one is still going strong. IMG_0006 (2).JPG
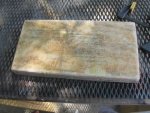
And here is that same cover after its hair cut. As you can see I usually give the entire fiberglass work a nice going over to remove and prickly points and make it relatively smooth. IMG_0007 (2).JPG
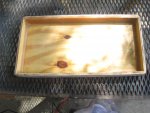
And this is the inside the will get CSM and colored Polyester today....I hope. Al the inside has been rounded over using PB and a trimmed down and shaped auto body filler spatula. IMG_0008 (2).JPG
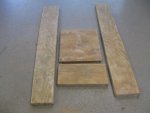
And here are the box covers with their hair cuts and smoothed out. Once the insides are CSM and poly colored, they are finished except with the hinges installed.

So hopefully I can work with the heat today and get the insides finished.

You all have a great day. :thumb:
 

sphelps

Supreme Mariner
Joined
Nov 16, 2011
Messages
11,468
Glad ya finally got some rain ! We have been getting a good bit down here ... Hail storm even chipped the paint on the Admirals Caddy ! :mmph:
Glass work looks great !
..Left handed scissors ...:lol:
 

gm280

Supreme Mariner
Joined
Jun 26, 2011
Messages
14,605
Thanks Sam for the compliment on the glass works. Not as impressive in person. But I think it will shape up nicely when I get them carpeted.

Today I managed to finish up the gray colored polyester coat and CSM on the inside of the rod box covers and that is the end of such water-proofing efforts now. However, I have maybe a quart of poly resin remaining and ordered another gallon with some more liquid pigment. I have a few areas I want to coat over and still have to make the sanding filler for the bottom of the hull to prep for primer and paint. So another gallon. :eek: This boat will probably not move very fast, but it will be solid. I just hope it doesn't sink from the poly weight. :facepalm:

Looking back I probably could have gone with a little thinner plywood everywhere and still maintained a good solid build. But being my first total refurbish, okay rebuild, I have learned tons of things that I would do differently if doing another boat project. And that could happen as well too. I am always on the look out for a nice medium-powered Bass Type hull to refurbish. But not until I finish the inside of the house like I promised the wifey.

You all have a great day... :thumb:
 
Top