1976 Starcraft Chieftain 18' OB - restomod

BWR1953

Admiral
Joined
Jan 23, 2009
Messages
6,195
More progress today. Much of it a learning experience for both the boy and myself. And some lessons were painful! :LOL:

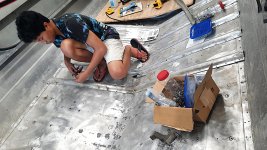
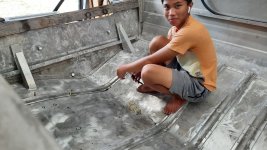
We did some more cleaning and then moved on to rib reinstallation and rivet stuff. We both had to learn about installing solid rivets, a first for us. 🤓

I showed the boy how clecos work. He was impressed... a little. 🙃
1.jpg

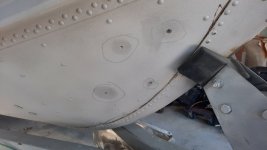
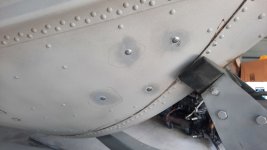
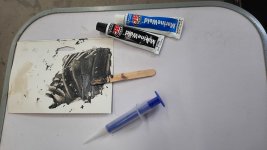
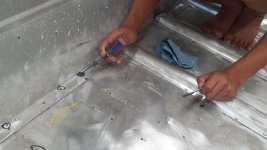
We used the JB MarineWeld to fill some of the rivet holes. We'll decide later if we want to drill them out and reuse them, or drill new holes.
3.jpg

We started out using the old school method of smearing the JB on, but then moved up to the syringe, which was far more effective.
2.jpg

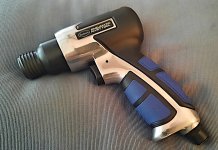
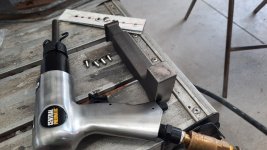
Then we moved on to riveting with the air hammer. My first result on some scrap aluminum was a large blood blister on my left index finger. And the boy got poked on the back of his hand. 😬
4.jpg

But we finally figured it out. Each of us got to install rivets correctly. We're ready to drill holes in the boat. :cool:
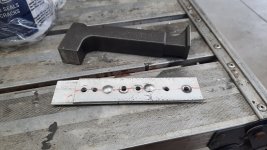
5.jpg

6.jpg
 

BWR1953

Admiral
Joined
Jan 23, 2009
Messages
6,195
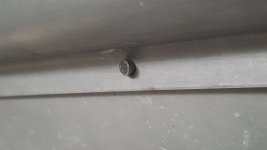
I got out there early this morning and started drilling out the marked rivets with a 3/16" DeWalt bit. 1.jpg

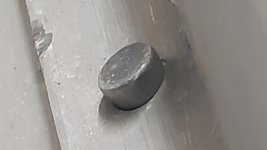
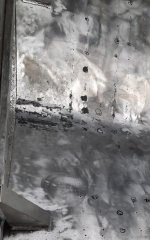
And as happens many times, found problems. Like extra large rivet holes. Sigh. :rolleyes:
2.jpg

And this one got a little lop-sided during the drilling process. 😬
3.jpg

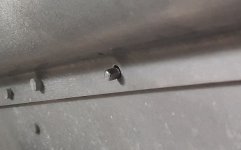
But, I test bucked a couple of the rivets in oversized holes to see if the rivets would fill in the gaps. Nope.
4.jpg


Yeahhh... no joy there. I've ordered some 1/4" rivets and have to wait for those. I did think about filling the holes with MarineWeld, but decided not to.
5.jpg


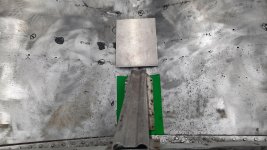
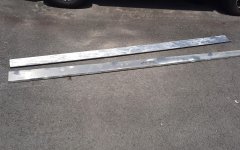
So, we moved to the stern and cut a pattern for the patch which will be installed under the boat. Then we cut the 0.080 sheet to match the pattern size. I'll take the sheet to my local metal shop and have them roll it to match the curve of the bottom of the boat.
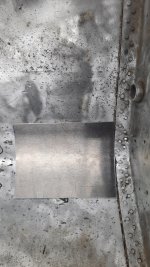
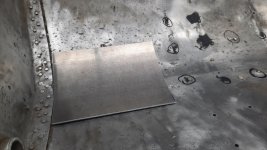
6.jpg
 

BWR1953

Admiral
Joined
Jan 23, 2009
Messages
6,195
No work done the last couple of days. I was out of town yesterday, we had an appliance repair guy here this morning and then we had to run errands this afternoon.

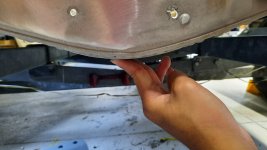
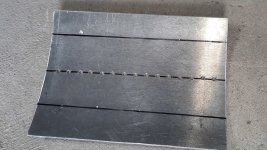
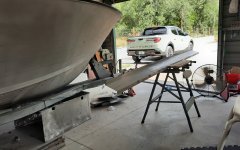
But! One of those errands was to have the 0.080" sheet patch rolled to shape. And I'm pleased to say that it fits perfectly under the boat! (y)

2.jpg

3.jpg

1.jpg
 

BWR1953

Admiral
Joined
Jan 23, 2009
Messages
6,195
Finally! Some progress today! :cool:

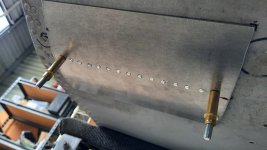
Our primary goal today was to get the stern patch ready for installation. It took a long time to figure out how to ensure that the holes for the patch were in the right place on the hull.

We ended up deciding to drill holes down the center of the patch as a start. There were no knee brace holes there, so it made it easier to line things up.

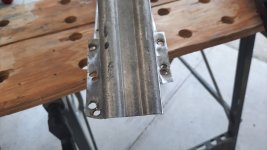
We marked the so-called "centerlines" of the knee brace holes on each side of the main centerline. They were a complete mess and will be redone.

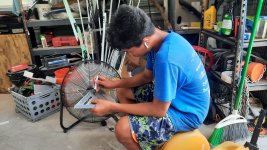
The boy marked off the patch centerline and the drill locations.
3.jpg

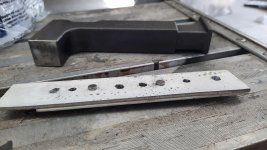
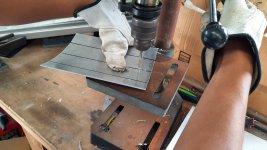
Then he drilled the rivet holes using a DeWalt 3/16" Pilot Point bit in our drill press.
4.jpg

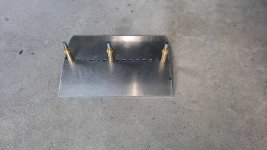
After the holes were drilled, I demonstrated how the clecos work.
5.jpg

You can see in this pic that the existing hole "centerlines" for the knee brace are off "a little."
6.jpg

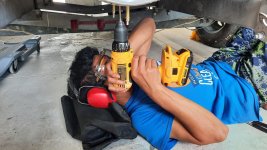
The boy drilled the first hole while I stabilized the patch. The he stuck a cleco in there to hold the front while I stabilized the rear. After those two holes were drilled, we used clecos to stabilize the patch while he drilled the rest of the holes. BTW - the boy loves his new DeWalt safety goggles. 🤓
8.jpg

10.jpg

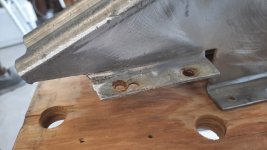
While the boy was working on the patch, I started cleaning up the center knee brace. And found a major problem! 😲
11.jpg

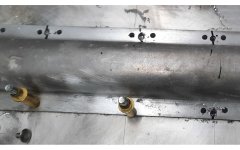
Not only are the holes a mess, but there's a chunk of the knee brace missing!
12.jpg

13.jpg

My neighbor bud says he can "probably" fix it for me. 🤞
14.jpg

After he completed drilling the holes in the stern patch, the boy finished cleaning up the corrosion spots and patched them using JB MarineWeld while I was messing with the knee brace.
16.jpg
 

Rasdiir

Petty Officer 2nd Class
Joined
Jul 18, 2011
Messages
167
The patch looks great!

I think a lot of knee braces are broken like that, it seems like most people just use a piece of 1/4" x 2x2 angle and bolt it to the knee brace as a replacement.
 

Alecapone

Seaman Apprentice
Joined
May 8, 2021
Messages
42
Nice ppe! Especially drilling upside down like that.
Does it count as working on the boat if i spend 2 hours looking through other peoples builds? It will probably save several hours and $$$ in the long run.
 

BWR1953

Admiral
Joined
Jan 23, 2009
Messages
6,195
The patch looks great!

I think a lot of knee braces are broken like that, it seems like most people just use a piece of 1/4" x 2x2 angle and bolt it to the knee brace as a replacement.
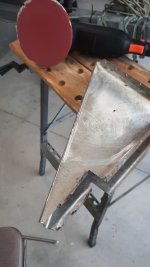
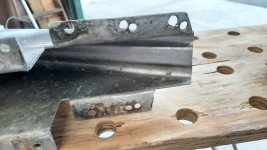
I dropped the knee brace off with a neighbor friend last evening. He's going to make repairs for me. :)
 

BWR1953

Admiral
Joined
Jan 23, 2009
Messages
6,195
Nice ppe! Especially drilling upside down like that.

Does it count as working on the boat if i spend 2 hours looking through other peoples builds? It will probably save several hours and $$$ in the long run.
That time sure better count towards production, otherwise I've wasted a LOT of time!! 🤪 :LOL:
 

BWR1953

Admiral
Joined
Jan 23, 2009
Messages
6,195
The boy and I got out there early this morning, before 0900, but didn't got a lot done. 😏

My young neighbor buddy had moved out west back in the winter and is back in town for a few days to get his house ready for sale.

So, we went out to lunch and then visited for most of the day. He's a great guy (as is his brother who is still around and helping me with the Chief) and it was great getting caught up with him. He's supposed to return in the Dec-Jan timeframe and we're all looking forward to getting together again.

I started cleaning the hull stringers this morning while the boy continued finding and sealing oddly shaped rivet holes and whatnot.

Not a lot of progress, but some. :cool:

1.jpg

2.jpg
 

BWR1953

Admiral
Joined
Jan 23, 2009
Messages
6,195
Only a bit more progress today, but we had to run errands this morning.

Got the stringers clean. Shiny!
1.jpg

Reminded me of this 1980s song. 🤪 :ROFLMAO:


Yesterday we received the 1/4" solid rivets in 3/8" and 7/16" length, so I decided to do a quick test in one hole. Worked perfectly! :cool:
2.jpg


Once we receive the repaired center knee brace, we'll start putting the Chief back together. Really looking forward to that! :)
 

Alecapone

Seaman Apprentice
Joined
May 8, 2021
Messages
42
Glad you got a positive result with the bigger rivets. Ill be sure to order some for any over sized holes. I found sometimes its quicker, easier, and cleaner, to just zip the head off with a grinder(and a light touch), then tap the rest out. Blinds drill out easy if its the right end. Other times it has a steel center that sends the drill bit head off center. Solids aren't as difficult.

I also put in time this am cleaning up the stringers and various other parts. I used a wet polisher with 400 grit diamond pad. Found 400 removes most everything, but doesn't take anything off the rivet heads. Anything -400 is to aggressive.
 

BWR1953

Admiral
Joined
Jan 23, 2009
Messages
6,195
Well, we're at a screeching halt right now.

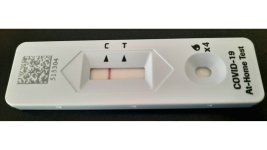
I tested Covid positive this morning. ☹️
 

Rasdiir

Petty Officer 2nd Class
Joined
Jul 18, 2011
Messages
167
Well, we're at a screeching halt right now.

I tested Covid positive this morning. ☹️
Sorry to hear that, hope the symptoms aren't too bad for you :( Boats can wait, health comes first. Hoping you get better soon!
 

BWR1953

Admiral
Joined
Jan 23, 2009
Messages
6,195
We're back to work!
bender back baby.png

I made it through covid okay. Took the test today and I'm all clear! Symptoms stopped a few days ago, but we didn't go back to work because it was the boy's birthday and we had yard work, etc. after that.
2.jpg

But we got out there this morning and the boy spent the bulk of his time cleaning the garage while I was messing around (practicing) with our new air solid rivet gun. 😙
1.jpg

But, we did get some actual work done today. We identified holes in the ribs which were oblong, oversized or otherwise misshapen and unusable. We've already done that on the hull itself.

Tomorrow we'll plug the bad rib holes with JB MarineWeld and start replacing bad rivets in the hull elsewhere. We also drilled new holes on either side of the oddly shaped holes and will install rivets in those holes after the JBMW is cured.
1.jpg

It's nice to finally be putting it back together! 🤓
 
Last edited:

classiccat

"Captain" + Starmada Splash Of The Year 2020
Joined
Dec 20, 2010
Messages
3,412
glad to see you're getting your grove back BWR!

I'm trying to visualize how you're using JBWELD to plug bad rivet holes below the waterline. You're completely filling oblong holes w/ JB... then when it cures, drill a new hole and set a solid rivet into it? I'm curious/skeptical how that holds up to the impact of a riveting hammer. Can you use 1/4 solids instead?
 

BWR1953

Admiral
Joined
Jan 23, 2009
Messages
6,195
glad to see you're getting your grove back BWR!

I'm trying to visualize how you're using JBWELD to plug bad rivet holes below the waterline. You're completely filling oblong holes w/ JB... then when it cures, drill a new hole and set a solid rivet into it? I'm curious/skeptical how that holds up to the impact of a riveting hammer. Can you use 1/4 solids instead?
Thanks! I'm high risk and on medications that drop my immune system down to zero, so my family and I were obviously concerned. But I'm still here! :cool:

To answer your questions, yes, some of the oblong holes will be enlarged to take 1/4" solids.

Others, like in this pic, have new holes on each side, which will have new 3/16" solids. I thought about it some more over the last couple of days and realized that it would be simpler and easier to just install the new 3/16" rivets, then fill the old oblong holes with the JB MarineWeld.

The "bad" holes in the hull (most of them) have already been filled with JBMW, which has a strength rating of 5020 PSI. After the new rivets are installed, we'll thoroughly inspect the JBMW to make sure all is good, then "top up" the holes with JBMW from the rib side.
1.jpg
 

BWR1953

Admiral
Joined
Jan 23, 2009
Messages
6,195
Yesterday we spent time practicing installing solids and testing out the new Eastwood rivet gun. In the pix below, we tried some, drilled them back out and practiced some more. So the pix don't reflect our total effort.

We were having difficulty getting the rivets to buck down properly.

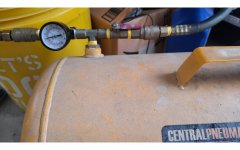
The new rivet gun works well, but is marked 40PSI max. And the instruction manual is contradictory, stating that 45PSI is the max operating pressure, then right below that says that max pressure is 90PSI. (Yes, I actually read the manual! 🤪 )

So, I called Eastwood and talked with a tech support rep. I learned that the rivet gun is a 3x but that they use it primarily with 1100F soft aluminum alloy, not the 2117-T4 hard alloy that we're using. The tougher material is obviously harder to buck.

And the tech advised that the material thickness as well as the tail length, affect bucking. Some of the materials that we were testing with were too thick. And we were also using 7/16" tails instead of the 3/8" tails that we should have been using.

So the tech helped us. Significantly, she said that we could test with higher pressures but not to exceed the 90PSI limit.

After speaking with the tech, we switched test materials to the 0.080" thick aluminum that I had on hand instead of the actual scrap that I was using. Hated to destroy it for testing, but it worked out well.

We also experimented with 45PSI and a bit higher. By using the correct material thickness and appropriate tail length, we started having success. More testing will follow and we'll increase pressure to help get things bucked down tightly.

As for the 1/4" solids, the Eastwood gun may not work as well, but there aren't a lot of places where we need those, so we'll probably use the air hammer for the 1/4" solids instead.

1.jpg
2.jpg
3.jpg
 

BWR1953

Admiral
Joined
Jan 23, 2009
Messages
6,195
We got back to work this morning, spending only a few hours out there before being run off by the heat.

We practiced riveting for awhile again, this time using 1/4" diameter rivets in addition to the usual 3/16" size. After testing, we decided to use the air hammer for the larger rivets. The Eastwood gun isn't really rated for those anyway.

After we finished our practice sessions, we actually started installing rivets! First time ever with solids. Woohoo! :D

We coated them with 3M 5200 before installing, hence the white ring around the rivets. I used a syringe to apply the sealant.

As it turned out, we flubbed a couple of installations and had to drill them back out and replace the new 1/4" rivets. Got it right the second time though! 🤓

So, we completed the 1/4" rivets and started to move on to the other marked rivets. But it was my first time seriously examining the rivets that the boy had marked for replacement and we ended up not having to do anything to a bunch of those. He'd marked rivets which "looked" like they were raised up from the hull, but once I got in there and checked them out, it turned out to be that the sandblasting had given a false look to them. They were all good. Saved us a lot of work and we didn't have to replace any of those.

Then we bucked another dozen or so and called it a day. I won't bore you with all the pix we took checking each and every rivet that we worked on. Several times with multiple pix. 😏

1.jpg
 

BWR1953

Admiral
Joined
Jan 23, 2009
Messages
6,195
It's been a while since we've worked on the Chief. Got sidetracked by other issues, including KF problems. 😕

But this morning we did some more solid riveting practice and followed a tip from @classicat to use less manual pressure on the bucktail side. It worked much better that way. (y)

We also experimented with rivet gun air pressure, eventually cranking it up to 70PSI, which dropped "hammer time" down from 15 seconds to just 6 seconds, a significant improvement!

I'm hoping we can get out there tomorrow morning and get some actual work done. 😏
 

BWR1953

Admiral
Joined
Jan 23, 2009
Messages
6,195
We managed to get out to the garage early this morning, like before 0730! 🤪 🌅
And we actually started installing rivets. Rib #3 has 74 rivet holes. We got 31 installed. We learned more as we went along too. Thanks again to @classiccat for the heads up about using 1/4" rivets for the oblong holes. We'll definitely do that wherever possible on the next 2 rib installations.

When we were first dealing with the oblong holes, I didn't have any 1/4" rivets and didn't realize that they could compensate so well for most of those bad holes. Lesson learned. (y)

In order to install the remaining rivets on rib #3, we have to lift the boat up and then relocate it on the trailer. The bunks and trailer frame are in the way and we can't get the rivet gun under the right spots. So, we'll work on ribs #1 and #2 first.
1.jpg
2.jpg

3.jpg

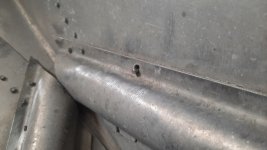
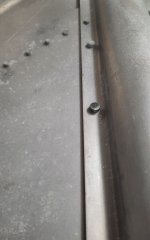
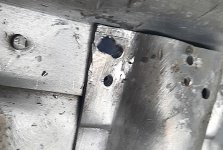
This one's the troublemaker. Other than welding or a big glob of JB Weld, is there another way to patch that hole?
4.jpg
 
Top