1976 Starcraft Chieftain 18' OB - restomod

BWR1953

Admiral
Joined
Jan 23, 2009
Messages
6,195
It got down to 85 degrees, so I went out to the garage and did a little work. Just came in.

Can anybody guess what I'm up to now? :unsure: :D

2.jpg

3.jpg

4.jpg
 

classiccat

"Captain" + Starmada Splash Of The Year 2020
Joined
Dec 20, 2010
Messages
3,412
That Chief has waited a looong time for a spot in the hanger!

Great job attacking that bottom hull skin corrosion ...Clecos will soon be your best friend!
 

Watermann

Starmada Splash of the Year 2014
Joined
Jan 12, 2013
Messages
13,794
Snooping for corrosion holes in the bottom is a good plan. I would only pull ribs that had a leak show up or a visible pinhole and normally that would be in the stern/bilge area where water collects and tends to stand.

John is right about taking out too many ribs at once, the hull could relax without the support and make it tough to get them back in their correct positions.

You see those knee braces, are they welded to the bottom? :unsure:

1-jpg.360785
 

BWR1953

Admiral
Joined
Jan 23, 2009
Messages
6,195
Snooping for corrosion holes in the bottom is a good plan. I would only pull ribs that had a leak show up or a visible pinhole and normally that would be in the stern/bilge area where water collects and tends to stand.

John is right about taking out too many ribs at once, the hull could relax without the support and make it tough to get them back in their correct positions.

You see those knee braces, are they welded to the bottom? :unsure:

1-jpg.360785
Yes, I had them installed last month.
 

BWR1953

Admiral
Joined
Jan 23, 2009
Messages
6,195
I've lost a week of progress and I was also gone most of yesterday and busy once I got home.

Felt like I'd lost the great mojo which had been really rolling at the beginning of the month. 😒

But this morning I got out to the garage and got about 90 minutes of work done before it started raining. Working out there in the rain is like being inside a snare drum with the snare wires loose. LOUD! 😖

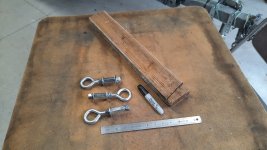
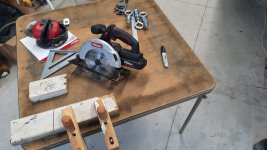
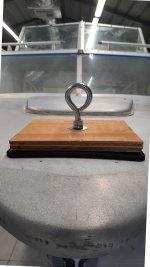
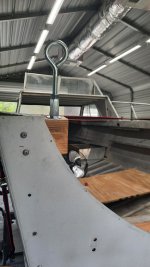
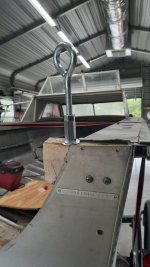
I started fabricating lift points so that the painter can easily get the underside done. He can spray the inside and topside while the boat is still on the trailer. Then he can lift the hull and get the sides and bottom done and let it dry while it's hanging around. 😎

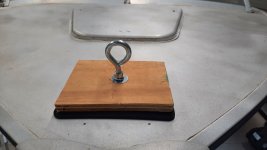
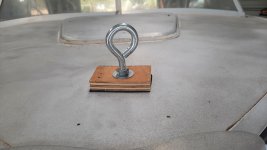
Half inch diameter eyebolt up front with a plywood plate on top of a rubber mouse pad to keep the hull from being marred. I'll probably resize it to match the size of the nav light shell. The front holes for that are visible in front of the plywood. That way no removal or additional painting will be necessary. It's not tightened down yet. I have to wait for the boy to get up under there. :sneaky:
2.jpg

3.jpg


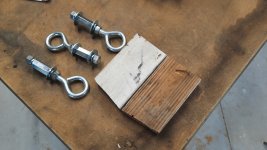
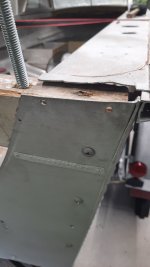
I'm using 1/2" threaded rod through sections of 2 x 4 for the stern points, connected to the eyebolts via couplers. Got the starboard side constructed but once again will need the boy to get his small hands to install the nut on the inside.
5.jpg

4.jpg

I'll cut the threaded rod to length next.
6.jpg
 

BWR1953

Admiral
Joined
Jan 23, 2009
Messages
6,195
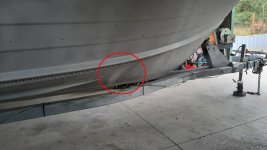
And while I was in the garage, I contacted a guy who might be able to help me with this dent in the hull. That's a worrisome item right there. 😬

1.jpg
 

Watermann

Starmada Splash of the Year 2014
Joined
Jan 12, 2013
Messages
13,794
And while I was in the garage, I contacted a guy who might be able to help me with this dent in the hull. That's a worrisome item right there. 😬

Oh boy those dents are a tough one to get right again. I'm no body and fender man but from experience I know that you can't beat large dents back into place from the inside when there's a crease. Marine Tex for bondo made mine less obvious and it sands fairly easy.
 

MNhunter1

Lieutenant Junior Grade
Joined
May 12, 2014
Messages
1,058
And while I was in the garage, I contacted a guy who might be able to help me with this dent in the hull. That's a worrisome item right there. 😬
I agree with Watermann - leave it or just soften the visibility with some MT or other filler. It'll never be noticed on the water.
 

classiccat

"Captain" + Starmada Splash Of The Year 2020
Joined
Dec 20, 2010
Messages
3,412
yeah i wouldn't stress; it's not going to have an effect on performance when especially when you're on plane.

i had 2 of those from the PO power-loading onto a clapped-out trailer... a few kisses with a deadblow hammer and they're barely noticeable.
 

BWR1953

Admiral
Joined
Jan 23, 2009
Messages
6,195
Ah. So I should treat the dent as cosmetic and not structural?

My concern was that I'd be 15 miles out in the Gulf and have a catastrophic failure while pounding waves running to shore from a storm. :oops:😬
 

BWR1953

Admiral
Joined
Jan 23, 2009
Messages
6,195
Should I re-buck or replace leaking rivets near the dent?
We're making progress out here again. 🙂
 

jbcurt00

Moderator
Staff member
Joined
Oct 25, 2011
Messages
25,047
Plan to dunk it before finishing putback?

I'd roebuck and GluvIt or Coat-It. Dunk & confirm watertight.

Remove & replace if it doesn't look to be rebuck-able, misshapen damaged etc.

Replace would be ideal.
 

BWR1953

Admiral
Joined
Jan 23, 2009
Messages
6,195
More progress today. (We also did a little something on the KF.)

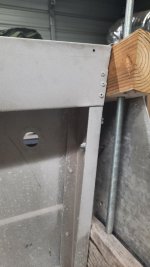
I finished up fabricating and installing the temporary lift points. I had to drill a couple more holes in the stern to solidly mount the 2x4s. It was weird to find that the upper factory bolts were drilled at different distances from the gunnel. The port side bolt was 1.25" lower. Odd.

1.jpg

2.jpg

3.jpg

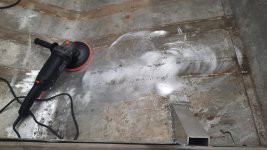
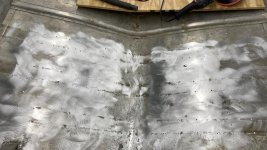
Remembering how very long it took us to clean the inside of the hull of the Kingfisher using wire wheels, etc., I decided to go a different route on the Chief. I bought a cheap power sander/polisher from Harbor Freight and we used 240 grit pads on the 7" wheel. Man, was that ever effective! We'll continue using the power tool as we move forward. In fact, the 240 grit might be a little too aggressive. I'm thinking about trying 400 or even a little higher.

I cleaned this area in literally 6-8 seconds! Whoo! 😳
4.jpg

So I turned the boy loose with the sander and he got this much done in just a couple minutes. Talk about a time saver!
5.jpg
 

Watermann

Starmada Splash of the Year 2014
Joined
Jan 12, 2013
Messages
13,794
Yeah amazing what a young man can do in short order, now my hands are numb for a day after I use a power tool for an extended period.

A wire wheel or cup brush will get the crud out of the recessed and pitted areas. Drill must have a side handle!
 

BWR1953

Admiral
Joined
Jan 23, 2009
Messages
6,195
Plan to dunk it before finishing putback?

I'd roebuck and GluvIt or Coat-It. Dunk & confirm watertight.

Remove & replace if it doesn't look to be rebuck-able, misshapen damaged etc.

Replace would be ideal.
Yes, we'll do another water test to confirm that it's watertight before a splash. In addition to patching, I'll use Coat-it to seal everything up. On the Kingfisher I used Gluvit and it ran everywhere! I hope the Coat-it isn't as messy. 🤪

Okay, I'll replace any rivets that are not in good shape. There's a long list of those. 😏

Yeah amazing what a young man can do in short order, now my hands are numb for a day after I use a power tool for an extended period.

A wire wheel or cup brush will get the crud out of the recessed and pitted areas. Drill must have a side handle!

I have a 1/2" drive hammer drill with side handle, but that might be a bit much! :LOL:
 

MNhunter1

Lieutenant Junior Grade
Joined
May 12, 2014
Messages
1,058
I'll use Coat-it to seal everything up. On the Kingfisher I used Gluvit and it ran everywhere! I hope the Coat-it isn't as messy. 🤪
I found the Coat-it to be a little thicker than the Gluvit, wasn't quite as runny and the darker color makes it much easier to see where it is going.

That being said, I picked up some Gluvit to syringe into my bow seam with the hopes it will flow into where the Coat-it didn't get to. I believe the Gluvit tends to flow a little better into all the small crevices.
 

BWR1953

Admiral
Joined
Jan 23, 2009
Messages
6,195
I found the Coat-it to be a little thicker than the Gluvit, wasn't quite as runny and the darker color makes it much easier to see where it is going.

That being said, I picked up some Gluvit to syringe into my bow seam with the hopes it will flow into where the Coat-it didn't get to. I believe the Gluvit tends to flow a little better into all the small crevices.
Hmmm... maybe I'll get a little of each. :unsure:
 

BWR1953

Admiral
Joined
Jan 23, 2009
Messages
6,195
While looking for rivet prices, I found this. Not sure what to make of it. 🤷‍♂️


Certain aluminum alloys react to each other and, therefore, must be thought of as dissimilar metals. The commonly used aluminum alloys may be divided into the two groups shown in figure 6-32.

Aluminum Alloy Interactions.jpg

Members within either group A or group B can be considered as similar to each other and will not react to others within the same group. A corroding action will take place, however, if any metal of group A comes in contact with a metal in group B in the presence of moisture.

Avoid the use of dissimilar metals whenever possible. Their incompatibility is a factor which was considered when the AN Standards were adopted. To comply with AN Standards, the manufacturers must put a protective surface coating on the rivets. This may be zinc chromate, metal spray, or an anodized finish.

The protective coating on a rivet is identified by its color. A rivet coated with zinc chromate is yellow, an anodized surface is pearl gray, and the metal sprayed rivet is identified by a silvery gray color. If a situation arises in which a protective coating must be applied on the job, paint the rivet with zinc chromate before it is used and again after it is driven.
 

BWR1953

Admiral
Joined
Jan 23, 2009
Messages
6,195
Yesterday I did about 2 hours of hull cleaning inside the boat. I combined using the power sander and the drill with wire wheels/brushes, etc. Worked well. :cool:

The boy did a little more when he got home. Then we got sidetracked by tractor stuff for several hours, right up until dark. I'm selling old implements for a tractor that's already sold, so we had to get a couple of them ready to go.

Today is another "lost" day as I have several appointments which will keep me busy. 😏
 

BWR1953

Admiral
Joined
Jan 23, 2009
Messages
6,195
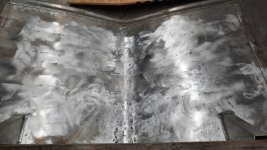
Hull cleaning progress as of yesterday morning. Tomorrow and the day after I should be able to get some more done. (I hope.) 🤪
1.jpg


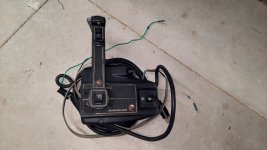
Tonight I bought this remote control. It's not the exact same one as I had originally with the 70(s), but I got it dirt cheap and it should work well enough to get the engine(s) running, tuned up and whatnot. Eventually, I'll have to fork over some big bucks for a dual binnacle setup.:cool:
2.jpg
 
Top