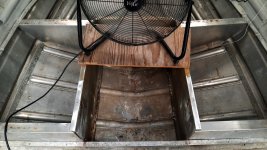
1976 Starcraft Chieftain 18' OB - restomod

BWR1953

Admiral
Joined
Jan 23, 2009
Messages
6,176
I really need to order rivets. 😬

The boy only has 2 days of school left and we'll soon be working hard on the Chief to get it going. I have to allow for delivery times in my planning. :unsure:

I have a couple of questions that I need to have answered before I can begin ordering rivets and then patching.

QUESTION 1: What thickness should I use for the aluminum patches? I was thinking that .060 should be plenty, because the original sheet is still in place other than where the little holes are. And that original sheet will be "sandwiched" between two new patch sheets and buttered with 3M 5200, plus the little holes will be filled with JB MarineWeld.
What say y'all? Or am I being too "thick" headed? Nyuk, nyuk. My neighbor buddy says I'm overthinking... again! 😏

From Watermann's Rivets section:
Hull sides .080
Bottom and Ribs: .090
Transom .100
Gunnels and bow cover .065

QUESTION 2: Before I order rivets, I'd like to know if I can use the 7/16" length for 2-layer sections as well as the 3-layer sections. Or would that be too long? And I'll have some places where it's 4 layers thick. :oops:
 

BWR1953

Admiral
Joined
Jan 23, 2009
Messages
6,176
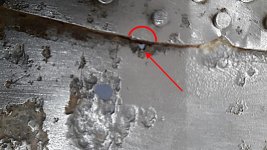
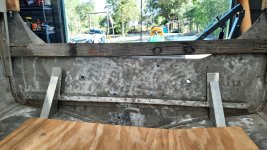
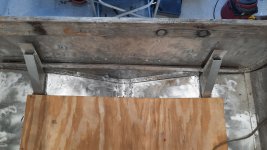
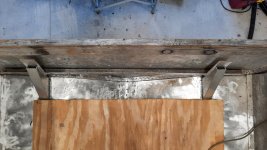
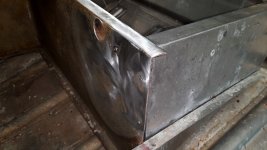
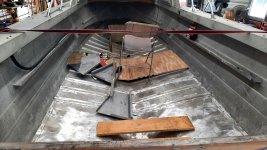
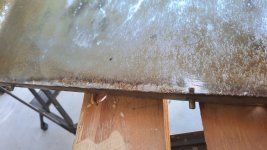
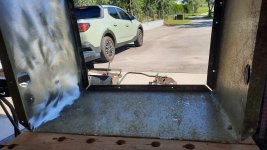
I'm thinking of using my rotary tool to grind a notch in the stern flange to fix this hole after cleanup.

A couple of options; install a rivet there or fill with JB Marine Weld. Thoughts?
1a.jpg
 

Watermann

Starmada Splash of the Year 2014
Joined
Jan 12, 2013
Messages
13,786
Just add up the layers and then allow for a proper bucktail for the solids. I can't remember right now the exact amount needed but .125 min is ringing a bell for a proper bucktail.

Personally I would only do a .080 outside patch rather than adding thinner inside and outside, especially if your thinking about putting anything under a rib. In that case it would be .080 + .090 + .090 for patch, hull and rib with .125 for buck tail = .385.

Yes on 7/16" solids, they are .437 which gives you some fudge room for 5200 and gaps that ribs can create.
 

BWR1953

Admiral
Joined
Jan 23, 2009
Messages
6,176
Just add up the layers and then allow for a proper bucktail for the solids. I can't remember right now the exact amount needed but .125 min is ringing a bell for a proper bucktail.

Personally I would only do a .080 outside patch rather than adding thinner inside and outside, especially if your thinking about putting anything under a rib. In that case it would be .080 + .090 + .090 for patch, hull and rib with .125 for buck tail = .385.

Yes on 7/16" solids, they are .437 which gives you some fudge room for 5200 and gaps that ribs can create.
Been running the roads again today, so no boat work. :cautious:

Thanks for the helpful info, WM! :) (y)

After reading your post, I successfully cancelled my order for 1/2" length rivets and tried to cancel the one I placed for 3/8" length rivets but am not sure that I made it in time. No reply from the seller yet.

This afternoon I bought a single 12" x 12" section of 0.80 inch aluminum sheet. I'll cut it to size to fit under the hull. No way for me to bend it to shape myself though. That stuff is solid! I'm gonna have to measure the radius of the bottom of the hull at the stern. That'll be a challenge in and of itself. And then I'll have it rolled by the metal company I bought it from.

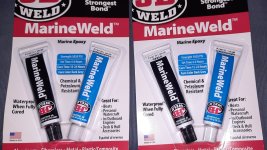
Today I received the JB MarineWeld. This variety has 5020 PSI strength! 💪
1.jpg
 

BWR1953

Admiral
Joined
Jan 23, 2009
Messages
6,176
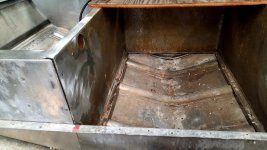
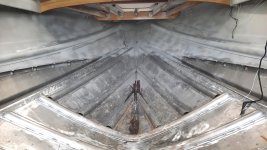
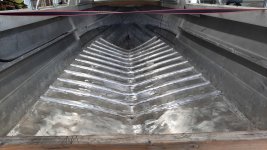
Got a little work done this morning. Not as much as I would have liked, but some.

We were sidetracked by selling tractor stuff again. Most of that is sold and I only have 2 items left, so hopefully it won't interfere much more.

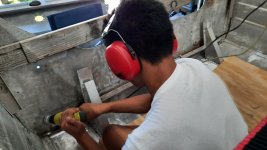
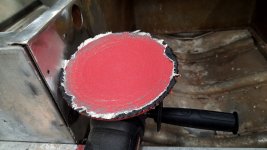
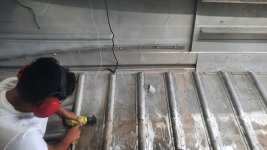
The boy got busy with the wire wheel and drill. He's learning and doing a fine job.

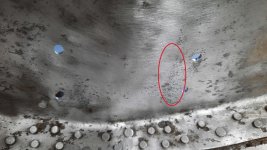
I showed him a section of the stern which was covered with white powder. He said it was "just dirt" and that he hadn't planned on cleaning it off. I then took the wire cup, ground the powder off and showed him the corrosion underneath. Explained to him that the "dirt" was in fact the corrosion which was destroying the aluminum.
2.jpg

So, he got after it!
3.jpg

Making progress.
4.jpg

5.jpg

6.jpg

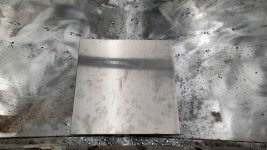
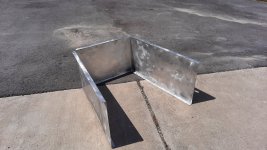
Here's the 0.080" aluminum 12" x 12" sheet. I definitely have to cut it down some.
1.jpg
 

Watermann

Starmada Splash of the Year 2014
Joined
Jan 12, 2013
Messages
13,786
Ah yeah the aroma of corrosion as it hits the air, sorta like a combination of dirty gym socks and stinky cheese. :sneaky:
 

captainnate

Petty Officer 2nd Class
Joined
Apr 19, 2011
Messages
195
I really need to order rivets. 😬

The boy only has 2 days of school left and we'll soon be working hard on the Chief to get it going. I have to allow for delivery times in my planning. :unsure:

I have a couple of questions that I need to have answered before I can begin ordering rivets and then patching.

QUESTION 1: What thickness should I use for the aluminum patches? I was thinking that .060 should be plenty, because the original sheet is still in place other than where the little holes are. And that original sheet will be "sandwiched" between two new patch sheets and buttered with 3M 5200, plus the little holes will be filled with JB MarineWeld.
What say y'all? Or am I being too "thick" headed? Nyuk, nyuk. My neighbor buddy says I'm overthinking... again! 😏

From Watermann's Rivets section:
Hull sides .080
Bottom and Ribs: .090
Transom .100
Gunnels and bow cover .065

QUESTION 2: Before I order rivets, I'd like to know if I can use the 7/16" length for 2-layer sections as well as the 3-layer sections. Or would that be too long? And I'll have some places where it's 4 layers thick. :oops:
I like to have a couple different lengths of rivets, just in case. It depends how much you want to spend. It just stinks reordering and waiting. I think they are about $15 for a bag of 100 from jay-cee.
 

BWR1953

Admiral
Joined
Jan 23, 2009
Messages
6,176
Ah yeah the aroma of corrosion as it hits the air, sorta like a combination of dirty gym socks and stinky cheese. :sneaky:
Hahaha! That's it exactly! :ROFLMAO:

I like to have a couple different lengths of rivets, just in case. It depends how much you want to spend. It just stinks reordering and waiting. I think they are about $15 for a bag of 100 from jay-cee.
Yeah, I started out that way, then things changed. Right now I'm not sure I'll be able to order any from the original vendor. I got a reply asking me to "take a picture of my original battery" so that a decision could be made. Uhhh.. I ordered rivets, not batteries. I sent a correction to the seller but no reply yet. Again. :rolleyes:
 

BWR1953

Admiral
Joined
Jan 23, 2009
Messages
6,176
Made progress today! :D

We had zero effect trying to remove the carpet adhesive in the cabin area with the Brush Cleaner. We also tried heating that dried on goop with a heat gun, then scraping it with a metal putty knife and that did nothing. :rolleyes:

So I went after it with the power sander using 240 grit paper. That test worked pretty well until I bumped a couple screws and rivets. Oopsies.

I wanted to try a coarser grit anyway, so I switched to 150 grit which worked nicely and I also have 80 grit available too.

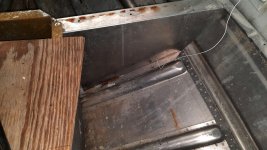
Results with the 150. I'm happy with how it got that stuff off of there! I'll work on the rest of it tomorrow while the boy is working inside the boat.
1.jpg

2.jpg

3.jpg

Rust, rust and more rust. The previous owners really liked using regular deck screws all over the place. Ugh! :cautious:
5.jpg

I ended up pulling the cabin sub-structure out. I'm going to examine options for the layout. Entire sections were just "floating" without adding structural support.
6.jpg

I'm not sure if this door that came with the boat is original. It certainly doesn't fit the opening very well. My original plan was for a pocket door, but that's probably not going to happen. 😏
7.jpg

I can't believe that regular steel screws were used on the door.
8.jpg

And there were also steel staples! Argh! 😫
9.jpg

Messy while working. 🤪
10.jpg

But it's looking better now. 😎
11.jpg
 

BWR1953

Admiral
Joined
Jan 23, 2009
Messages
6,176
More progress today!

While the boy worked inside the Chief, I cleaned up the cabin substructure.

Parallel processing and whatnot! :D

That carpet adhesive was pretty yucky.
1.jpg

The power sander works well in this application.
2.jpg

Meanwhile, the boy was hard at it inside the boat. (y)
3.jpg

4.jpg

Looking much better in there!
6.jpg

I'm a happy camper! :cool:
8.jpg

7.jpg

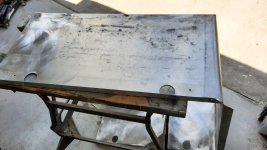
At some point, the center cabin section got crumpled a bit. So, I took a chance and started whanging on it with a ball peen hammer and it worked!
The crumpled section (at the rear of the pic) flattened right back out. My first body panel success! 😀
5.jpg
 

Watermann

Starmada Splash of the Year 2014
Joined
Jan 12, 2013
Messages
13,786
That sanding is my worst nightmare. for some reason it's nothing but dread for me. Ahh to be young and able to sit like him and run a power tool without the hands becoming numb.

Moving forward, the clean up and repairs always take the longest, looking good!
 

BWR1953

Admiral
Joined
Jan 23, 2009
Messages
6,176
That sanding is my worst nightmare. for some reason it's nothing but dread for me. Ahh to be young and able to sit like him and run a power tool without the hands becoming numb.

Moving forward, the clean up and repairs always take the longest, looking good!
Thanks WM!

We're moving forward a lot faster with the Chief than we did with the KF. :)

Yeah, having a strong youngster to do a lot of the heavy work is great. Only 2 more years left for him being here, so we'll keep him busy! 🤪

Speaking of power tools, a few days ago I was sitting cross legged in the boat, power sanding the forward cabin sub-structure when I accidentally lowered it between my legs and ground down my bare skin on both legs! o_O At least I learned that my blood thinner is working! :ROFLMAO:

No boat work done over the last couple of days... I was prepping for a medical exam that I had this morning. Result was good news though! 😏

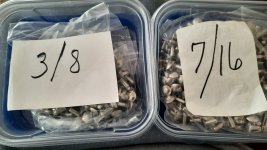
Today we received rivets, rivets and more rivets! And there are still more en route! :LOL:

1.jpg
 

Watermann

Starmada Splash of the Year 2014
Joined
Jan 12, 2013
Messages
13,786
Yea I've had some runaway accidents with power tools, as long as it's not needing a trip to the clinic for stiches, it's all good. :oops:

I still have a good sized collection of solid and blind rivets as well. Never can have too many and solids are not nearly as expensive.
 

BWR1953

Admiral
Joined
Jan 23, 2009
Messages
6,176
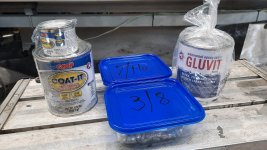
This evening we received the sticky stuff. Tomorrow we'll get started on rivet and leak repairs! :D

2.jpg

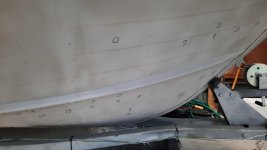
The boy counted 136 rivets that need to be replaced, not including the ribs we removed. And there are "other" holes which will need to be addressed as well.
3.jpg


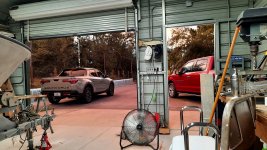
While I was sitting in the garage a little while ago, planning out our day tomorrow, I glanced outside and noticed the sun was going down. It gave a neat look to our 2 tow vehicles. Really showed the size difference and styling. Either one will look good pulling the Chief! :cool:
4.jpg
 

Watermann

Starmada Splash of the Year 2014
Joined
Jan 12, 2013
Messages
13,786
Having used both epoxy sealers I can say that the slightly thicker Coat-it did NOT completely seal the keel section of the Seafarer. I can only surmise that it just wasn't thin enough to get down in the narrow gaps. It did work well on the seams because of the lip allowing it to fill in the seam completely. I taped them off so the run mess could be just be peeled off while still tacky.
 

Alecapone

Seaman Apprentice
Joined
May 8, 2021
Messages
42
I love that you are doing this as a father/son project! Not really my business, but you should consider some safety glasses at the least. My dad got a piece of wire wheel in his eye once. +1 for the hearing protection. Eyes, ears, and respiratory are the big 3. I cringe at the sandals, and no cut proof gloves, but stitches aren't that big of deal. ;)
 

BWR1953

Admiral
Joined
Jan 23, 2009
Messages
6,176
I love that you are doing this as a father/son project! Not really my business, but you should consider some safety glasses at the least. My dad got a piece of wire wheel in his eye once. +1 for the hearing protection. Eyes, ears, and respiratory are the big 3. I cringe at the sandals, and no cut proof gloves, but stitches aren't that big of deal. ;)
Yow! I totally missed that safety violation! I'm normally very strict about safety. Thanks for the alert! 😬

"The boy" as my wife calls him, is my stepson and will turn 16 in a few weeks. He's a good kid and normally is very careful about safety too.

After I saw your heads up, I sat the boy down and we talked about the oversight. He said that the safety goggles that he normally uses are scratched and fogged up. So we picked out a new set of Dewalt goggles and ordered them right away. He's using an older pair in the meantime. They'll be here in a few days.

Whew! 😏
 

BWR1953

Admiral
Joined
Jan 23, 2009
Messages
6,176
Having used both epoxy sealers I can say that the slightly thicker Coat-it did NOT completely seal the keel section of the Seafarer. I can only surmise that it just wasn't thin enough to get down in the narrow gaps. It did work well on the seams because of the lip allowing it to fill in the seam completely. I taped them off so the run mess could be just be peeled off while still tacky.
Yes, I'd read that the Coat-it is thicker. I plan on using Gluvit as the primary for getting down deep into the hull crevices. The Coat-it will be used for shallower stuff. :)
 
Top