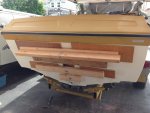
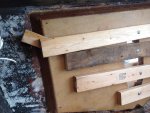
1974 Duo Vagabond 17' sterndrive Transom and stringers project

Woodonglass

Supreme Mariner
Joined
Dec 29, 2009
Messages
25,924
Uhhmm no one recommended Hammering anything in place. The Rubber mallet just loosens the fabric weave and allows it to conform to sharp corners. Cutting the transom edges to 45 will increase the amount of resin used. PB filler is thickened resin using cabosil and Chopped Strand Fibers. It IS very strong and will not crack. If you cut your transom 1/2 inch short all the way around then apply the PB liberally to the back of the wood the PB will ooze out around the sides and you use the excess ooze out to form the fillets. This makes it MUCH easier to lay the layers of 1708 over the entire transom and out onto the hull sides and bottom. The 2nd link below has the info. Not sure how you think cutting 45's will make it easier or stronger. Sometimes the tried and proven metehods ARE the best because those that use em have already tried many of the other ways and found them NOT to be effective or advisable. Not to say that there's not more than one way to skin a cat. Some are just better than others and you learn from your mistakes. Bottom line it IS your boat and you can do with it as you see fit.,
 

Redtruck12

Petty Officer 1st Class
Joined
Jan 25, 2018
Messages
344
Thanks for your detailed response Woodonglass. I realize you have tons more experience on the subject. I'm not here to rock the boat (excuse the pun) just trying to think of ways to improve on the original design , build a better mousetrap kind of thing🤓
I love a good discussion dont you?
 

Woodonglass

Supreme Mariner
Joined
Dec 29, 2009
Messages
25,924
Yeah, I have no problem thinking and working outside the box. But as I stated, there are times when Tried and True methods ARE the way to go. Age and Time tend to be the best teachers. I have BOTH and I still learn new stuff everyday!!
 

Redtruck12

Petty Officer 1st Class
Joined
Jan 25, 2018
Messages
344
Been working away on my transom board, glued and screwed, test fit, marked and cut the "keyhole" all was time consuming but pretty straight forward. Did some more playing with my 45deg edges (top and sides) did a couple of test pieces and am confident it's going to work for what I'm planning. that's the way I'm going to go with it.
continued with initial poly saturation, c.s.m layer and 1st 1708 layer. Yes I do like the way the 1708 lays down.
attached a picture of one of my test pieces NO FILET😉
 

Attachments

  • photo291320.jpg
    photo291320.jpg
    241 KB · Views: 1

Woodonglass

Supreme Mariner
Joined
Dec 29, 2009
Messages
25,924
as they say a Pic is worth a thousand words. Now that I see what you're doing your technique is acceptable and used frequently for an inboard transom plate. For transoms that extend from hull side to hull side, not so much. I was visualizing the latter.
 

chevymaher

Commander
Joined
Mar 29, 2017
Messages
2,915
Been working away on my transom board, glued and screwed, test fit, marked and cut the "keyhole" all was time consuming but pretty straight forward. Did some more playing with my 45deg edges (top and sides) did a couple of test pieces and am confident it's going to work for what I'm planning. that's the way I'm going to go with it.
continued with initial poly saturation, c.s.m layer and 1st 1708 layer. Yes I do like the way the 1708 lays down.
attached a picture of one of my test pieces NO FILET😉

I did mine that way. It works just fine.
 

Redtruck12

Petty Officer 1st Class
Joined
Jan 25, 2018
Messages
344
I'm getting close to getting the transom installed but a bit concerned with bonding it to the inboard transom fibreglass.
Question🙃
Peanut butter with cabosil? Milled fiber? Fumed silica? P.L. Construction adhesive?
Whats normally used? Best - easiest etc.

Looks like weather may be cool and wet here this weekend and I still need to work out my clamping syste
 

Redtruck12

Petty Officer 1st Class
Joined
Jan 25, 2018
Messages
344
So what would be the recommended /best recipe for "peanut butter" for attaching /bonding the transom wood?
 

Redtruck12

Petty Officer 1st Class
Joined
Jan 25, 2018
Messages
344
So what would be the recommended /best recipe for "peanut butter" for attaching /bonding the transom wood?
how much? How thick?
I am a little concerned with "kick off" time as well (will be myself and a inexperienced (yet enthusiastic 16 year old) and thinking polyester with Cabosil??? At 1% catalyst??
 

Baylinerchuck

Commander
Joined
Jul 29, 2016
Messages
2,726
So I used 1/4” chop in all my PB. Most call this hairy PB. When you use fibers in Thickened resin, the resin will not shrink and crack. As far as a recipe, you make a batch of resin, same amount of catalyst you are used to using for whatever temperature you’re dealing with. Add cabosil/aerosil or whatever thickening agent you’re using. Mix until you get the consistency of mayonnaise. Add fibers and mix until it looks stringy. Add a little more thickener until you get the consistency of peanut butter. You’ll get the feel of it.

The amount of catalyst really depends on temps you’re dealing with. Never exceed 2% MEKP. Use 2% at 60 to 70 degrees, 1.5% 70 to 80 degrees, 1% at 80 to 90 degrees. Hotter than that you better be quick. Your resin should have instructions.

Just make sure you have everything ready. My 14 year old daughter helped me. We did several trial runs before I made the transom glue. Make sure you have a canaster respirator for your boy. Poly resin is nasty.
 

Redtruck12

Petty Officer 1st Class
Joined
Jan 25, 2018
Messages
344
Been fighting for good weather and available Tim for about a week, last week was way to hot and this week too cold (down to about 6deg. c at night.
so have been final? Sanding , prepping and matching up my clamping system. Using 2x4s and will add plywood on the exterior as advised by Woodonglass 👍
Working on what I can and waiting on weather🙄
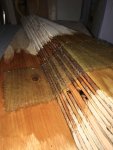
On innitial de- construction I had only removed stringers that we're obviously rotten and left the remaining for the time being.

last night I worked my way along the stringers to the point of good clean wood between 4+5 feet forward of the transom.
there is spacing off the hull +\- 1/2 inch kind of what I expected. BUT very loos wrap of c.s.m. And roven woven.
Looks original but very loose and there is a gap (bare wood) between sections, NO FILETS!!! The glass looks more draped over the stringer than "wrapped" roughly 1" plus of no contact where I think a filet should have been. And no signs of any waterproofing of the stringers.
Is this normal for a mid 70s build? Looks dam sloppy to me🤔

Definately not the way I will be doing it.

secondary question;

my transom is 4' by aprox 2 1/2 feet .

how much "Peanut budder" should I expect to need to mix?
I don't want to mix way too muchand waste material BUT also don't want to get caught short!
Any advice?
 

Attachments

  • photo292465.jpg
    photo292465.jpg
    156.5 KB · Views: 0
  • photo292466.jpg
    photo292466.jpg
    302.4 KB · Views: 0

kcassells

Fleet Admiral
Joined
Oct 16, 2012
Messages
8,600
Factory mass production. Thats what you are seeing. But not what you will be doing.
In any event I'm looking at @ 3-4 qts. for the transom. Try to have another pair of hands to help you set it. Have clamps ready and a spreading trowel. Make a practice run with your buddy. After you clamp it and squeeze out the pb work it into the bottom and sides to make filets.
​​​​​​​Make that pb nice and tight like it won't be running or dripping.
 

Redtruck12

Petty Officer 1st Class
Joined
Jan 25, 2018
Messages
344
Yes after seeing how it was done originally (and lasted more than 40 years) should have no problem doing better than they did.
back to the p.b.
I have only mixed small amounts of thickened resin and only using 3m bubbles (for faring) I was suppressed and now realize the substantial amount of thickening agent needed to thicken the resin

would I be correct in thinking likely aprox 3:1
that being about
- 1 litre /quart of resin
- 3 parts cabosil + chopped fibre (mixed in gradually of course

will end up with roughly 4 litres /quarts

does that sound about right???
 

kcassells

Fleet Admiral
Joined
Oct 16, 2012
Messages
8,600
Sounds about right but just be prepared to add more cabosil. That is the thickening agent. Throw your glass in the resin 1st and let them soak. They will fall to the bottom of the cup ay see when they are ready. . Then add the hardener, mix and begin adding the other ingredients.
 

Baylinerchuck

Commander
Joined
Jul 29, 2016
Messages
2,726
Kcassells is right, keep some cabosil handy to thicken up to your liking. I normally add the fibers in after getting the resin thickened to a consistency of catsup. The fibers will slightly thicken the PB. The fibers also help mix the cabosil thoroughly. Good luck!!
 

kcassells

Fleet Admiral
Joined
Oct 16, 2012
Messages
8,600
The fibers do nothing to thicken the mix. They only add to the slurry. The cabosil is the thickener. Putting the glass in the resin first lets the glass become saturated which is what you want. No offense to different opinions. :)
Just keep a mixing cup available to go if you need to add more. OOOhhh the pressure of it all. :)
 

Redtruck12

Petty Officer 1st Class
Joined
Jan 25, 2018
Messages
344
Wellllllllll..
todays the day, good weather and enough free time to dedicate to it without inturuptions.
started by measuring out my resin and hardener, soaked my chopped fiber.
cleaned the heck out of everything with lots of acetone, setup all my clamps.
decided the sun may be a problem (I have been very worried about premature kick off)

Decided to go a liter and a half on resin last minute, as I didn't want to get caught short.
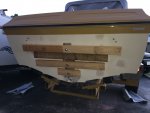
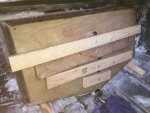
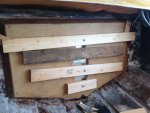
spread and worked the P.B. Onto both surfaces with a square notched trowel, set and lined the new transom in place, lined up the keyhole cutout.
Started clamping, bottom to top, snug then tight while checking for a consistent ooze especially around the keyhole. Had a decent ooze , adjusted my clamps, added som shim blocks to put added pressure on the outer corners of the transom plate.
watched all my edges and worked my ooze smooth.
Went very well ( in my opinion)
planning to leave it clamped at least 24 hours?
is that long enough? Longer?
 

Attachments

  • photo292739.jpg
    photo292739.jpg
    1.8 MB · Views: 0
  • photo292740.jpg
    photo292740.jpg
    1.5 MB · Views: 0
  • photo292741.jpg
    photo292741.jpg
    2 MB · Views: 0

Redtruck12

Petty Officer 1st Class
Joined
Jan 25, 2018
Messages
344
Moving on to stringers soon,
im confident that I only need to replace aprox 5' of them.
Thinking of a scarf cut joint to joint the new to the old.
what is common? What is best? Should I sister the joint?
yup ... I have lots of ideas but I'm very interested in advice from experience
 
Top