1973 Starcraft SuperSport 16ft. restoration questions

Rasdiir

Petty Officer 2nd Class
Joined
Jul 18, 2011
Messages
167
Had a real eye opener experience today while looking for the Gluvit at the boat shops. With the exception of my friend, who will be 80 years old this month and still operates his own boating repair business, no one said they would work on the Johnson motor if required in the future...because of its age and because of problems getting parts for the motor. This news got my attention as I certainly don't know how to work on the motor if it should require anything extensive in the future. I would like to think the motor would run good for quite awhile but we all know how that can work out. My friend suggested that I consider putting a new 4-stroke long shaft, 60-75 hp, (no, he doesn't sell motors) because of our age and my lack of knowledge should a problem arise with the Johnson. A Suzuki was his suggestion for reliability, mileage per gallon, ease of operation and quiet ride for the Admiral and me. Even the motor tilt is built into the motor so I would not have to use the original control and hardware. Sounds nice but GeeeZooow...always something to think about. And then there are the transom holes in the original sheet metal (I have not drilled the matching holes through the new wood transom yet), and that new marine plywood motor mount that has all the holes drilled to match the aluminum transom sheet. I could chuck that piece though and cover the aluminum transom sheet holes with a new aluminum piece instead of making another wood motor mount piece. Thanks for letting me think šŸ’­ out loud for a bit...just consider it an old farts šŸ’Ø thing! LOL
Safe boating,
Joe
I think the general consensus (depending on time, cost, etc) is that it's best to omit that plywood motor mount anyway, or better yet to use a piece of aluminum (1/4"?) instead, so whether or not you need to cover the existing mount holes it may be something to consider.
 

piperjoe

Chief Petty Officer
Joined
Jul 11, 2013
Messages
563
I think the general consensus (depending on time, cost, etc) is that it's best to omit that plywood motor mount anyway, or better yet to use a piece of aluminum (1/4"?) instead, so whether or not you need to cover the existing mount holes it may be something to consider.

Yes, I am certainly considering the metal plate as was also suggested by a second visitor to the shop. Even with an aluminum plate I'd still have to drill matching holes to the original aluminum transom sheet, though, and I already have the marine plywood piece made up to match the transom. Something to give more thought to. Thanks!

Safe boating,
Joe
 

piperjoe

Chief Petty Officer
Joined
Jul 11, 2013
Messages
563
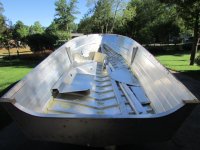
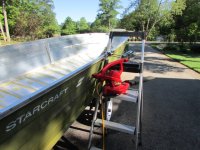
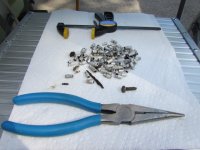
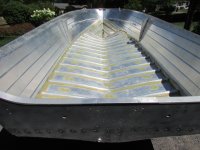
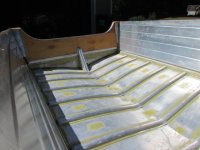
This morning was really nice weather wise as it was somewhat cool and sunny. I pulled the aluminum boat parts out of the boat hull and lay them on the driveway. Then, all the water from our recent rain storms (not really too much) was drained/removed from the inside of the hull. Next I cleaned some loose dirt/crud from the sump area so that location could dry. Then, I decided to use the lawn blower to blow whatever water was still around the hull ribs so the hull would be dry for the Gluvit application. Glad of the decision to do that...see the photo to observe what came out of those ribs, and that photo doesn't include the dirt and leaves and whatever that blew clear of the hull while the blower was running. This was the third time I had used the blower on those ribs and I still can't believe the amount of material that has been ejected. The Gluvit was mixed in one of those aluminum throw-a-way bread baking pans (about 6" x 12" size) and this proved to be a good thing to do as the Gluvit did not get near as warm as just mixing it in the can it came in, and, as a result I had more time to apply the Gluvit before it started to set up and drag the foam brush as happened with the first can I applied before. So, now the boat is basking in the sunshine and I'll leave the hull alone...probably through tomorrow so the epoxy can cure properly without being disturbed. In the meantime I will get those decking stringers ready and cut some more marine plywood. As for the rest of today...can you say "mow the yard?" LOL!

Safe boating,
Joe
 

Attachments

  • 001.JPG
    001.JPG
    137.1 KB · Views: 19
  • 002.JPG
    002.JPG
    158.9 KB · Views: 18
  • 004.JPG
    004.JPG
    113.2 KB · Views: 18
  • 007.JPG
    007.JPG
    117.7 KB · Views: 19
  • 008.JPG
    008.JPG
    108.2 KB · Views: 17

piperjoe

Chief Petty Officer
Joined
Jul 11, 2013
Messages
563
After a considerable amount of research and conversation the Admiral and I have decided that a new 60 hp 4-stroke motor (probably a Suzuki) would be a good option for older folks like us. Ease of use, fuel mileage advantage and quiet ride would help Joyce enjoy the boating experience. New motor with built in tilt and new cables should aid in eliminating related potential trouble. Now, if I can get the motor drop shipped to my friends boat shop that would be nice, too. We'll see what develops. In the meantime, if anyone reading this thread has experience with this motor, or similar, please chimed in with your thoughts and comments. Thanks!

Safe boating,
Joe
 

piperjoe

Chief Petty Officer
Joined
Jul 11, 2013
Messages
563
The second application of Gluvit cured nicely and the rivets look to be well covered and sealed. Glad to have that task checked off. Working on the boat today and it was hot and very humid this morning so we'll see how long I last outside this afternoon before seeking the air conditioning in the house.

Question for the day: Re decking

I plan to cover all of the bottom surfaces and sides of the new marine plywood decking with three coats of West Systems epoxy; using a squeegee after each coat to avoid excessive epoxy build up which would only end up cracking anyway. Then I would attach the deck pieces to the stringers with rivets placed in countersunk rivet holes. I would then apply 2 coats of the West Systems epoxy to the top of the new decking and fill/seal those countersunk rivet holes in the process so that the top of the decking would be smooth and ready for the new vinyl covering. Is this a sound plan of action? Darn... I wish I knew more about what I'm doing. Anyway, it's time to get back to work on the "Moni-Pit"! šŸ˜‚

Safe boating,
Joe
 

piperjoe

Chief Petty Officer
Joined
Jul 11, 2013
Messages
563
Went outside and bailed water off the tarp at the aft end of the boat, and, while out there looking at "Miss Moni-Pit" the thought crossed my mind that I'd like to paint the inner hull surfaces from the decking level upwards to the gunwales and such from bow to stern. A white or light sand color would be nice. Does anyone reading this post have experience, (or know if it could even be done), using a 6 gallon Porter-Cable pancake compressor, that I already have, to drive a small paint gun for paint application? I would rather not use multiple spray paint cans or roller and brush. Don't have a paint gun at this time either so tips along that line would be helpful, too. Thanks in advance!

Safe boating,
Joe
 

piperjoe

Chief Petty Officer
Joined
Jul 11, 2013
Messages
563
Wow! A real "frog choker" coming down as I look out the window this morning. The weatherman is saying we're to have a high of 67 degrees, 90% chance of precipitation (I would say he got that one correct LOL) and 1 - 2 inches of total rainfall today. That should "splash" the boat AND the trailer and the Admiral and I don't have to leave the house! Think I will work on her model sailboat this morning and see what develops weather wise after lunch. At least I will be working on a boat, eh?

Safe boating,
Joe
 

piperjoe

Chief Petty Officer
Joined
Jul 11, 2013
Messages
563
Beautiful morning in Up North Michigan! Blue sky and lots of sunshine to start the day, so, after breakfast I believe I will get some old paint off the outside of the aluminum hull with help from the Citristrip process.

Safe boating,
Joe
 

piperjoe

Chief Petty Officer
Joined
Jul 11, 2013
Messages
563
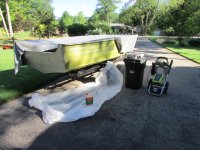
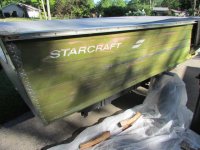
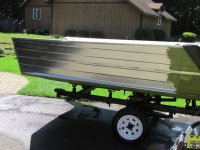
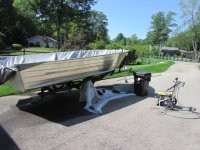
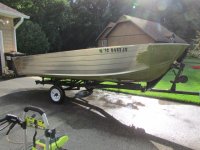
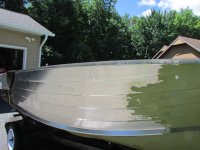
Removed about 1/2 of the paint from the starboard side, above the chine (?), and worked at cleaning some aluminum parts while the Citristrip worked. Was able to scrape the paint from the outside hull while the boat was in the driveway and that was nice. I placed a throw-a-way plastic painting tarp under the boat to catch any dropping paint goop and this worked out nicely as there was no real mess...just rolled up the plastic and tossed it when I finished for the afternoon. The Citristrip stayed where I painted it onto the hull and that was a huge benefit 'cause the Admiral was sitting out there from time to time monitoring the proceedings. One does not want a big mess in front of the garage when the Admiral is watching. More of the same tomorrow if the weather stays nice.

Safe boating,
Joe
 

Attachments

  • 003.JPG
    003.JPG
    168.4 KB · Views: 10
  • 004.JPG
    004.JPG
    141.4 KB · Views: 9
  • 005.JPG
    005.JPG
    152.3 KB · Views: 9
  • 006.JPG
    006.JPG
    148.3 KB · Views: 10
  • 007.JPG
    007.JPG
    144.7 KB · Views: 10
  • 012.JPG
    012.JPG
    131.5 KB · Views: 10

piperjoe

Chief Petty Officer
Joined
Jul 11, 2013
Messages
563
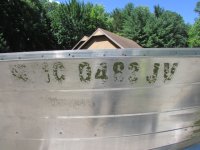
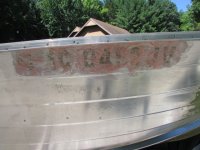
Continued removing the original paint from the starboard side today. Also worked on some more boat parts while the paint remover worked on the paint. I'll say one thing, those old registration numbers/letters and the sticker are really stuck onto the boat. "Baked on" would probably describe the situation better. I thought the Citristrip would work itself under the paint that is under the sticker/letters/numbers but it was not to be. Suggestions? More paint removal tomorrow after a trip to town and mowing the yard...maybe.

Safe boating,
Joe
 

Attachments

  • 002.JPG
    002.JPG
    163.4 KB · Views: 6
  • 004.JPG
    004.JPG
    136.3 KB · Views: 6

Rasdiir

Petty Officer 2nd Class
Joined
Jul 18, 2011
Messages
167
Continued removing the original paint from the starboard side today. Also worked on some more boat parts while the paint remover worked on the paint. I'll say one thing, those old registration numbers/letters and the sticker are really stuck onto the boat. "Baked on" would probably describe the situation better. I thought the Citristrip would work itself under the paint that is under the sticker/letters/numbers but it was not to be. Suggestions? More paint removal tomorrow after a trip to town and mowing the yard...maybe.

Safe boating,
Joe
I don't have the awesome Citristrip, but I ended up just doing multiple coats of stripper on my numbers and scraping like crazy with a putty knife. The nylon brush on the drill cleaned up the last bit, but it definitely was the hardest part of paint removal (and that's saying something for me, because with our crappy Canadian paint strippers I've been at this for 2 months now!) Does the stripper at least make the vinyl gummy or is nothing happening at all?
 

piperjoe

Chief Petty Officer
Joined
Jul 11, 2013
Messages
563
Hi Rasdiir! The Citristrip doesn't do much on the registration items, perhaps making them a bit soft if anything. I used a putty knife to remove the Starcraft logo and of course I had the resultant scratched aluminum surface afterwards. Even sharpened the putty knife and it was still a slow go. I will work on it again this morning as it is a beautiful day in Up North Michigan!

Safe boating,
Joe
 

piperjoe

Chief Petty Officer
Joined
Jul 11, 2013
Messages
563
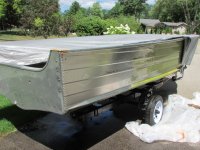
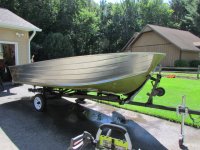
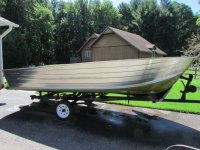
I decided to try the Citristrip in the spray can, that I already had, on the registration numbers/letters and the old Michigan sticker. Wasn't sure how that would work on a the vertical metal surface but it stayed where I sprayed it and, with the help of a sharpened putty knife, I was able to remove the graphics. Easy? Heck no, it only took two CD's worth of music to get the items off the paint...and then I put the regular Citristrip onto the old paint that was under the registration, waited a half hour, and finally removed that paint off of the hull. Next, the remaining starboard outside paint was removed. The old paint was left on the bow plate and under the chine (?) for now because of a new paint scheme being considered that will allow for some of the "old StarCraft look" to remain on the restored hull. Worked on the original floor straps and got those cleaned up. Gosh...I get to do this again on the port side of the hull...

Safe boating,
Joe
 

Attachments

  • 001.JPG
    001.JPG
    126 KB · Views: 5
  • 002.JPG
    002.JPG
    118.4 KB · Views: 5
  • 003.JPG
    003.JPG
    123.9 KB · Views: 5
  • 004.JPG
    004.JPG
    118 KB · Views: 5
  • 005.JPG
    005.JPG
    124.2 KB · Views: 5
  • 007.JPG
    007.JPG
    161.7 KB · Views: 6
  • 008.JPG
    008.JPG
    152.8 KB · Views: 6
  • 006.JPG
    006.JPG
    142.4 KB · Views: 6

piperjoe

Chief Petty Officer
Joined
Jul 11, 2013
Messages
563
Try using a heat gun with your putty knife to remove the letters. Worked for me.
Thank you for the heat gun reminder! I gave two of those away when finding new homes for my RC model aircraft items. Never thought about using the tool until reading your post. Will give it a try on the port side of the boat.

Safe boating,
Joe
 

piperjoe

Chief Petty Officer
Joined
Jul 11, 2013
Messages
563
A nice steady rain this morning and I am sitting on the rocking chair with the windows open listening to natures music. And thinking (this is when I get into trouble...usually) that I really should look further at what is actually required for maintaining/upkeep with regards to the Johnson 85 hp motor I already have for the boat. A new motor sounds like a good idea and it's certainly doable, however, the Admiral and I could purchase quite a lot of gas for that $9000 - $10000 cash outlay. As my marine motor experience is next to nill I have looked for an applicable manual for this Johnson 85 50 Anniversary motor without success. Do any of you reading this post have suggestions as to where I should be looking to obtain this information or a copy of this manual? In the meantime the search will continue on this forum and elsewhere but I thought (there I go again) I would check with the experienced boaters/restorers who have far more practical knowledge of marine motors than I have. And onward we go...

Safe boating,
Joe
 

piperjoe

Chief Petty Officer
Joined
Jul 11, 2013
Messages
563
Does anyone have comments regarding the Seloc brand of marine motor manuals? Found one available for the 1972 Johnson 85 motor online. Wondering if a snuffy, like I am, would be able to follow along with the text and details and actually be able to work on the motor when required. Mechanically inclined I may be though motor savvy...not so much. On the up side I would most likely get to purchase some new tools for the task, eh?šŸ˜Š

Safe boating,
Joe
 

piperjoe

Chief Petty Officer
Joined
Jul 11, 2013
Messages
563
Well, I am certainly impressed with this iboats forum. Found that there are three available manuals dealing with this 1972 Johnson motor for sale right here within an iboats advertisement. No, I don't know why I did not check here first. A snuffy newbie move I guess. After finding the manual information I decided to actually search through this forum for questions and answers pertaining to my motor AND actually sit down to read the information contained within the various threads. It's been very interesting to read about this motor and the problems/fixes/advice in the various posts. I will be reading up on this subject to learn more about the motor at hand, however, one thing is becoming apparent to me already... I am not alone with my lack of knowledge with regards to this Johnson 85 and there are many among us willing to share their knowledge to help the old guy like me become more confident and thereby succeed. I believe that there was a valuable lesson learned today at my house.

Safe boating,
Joe
 

piperjoe

Chief Petty Officer
Joined
Jul 11, 2013
Messages
563
Today I will get a heat gun and have a go at the port side registration items. Then it's on to paint removal. Yippee!

Safe boating,
Joe
 

piperjoe

Chief Petty Officer
Joined
Jul 11, 2013
Messages
563
"NASA, we have liftoff!"
At least the outer Mylar surfaces came off quickly and easily with the heat gun help, the black and green coloring not so much as the colors just smeared around over the paint. I'll purchase a couple more plastic paint tarps tomorrow and start the port side paint removal process.

Safe boating,
Joe
 
Top