1973 Starcraft SuperSport 16ft. restoration questions

piperjoe

Chief Petty Officer
Joined
Jul 11, 2013
Messages
553
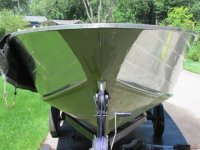
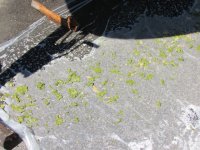
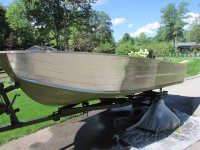
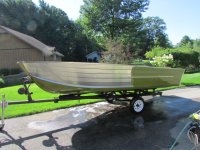
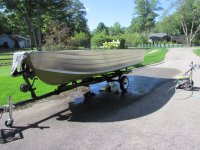
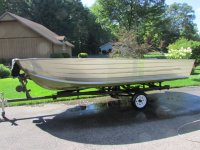
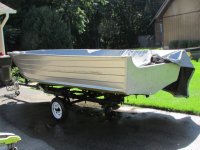
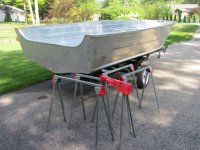
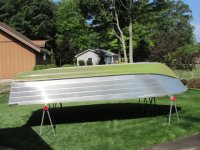
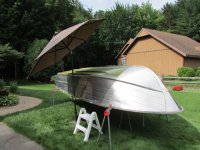
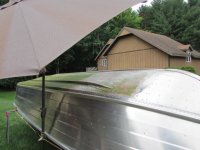
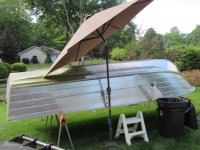
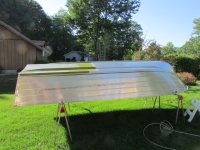
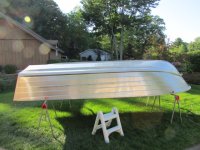
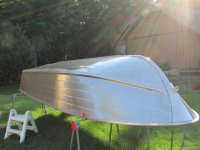
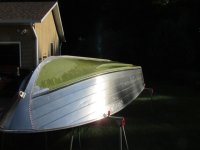
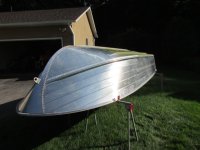
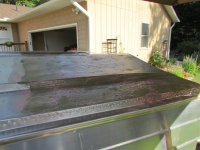
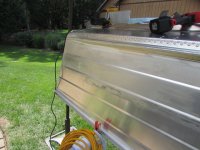
Went to town and picked up the plastic drop clothes, another 100 pack of throwaway gloves and more Citristrip. The paint is coming off the port side and I am not taking photos...they would be very similar to the above photos of the starboard side. No need to bore you more than I already have with new pics of the same process.

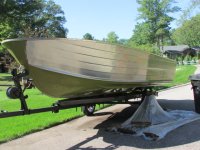
While at the store I took a look at the airless paint sprayers. Quite an interesting tool. Had a good discussion about using this tool to paint my boat with an experienced fellow and came away with some useful information and the feeling that I just might be able to do that. Going to investigate this idea further along with the Rustoleum marine paint line that he suggested with regards to ease of use and overall cost outlay while looking good on the boat when finished; that paint line also has an above the waterline primer (can use it on everything I want to paint inside of the boat) and a below the waterline primer (can use it on all of the outside of the hull and even the trailer to aid paint adhesion) to go with their marine paint. I am kind of excited about being able to paint my own boat and trailer if that works out. Sometimes I have a good day and feel like a kid in a candy store (and no headache today.) WooHoo!

Safe boating,
Joe
 

piperjoe

Chief Petty Officer
Joined
Jul 11, 2013
Messages
553
Removed original paint today from the port side. Amazing to see how much "boat rash" shows up on the bare aluminum when the paint is off the old gal. Also, if you recall I wanted to remove those port side registration items without scratching the hull as I had done on the starboard side...so, when I scraped off the Citristrip from the port side area where the registration was adhered I saw that the hull area was really scratched and gouged by someone other than me. Did a double take and had a good laugh. Nothing real serious though I think a little fix-it-here-and-there is in order before any painting. Going to go ahead and put a few photos with the post because a few folks want to see them. Back to the paint removal tomorrow if all goes well.

Safe boating,
Joe
 

Attachments

  • 002.JPG
    002.JPG
    139.6 KB · Views: 12
  • 003.JPG
    003.JPG
    172.3 KB · Views: 12
  • 004.JPG
    004.JPG
    155.5 KB · Views: 11
  • 006.JPG
    006.JPG
    148.1 KB · Views: 10
  • 008.JPG
    008.JPG
    155.6 KB · Views: 11

piperjoe

Chief Petty Officer
Joined
Jul 11, 2013
Messages
553
Finished removing the paint from the port side of the hull, above the chine. Will need to remove the paint from the bottom of the hull which will require taking the boat off the trailer and supporting the hull on sawhorses. Have to give the sequence of work a bit of thought now because snow in the air during the first week of October can occur in these parts. So, I'll probably get the bottom paint off now and some general sanding and such but won't do any fresh hull painting until Spring. Have to be careful about adding weight to the hull, too, so that I can handle the hull when I paint it. May get the deck rails riveted in place but hold off on installing the flotation foam and actual decking until after the hull is painted. Might even be able to get some trailer wiring and some new wheel bearings and such installed yet this year. Here's hoping for a nice, warm, Fall season this year!

Safe boating,
Joe
 

Attachments

  • 001.JPG
    001.JPG
    169.5 KB · Views: 8
  • 002.JPG
    002.JPG
    160.9 KB · Views: 8
  • 004.JPG
    004.JPG
    135 KB · Views: 8

piperjoe

Chief Petty Officer
Joined
Jul 11, 2013
Messages
553
Went to Lowes today because I had seen ready to use wood sawhorses there. Picked out four of them and a couple packs of 5" sanding disks for the palm sander. Got up to the checkout and the lady looked at the wood sawhorses and said she had something in mind that I might like better. Took the Admiral and me over to the tool department and showed me some Craftsman metal folding sawhorses. I didn't know there was a sawhorse like this and the product is really nice. I will be able to fold up the individual sawhorses (bought four of them) and they stack together for storage. Saved enough money to essentially get the two packs of sanding disks for free (instead of buying the wood sawhorses). Thought some of you folks might want to check these out if you need sawhorses...the reviews are good. I hope to get the boat off the trailer tomorrow and then onto the sawhorses with the bottom of the hull up. Then I can get to work removing the bottom hull paint. Geez...it just occurred to me that I sure hope this old guy can lift the hull up to the sawhorses. This should be interesting. I will get a photo tomorrow showing the sawhorses and turned over hull if all goes well.

Safe boating,
Joe
 

piperjoe

Chief Petty Officer
Joined
Jul 11, 2013
Messages
553
Reached another milestone today! The boat is now off the trailer and resting bottom side up on the four Craftsman sawhorses. I have a spring clamp on each sawhorse at the side of the boat hull to keep the hull stationary while I work on it. The Admiral and I were able to get the boat off the trailer, flip it on its side, and over, so I could get a sawhorse under the first corner, and then continue the lifting required to get it up onto the remaining sawhorses so, all-in-all, it went pretty well but I'm glad the hull doesn't weigh much more than it does. I have a small step stand and can reach over the center line of the hull so the paint removal should proceed without too much of a problem. There are, of course, one heck of a lot of rivets to work around on the bottom of this hull which should make the paint removal task interesting. If it stops raining I may be able to get some Citristrip on the bottom paint yet today, otherwise, we'll see what tomorrow brings. Nontheless, I'm happy with the progress thus far!

Safe boating,
Joe
 

Attachments

  • 002.JPG
    002.JPG
    159.2 KB · Views: 15
  • 003.JPG
    003.JPG
    177.4 KB · Views: 15
  • 004.JPG
    004.JPG
    165.1 KB · Views: 13
  • 005.JPG
    005.JPG
    157.4 KB · Views: 14
  • 006.JPG
    006.JPG
    174.9 KB · Views: 14
  • 007.JPG
    007.JPG
    152.9 KB · Views: 14
  • 010.JPG
    010.JPG
    124.5 KB · Views: 15
  • 011.JPG
    011.JPG
    157.4 KB · Views: 12
  • 013.JPG
    013.JPG
    120 KB · Views: 14

Rasdiir

Petty Officer 2nd Class
Joined
Jul 18, 2011
Messages
132
Reached another milestone today! The boat is now off the trailer and resting bottom side up on the four Craftsman sawhorses. I have a spring clamp on each sawhorse at the side of the boat hull to keep the hull stationary while I work on it. The Admiral and I were able to get the boat off the trailer, flip it on its side, and over, so I could get a sawhorse under the first corner, and then continue the lifting required to get it up onto the remaining sawhorses so, all-in-all, it went pretty well but I'm glad the hull doesn't weigh much more than it does. I have a small step stand and can reach over the center line of the hull so the paint removal should proceed without too much of a problem. There are, of course, one heck of a lot of rivets to work around on the bottom of this hull which should make the paint removal task interesting. If it stops raining I may be able to get some Citristrip on the bottom paint yet today, otherwise, we'll see what tomorrow brings. Nontheless, I'm happy with the progress thus far!

Safe boating,
Joe
Flipping is a big step, you'll be painting before long at this rate! I've been working on stripping paint (among trailer work), and it's taken me all summer as I'm only able to get at it a few hours a week and our paint stripper in Canada is not great.
 

piperjoe

Chief Petty Officer
Joined
Jul 11, 2013
Messages
553
Hello, my friend! Joyce was a great helper for getting the boat flipped. I will admit it...I don't believe I would have gotten it turned over and secured on the sawhorses by myself. Getting older rears up occasionally and I don't have the strength in my left arm and hand after my mini-stroke that I am used to anymore. It will take a while longer to strip the paint from the bottom of the boat because of the need to use a step stand or a ladder in order to do the work. Have to heed the Vertigo warning, too. The plan is to be careful, do not get in a hurry and enjoy the restoration work. If I can remove all of the old paint from the boat this year before the cold weather and snow comes around I would be happy. Anything else that gets accomplished before the Winter tarping would be great. A step at a time though while the good weather lasts in our neck of the woods.

Safe boating,
Joe
 

piperjoe

Chief Petty Officer
Joined
Jul 11, 2013
Messages
553
And the paint strip routine continued...until it started to rain. One tip though: As there are a lot of rivets on this boat bottom I used an old dish cleaning brush that I had in the garage to take the Citristrip and paint off the rivet heads. Did the trick and the brush, along with some paper towels, removed the paint faster than trying to scrap the paint from around those rivet heads.

Safe boating,
Joe
 

Attachments

  • 001.JPG
    001.JPG
    121.8 KB · Views: 4
  • 005.JPG
    005.JPG
    103.4 KB · Views: 4

piperjoe

Chief Petty Officer
Joined
Jul 11, 2013
Messages
553
Worked at taking the old paint off the hull bottom. A nice day with plenty of sunshine and a North breeze. With the sunshine came heat that can dry the paint remover too fast and shiny bright aluminum to make the eyes squint. Looking around for a solution I saw the patio umbrella at the patio table. Measured the height of the boat on the saw horses and checked the umbrella and sure enough it would work by the boat to provide shade, and, I could rotate the umbrella to follow the sun thereby keeping the shade where I needed it...over me and the boat. Much nicer working condition without the hot sun warming the aluminum and my back. Should be able to finish removing the paint from the port side hull bottom tomorrow if all goes well.

Safe boating,
Joe
 

Attachments

  • 001.JPG
    001.JPG
    142.1 KB · Views: 3
  • 003.JPG
    003.JPG
    115.5 KB · Views: 4
  • 006.JPG
    006.JPG
    145.8 KB · Views: 3
  • 008.JPG
    008.JPG
    146.6 KB · Views: 4

piperjoe

Chief Petty Officer
Joined
Jul 11, 2013
Messages
553
All of the paint is now off the port side bottom hull. Tomorrow I will start on the starboard side bottom hull surface if all goes well. I will be glad when this paint stripping task is finished.

Safe boating,
Joe
 

Attachments

  • 001.JPG
    001.JPG
    149.9 KB · Views: 2
  • 003.JPG
    003.JPG
    116 KB · Views: 2
  • 004.JPG
    004.JPG
    81.9 KB · Views: 2

piperjoe

Chief Petty Officer
Joined
Jul 11, 2013
Messages
553
Started removing paint on the starboard bottom hull area this afternoon after returning home from a dog grooming run. Interesting thing though: I stopped at different places to discuss paint options and aluminum cleaner options. The aluminum cleaner wasn't available and the dealer didn't know when it would be available due to supply line problems. And, there wasn't enough name brand paint from a single supplier to paint the boat due, again, to supply line problems. One store manager even told me that their paint supplier had given them notice that they were not going to supply the stores with the store brand paint from their lines anytime soon. There really wasn't much marine paint of any kind on the shelves and I don't want to mix product name paints from different manufacturers so this is a bit of a dilemma. Of course, now that I think of it, I could purchase whatever colors of marine primer and marine top coat paint that I could get and just tell onlookers it's a designer camafudgeit job. Not!! Anyway, hope to get back to work on the boat tomorrow if all goes well.

Safe boating,
Joe
 

Attachments

  • 001.JPG
    001.JPG
    105.5 KB · Views: 1

piperjoe

Chief Petty Officer
Joined
Jul 11, 2013
Messages
553
The original paint is now off the boat. Probably the least enjoyable part of the restoration thus far, however, I stuck with it and the task is finished. Supposed to rain tomorrow for most of the day which is all right with me and the hull can get a good rinse. Next up I'll go over the outer hull surface with a 50% vinegar and 50% water wipe down mixture followed by a good power rinse with water. After that I can get ready to tip and roll the marine primer on the outside hull surface if I decide to do that this year.

Safe boating,
Joe
 

Attachments

  • 002.JPG
    002.JPG
    125.3 KB · Views: 3
  • 003.JPG
    003.JPG
    148.4 KB · Views: 3
  • 004.JPG
    004.JPG
    117 KB · Views: 3
  • 005.JPG
    005.JPG
    133.8 KB · Views: 3
  • 006.JPG
    006.JPG
    131.3 KB · Views: 3

piperjoe

Chief Petty Officer
Joined
Jul 11, 2013
Messages
553
Today looks like a good time to go over the aluminum below the waterline with a 3M sanding/cleaning wheel. Purchased more 220 and 320 sanding disks for the palm sander, too. Need to start going over the boat trailer and get the new lights and wire attached to the frame. Will probably replace the wheel bearings with a new set just to be safe. Lots of fiddling around with the details to keep me busy as we head into our Fall season in Up North Michigan.

Safe boating,
Joe
 

piperjoe

Chief Petty Officer
Joined
Jul 11, 2013
Messages
553
Started going over the aluminum hull to "clean it up" before paint. I have sanding grits ranging from 220 to 4,000 for the task. The 220 and 320 grits were used via palm sander and the 800, 1,500 and 4,000 grits were used with a soft sanding block. All sanding paper is the 3M wet or dry type. Not looking for a pristine and super shiny finish as the boat will be painted, however, it will be nice to start painting later on with a clean hull. Would like to find a product to fill the deeper gouges and such that sanding won't remove; something I can put on the hull, smooth off and then sand smooth. Any suggestions?

Safe boating,
Joe
 

Attachments

  • 005.JPG
    005.JPG
    124.2 KB · Views: 5
  • 001.JPG
    001.JPG
    89.5 KB · Views: 5
  • 004.JPG
    004.JPG
    111.9 KB · Views: 5
  • 007.JPG
    007.JPG
    129.4 KB · Views: 4

BWR1953

Vice Admiral
Joined
Jan 23, 2009
Messages
5,857
Started going over the aluminum hull to "clean it up" before paint. I have sanding grits ranging from 220 to 4,000 for the task. The 220 and 320 grits were used via palm sander and the 800, 1,500 and 4,000 grits were used with a soft sanding block. All sanding paper is the 3M wet or dry type. Not looking for a pristine and super shiny finish as the boat will be painted, however, it will be nice to start painting later on with a clean hull. Would like to find a product to fill the deeper gouges and such that sanding won't remove; something I can put on the hull, smooth off and then sand smooth. Any suggestions?

Safe boating,
Joe
I had big gouges on the keel of my Kingfisher and used JB WaterWeld for repair. Worked great.
 

piperjoe

Chief Petty Officer
Joined
Jul 11, 2013
Messages
553
I had big gouges on the keel of my Kingfisher and used JB WaterWeld for repair. Worked great.
I have been considering JB WaterWeld so it's good to know the product worked great for you. How long would you recommend for the curing time before spraying the etching solution for the marine primer and paint?

Safe boating,
Joe
 

BWR1953

Vice Admiral
Joined
Jan 23, 2009
Messages
5,857
I have been considering JB WaterWeld so it's good to know the product worked great for you. How long would you recommend for the curing time before spraying the etching solution for the marine primer and paint?

Safe boating,
Joe
That I don't know. After it cured, I smoothed it out and let it sit for quite awhile because I was working on other stuff. 🤷‍♂️
 

piperjoe

Chief Petty Officer
Joined
Jul 11, 2013
Messages
553
That I don't know. After it cured, I smoothed it out and let it sit for quite awhile because I was working on other stuff. 🤷‍♂️
Thank you for the honest answer. Best to not be in a hurry, and there is the trailer to work on while it cures. I appreciate your comments!

Safe boating,
Joe
 

piperjoe

Chief Petty Officer
Joined
Jul 11, 2013
Messages
553
For BWR1953: Go Artemis 1!! What an amazing and exciting Space project for the United States 🇺🇸 and the world 🌎. I, for one, am thrilled to see us go back to the Moon. An awesome technical endeavor to say the least. Here's to a successful mission!

And, to return to our regularly scheduled boat restoration thread, the plan for the day is to continue puttering around on the hull. Going to look for a 3" size sanding/polishing tool as the 5" palm sander is a bit too large and can become somewhat unwieldy to control with one hand on the various aluminum hull areas. Will see what is available when I go to the store.

Safe boating,
Joe
 

BWR1953

Vice Admiral
Joined
Jan 23, 2009
Messages
5,857
For BWR1953: Go Artemis 1!! What an amazing and exciting Space project for the United States 🇺🇸 and the world 🌎. I, for one, am thrilled to see us go back to the Moon. An awesome technical endeavor to say the least. Here's to a successful mission!...
Thanks! I'm hoping for good weather tomorrow. 🚀
 
Top