1973 Starcraft SuperSport 16ft. restoration questions

piperjoe

Chief Petty Officer
Joined
Jul 11, 2013
Messages
553
For BWR1953: Go Artemis 1! Mr. Sarafin and his mission crew certainly made the correct call with regards to the hydrogen cooling line issue. Artemis 1 is still standing and is intact. Looking forward to seeing a successful liftoff and mission!

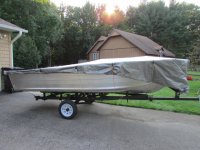
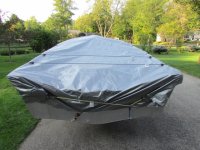
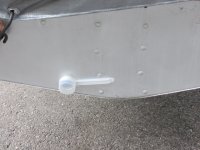
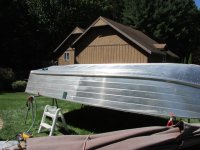
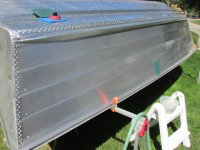
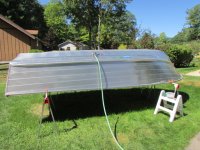
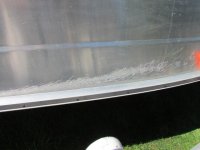
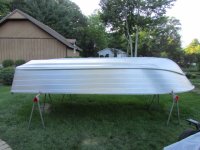
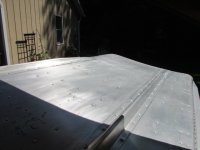
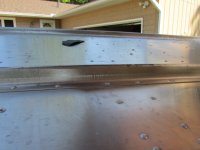
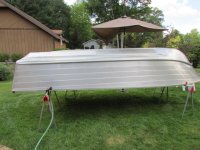
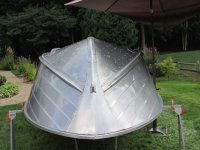
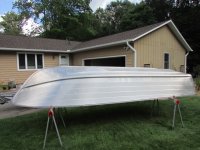
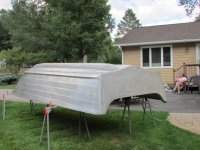
On to the boat restoration: came away, after discussing the cleanup/painting on the aluminum hull with a body repairman, a bit slowed down on my work. He suggested I just do the general cleanup and damage control on the hull surface for now, put the boat back onto the trailer, and wait until Spring to do the final cleanup and etching prior to paint work. Was told that the clean aluminum surface would start oxidizing quickly and unless painted within three days or so I would be wasting my time and money. I understand the oxidation process and understand what he said, however, am curious as to your thoughts on this advice. I plan to brush on a thin coat of marine below water primer and let it dry for a week, followed by a second similar primer coat which would be rolled and tipped to avoid a thick coat of paint. All of the painting would most likely be accomplished outside in the open air. Any thoughts on this advice from experienced aluminum hull painters?

Safe boating,
Joe
 

MNhunter1

Ensign
Joined
May 12, 2014
Messages
981
Was told that the clean aluminum surface would start oxidizing quickly and unless painted within three days or so I would be wasting my time and money. I understand the oxidation process and understand what he said, however, am curious as to your thoughts on this advice. I plan to brush on a thin coat of marine below water primer and let it dry for a week, followed by a second similar primer coat which would be rolled and tipped to avoid a thick coat of paint. All of the painting would most likely be accomplished outside in the open air. Any thoughts on this advice from experienced aluminum hull painters?

Safe boating,
Joe
Same information I came up with. You're good if you get the primer down shortly after the etch, but that bare aluminum needs that first base shorty after etching if you want to maximize your adhesion and get the most out of all your prep work. I'm in the same boat:)
 

piperjoe

Chief Petty Officer
Joined
Jul 11, 2013
Messages
553
Same information I came up with. You're good if you get the primer down shortly after the etch, but that bare aluminum needs that first base shorty after etching if you want to maximize your adhesion and get the most out of all your prep work. I'm in the same boat:)
This information was reinforced this morning when the Admiral and I went into Traverse City and stopped in at the local guru paint store. It was suggested that I do all of the hull preparation work just short of applying the etching liquid. And save the painting for next Spring when I would not be rushed to get the paint on before Winter. I think that is a sound plan as I would not be doing anything with the boat anyway even if I did get the paint on the hull. One other thing that surprised me, and this was agreed on by all the painters there who have experience painting aluminum items, was that I didn't need to use any sanding grits other than 220 320 for prep work if painting the hull. That 3M medium sanding disk is great for going over the rivets and rounded areas and the above grits can take care of the rest of the hull. I purchased a 3" sanding disk adapter for my hand drill and a box of 3" sanding pads so I will see how that works out in the next day or so. I also purchased a can of two part filler for be used for filling the dings and deeper scratches in the hull. Will see how that turns out, too. 😂

Safe boating,
Joe
 

piperjoe

Chief Petty Officer
Joined
Jul 11, 2013
Messages
553
Another question: does anyone following along have comments regarding the use of Urethane paint on an aluminum boat? This was suggested and I am curious if you have used it and your comments as to how it has held up on the water.

Safe boating,
Joe
 

piperjoe

Chief Petty Officer
Joined
Jul 11, 2013
Messages
553
I didn't need to use any sanding grits other than 220 320 for prep work if painting the hull.

Safe boating,
Joe
This should have read "220 and 320 for final prep work (before etching) if painting the hull." Thought I'd better clarify the post.

Safe boating,
Joe
 

piperjoe

Chief Petty Officer
Joined
Jul 11, 2013
Messages
553
Continuing the hull "get ready for paint" work. No photos (lucky you!). Probably will spend the rest of the work season on the hull and maybe the trailer. Motor still stored at my friends boat shop and will be there over the Winter. So, with the work plan in place, and thread interest waning, I'll take my leave now and see you in the Spring. This will also give me time to see if the Vertigo will let up a bit as I may have to find a new home for the boat restoration. Be safe while enjoying your boat!

Safe boating,
Joe
 

piperjoe

Chief Petty Officer
Joined
Jul 11, 2013
Messages
553
Okay...okay...I told a teeny-tiny little fib. I just couldn't stay away. Anyhow, the weather this past weekend was really nice so the decision was made to start cleaning the outside metal surface of the boat hull and smoothing down ragged edges on the hull dings. Tried a couple of different cleaning/sanding methods and was surprised that the best, to my eyes anyway, result was achieved by using Scotch pads (green and blue) and warm water with some Dawn dish soap added. I wanted to clean the aluminum hull but leave the surface "scratched/etched" for painting later on, somewhat like the effect from using 320 grit wet/dry sandpaper. The Scotch pads were much easier to hold, control, and use than wet sandpaper. I used plenty of rinse water straight from the hose and changed the sudsy scrub water a few times as it can get black in a hurry. The entire port side of the hull, including the bottom of the boat on the port side, has now been sanded and I can continue on to the starboard side. Three days of good, albeit warm, weather coming up so I should be able to complete the cleanup/sanding of the hull exterior surfaces. With luck perhaps even the filler can be put on the hull where needed and sanded smooth before the boat goes back onto the trailer. That would be good.

Safe boating,
Joe
 

Attachments

  • 001.JPG
    001.JPG
    124.5 KB · Views: 12
  • 002.JPG
    002.JPG
    118 KB · Views: 13
  • 003.JPG
    003.JPG
    168.2 KB · Views: 12
  • 004.JPG
    004.JPG
    91.4 KB · Views: 11
  • 008.JPG
    008.JPG
    140.7 KB · Views: 12

piperjoe

Chief Petty Officer
Joined
Jul 11, 2013
Messages
553
Today I went back over the hull bottom on the port side using the same Scotch pad routine that I used on the port side metal. Well worth the couple of hours of enjoyable afternoon sunshine. Will stay with this cleanup method for the starboard side aluminum. Actually think the Admiral and I have made some restoration progress this year.

Safe boating,
Joe
 

piperjoe

Chief Petty Officer
Joined
Jul 11, 2013
Messages
553
Worked on the starboard side bottom hull metal this afternoon. For some reason this side is a bit more worse for wear than the port side. It's coming along nicely, though, with a little extra spit and vinegar effort on my part. A couple of nice days in the forecast yet before the expected rain and cooler weather comes our way so I will be at it again tomorrow because I want to finish this outside hull cleanup task and get the boat on the trailer.

Safe boating,
Joe
 

piperjoe

Chief Petty Officer
Joined
Jul 11, 2013
Messages
553
Didn't get much accomplished on the boat today 'cause it was late in the afternoon when the Admiral and I returned to port after an "in town" excursion and lunch. One thing I did want to show was the area around the keel, before and after the scrub/sanding cleanup. The light brown in the photo ran along and over the keel length on both the port and starboard sides, and, on isolated areas of the hull bottom metal. At first I thought it was just a stain but it took some time and effort to get the material off the hull. I think it was lake bottom sediment that was actually ground into the aluminum. After some work it comes off the metal as a small, granular (like sand), material that readily shows up on the pads and hull surface before being rinsed off. Glad I am taking the time to clean the bottom of the boat because I could have easily painted right over the areas noted with marine paint and, most likely, the new paint would not remain over the stained areas for long. Just wanted to point out what I found on my hull as the restoration process continues.

Safe boating,
Joe
 

Attachments

  • 002.JPG
    002.JPG
    132.1 KB · Views: 11
  • 004.JPG
    004.JPG
    86.8 KB · Views: 11
  • 005.JPG
    005.JPG
    94.6 KB · Views: 12

piperjoe

Chief Petty Officer
Joined
Jul 11, 2013
Messages
553
Hull bottom aluminum surface on port and starboard side of the keel are now clean. Will work on the starboard side aluminum surface tomorrow if all goes well; I can stand with both feet on the ground to get the job done. And onwards we go....

Safe boating,
Joe
 

piperjoe

Chief Petty Officer
Joined
Jul 11, 2013
Messages
553
Finished cleaning the outside hull aluminum surfaces today. Then I mowed the lawn...LOL!

Safe boating,
Joe
 

Attachments

  • 001.JPG
    001.JPG
    140.2 KB · Views: 7
  • 003.JPG
    003.JPG
    125.2 KB · Views: 6
  • 004.JPG
    004.JPG
    134.4 KB · Views: 7
  • 005.JPG
    005.JPG
    145 KB · Views: 7

Rasdiir

Petty Officer 2nd Class
Joined
Jul 18, 2011
Messages
132
Looks great, after all that I would polish it up and keep it shiny!
 

piperjoe

Chief Petty Officer
Joined
Jul 11, 2013
Messages
553
The photos make the hull appear better than it looks when standing next to it. Lots of nicks, scratch marks, dents and other miscellaneous abrasions on the hull surface. I will be using a surface filler to repair the most noticeable of the hull surface damage. My thinking is that a coat of light colored paint, white or sand color, would look better on the hull and require less upkeep maintenance than trying to keep all that aluminum polished and clean.

Safe boating,
Joe
 

piperjoe

Chief Petty Officer
Joined
Jul 11, 2013
Messages
553
Will be going to town tomorrow and while there I think I will get a new tarp for the boat. After giving the restoration work plan some thought the Admiral and I will put the hull back on the trailer and place miscellaneous boat items in it for storage. Then I can move the boat and trailer down to the Winter rest spot in my yard. I'll buy a piece of Oak board so new boards can be cut to replace the flimsy and soft original ones that go under the top bow aluminum sheet; these wood items will get a couple of brushed on spar varnish coats for good measure. Should be able to finish cutting the new marine plywood deck pieces, too, and get the West Systems epoxy on them before snow comes our way. Have the boat in the queue for putting the Johnson on the transom this coming Spring after the hull paint is on and cured. Then it's deck stringers, foam to be cut and placed in the hull belly, and putting the deck pieces on the stringers. Should start to look like a boat again. Getting a bit excited 😊 just thinking about the upcoming restoration work I may be able to accomplish next year. I may be slow as a turtle 🐢 with regards to this restoration effort but I am still plodding along towards that lake splash just the same!

Safe boating,
Joe
 

piperjoe

Chief Petty Officer
Joined
Jul 11, 2013
Messages
553
The boat hull is now back on the trailer. I am thankful for the tilt feature on the original trailer as it was a huge aid as far as loading the boat off the lawn. The Admiral and I were able to offload the boat from the sawhorses, turn it right side up on the lawn and get it all the way onto the trailer by ourselves. Those trailer rollers were nice, too, as I doubt the two of us could have loaded the boat if the trailer only had carpeted bunks. Placed some of the aluminum parts inside the hull for over Winter storage and also put three plastic lawn chairs right side up inside the hull for the new tarp to drape over so water and snow can run off. We ran out of daylight so tomorrow the Admiral and I will tarp the hull and move it to its place on the yard.

Safe boating,
Joe
 

piperjoe

Chief Petty Officer
Joined
Jul 11, 2013
Messages
553
Can you say, "Goodnight StarCraft"? The boat is now tarped and ready for me to hook onto the trailer with the pickup and move it off the driveway. Time for Fall yard work/cleanup. I'll be working on some miscellaneous boat items over the Fall/Winter slowdown, but, I can tell you I'm looking forward to getting back into the restoration come Spring. So, my friends, thanks for checking in and leaving your comments/suggestions/encouragement! "Goodnight StarCraft!"

Safe boating
Joe
 

Attachments

  • 003.JPG
    003.JPG
    122.2 KB · Views: 14
  • 002.JPG
    002.JPG
    150 KB · Views: 15
  • 005.JPG
    005.JPG
    140.3 KB · Views: 16
  • 005.JPG
    005.JPG
    140.3 KB · Views: 15
  • 006.JPG
    006.JPG
    156.3 KB · Views: 15
  • 007.JPG
    007.JPG
    117.7 KB · Views: 15

Moserkr

Chief Officer + Starmada Splash Of The Year 2021
Joined
Nov 23, 2020
Messages
835
Nice work so far!! Looks ready for a winters nap. Hope its not too long so you can finish her up next year.
 

piperjoe

Chief Petty Officer
Joined
Jul 11, 2013
Messages
553
The Admiral and I moved the boat to its Winter parking spot this afternoon in the backyard. Even managed to power wash the other trailer today while the weather was dry. That about does it for now so the Admiral and I will see you next Spring!

Safe boating,
Joe
 
Top