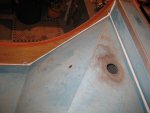
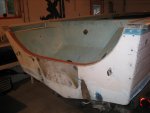
1973 starcraft ss restore in progress

crankbait cowboy

Chief Petty Officer
Joined
Mar 25, 2013
Messages
574
Re: 1973 starcraft ss restore in progress

found on flea bay in south florida or somewhere. dont have outfit handy but typed in aluminum marine fuel tank on flea bay.i talked to the dealer and he said its been cleaned inside, primed outside ,pressure tested to 3 psi and not sure if sending unit works. 100 bucks plus a 100 to ship to northern mn. aint got it yet but will post pic when i do. it is hard to find one that will fit under deck in 18 ss so when i found this one i jumped. looked for weeks and actully had best luck with flea bay. and to make a new one is more like 400.00 plus shipping
 

Watermann

Starmada Splash of the Year 2014
Joined
Jan 12, 2013
Messages
13,787
Re: 1973 starcraft ss restore in progress

Sounds like a good deal to me, so how many gallons is the tank?
 

crankbait cowboy

Chief Petty Officer
Joined
Mar 25, 2013
Messages
574
Re: 1973 starcraft ss restore in progress

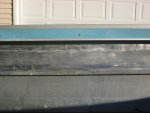
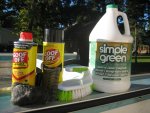
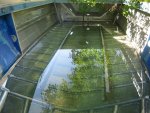
these were my supplies used today. used goof off to remove the glue on storage areas on gunnel with plastic scraper. not perfect but gonna cover area with vinyl or carpet again anyway.IMG_0106.jpgIMG_0108.jpg see next post
IMG_0107.jpg
 

crankbait cowboy

Chief Petty Officer
Joined
Mar 25, 2013
Messages
574
Re: 1973 starcraft ss restore in progress

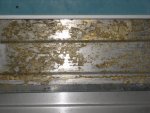
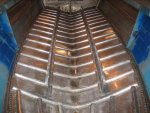
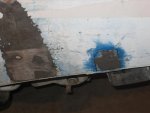
next i cleaned out limbars with a wire and scrubbed whole inside with 1/2 simple green and 1/2 warm water. then filled with h20 and let it stand in h20 and simple green for a couple hrs while checking for leaks, finding a few rivets on bow and the rear starboard strake right at rear end of boat. i marked these area and drained boat letting it sit in sun for afternoon to dry and then put gluvit on tonight see pics in next post
 

crankbait cowboy

Chief Petty Officer
Joined
Mar 25, 2013
Messages
574
Re: 1973 starcraft ss restore in progress

so now for a couple questions. the leaky areas i am wondering should i use 5200 or marine tex on outside of hull (cleaned up good of course anbd before prepping for paint ) and also best way to fill holes not needed in transom.( 5200, marine tex or jb weld) plan was to put transom in befor filling these holes so i would have a solid backing behind it. thanks for any advise you may be able to give me.

IMG_0117.jpg
 

Watermann

Starmada Splash of the Year 2014
Joined
Jan 12, 2013
Messages
13,787
Re: 1973 starcraft ss restore in progress

You been busy this weekend I see. Simple green hot tub! Be sure you chase all the water out of the seams before using the gluvit. I used my heat gun to make 100% everything was dry before putting it on. Also is will need a few dry days to set up good as well. All in all not too many leakers it looks like. One thing I found is go lighter on it that you think you need, it's more runny than it looks when your putting it on. You'll come back to see it's not where you left it.
 

classiccat

"Captain" + Starmada Splash Of The Year 2020
Joined
Dec 20, 2010
Messages
3,412
Re: 1973 starcraft ss restore in progress

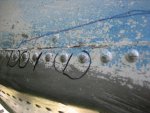
That seam between the bow plate and hull skin is prone to leaking (just above the circled rivets)...water may have been running out of that guy and onto the rivets. I'd hit that seam with 5200.
 

Woodonglass

Supreme Mariner
Joined
Dec 29, 2009
Messages
25,927
Re: 1973 starcraft ss restore in progress

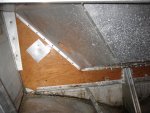
Did you Gluvit the inside of the Boat? If so, I Re-Buck the rivets and then Re-Gluvit those areas. Gluvit should take care of the rivet and seam leaks. You may have to do some creative tipping and tilting to get it to flow into the areas in question but if you get it in there it WILL seal em.;)
 

dozerII

Admiral
Joined
Oct 25, 2009
Messages
6,527
Re: 1973 starcraft ss restore in progress

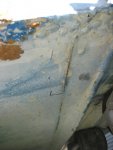
Coming along nicely CC. If you can find it the Aerosol GoofOff Graffiti remover works the best for glue removal. Up in the bow where the side aluminum all comes together you will find either red or brown sealant that was poured in at the factory, use a flat screw driver or an old wood chisel and you will probably find it is easy to dig that stuff out, as it has lost it's bond. Once you get that all removed your gluvit will seep right into those seams and seal the leaks at the bow.
 

crankbait cowboy

Chief Petty Officer
Joined
Mar 25, 2013
Messages
574
Re: 1973 starcraft ss restore in progress

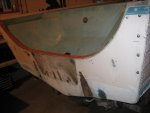
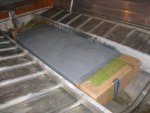
got the gluvit on inside of hull. went well and pretty impressed as to how it filled and set up. then i dropped in transom and fit all hardware, and jb welded some unneeded holes in transom skin. gonna attach all hardware hopefully tonight with 5200 slathered on bolts and washers , and hopefully lay a bead of 5200 along splashwell and transom seam. on another note i got my fuel tank via ups. pretty happy with it as it is 30 gl below deck and gonna fit nicely. guy said he cleaned inside and primed and pressure checked to 3 psi before advertising. i will pressure check before putting in boat. 100 bucks on ebay plus a 100 to ship. thought was a good price compared to what i have been seeing and tough to find one that size for under deck. see pics in next post.
 

crankbait cowboy

Chief Petty Officer
Joined
Mar 25, 2013
Messages
574
Re: 1973 starcraft ss restore in progress

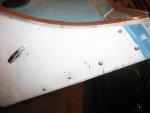
last night got the transom hardware mounted, with it all slathered in 5200. and a bead of 5200 around the splashwell/transom seam. also used a backer plate on the transom hooks like many on here have. all went pretty well. my top cap is in poor shape , anybody got any ideas as to best way to replace it?
 

Watermann

Starmada Splash of the Year 2014
Joined
Jan 12, 2013
Messages
13,787
Re: 1973 starcraft ss restore in progress

Good lord, why on earth would SC think a splashwell needs 40+ screws to hold it in place?
 

pckeen

Commander
Joined
Jun 20, 2012
Messages
2,067
Re: 1973 starcraft ss restore in progress

Good lord, why on earth would SC think a splashwell needs 40+ screws to hold it in place?

....kids like to bounce on them....kids use them as springboards for jumping in the water....kids think it would be a good idea to drop an anchor in the back....:facepalm::joyous::mad-new:

At least we know the transom won't separate from the splashwell when all 40 are in.
 

dozerII

Admiral
Joined
Oct 25, 2009
Messages
6,527
Re: 1973 starcraft ss restore in progress

last night got the transom hardware mounted, with it all slathered in 5200. and a bead of 5200 around the splashwell/transom seam. also used a backer plate on the transom hooks like many on here have. all went pretty well. my top cap is in poor shape , anybody got any ideas as to best way to replace it?

On the Naked Lady the top cap for the transom was cracked and really bent up. Took a sample to the local metal fab shop and they made us a new one. Fitting it on the transom took four guys, a rubber hammer and quite a bit of cussing. But it can be done and looks good.
 

crankbait cowboy

Chief Petty Officer
Joined
Mar 25, 2013
Messages
574
Re: 1973 starcraft ss restore in progress

thanks doz and water, looking for ideas like you suggest. not sure which way i am going to go yet
 
Top