1973 starcraft ss restore in progress

Watermann

Starmada Splash of the Year 2014
Joined
Jan 12, 2013
Messages
13,787
Re: 1973 starcraft ss restore in progress

I'm thinking that's a good plan. I enjoy guys working this all out while I'm lurking around, gives me all the ideas for my Chief.
 

boatbeginner1

Petty Officer 1st Class
Joined
Jun 17, 2012
Messages
311
Re: 1973 starcraft ss restore in progress

Looks good! Have you measured to make sure the 2 batteries will fit on tone side and the gas tank will fit on the other? I found that on my Jet Star, the gas tank barely fits when I install a bilge pump. Overall, good plan and nice drawings!
 

crankbait cowboy

Chief Petty Officer
Joined
Mar 25, 2013
Messages
574
Re: 1973 starcraft ss restore in progress

yea, should work fine. am now looking for a gas tank to fit. how big a tank you guys think i will need to run all day with a 120 hp engine. got yhe floor cut last night ( see pics ) and dry fit nicely. used old for templates, and used 5/8 marine grade as that was what po had in there and consoles and side boards fit well. i know some use 3/4 and factory is 1/2 so thinking 5/8 with 2 coats epoxy will be plenty stiff. gonna put some extra square meat pieces under area where seats go for pedastals to grab too and some tabs between each sheet on underside where they meet each other , then resin whole thing.
 

Watermann

Starmada Splash of the Year 2014
Joined
Jan 12, 2013
Messages
13,787
Re: 1973 starcraft ss restore in progress

Rule of thumb for outboards, they will consume at WOT, 1 gallon an hour for every 10 HP. So at WOT that 120 would chomp down 12 gallons an hour. I guess you could make the boat into a gas tank and put a couple seats on top. :D
 

crankbait cowboy

Chief Petty Officer
Joined
Mar 25, 2013
Messages
574
Re: 1973 starcraft ss restore in progress

am now thinking 100 hp may be big enough if i can get 40 mph or so from it. anything over that is not nessessary for my needs. how big a fuel tank you others using in a 18 ft ss open bow and what model or size, and where you putting it. thanks
 

crankbait cowboy

Chief Petty Officer
Joined
Mar 25, 2013
Messages
574
Re: 1973 starcraft ss restore in progress

i found a 30 gl fuel tank that will fit under the deck. all fittings stick up too high for deck but i could have at rear end under splashwell , out of sight. what do you guys think. i know i am giving up some floatation space ( do you think this is a concern ) but my weight would be spread over 60 inches down the middle. gonna run some longer trips so think i need more than the standard 18 gl or so.aluminum used tank, that would fit well. other option is a 18 gl poly in front bow. but a bit concerned about the fuel pickup being on front end and low fuel and bouncing will the pickup suck air. see pic below , and please give me your thoughts. thanks
 

jasoutside

Supreme Mariner
Joined
Dec 20, 2009
Messages
13,269
Re: 1973 starcraft ss restore in progress

That would be pretty awesome if you could actually squeeze a 30 gal tank sub deck! Fittings under the splashwell is a good solution but are you sure the tank itself it isn't too tall? Ultra thin tanks are tough to find.
 

crankbait cowboy

Chief Petty Officer
Joined
Mar 25, 2013
Messages
574
Re: 1973 starcraft ss restore in progress

wow that was quick! tank is 6.5 inches total height in middle, and only 3 inches high out on ends. i made a template of cardboard and it will fit under deck nicely with room for some kind of cushion effect under it. i also like that the weight would be distributed farther forward than a tank totally under splashwell. what do you think of giving up the floatation space? also the fill fitting is on wrong side and a 90 degree. would want on other side and straight to avoid filling problems. could i have a welding shop change that out fairly easily? thanks
 

jasoutside

Supreme Mariner
Joined
Dec 20, 2009
Messages
13,269
Re: 1973 starcraft ss restore in progress

I wouldn't sweat the flotation issue, just be diligent in putting foam wherever you can. If you take a look at my Sea Nymph thread you see that I actually built out the bulkheads and deck as "foam core" which added a ton of flotation.
 

Landof9000lakes

Seaman Apprentice
Joined
Jul 26, 2013
Messages
39
Re: 1973 starcraft ss restore in progress

any ideas as to how to remove the drain tubes and plug hole in transom, as i want to tear out old and replace. also wondering do i put new transom in, dry fit, and drill all holes needed, then remove and drill holes out bigger,fill with 5200 and then put together drilling new holes. hard for me to follow exactly what procedure you other guys are doing. thanks in advance. will have some pics of the transom coming out
I'm not 100% sure what you are asking but I 'think' you are talking about the splash well drain holes.

If so I'll offer my plan of attack.

I'm moving my splashwell to reduce it's size and when I do the old splashwell drain holes will be way out of position.
So to deal with that I'm placing a thru hull fitting in the old splashwell drain holes and running a hose from them to the drains in the bottom of the new splash well.

Water will drain from the new splashwell but exit through the old splashwell drain holes.
 

crankbait cowboy

Chief Petty Officer
Joined
Mar 25, 2013
Messages
574
Re: 1973 starcraft ss restore in progress

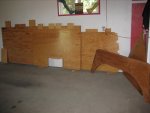
got 2 coats epoxy resin on bottom and 1 on top of deck boards. (will put a final coat on top when installed filling all seams real good. took advantage of nice weather but gonna be awhile before i get floatation/fuel tank and deck on so shoould cure real well.

IMG_0105.jpg
 

crankbait cowboy

Chief Petty Officer
Joined
Mar 25, 2013
Messages
574
Re: 1973 starcraft ss restore in progress

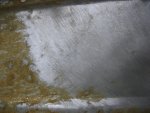
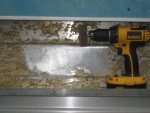
started taking off old glue from gunnel storage area. using drill and an 80 grit sandpaper disk. seems to work real well. as you can see in 2nd pic it leaves pretty good scratches. should be fine for this area and cleaning up bottom of boat as it will all be covered with floor or vinyl. but wondering if this would be an issue for any place i am going to paint (scratches) any thoughts from you all?IMG_0102.jpgIMG_0103.jpg
 

Landof9000lakes

Seaman Apprentice
Joined
Jul 26, 2013
Messages
39
Re: 1973 starcraft ss restore in progress

Well since you are asking. I'll give another vote for just leaving it. That aluminum isn't that thick and you are removing material.
Just kind of makes me uncomfortable.
As for prepping it for paint....Those scratches will likely show when painted over yes.
 

Watermann

Starmada Splash of the Year 2014
Joined
Jan 12, 2013
Messages
13,787
Re: 1973 starcraft ss restore in progress

started taking off old glue from gunnel storage area. using drill and an 80 grit sandpaper disk. seems to work real well. as you can see in 2nd pic it leaves pretty good scratches. should be fine for this area and cleaning up bottom of boat as it will all be covered with floor or vinyl. but wondering if this would be an issue for any place i am going to paint (scratches) any thoughts from you all?View attachment 212103View attachment 212104

I would drop to 120 grit paper, then when you shoot the bottom coat of SE primer, a 2nd coat of high build primer and 2 top coats of paint, theres no way you'll see the surface scratches.
 

dozerII

Admiral
Joined
Oct 25, 2009
Messages
6,527
Re: 1973 starcraft ss restore in progress

Hey CC, this product Shop Goof Off 16 oz Aerosol Graffiti Remover at Lowes.com Goof-off Graffiti remover in the aerosol can is what took all the glue off on the 201 spray it on let it sit for a couple minutes then use a plastic scrapper to get the bulk off then wipe with a rag and a little more spray. Final clean with acetone on a rag.
 

classiccat

"Captain" + Starmada Splash Of The Year 2020
Joined
Dec 20, 2010
Messages
3,412
Re: 1973 starcraft ss restore in progress

The decking & transom look really good! Tabbing like that is the way to go!

If you can't find what glen recommends (goo-off), Zip Strip was the mutt's nuts!
 

kungpaoshizi

Petty Officer 1st Class
Joined
Apr 29, 2013
Messages
221
Re: 1973 starcraft ss restore in progress

got 2 coats epoxy resin on bottom and 1 on top of deck boards. (will put a final coat on top when installed filling all seams real good. took advantage of nice weather but gonna be awhile before i get floatation/fuel tank and deck on so shoould cure real well.

View attachment 212102

Nice sign in the pic lol

Floatation I wouldn't worry about too much, maybe build up surrounding areas a bit extra.. Where did ya find the tank btw, been wondering about a tank myself with something like those dimensions. :)
Looks good so far!
 
Top