1972 18' Starcraft Restoration

Bestmason

Seaman Apprentice
Joined
Jan 12, 2014
Messages
46
Re: 1972 18' Starcraft Restoration

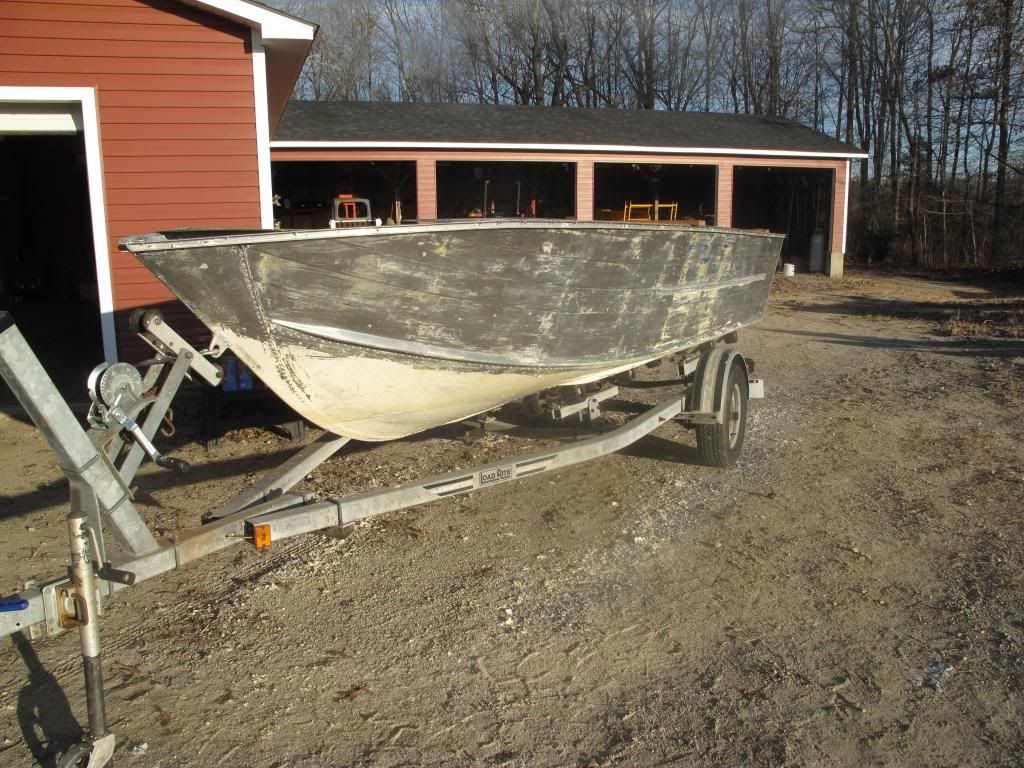
Well it is Sunday and I have had a good morning "spiritually". But now my thoughts turn to an 18' Starcraft gliding down my local lake chasing the largest Striper I have ever seen. Now back to reality. Thanks for all the input men! This is where I started yesterday:

http://i1018.photobucket.com/albums/af302/Bestmason/021_zpsd0eeac06.jpg

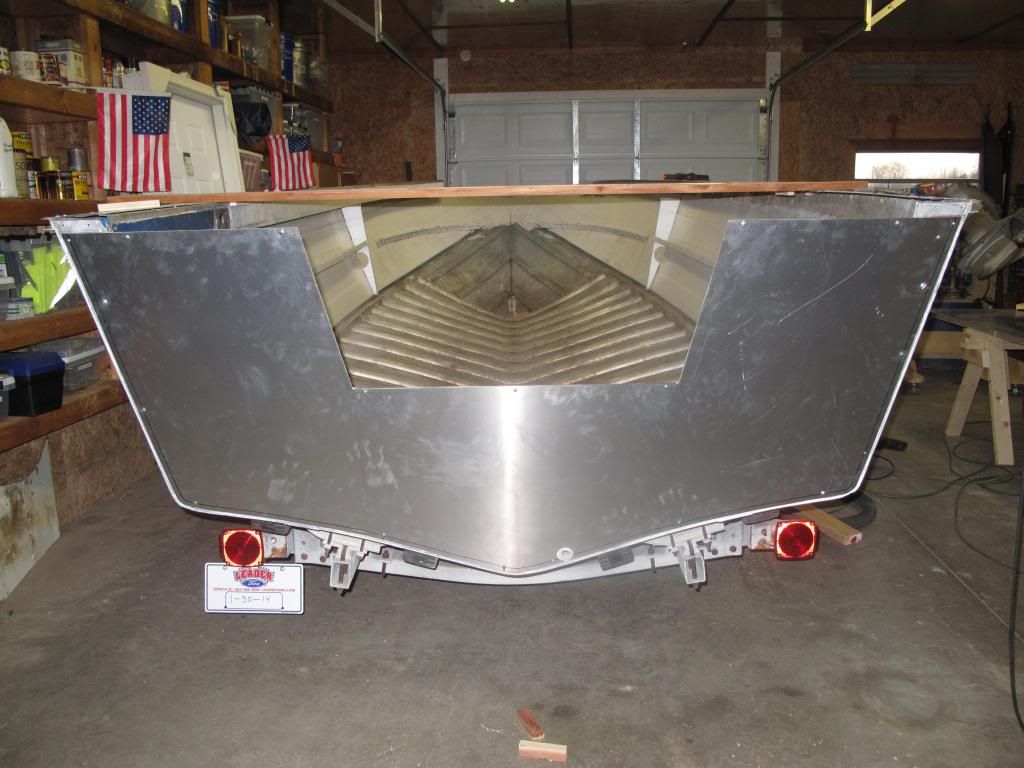
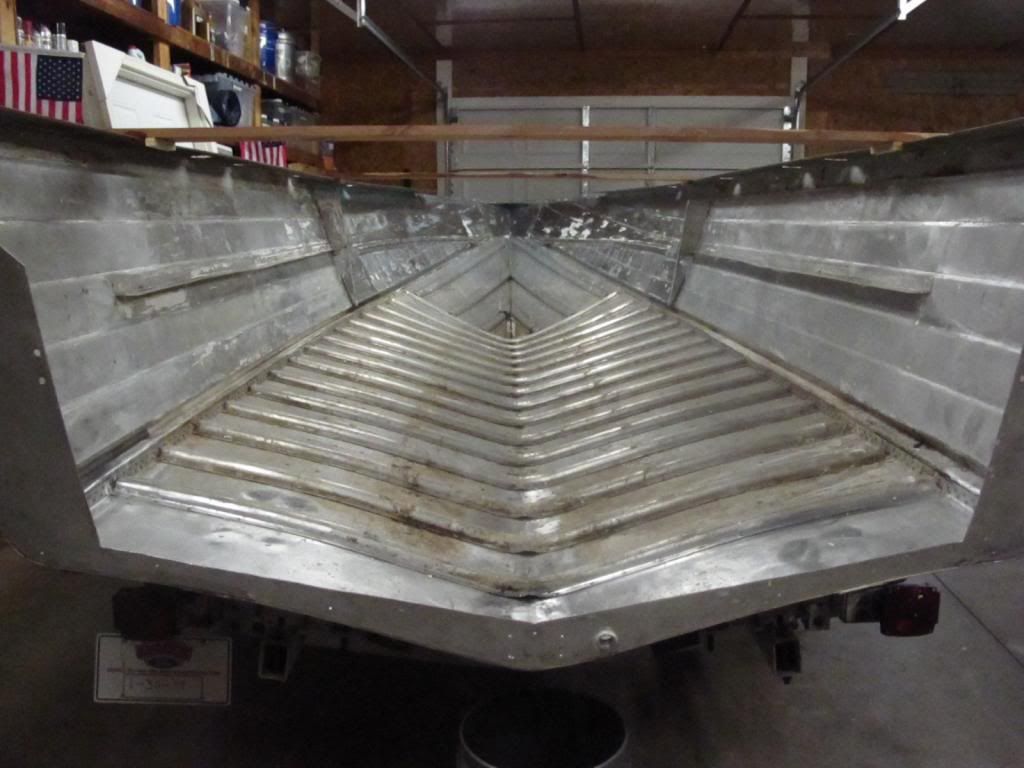
This is what I ended with:

http://i1018.photobucket.com/albums/af302/Bestmason/BoatRebuild001_zps009b54f8.jpg

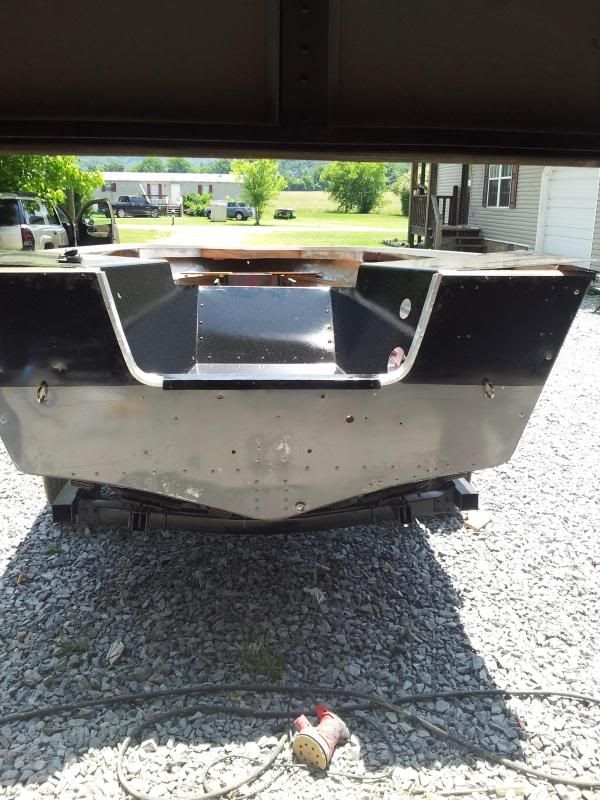
OK, please do not throw things,, I chose to go with a more modern transom profile. I think it will provide more structural stability and less backwash. Maybe just in my mind though. I will be using solid rivets around the perimeter 2 " apart set in 5/8". That was a good point about them being in the way of the ply wood transom board. I will rabbit the edge where need about 3/32" to allow for rivet heads. I will also rework the splash area to give more fishing room hopefully next week after I get boat stripped.

Questions:

Where can I get a reasonably priced rivet gun?
What style and size rivets to use?
Is 2" on center close enough with 5200?
Can anyone come to Balls Creek and help me strip the boat?

Thanks men. ED
 

Bestmason

Seaman Apprentice
Joined
Jan 12, 2014
Messages
46
Re: 1972 18' Starcraft Restoration

Oh yes, is a 21" transom height correct for an OB with a 20 in shaft? That was the closest i could measure from old transom. Thanks ED:confused:
 

jbcurt00

Moderator
Staff member
Joined
Oct 25, 2011
Messages
24,996
Re: 1972 18' Starcraft Restoration

Not an engineer, but I'll give ya my $0.0175....

If you look at the joints between adjoining panels on the transom & elsewhere, the rivets are typically a double row & much closer together then 2". Since you cut the transom skin out, you have a double row of rivets left along all 3 cut edges that will prevent the new skin from spanning the entire width & height of the transom.

I would probably remove at least 1 row of rivets and run the new skin to just beyond the removed row. Then reuse the existing skin's rivet holes and thru drill the new skin. Having the existing skin & new skin overlapping, and fastened at the outer corners would spread as much of the load as far as possible apart, and when you rabbet the plywood transom for the rivet heads, it'll be at the outer edges too.

Starcraft used some sort of sealant between overlapping panels, 5200 should be a good substitute.

Solid rivets are available here:
rivetsonline.com

There are other vendors, depending on where you are, you might find them locally.
 

vintage2

Seaman Apprentice
Joined
Apr 4, 2012
Messages
32
Re: 1972 18' Starcraft Restoration

Bestmason, I have been looking at your resto, Wow, you ARE moving along. I too am in the middle of one on a '73 SS (Took almost a year break but now back at it). Mine was painted blue/white. During the demo I found no other colors and the hidden paint was also blue, so I believe it to be the original color. Keep up the good work.
 

Weep'n Willy

Master Chief Petty Officer
Joined
Jun 12, 2012
Messages
831
Re: 1972 18' Starcraft Restoration

But now my thoughts turn to an 18' Starcraft gliding down my local lake chasing the largest Striper I have ever seen.

No doubt that the thought of being on the waters chasing down some rod busting fish is great motivation but man you sure have some powerful motivation in the deconstruction of this rig. Nice work. Good luck with the resto and hopefully we sill see a pic of that striper in your mind.
 

Watermann

Starmada Splash of the Year 2014
Joined
Jan 12, 2013
Messages
13,775
Re: 1972 18' Starcraft Restoration

You should be able to use 3/16" brazier rivets and 5200 to make that new skin a part of the old boat.

 
Last edited:

Bestmason

Seaman Apprentice
Joined
Jan 12, 2014
Messages
46
Re: 1972 18' Starcraft Restoration

Not much to show today but I got a start stripping. I am waiting for stainless brushes to arrive to do a final clean up. I do have a question. I saw that someone used "Simple Green" in the bottom to help clean it. Is this the best choice? Or is there a better choice? I plan to strip as much paint off as possible them wire brush and sand down to reasonably clean aluminum. I am going to use a softef end brush in a drill to clean around the rivets so as not to remove metal.

Another question, how clean do I need to be around the floor bracing before I apply the Gluvit to the seams. Does it need to be shiny metal? Do I need to remove the original red sealant from the edges of the bracing?

Thanks for all the help. ED
 

Watermann

Starmada Splash of the Year 2014
Joined
Jan 12, 2013
Messages
13,775
Re: 1972 18' Starcraft Restoration

As far as cleaners go, I've had the best luck using this.

F18760945.jpg


Clean and oil free is what is best when it comes to the Gluvit or when priming before painting. After wheeling off the gunk, I clean the surface with the vinegar and then acetone if the surface had anything greasy or oily on it.
 

SigSaurP229

Commander
Joined
Oct 1, 2008
Messages
2,123
Re: 1972 18' Starcraft Restoration

While I think I understand what you are going for and I agreee the newer style splashwell like mine is more utilitarian and Probably stronger there is a differnce in construction than in what you are doing.

My back transom skin goes all the way from one corner to the other and is folded underneath the outer hull then double riveted into place with the channels for the transom riveted into it as well. I agree that it makes for a much stronger transom but only because everything is folded then riveted into place.


Then the splashwell goes over everything there is absolutely no way to remove my transom without removing the splashwell as well.

With how I think you are approaching this I think you may be wise to consider the addition of some Knee braces right on the seams of where the old pieces and the new pieces meet.


Harbor freight is the best place to get a rivet gun, $34.99 for the air riveter and worth every nickle.


I would use 3/16" aluminum closed end blind rivets.
 
Last edited:

Bestmason

Seaman Apprentice
Joined
Jan 12, 2014
Messages
46
Re: 1972 18' Starcraft Restoration

High all. I have discovered a ground shaking truth, "I love stripping".:laugh::facepalm: Not, but it beats sanding 4 coats of paint. I have discovered that I believe the last coat is an epoxy derivative that someone brushed on thick. Once through that no prob.

Sig, JB I have been thinking about what you said about rapping the new transom skin around the edge and then riveting. I bought 5052 aluminum and that stuff just doesn't bend as well as 3031. How did you bend the edges? Did you anneal the aluminum first or did you just hammer or use a break? Thanks again for your input, I value it greatly. ED

I will upload pics of me stripping tonight.
 

jbcurt00

Moderator
Staff member
Joined
Oct 25, 2011
Messages
24,996
Re: 1972 18' Starcraft Restoration

I will upload pics of me stripping tonight.
No, really, please don't :facepalm: :laugh:
Sig, JB I have been thinking about what you said about rapping the new transom skin around the edge and then riveting. I bought 5052 aluminum and that stuff just doesn't bend as well as 3031. How did you bend the edges? Did you anneal the aluminum first or did you just hammer or use a break? Thanks again for your input, I value it greatly. ED
BlueFin has done the most hull rivet replacement & panel fab of any build I can remember. He may be able to help w/ alloy choices & bending. He commented earlier:
017_zpsf3773d1e.jpg


^^^ Wow! My kind of resto! .
His build:
My First StarCraft; 1975 18' SuperSport
 

jasoutside

Supreme Mariner
Joined
Dec 20, 2009
Messages
13,269
Re: 1972 18' Starcraft Restoration

I just threw up in my mouth a little bit.
 

classiccat

"Captain" + Starmada Splash Of The Year 2020
Joined
Dec 20, 2010
Messages
3,411
Re: 1972 18' Starcraft Restoration

After reading your story, I eyeballed my transom skin for a bit...contemplated what it would take to replace. The riveting part isn't too scary but forming that piece is out of my league (tin weekend warrior). That needs to be pressed over a form to conform to the bottom /side hull skins simultaneously/perfectly. It's 5052 aluminum and quite thick...mine appears a tad over 0.090". I'd be VERY impressed if you were able to DIY that. It wouldn't hurt to test the malleability with a block of wood & a dead-blow hammer....focusing on the corners/angles. What you do have going in your favor that is its the inner piece. My limited understanding is that 5052 should not be annealed/heat-treated. (but OK for welding).


If you decide to work with what you already have...I don't know much about 3031 other than the fact that it's alloyed with manganese (5052 contains magnesium)...if it's anything like 3003, than it has great corrosion resistance (as does 5052). You can probably get away with a double-row of rivets (seam pattern) around the perimeter. Solid rivets only...for obvious reasons but you also need to keep as small of a bucktail as possible so that the transom ply can clear them (even after you put a rabbit at the outer corners of the PLY). EDIT: +1 on the additional knee braces.
 
Last edited:

SigSaurP229

Commander
Joined
Oct 1, 2008
Messages
2,123
Re: 1972 18' Starcraft Restoration

High all. I have discovered a ground shaking truth, "I love stripping".:laugh::facepalm: Not, but it beats sanding 4 coats of paint. I have discovered that I believe the last coat is an epoxy derivative that someone brushed on thick. Once through that no prob.

Sig, JB I have been thinking about what you said about rapping the new transom skin around the edge and then riveting. I bought 5052 aluminum and that stuff just doesn't bend as well as 3031. How did you bend the edges? Did you anneal the aluminum first or did you just hammer or use a break? Thanks again for your input, I value it greatly. ED

I will upload pics of me stripping tonight.

Mine was that way from the factory and I didn't have to do it. My SS kind of falls in the odd years though were there isn't a whole lot of info out there about them.

Honestly I've not seen an outboard transom come apart like that. My transom is one solid piece from port to starboard and the only way it will come apart like that is if I cut it.


You can see a row of rivets in mine but they only hold the channel that supports the transom.

The three bolts on the side each hold the transom.

The back transom skin is one solid piece folded at the sides and bottom then riveted to the hull.
 
Last edited:

Bestmason

Seaman Apprentice
Joined
Jan 12, 2014
Messages
46
Re: 1972 18' Starcraft Restoration

Mine was that way from the factory and I didn't have to do it. My SS kind of falls in the odd years though were there isn't a whole lot of info out there about them.

Honestly I've not seen an outboard transom come apart like that. My transom is one solid piece from port to starboard and the only way it will come apart like that is if I cut it.


You can see a row of rivets in mine but they only hold the channel that supports the transom.

The three bolts on the side each hold the transom.

The back transom skin is one solid piece folded at the sides and bottom then riveted to the hull.

Thanks for the input Sig. I contacted a friend of mine who works an a nearby marina and with ya'lls help and Adam I think I have come up with a plan that will hold this baby together. It involves a lot of rivets, extra corner bracing and three pieces of 5052 aluminum, and additional transom supports. I will take pics of the progress when I get there.

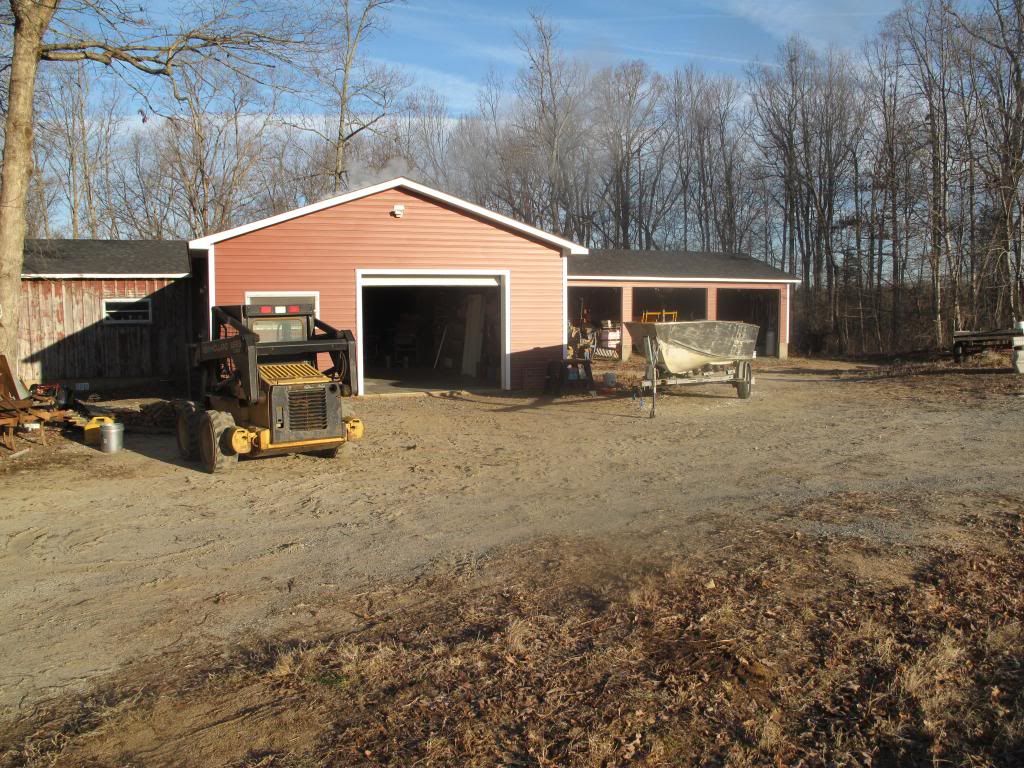
Now this is what I saw as I approached the shop:


I had planned more stripping today but it was 17 degrees so I decided not to flip the boat. At the end of the day this is what it looks like:


ed

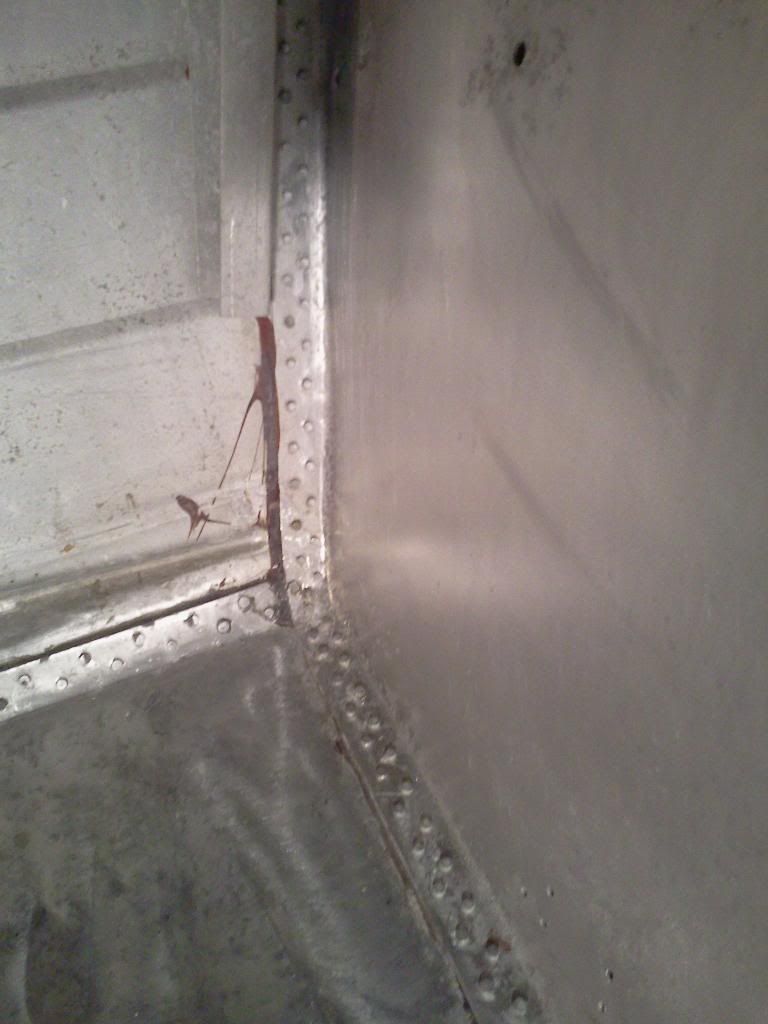
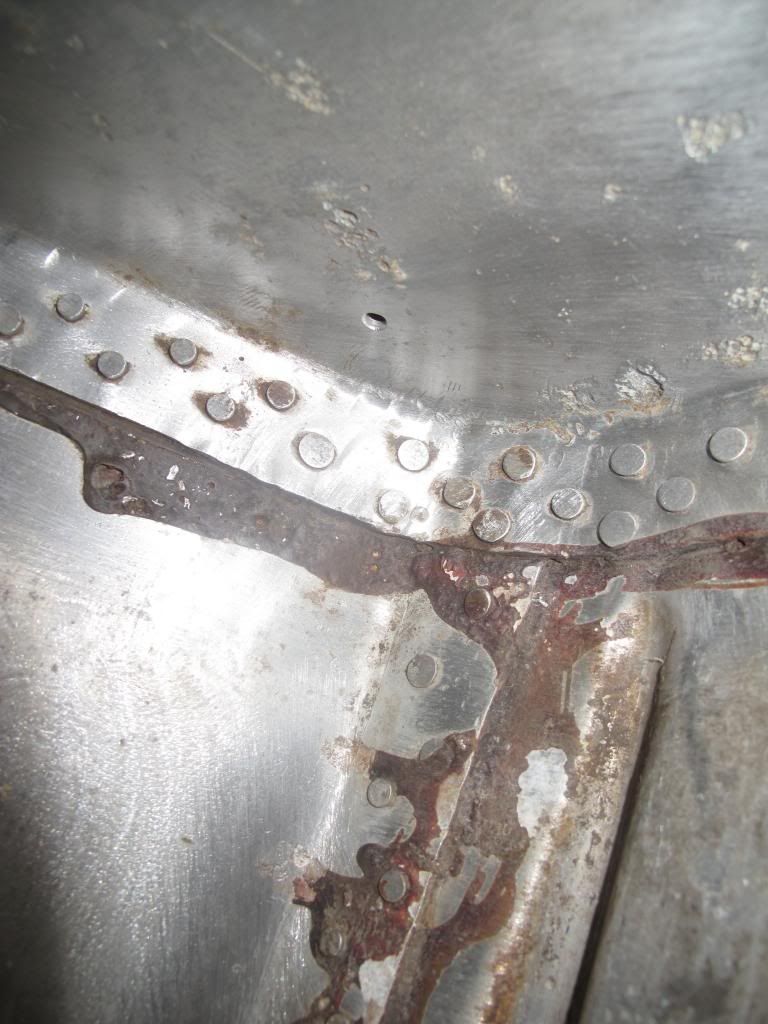
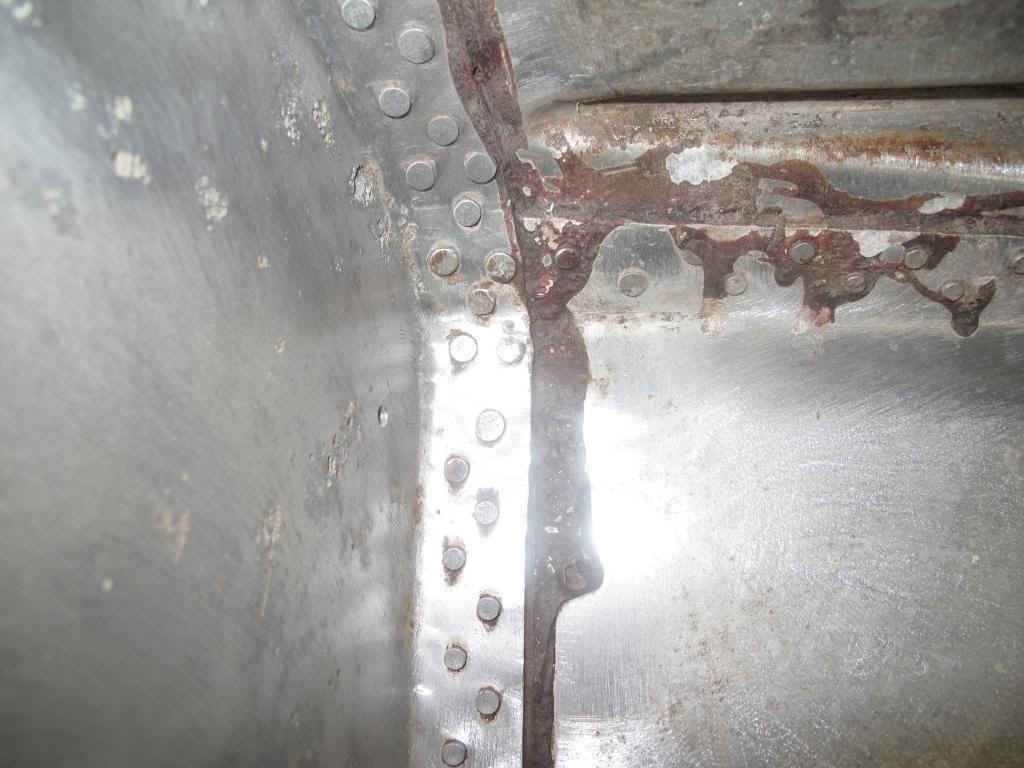
I washed the inside of the boat with the best cleaners I had. Now I will start cleaning the inside of the hull. I worked a little in the transom area to begin cleaning the corrosion with nyalon brushes, this is what I found:


A question, after I brush down the entire hull what is the best way to remove the white corrosion in the cavities the brush just will not get? I read about BF using an acid wash. What acid, how much, how to neutralize and get it out from all the nooks and crannies? I really want to kill this corrosion. So what is best? Thanks ED
 

classiccat

"Captain" + Starmada Splash Of The Year 2020
Joined
Dec 20, 2010
Messages
3,411
Re: 1972 18' Starcraft Restoration

Cleaning-up well Ed!

Mechanical methods are the only way that I've been able to remove that embedded white stuff...and I've tried some nasty acids (Muriatic / HCl). I don't recommend that.

Dental pick, stainless steel wire brush...and if they don't work, I'm carefully using a dremel and a tungsten carbide bit.

I've been using the West Systems 860 Aluminum Etch Kit; PartA; phosphoric acid wash and PartB; chromate conversion.

The part-A does just that but it also makes the surface of the aluminum hydrophillic; water won't bead on it. Then you use part-B to form a protective layer on the aluminum. With the 860 kit, adhesion is enhanced for a short period of time (~2hr window). I believe this is similar to the Alumaprep / Alodine that folks often recommend.
 

Watermann

Starmada Splash of the Year 2014
Joined
Jan 12, 2013
Messages
13,775
Re: 1972 18' Starcraft Restoration

Dejavu... yeah corrosion oxidized white nastyness. I use a FINE wire wheel and lots of the heinz cleaning vinegar in a spray bottle. When the stuff is in a recess that I can't get, I've used my picks and an awl to poke and prod the stuff out. There's nothing quick or easy when it comes down to this dirty work. Then there's that red SC smeg... I hate even looking at it.
 

Bestmason

Seaman Apprentice
Joined
Jan 12, 2014
Messages
46
Re: 1972 18' Starcraft Restoration

Cleaning-up well Ed!

Mechanical methods are the only way that I've been able to remove that embedded white stuff...and I've tried some nasty acids (Muriatic / HCl). I don't recommend that.

Dental pick, stainless steel wire brush...and if they don't work, I'm carefully using a dremel and a tungsten carbide bit.

I've been using the West Systems 860 Aluminum Etch Kit; PartA; phosphoric acid wash and PartB; chromate conversion.

The part-A does just that but it also makes the surface of the aluminum hydrophillic; water won't bead on it. Then you use part-B to form a protective layer on the aluminum. With the 860 kit, adhesion is enhanced for a short period of time (~2hr window). I believe this is similar to the Alumaprep / Alodine that folks often recommend.

BF, does the West Systems 860 replace the 50/50 vinegar wash just before using an etching primer?
 

Bestmason

Seaman Apprentice
Joined
Jan 12, 2014
Messages
46
Re: 1972 18' Starcraft Restoration

Dejavu... yeah corrosion oxidized white nastyness. I use a FINE wire wheel and lots of the heinz cleaning vinegar in a spray bottle. When the stuff is in a recess that I can't get, I've used my picks and an awl to poke and prod the stuff out. There's nothing quick or easy when it comes down to this dirty work. Then there's that red SC smeg... I hate even looking at it.

Watermann, do I need to remove all the SC red stuff I can, I have been using a wood chisel and carefully removing loose stuff. OK mostly under the red stuff, but have found some lite corrosion in a place or two. ED
 

Watermann

Starmada Splash of the Year 2014
Joined
Jan 12, 2013
Messages
13,775
Re: 1972 18' Starcraft Restoration

I have been told to leave the red gunk if it's still bonded but if that stuff is loose then it has to go in my book. This is my first go around with the stuff and plan on getting rid of all that I can before I apply the Gluvit.
 
Top