1970's Aluminum Mckenzie Cherokee Runabout Rebuild

Status
Not open for further replies.

jhendery

Petty Officer 1st Class
Joined
Jun 14, 2012
Messages
336
Nah, that's normal J. The mandrel breaks off deeper in thicker material, it breaks off at the bottom of the material you're fastening to... so after the mandrel breaks you'll have to pump the handles on the tool a couple of time to pull the mandrel out completely.

Thanks Jiggy. Yes, I noticed the mandrel breaks deeper using thicker material. (3/4" plywood) But it almost seems like the mandrel is pulled into the ply a small amount. And the rivet casing is extruding too. I will rivet another 1/4" example and post for comments. Just want to make sure the tool is good to go before I begin riveting the deck into place.
 

jhendery

Petty Officer 1st Class
Joined
Jun 14, 2012
Messages
336
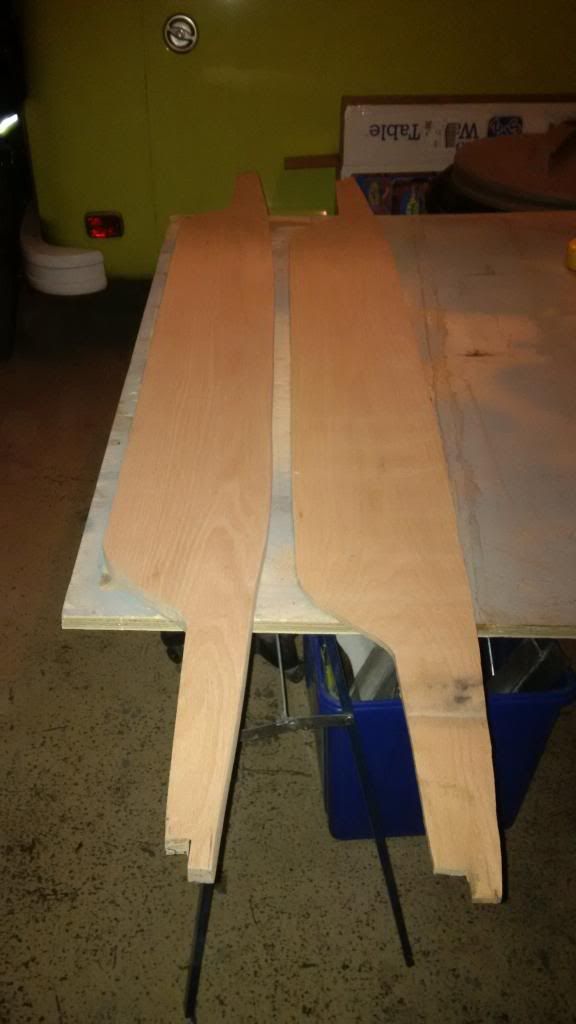
Notched the oak dash at port and starboard ends last evening. With the brackets and angle pieces in position I should be able to fit the SS hardware through the bracket and angle piece. At this stage the dash should be positioned in the final resting place where I can mark the mounting holes.

Went ahead and cut-out the dash-face using 1/4" oak. (right)


Not sure how this is all going to come together?

Should the dash mounting holes be countersunk into the 3/4" dash and the 1/4" dash be used as the dash face?

What about all the other holes required for steering wheel, bow and stern lights, bilge and tilt and trim toggle switches?

Have a good one folks! :)
 
Joined
May 13, 2014
Messages
22
Trying to figure out this site. sorry for the redundency
fetch
fetch
fetch
fetch
 

jigngrub

Fleet Admiral
Joined
Mar 19, 2011
Messages
8,155
Not sure how this is all going to come together?

Should the dash mounting holes be countersunk into the 3/4" dash and the 1/4" dash be used as the dash face?

What about all the other holes required for steering wheel, bow and stern lights, bilge and tilt and trim toggle switches?

Have a good one folks! :)

Not sure what you have in mind J, but I would bond the 1/4" oak to the 3/4" plywood with a real strong waterproof adhesive like a thickened epoxy resin, PL premium, or Gorilla glue and mount it as a solid piece. I'd be afraid that 1/4" would warp in a marine environment if it wasn't bonded to the 3/4.
 
Last edited:

Woodonglass

Supreme Mariner
Joined
Dec 29, 2009
Messages
25,928
Notched the oak dash at port and starboard ends last evening. With the brackets and angle pieces in position I should be able to fit the SS hardware through the bracket and angle piece. At this stage the dash should be positioned in the final resting place where I can mark the mounting holes.

Went ahead and cut-out the dash-face using 1/4" oak. (right)


Not sure how this is all going to come together?

Should the dash mounting holes be countersunk into the 3/4" dash and the 1/4" dash be used as the dash face?

What about all the other holes required for steering wheel, bow and stern lights, bilge and tilt and trim toggle switches?

Have a good one folks! :)

Since it's just for added thickness I'd put the 1/4" on the backside. I'd want the Full 3/4" thickness Facing the front just in case you want to recess the gauges etc. you'll have the depth for drilling. Due to the foaming effect of GG I would not use it for Laminating the oak. I'd use plain ole epoxy with Light clamping pressure left to cure overnight.
 

jbcurt00

Moderator
Staff member
Joined
Oct 25, 2011
Messages
25,057
I think the oak IS the forward facing side of the dash to dress it up & make it look pretty......

Since you are making the dash 1" thick, you will probably have to drill some bore holes/recesses in the backside of the 3/4" to allow the gauges & steering setup to install & work right. I'm not 100% sure, but the gauges in particular may be difficult to mount thru a 1" thick dash.
 

jhendery

Petty Officer 1st Class
Joined
Jun 14, 2012
Messages
336
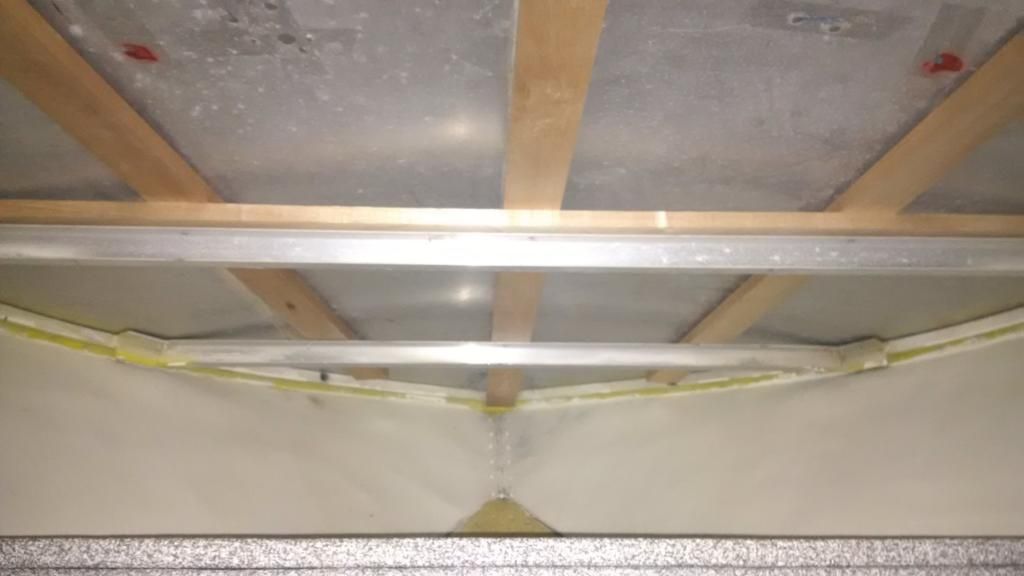
Have the mahogany pieces fitted in position. Overall I am happy with the new strips.

Need to remove one old rivet then bore holes to 1/4". Going to use SS hardware to install the bow strips.

The horizontal piece will be replaced by a single mahogany wedge at each support.


Next will re-install the dash and mark mounting hole positions. I think I will mount the dash using SS hardware.

Need someone to chime in here ...

I picked up Epifanes Marine Varnish. It's a clear-coat high gloss finish.

But ideally I would like to enhance the oak grain. Would an interior varnish be ok to enhance the grain? Then top-coat with Epifanes?

Once the dash is installed and mounted can the steering wheel hole and switch holes be bored?

Or should these holes be bored before installing the dash?

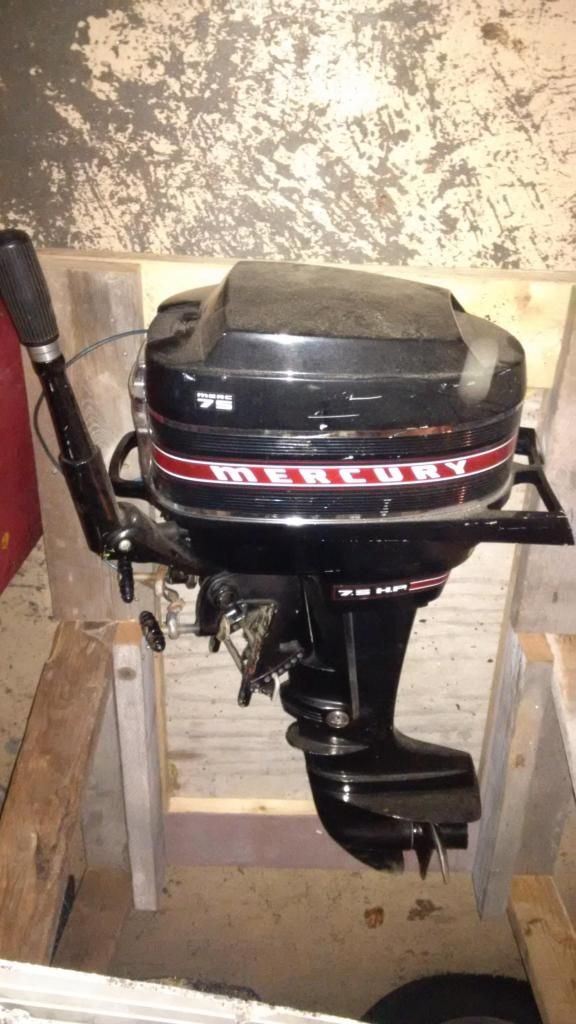
Picked this up over the weekend. Need to replace the water pump.


Have a good one folks! :)
 
Last edited:

jbcurt00

Moderator
Staff member
Joined
Oct 25, 2011
Messages
25,057
Epifanes is oil based, correct? Any oil based stain, I like MiniWax, should be compatible. I really like mixing Early American and Cherry together 1/2 & 1/2 by volume, and then add about 25% (or a little more) of the total of Golden Oak. All 3 colors should be available in a pint at most home stores.

It makes a really warm, rich, but not quite cherry, color w/ a few shimmering rays, similar to the ray flecks quarter sawn oak has.
 

jhendery

Petty Officer 1st Class
Joined
Jun 14, 2012
Messages
336
Epifanes is oil based, correct? Any oil based stain, I like MiniWax, should be compatible. I really like mixing Early American and Cherry together 1/2 & 1/2 by volume, and then add about 25% (or a little more) of the total of Golden Oak. All 3 colors should be available in a pint at most home stores.

Thanks JB.

Epifanes Marine clear varnish is based on tung oil, phenolic modified alkyd resins with maximum UV absorbers. So I think it is oil based.

So the MiniWax should be ok used to bring out the oak grain and top-coat with Epifanes.

https://epifanes.com/na/store/varnishes-and-clear-finishes/

Curious about the dash hole for steering wheel. Can the holes be bored with the dash mounted?

:)
 

jhendery

Petty Officer 1st Class
Joined
Jun 14, 2012
Messages
336
So the mahogany bow strips have the holes drilled. Getting ready to install with SS hardware. The easiest way to install SS hardware would be to go through aluminum bow through mahogany and supports. Aside from leaks any reason not to go through aluminum bow?
 
Joined
May 13, 2014
Messages
22
Thought I would chime in, It usually ins't a good idea to mix stainless with aluminum. galvanic corrosion is the result. Use aluminum hardware if possible
 

jbcurt00

Moderator
Staff member
Joined
Oct 25, 2011
Messages
25,057
I'm not sure I could find aluminum bolts to use on an OB, I'll be using stainless, and I'll try to find 316 allow stainless. Same w/ any other thru bolts I put on an aluminum boat, SS #316 alloy.
 

jbcurt00

Moderator
Staff member
Joined
Oct 25, 2011
Messages
25,057
I'm not sure I could find aluminum bolts to use on an OB, I'll be using stainless, and I'll try to find 316 alloy stainless. Same w/ any other thru bolts I put on an aluminum boat, SS #316 alloy.
 

jhendery

Petty Officer 1st Class
Joined
Jun 14, 2012
Messages
336
Thanks JB and Cherokee.

Ideally I would prefer to not go through aluminum bow but I am not sure I know of another alternative? Rivets were originally used likely without the aluminum bow in position.

Post #349 shows the underside of the aluminum bow with mahogany strips and aluminum horizontal supports.

My plan is to go from bow topside through mahogany and aluminum horizontal support and using lock washers and nut fasten things together.

Will use 5200 to seal the holes when SS hardware is installed.

Then the dash goes back in to mark the mounting holes. And finally remove the dash, sand and apply varnish.

Sound like a reasonable plan?
 

jigngrub

Fleet Admiral
Joined
Mar 19, 2011
Messages
8,155
Stainless hardware will be fine and more appealing to the eye than rivets. Use nyloc nuts.

Go light with the 5200 because it can be a mess.
 
Status
Not open for further replies.
Top