1970's Aluminum Mckenzie Cherokee Runabout Rebuild

Status
Not open for further replies.

jhendery

Petty Officer 1st Class
Joined
Jun 14, 2012
Messages
336
Re: 1970's 16 ft Aluminum Mackenzie Runabout Rebuild

Re: 1970's 16 ft Aluminum Mackenzie Runabout Rebuild

Thanks LL. And good to hear from you.

Was thinking today I may just use my original transom plate.

Drained LA boat from the nasty storm we had last Saturday. Ended up using a hose and siphoned most of the rain water out.

With the new skin I really need to get a hole opened up for drainage. Should I use the original location for the hole?

And I wonder if it would be best to punch the center to make drilling easiest?

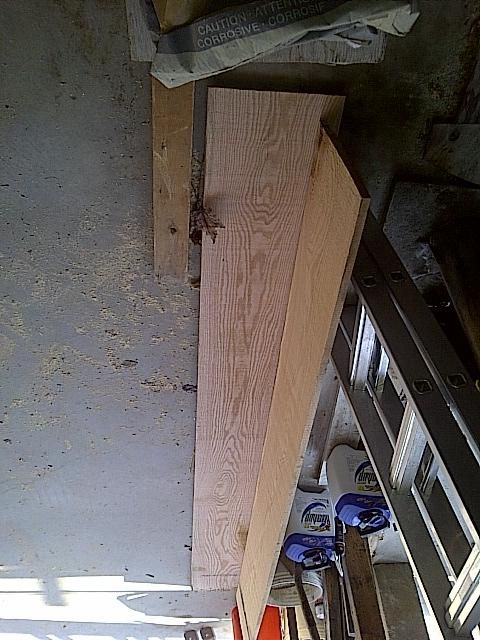
Here's that oak plank cut into 3/4" and 1/4" pieces. Like the grains. :)
 

lakelover

Rear Admiral
Joined
Mar 26, 2003
Messages
4,386
Re: 1970's 16 ft Aluminum Mackenzie Runabout Rebuild

Re: 1970's 16 ft Aluminum Mackenzie Runabout Rebuild

I'd think you could use either side of center for the location, which would be the lowest point. Definitely punch the center to keep your bit from wandering as you start. Love that oak grain, how will you finish it?
 

Grandad

Lieutenant Commander
Joined
Jun 7, 2011
Messages
1,504
Re: 1970's 16 ft Aluminum Mackenzie Runabout Rebuild

Re: 1970's 16 ft Aluminum Mackenzie Runabout Rebuild

Here's that oak plank cut into 3/4" and 1/4" pieces. Like the grains. :)
I'm kinda partial to the oak grain myself. I cheated though; mine's Formica. Very durable and finishing was a snap. You'll probably want to have your oak top piece professionally planed/sanded, before you finish it. If you don't get all those machining ripples out, you'll be disappointed in the finish and trying to sand them out of oak without the right equipment is really tough. - Grandad
 

jhendery

Petty Officer 1st Class
Joined
Jun 14, 2012
Messages
336
Re: 1970's 16 ft Aluminum Mackenzie Runabout Rebuild

Re: 1970's 16 ft Aluminum Mackenzie Runabout Rebuild

I'd think you could use either side of center for the location, which would be the lowest point. Definitely punch the center to keep your bit from wandering as you start. Love that oak grain, how will you finish it?

Thanks LL. Not sure how I am going to finish it. At this stage the dash is not top priority. But pleased I have the material sorted out. What did you do to finish your dash?
 

lakelover

Rear Admiral
Joined
Mar 26, 2003
Messages
4,386
Re: 1970's 16 ft Aluminum Mackenzie Runabout Rebuild

Re: 1970's 16 ft Aluminum Mackenzie Runabout Rebuild

What did you do to finish your dash?

I put 7 coats of spar urethane on it, lightly sanding between the coats.
 

jhendery

Petty Officer 1st Class
Joined
Jun 14, 2012
Messages
336
Re: 1970's 16 ft Aluminum Mackenzie Runabout Rebuild

Re: 1970's 16 ft Aluminum Mackenzie Runabout Rebuild

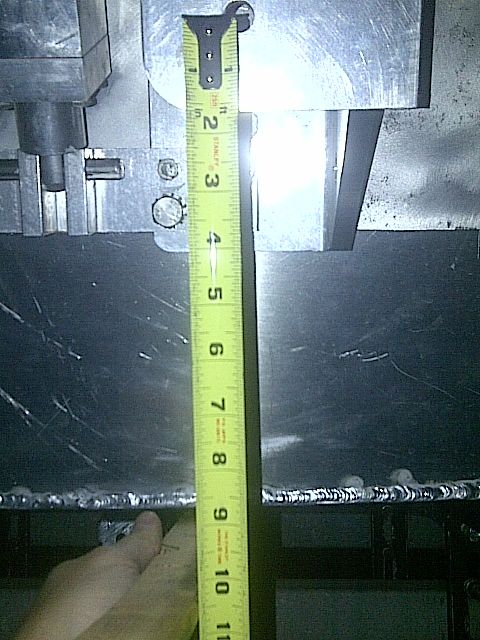
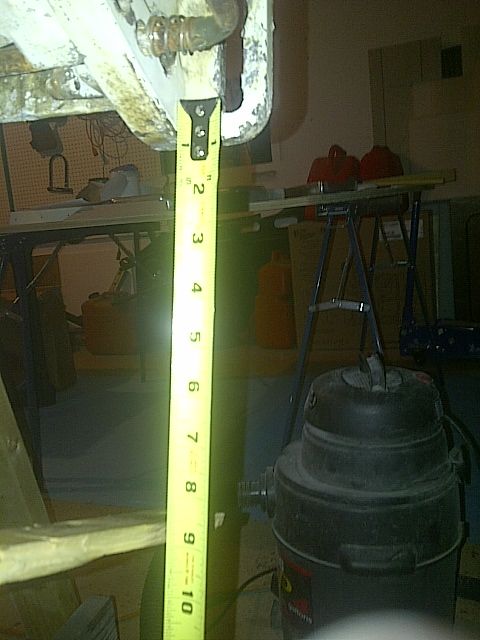
Ok. So I need to get the cmc mounted to the transom correctly. Took some measurements tonight and I think I know where the mounting holes need to be drilled.

As PMC mentioned the cavitation plate should be 1 to 3 inches above the bottom of the boat.

I centered the transom plate with transom cap and now the plate rests just below the cap. So the surface where the cmc is mounted will be flush. The top of the cmc will be roughly 1" above the transom cap.

The distance from the cmc bottom mounting hole to the bottom of the boat measures roughly 8.5".


The distance from the bottom ob engine mounting position to cavitation plate measures 8.5". That would leave the cavitation plate flush with the bottom of the boat.


Instead I think I need to mount the ob to the cmc at the 10" position. This should leave the cavitation plate 1.5" higher than the bottom of the boat which agrees with the cmc manual and PMC.

All that being said I need to confirm this thinking so I bore the holes in the right positions on the transom.

Survey says?

:)
 
Last edited:

jhendery

Petty Officer 1st Class
Joined
Jun 14, 2012
Messages
336
Re: 1970's 16 ft Aluminum Mackenzie Runabout Rebuild

Re: 1970's 16 ft Aluminum Mackenzie Runabout Rebuild

So I settled on where to mount the cmc and drilled 4 mounting holes through the new skin and transom. Good. :)

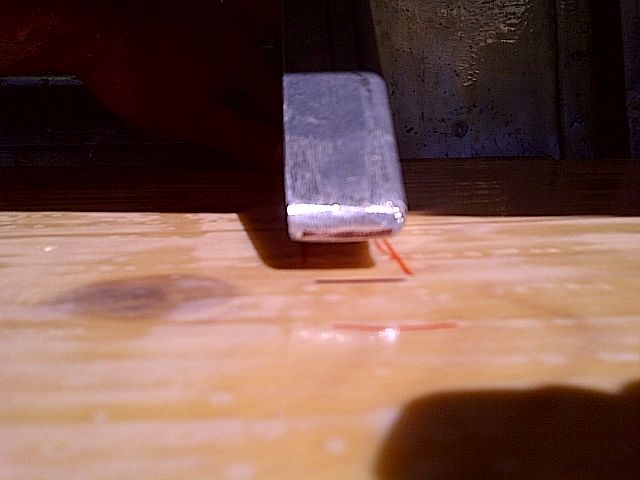
All the holes are marked and ready for drilling. Not sure what dimension to over-bore?

Was thinking 3/8" or 7/16" over-bore for the transom bracket hardware and knee braces.

The cmc mounting hardware will use 1/2" stainless steel. Perhaps 3/4" over-bore?

Need to drill holes in the knee braces where they'll be riveted to the stringers. Interested to see how the mounting turns out. The angle is not 100% flush where the knee brace is mounted to the stringer and transom.

Next things to do ...

- Clean with vinegar water splash well
- repair small holes on transom plate and transom cap
- Acetone wipe transom plate and splash well
- rattle can zinc chromate transom plate and splash well
- prime transom plate and splash well
- over bore transom holes

Have a good one eh!

:)
 

jhendery

Petty Officer 1st Class
Joined
Jun 14, 2012
Messages
336
Re: 1970's 16 ft Aluminum Mackenzie Runabout Rebuild

Re: 1970's 16 ft Aluminum Mackenzie Runabout Rebuild

Here's that gap I was mentioning where the knee brace connects to the transom. The brace is resting flat and flush on the stringer but the brace is out by 3/8" on the transom.


Maybe I am over thinking this. I expect that gap will be taken up when the stainless steel hardware is tightened up. Just want to make sure I am not going to put too much stress on the stringers.

The last holes I need to mark are for the stern eyes. Considering the splash well measures 6.5" tall I think I need to position the stern eyes below the splash well to so the hardware is not visible.

Does this make sense?


Happy Sunday! :)

I think I will bore the holes using 5/8" drill bit and use 1/4" stainless steel hardware.

For the ob mounting holes I will over-bore 1" and use 1/2" mounting hardware. Same dims for stern eyes.

Not sure if I need to be concerned about the angle on the knee brace? I think the gap should will end up flush when the hardware is tightened - just don't want to put too much stress on the stringers.
 

jbcurt00

Moderator
Staff member
Joined
Oct 25, 2011
Messages
25,056
Re: 1970's 16 ft Aluminum Mackenzie Runabout Rebuild

Re: 1970's 16 ft Aluminum Mackenzie Runabout Rebuild

If the transom's flat across the back and the stringer/hull bottom aren't deflecting & causing the 3/8" gap behind the knee brace, I don't think I'd try to close the gap by tightening the nuts & bolts as you install them. That'll strain the fastening hardware at the knee brace-transom junction, the knee-stringer attachment point & the stringer-hull attachment. The transom plywood & aluminum skin are new, but the knee brace, stringer & hull are all vintage and could crack where the bolt passes thru them. Esp w/ the constant pressure from an OB.

If everything is flat, and seems to be as it should be, w/ no deflection, I'd make a 1/4-3/8" shim to go behind the knee brace, and fill the gap rather then close it.

Been a ton of work, why try to force the 3/8" gap closed

If you over bore the holes, you'll only do that thru the transom ply, correct? Not the new exterior aluminum transom skin, right? The transom skin will only need the appropriately sized thru hole, 5/16" for a 1/4" bolt.

If you're filling the over bored hole w/ epoxy, you might consider drilling a slightly larger bore hole on the interior side of the transom, less then 1/2way thru. That'll make the epoxy plug 'T' shaped & less likely to ever pull thru the transom plywood. Which, admittedly, is very unlikely.
 

jhendery

Petty Officer 1st Class
Joined
Jun 14, 2012
Messages
336
Re: 1970's 16 ft Aluminum Mackenzie Runabout Rebuild

Re: 1970's 16 ft Aluminum Mackenzie Runabout Rebuild

Thanks JB.

The knee brace touches the bottom of the transom. The top of the knee brace is where the 3/8" gap is found. I think the shim is a good idea - the thought crossed my mind. I will need two shims - one for each knee brace.

One other question. I am going to use 3 rivets to install the knee brace to the stringer. Does that sound about right? Hardware is not an option. I don't want to drill through the hull to the bottom of the boat.

Cheers! :)
 

jhendery

Petty Officer 1st Class
Joined
Jun 14, 2012
Messages
336
Re: 1970's 16 ft Aluminum Mackenzie Runabout Rebuild

Re: 1970's 16 ft Aluminum Mackenzie Runabout Rebuild

If you over bore the holes, you'll only do that thru the transom ply, correct? Not the new exterior aluminum transom skin, right? The transom skin will only need the appropriately sized thru hole, 5/16" for a 1/4" bolt.

YES. Thanks!

If you're filling the over bored hole w/ epoxy, you might consider drilling a slightly larger bore hole on the interior side of the transom, less then 1/2way thru. That'll make the epoxy plug 'T' shaped & less likely to ever pull thru the transom plywood. Which, admittedly, is very unlikely.

Ok. That makes sense. I was going to use a piece of tape to block one side when I plug the holes with epoxy. Will this work?
 

jbcurt00

Moderator
Staff member
Joined
Oct 25, 2011
Messages
25,056
Re: 1970's 16 ft Aluminum Mackenzie Runabout Rebuild

Re: 1970's 16 ft Aluminum Mackenzie Runabout Rebuild

Tape, block, wax paper, anything to keep the epoxy from oozing out!
 

jhendery

Petty Officer 1st Class
Joined
Jun 14, 2012
Messages
336
Re: 1970's 16 ft Aluminum Mackenzie Runabout Rebuild

Re: 1970's 16 ft Aluminum Mackenzie Runabout Rebuild

Tape, block, wax paper, anything to keep the epoxy from oozing out!

Thanks JB.

Got the transom holes bored-out last night and filled with epoxy. Mixed cabacil silica into the epoxy for a peanut butter like consistency. Not sure I am completely happy with the consistency - maybe a little too much filler.

Here's a before epoxy pic with bored holes.


Also got a little work into the transom plate and sanded down the jb weld patches. And cleaned with acetone and first coat of ZC primer.

Also fit the splash well into place with transom core to confirm position for drain holes. Holes bored and ready to go. Drain tubes will be a good fit. And acetone cleaned splash well ready for ZC primer.

Next up ...

- 2nd coat of ZC primer for transom plate
- ZC primer splash well
- prime transom plate and splash well
- purchase stainless steel hardware
- install transom :)

Was thinking about what product to use for finishing-up the splash well. Paint is one option but I am curious about other products. I think EZ used rubberized truck liner spray-on but results were questionable. Suggestions?

Happy Friday folks!
 

jhendery

Petty Officer 1st Class
Joined
Jun 14, 2012
Messages
336
Re: 1970's 16 ft Aluminum Mackenzie Runabout Rebuild

Re: 1970's 16 ft Aluminum Mackenzie Runabout Rebuild

Got another coat of epoxy on one side of the transom. The plugged holes look solid.

Maybe finish off the other side tomorrow night.

Have a good one!!

:)
 

jhendery

Petty Officer 1st Class
Joined
Jun 14, 2012
Messages
336
Re: 1970's 16 ft Aluminum Mackenzie Runabout Rebuild

Re: 1970's 16 ft Aluminum Mackenzie Runabout Rebuild

Other side of transom is epoxied. Should be the final coat. Getting close to installing transom.

I think I am gong to have an issue with the knee braces. They are 3 dimensional and the riveting tool will not work in the confined space. The braces are going to be riveted to the stringers and SS hardware through transom. I will post a picture shortly ...

Have a good one eh!

Oh yeah, on another note I was onboard an aging glasser on Lake Scugogg this afternoon. Nice to go for a boat ride. A wee bit windy but good all around.

:)
 

jigngrub

Fleet Admiral
Joined
Mar 19, 2011
Messages
8,155
Re: 1970's 16 ft Aluminum Mackenzie Runabout Rebuild

Re: 1970's 16 ft Aluminum Mackenzie Runabout Rebuild

How many coats of epoxy are you using on the transom J? Just remember, you can never have too many coats of epoxy!

Oh yeah, on another note I was onboard an aging glasser on Lake Scugogg this afternoon. Nice to go for a boat ride. A wee bit windy but good all around.

I'm pretty sure that using the "G" word in a tinny thread is against the law.:D
 

jhendery

Petty Officer 1st Class
Joined
Jun 14, 2012
Messages
336
Re: 1970's 16 ft Aluminum Mackenzie Runabout Rebuild

Re: 1970's 16 ft Aluminum Mackenzie Runabout Rebuild

How many coats of epoxy are you using on the transom J? Just remember, you can never have too many coats of epoxy!

Thanks Jig. Three coats before the bored holes and now another coat on each side.

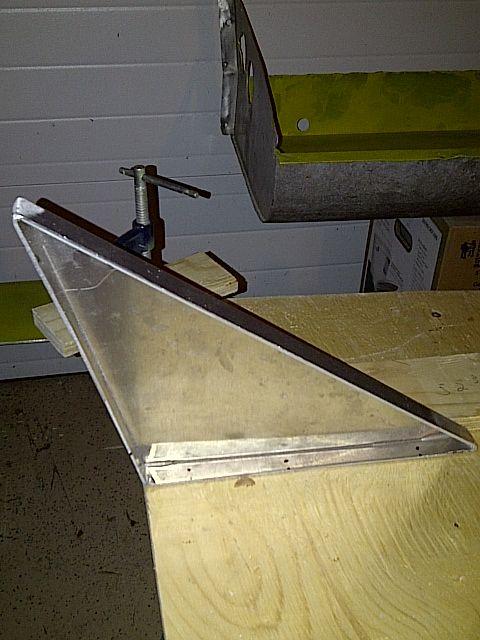
Here's the knee brace I had made up last year. Not sure how I am going to get the riveting tool inside the brace where the bottom will be riveted to the stringer? The three dots mark the spots where the rivets will be set.


Suggestions?
 

jhendery

Petty Officer 1st Class
Joined
Jun 14, 2012
Messages
336
Re: 1970's 16 ft Aluminum Mackenzie Runabout Rebuild

Re: 1970's 16 ft Aluminum Mackenzie Runabout Rebuild

edit
 
Last edited:

jhendery

Petty Officer 1st Class
Joined
Jun 14, 2012
Messages
336
Re: 1970's 16 ft Aluminum Mackenzie Runabout Rebuild

Re: 1970's 16 ft Aluminum Mackenzie Runabout Rebuild

Thanks Jig. Three coats before the bored holes and now another coat on each side.

Here's the knee brace I had made up last year. Not sure how I am going to get the riveting tool inside the brace where the bottom will be riveted to the stringer? The three dots mark the spots where the rivets will be set.


Suggestions?

I have a hand-grip rivet tool that will work although I may be able to use the press rivet tool on a slight angle. In any case definitely too confined space for the last rivet. Is there any way to know how many rivets are best?

:)
 
Status
Not open for further replies.
Top