1970's Aluminum Mckenzie Cherokee Runabout Rebuild

Status
Not open for further replies.

jhendery

Petty Officer 1st Class
Joined
Jun 14, 2012
Messages
336
Re: 1970's 16 ft Aluminum Mackenzie Runabout Rebuild

Re: 1970's 16 ft Aluminum Mackenzie Runabout Rebuild

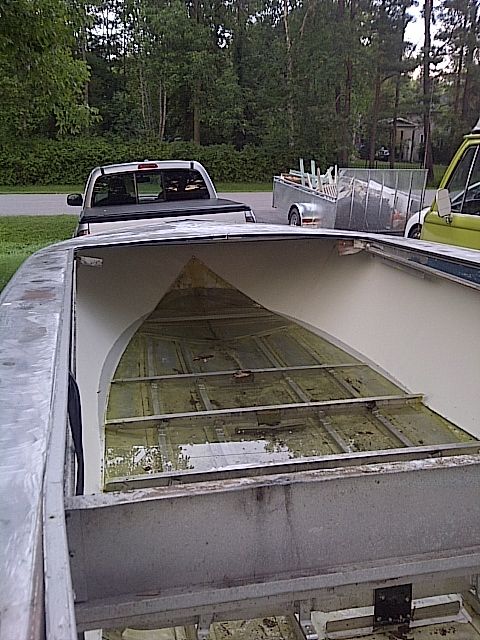
Made wee progress tonight. Mixed up a batch of epoxy and applied to one side of bow deck. When dry will flip for the other side.

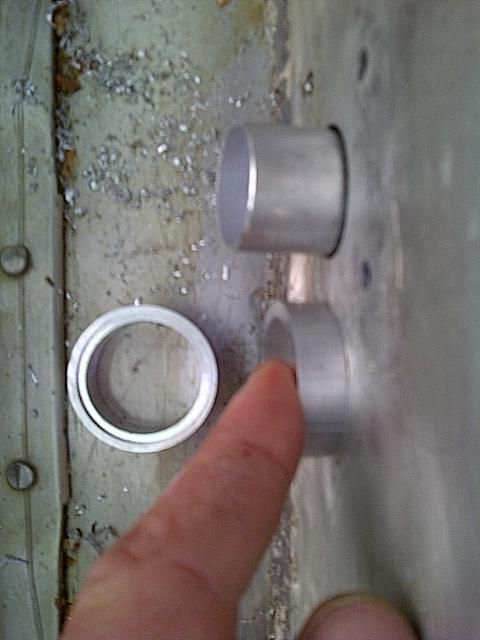
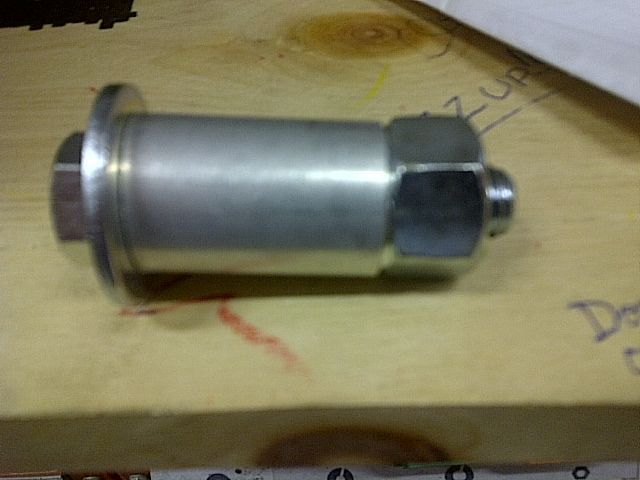
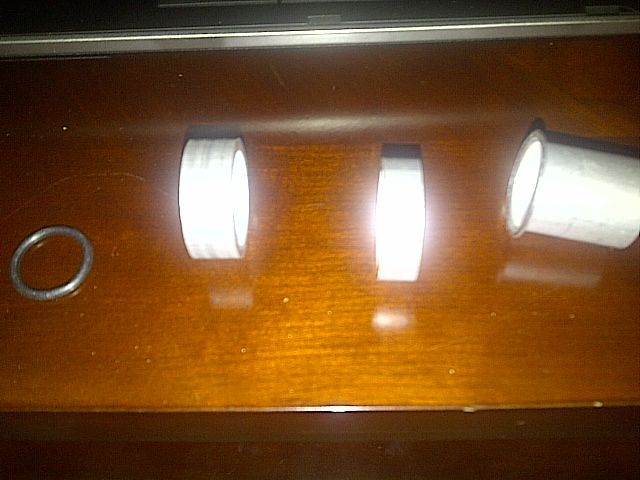
Starting to think about the drain hole again. Here is a picture of the drain kit pieces.


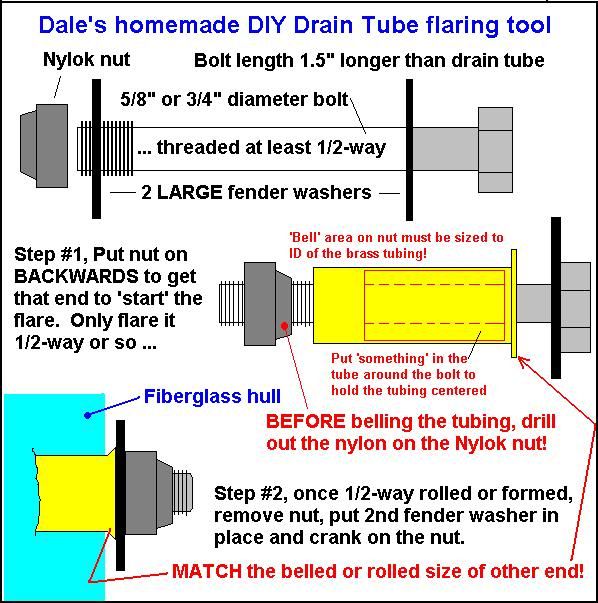
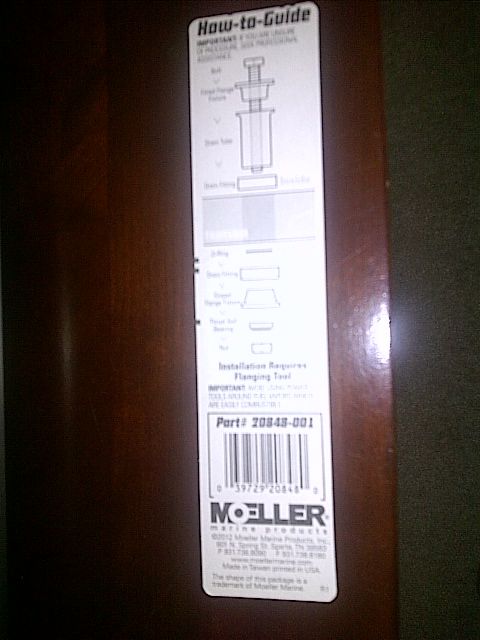
And diagram for installation. I think this kit is supposed to be installed through the transom wood core? Thoughts?


Have a good one eh!
 

jbcurt00

Moderator
Staff member
Joined
Oct 25, 2011
Messages
25,036
Re: 1970's 16 ft Aluminum Mackenzie Runabout Rebuild

Re: 1970's 16 ft Aluminum Mackenzie Runabout Rebuild

Most drain plugs are sized to go thru the transom wood core, same as those ^^^

Drill & treat them the same as the rest of your transom thru holes for tow eye, motor mounts etc....
 

jhendery

Petty Officer 1st Class
Joined
Jun 14, 2012
Messages
336
Re: 1970's 16 ft Aluminum Mackenzie Runabout Rebuild

Re: 1970's 16 ft Aluminum Mackenzie Runabout Rebuild

Most drain plugs are sized to go thru the transom wood core, same as those ^^^

Drill & treat them the same as the rest of your transom thru holes for tow eye, motor mounts etc....

Thanks JB.

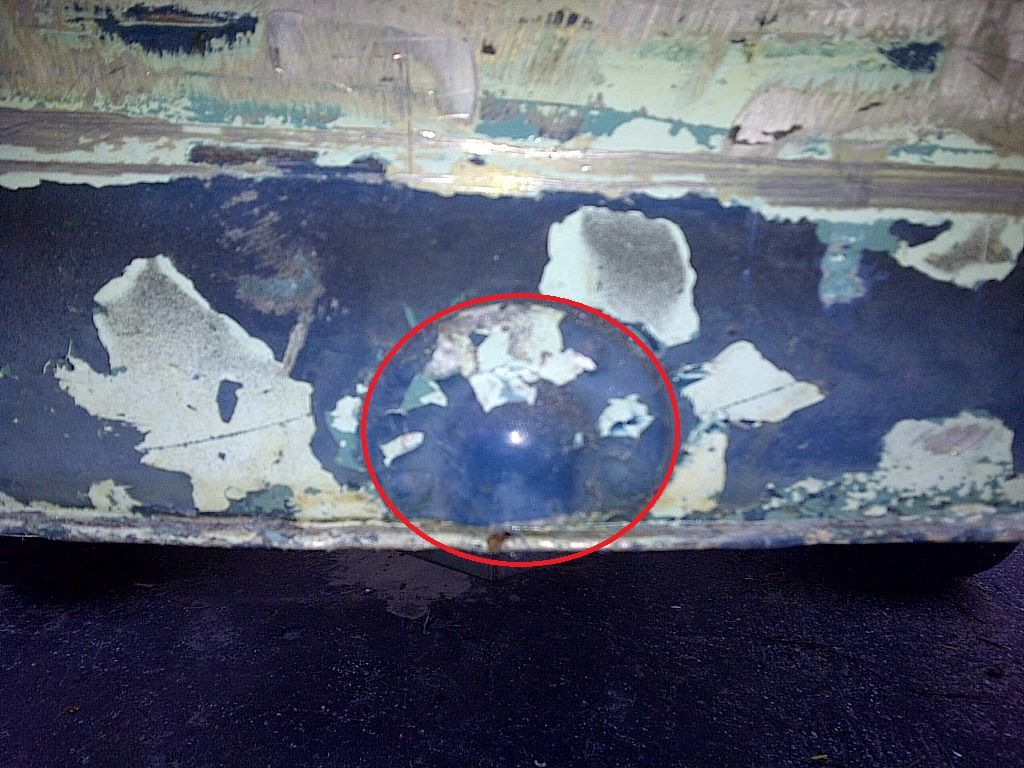
Sounds like my bilge drain hole is somewhat different than other types. I think my original drain is similar to a garboard drain system. The picture below shows the outside drain flange screwed through the skin and connects to a matching plate found on the inside of the skin. Perhaps a little hard to notice in this picture but the drain does not go through the transom core.


I also have two skins now (original and new) so I think I need to use a tube to allow water to pass through both skins.

Suggestions?

Have a good one folks!

:)
 
Last edited:

jbcurt00

Moderator
Staff member
Joined
Oct 25, 2011
Messages
25,036
Re: 1970's 16 ft Aluminum Mackenzie Runabout Rebuild

Re: 1970's 16 ft Aluminum Mackenzie Runabout Rebuild

Sorry, my previous post was during 'dinner' 14hrs into a 20+hr shift out of town. On my phone I couldn't really see much in your pix, and it's fiberglass boats that usually have the transom plywood down near the bilge drain tube. Tinny transom ply doesn't usually extend down that far, but you'll use similar tubes for the splashwell drains & they are thru plywood.

Your drain tube has 2 'collars':
Innisfil-20130807-00482.jpg


A larger (2nd piece from the left) and a smaller (3rd from the left) collar that allow you to use the drain tube on thin tinny transom skins that are 1/8" +/- thick.

Is that a metal ring (1st from left) or an o-ring?

W/ the newly installed 2nd transom skin, there is no longer a thru hole for the bilge drain correct? Then you'll have to drill an appropriate sized hole for the bilge drain. Once you have a thru hole, you can use those 2 collars individually, or together, with an o-ring, to install the drain tube thru your aluminum transom. After you determine how the collars, o-ring & tube fit your transom, you may have to trim the tube, allowing 1/4" for the exterior rolled flange.

This installation pdf from Moeller is more specific & has some ALUMINUM BOATS ONLY instructions:
View attachment flanging-tool.pdf

You should probably add 3M 5200 (or similar) to the back of the exterior collar & between the collar & the tube. Esp if you didn't get any o-ring. Mine didn't come w/ the o-ring or either of the collars....
 

jhendery

Petty Officer 1st Class
Joined
Jun 14, 2012
Messages
336
Re: 1970's 16 ft Aluminum Mackenzie Runabout Rebuild

Re: 1970's 16 ft Aluminum Mackenzie Runabout Rebuild

Is that a metal ring (1st from left) or an o-ring?

Yes

W/ the newly installed 2nd transom skin, there is no longer a thru hole for the bilge drain correct? Then you'll have to drill an appropriate sized hole for the bilge drain. Once you have a thru hole, you can use those 2 collars individually, or together, with an o-ring, to install the drain tube thru your aluminum transom. After you determine how the collars, o-ring & tube fit your transom, you may have to trim the tube, allowing 1/4" for the exterior rolled flange.

This installation pdf from Moeller is more specific & has some ALUMINUM BOATS ONLY instructions:
View attachment 207095

You should probably add 3M 5200 (or similar) to the back of the exterior collar & between the collar & the tube. Esp if you didn't get any o-ring. Mine didn't come w/ the o-ring or either of the collars....

Thanks JB.

So next up with transom is to get that drain hole drilled. I will use the original skin as a guide since the hole is already there.

One end of the tube has the rolled flange or 'lip' of sorts. Should this end of tube be installed on the exterior skin?

Have a good one! :)
 
Last edited:

jhendery

Petty Officer 1st Class
Joined
Jun 14, 2012
Messages
336
Re: 1970's 16 ft Aluminum Mackenzie Runabout Rebuild

Re: 1970's 16 ft Aluminum Mackenzie Runabout Rebuild

Rubber o-ring
 

jhendery

Petty Officer 1st Class
Joined
Jun 14, 2012
Messages
336
Re: 1970's 16 ft Aluminum Mackenzie Runabout Rebuild

Re: 1970's 16 ft Aluminum Mackenzie Runabout Rebuild

Boat work has been slow last couple of weeks. A renovation has been keeping me away from the dry dock. Should have renovations finished up by the long weekend.

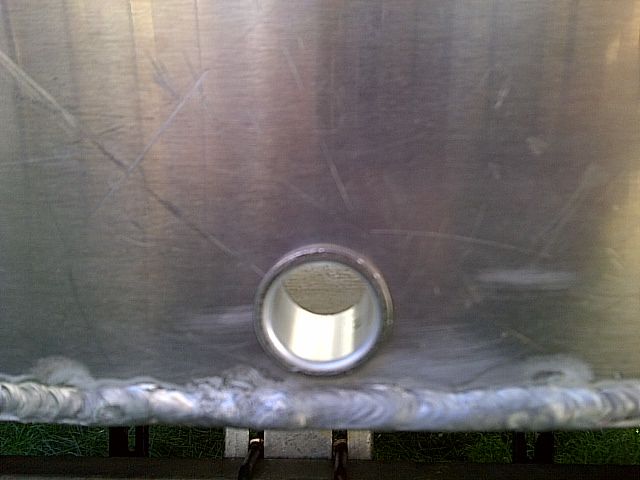
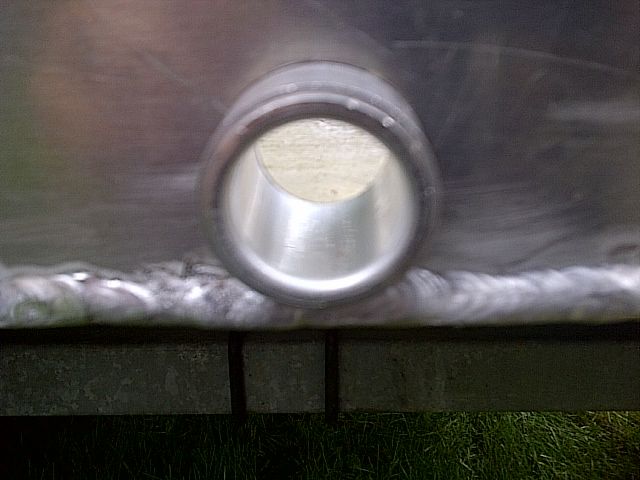
Anyway did manage to get the bilge drain hole drilled. Here' s how it looks with the tube inserted.


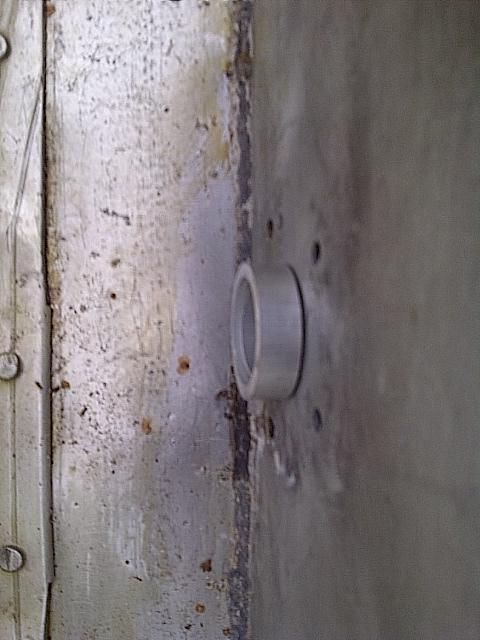
And from the inside


Not sure what to do with the rings? And I think I need to trim the length of the tube so the end can be flared flush with the skin?

Does this sound about right?

Have a great weekend folks!

:)
 

jbcurt00

Moderator
Staff member
Joined
Oct 25, 2011
Messages
25,036
Re: 1970's 16 ft Aluminum Mackenzie Runabout Rebuild

Re: 1970's 16 ft Aluminum Mackenzie Runabout Rebuild

Look thru the Moeller pdf installation instructions again

It shows 1 ring on the interior and another on the exterior of the transom. Using these 'drain fittings' makes the drain tube long enough to accomodate a drain plug. If the drain tube sticks out more then 1/4" past the exterior fitting, the tube needs to be trimmed, otherwise it won't crimp properly.

Revisit the installation pdf it's drawn out in pretty good detail.
 

jhendery

Petty Officer 1st Class
Joined
Jun 14, 2012
Messages
336
Re: 1970's 16 ft Aluminum Mackenzie Runabout Rebuild

Re: 1970's 16 ft Aluminum Mackenzie Runabout Rebuild

Look thru the Moeller pdf installation instructions again

It shows 1 ring on the interior and another on the exterior of the transom. Using these 'drain fittings' makes the drain tube long enough to accomodate a drain plug. If the drain tube sticks out more then 1/4" past the exterior fitting, the tube needs to be trimmed, otherwise it won't crimp properly.

Revisit the installation pdf it's drawn out in pretty good detail.

Thanks JB. Will refer back to the guide for details. Have a good one eh!
 

jhendery

Petty Officer 1st Class
Joined
Jun 14, 2012
Messages
336
Re: 1970's 16 ft Aluminum Mackenzie Runabout Rebuild

Re: 1970's 16 ft Aluminum Mackenzie Runabout Rebuild

Renos are finished.

LA boat feeling neglected filled with rain water.


Positioned bilge drain tube with O-rings and fittings into place.

I think drain tube with flange should be installed on outside of transom skin.

I fitted large ring with grove and o-ring into place on outside of transom skin.


And fitted small ring on inside of transom skin. Considering using a o-ring on the inside also.


Aside from 5200 is there anything else I should be doing?

Was planning to use a clamp of sorts to bind the outside and inside rings together.

Suggestions? TIA! :)
 

jbcurt00

Moderator
Staff member
Joined
Oct 25, 2011
Messages
25,036
Re: 1970's 16 ft Aluminum Mackenzie Runabout Rebuild

Re: 1970's 16 ft Aluminum Mackenzie Runabout Rebuild

That doesn't look like there's a 1/4" of tube sticking out of the back to allow you to roll the edge, holding the parts all together....

Was planning to use a clamp of sorts to bind the outside and inside rings together.
??:confused:?? What??
 

jhendery

Petty Officer 1st Class
Joined
Jun 14, 2012
Messages
336
Re: 1970's 16 ft Aluminum Mackenzie Runabout Rebuild

Re: 1970's 16 ft Aluminum Mackenzie Runabout Rebuild

That doesn't look like there's a 1/4" of tube sticking out of the back to allow you to roll the edge, holding the parts all together....

After another look at the Moeller PDF I realize the drain fittings need to be switched. The large ring with groove for o-ring goes on the inside and the small ring without groove goes on the outside. I will check to see how the pieces line-up.

After I use the home-made flange tool do I need to clamp the pieces together until the 5200 sets?
 

jbcurt00

Moderator
Staff member
Joined
Oct 25, 2011
Messages
25,036
Re: 1970's 16 ft Aluminum Mackenzie Runabout Rebuild

Re: 1970's 16 ft Aluminum Mackenzie Runabout Rebuild

If you're worried about the assembly moving before the 5200 cures, leave the flange tool in the drain tube.

If you snug the 'crimp' on the end of the drain tube by using the flanging tool, it's probably going to be snug enough to not move, but I guess it might......
 

jhendery

Petty Officer 1st Class
Joined
Jun 14, 2012
Messages
336
Re: 1970's 16 ft Aluminum Mackenzie Runabout Rebuild

Re: 1970's 16 ft Aluminum Mackenzie Runabout Rebuild

If you're worried about the assembly moving before the 5200 cures, leave the flange tool in the drain tube.

If you snug the 'crimp' on the end of the drain tube by using the flanging tool, it's probably going to be snug enough to not move, but I guess it might......

Thanks JB. That makes sense. Now I need to source the parts for the flange tool ... :)
 
Last edited:

jhendery

Petty Officer 1st Class
Joined
Jun 14, 2012
Messages
336
Re: 1970's 16 ft Aluminum Mackenzie Runabout Rebuild

Re: 1970's 16 ft Aluminum Mackenzie Runabout Rebuild

update ...

when I arrange the small ring on the outside with the large ring and o-ring on the inside the drain tube and ring are pretty much flush. So there is no 1/4" to flare.

I think the reason the pieces line up this way is because LA boat has two skins to pass through with a small 1/4" gap between the skins. The original skin is in rough shape and does not rest flat with the new skin.

I think I have two options.

The first would be to attempt clamping the skins together at the transom bottom to reduce the gap. This would likely leave a 1/4" or enough material to flare. Not sure if this would put to much stress on the drain tube. On the other had when the transom core is installed the gap will likely be less.

The second option would be to go with a 1/4" longer drain tube which I'd like to avoid if possible.

TIA!!!

:)
 
Last edited:

jhendery

Petty Officer 1st Class
Joined
Jun 14, 2012
Messages
336
Re: 1970's 16 ft Aluminum Mackenzie Runabout Rebuild

Re: 1970's 16 ft Aluminum Mackenzie Runabout Rebuild

Looking for a clamp with a deep throat that would help to close the 1/4" gap between the two skins. Any suggestions?
 

jhendery

Petty Officer 1st Class
Joined
Jun 14, 2012
Messages
336
Re: 1970's 16 ft Aluminum Mackenzie Runabout Rebuild

Re: 1970's 16 ft Aluminum Mackenzie Runabout Rebuild

I think I've found a clamp to close the gap between skins before I attempt to flare the drain tube. It's not really the depth I need but I should be able to rig something up.

Now I am looking for the parts to make the flaring tool. Will need to check the local hardware store. Not sure about using a nylock nut to flare the tube. Any opinions on this?


jbcurt00

Moderator
Staff member
Joined
Oct 25, 2011
Messages
25,036
Re: 1970's 16 ft Aluminum Mackenzie Runabout Rebuild

Re: 1970's 16 ft Aluminum Mackenzie Runabout Rebuild

Tubes are soft, esp aluminum tubes. The tapered flare of the nylock nut shouldn't be difficult to use.
 

jhendery

Petty Officer 1st Class
Joined
Jun 14, 2012
Messages
336
Re: 1970's 16 ft Aluminum Mackenzie Runabout Rebuild

Re: 1970's 16 ft Aluminum Mackenzie Runabout Rebuild

Tubes are soft, esp aluminum tubes. The tapered flare of the nylock nut shouldn't be difficult to use.

Thanks JB.

In the end I burned a drain tube and cut a new one to length for the bilge drain hole. The small gap and extra skin proved too thick for the Moeller drain tube included in the kit.

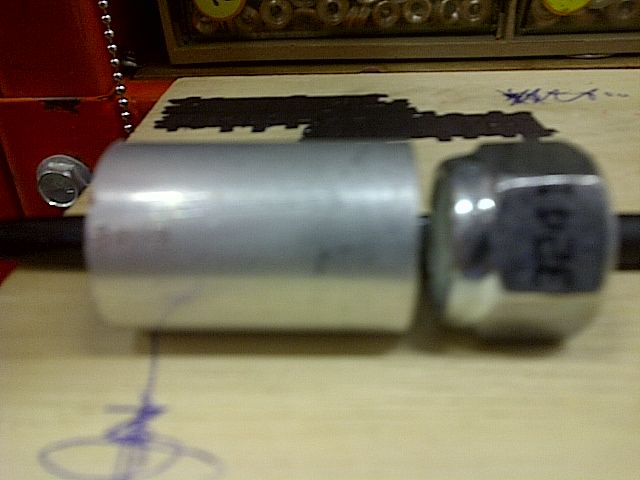
Had a look at HD for the home made flare tool. The 5/8" nylock nut appears to be the closest to the inner dimension of the drain tube.


But I am not sure it's going to work


The nylock nut fits inside the end of the drain tube. So I am not sure how much flaring is actually going to occur.

:confused:
 
Status
Not open for further replies.
Top