1969 Mako cut and gut project by Lectro88

Lectro88

Petty Officer 1st Class
Joined
Oct 24, 2020
Messages
303
Seeing the NUMBER of clamps, I'd say someone is a wood worker as well. Once you apply the epoxy and it soaks in and cures, whatever twist or straightening you applied via the clamps, is how it will end up. So nice work. Keep posting those pictures. You know without pictures, it never happened... lol
Thanks gm280.
hadn’t heard from you in a while.
I don’t claim to be a woodworker, but I have many tools and 30+ years in building industry/construction. My specialty is industrial/commercial electrician.
I have made my mind up to build this thing back to the best of my abilities.
I am taking my sweet time and doing things time and time again, building off what I see and improving on that. (When the light comes on.) Hey there maybe a better way.
the bullet proof transom is prime example of this.
you can see how simple it started out and how it morphed into a overbuilt monster.
if it ever starts rotting, at 3” thick and kneed into the hull it’s going to take a long time to show trouble.
the same with these stringers.
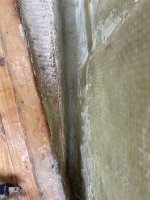
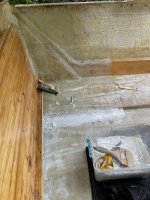
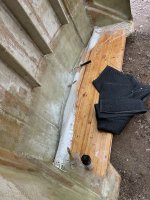
I turn my 16 grit disk upside down and follow the hull cutting the underneath side of the stringer, contouring it very closely to hull changes,
I will seal the bottom of stinger later as I’m adding 1 more layer 24 oz back close to transom.
but fully encapsulated the way I’m doing is and even more glass to come with tabbing, this all should last crazy long.

Oh and I bought a bench plainer so look out…

thanks for the reply.
Lectro88
 

Lectro88

Petty Officer 1st Class
Joined
Oct 24, 2020
Messages
303
Why are you using hardwoods vs. ply? What a nightmare you have there.
Not hardwood. 1x6’s.
the length is 1 thing, and I can lap-joint and dowel and the strength.
I don’t like lap jointing ply.
can’t find good marine ply here.
And like I said before I have enough 1x’s & 2x’s to build 1-1/2 Viking ship’s
Not a Nmare to me,

follow along,.
it’s going to get better…

I don’t “suffer” from insanity…
I actually enjoy it.
 

kcassells

Fleet Admiral
Joined
Oct 16, 2012
Messages
8,719
Not hardwood. 1x6’s.
the length is 1 thing, and I can lap-joint and dowel and the strength.
I don’t like lap jointing ply.
can’t find good marine ply here.
And like I said before I have enough 1x’s & 2x’s to build 1-1/2 Viking ship’s
Not a Nmare to me,

follow along,.
it’s going to get better…

I don’t “suffer” from insanity…
I actually enjoy it.
I meant soft woods. No ply where your at. Well go then with the best you have.
 

Lectro88
Petty Officer 1st Class
Joined
Oct 24, 2020
Messages
303
I meant soft woods. No ply where your at. Well go then with the best you have.
I could drive 50 miles and get the specialty plywood’s at $90-$130 a sheet.
I have more in epoxy than in the wood.
about pint & half.
Those boards cost me pennies..
My time is the most invaluable…
But it’s my “twist”
The lumber I’m using seems lighter in weight than ply too.

This keeps my mind occupied also
 

Lectro88
Petty Officer 1st Class
Joined
Oct 24, 2020
Messages
303
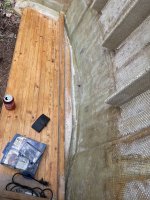
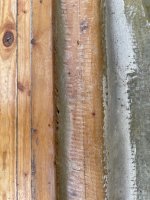
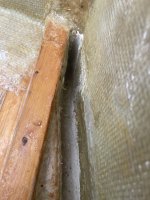
Here’s how my stringers are turning out.
This is after a mild sanding and another coat of epoxy over the glass.
So at least 3 coats before installation.
Hopefully they will turn water for a while.
A few little fish eyes can be seen in the reflection of the light.
But I think it’s going to be just fine.
I may get board one cold night and sand and coat again. Just for fun. Lol.
29525C0B-6B60-4482-B2D1-CDC6EE1D08B1.jpeg1CEDB082-82CD-42C7-87FD-8B69C3649B00.jpeg
 
Last edited:

gm280

Supreme Mariner
Joined
Jun 26, 2011
Messages
14,604
Looks like you are not only rebuilding your boat, but having some fun as well. That's how it should be, but there will be days you wish everything was finished already. Been there, done that. But those days go and new interests take over again. When taking pictures to post, close ups are nice but also take a further away shot to let everyone know where your work is positioned in the haul as well. That way we can get an idea how the project is coming along... JMHO
 

Lectro88
Petty Officer 1st Class
Joined
Oct 24, 2020
Messages
303
Looks like you are not only rebuilding your boat, but having some fun as well. That's how it should be, but there will be days you wish everything was finished already. Been there, done that. But those days go and new interests take over again. When taking pictures to post, close ups are nice but also take a further away shot to let everyone know where your work is positioned in the haul as well. That way we can get an idea how the project is coming along... JMHO
True that about enjoying the ride of the build back.
Even the money and time I blow on this, not even a second thought.
It’s more of a sense of satisfaction.
I’m more concerned about actually seeing it finished, not having it finished.

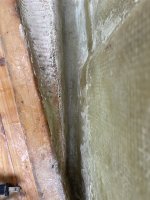
I did the close up to show the glass and finish.
The basement is so cluttered… 50yrs of stuff.., trying to clean the pic up, if you will.
When I lay these in the hull I will be sure to give some wide angles.
These won’t see the hull for installation till probably Spring,. Unless we get some warm runs.
This is all prefab during the cold.(Slow steady progress, rather than just sitting waiting)
I still have some more tricks up my sleeve.
You Know I Don’t Do Anything Conventional or the easy way.

Thanks for the reply gm280
 
Last edited:

Lectro88
Petty Officer 1st Class
Joined
Oct 24, 2020
Messages
303
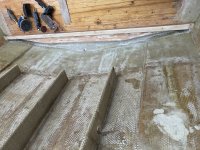
I didn't realize that I had delamed glass on under side of transom. Glad I did this.
My reason is clean up sharp finger getters and sand/grind that white epoxy from fumed silica and add a few extra layers of glass and epoxy just for fun and giggles.
Truth is I just wasn't satisfied with how it turned out, and I'm just now getting around to fix it.
There were several places water "could" get in even though there are several layers of epoxy and glass prior to transom install.
But now I can sand/grind and epoxy won't run as much in this position and I can get to it and monitor what its doing.


B7E4ECBF-5119-48FE-BAB2-71FB95069148.jpeg


B2F71220-E2F6-469A-8841-996ABEAF4448.jpeg


0B6BA618-3A64-4E29-9393-3CC0197EE56E.jpeg


B47C1838-90E9-4491-99A3-B182268F172E.jpeg


1D171584-9ED4-4750-B238-26149C41D612.jpeg
 
Last edited:

Lectro88
Petty Officer 1st Class
Joined
Oct 24, 2020
Messages
303
I know I'm slow and Picky.
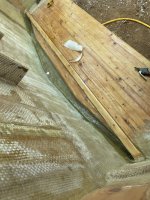
But I got the grinding and sanding done.
And It ended up being worse after I started grinding than what pics showed and what I had thought.
Some of the epoxy was like jelly or silicone... I think fumed silica was the culprit. Only place I used it and only place I had the mis-colored white goo.

So a week later I smeared epoxy again and used finer cloth.
All except for the tree debris, I'm happy now... much better.
I have a few other things to do, lightly sand this and add another layer cloth and epoxy, And I will start adding stringers.

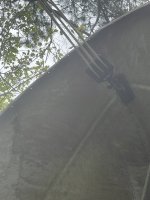
Here the grinding is done.
(I bet not many tools stick to the transom like that)
23EFB36F-ECC9-446B-800E-D843CDED1DBC.jpeg


934BDA7F-4480-4E06-A75E-0F6C557DC5CC.jpeg

The cloth just disappeared, 6 or 8 oz don't remember.
E67BE33C-0380-43B6-BE0C-7CFFD6EF80E0.jpeg
And so much easier with boat standing up.
 
Last edited:

gm280

Supreme Mariner
Joined
Jun 26, 2011
Messages
14,604
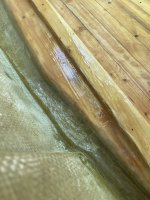
Are you going to apply fiberglass over the entire transom?
 

Lectro88
Petty Officer 1st Class
Joined
Oct 24, 2020
Messages
303
Are you going to apply fiberglass over the entire transom?
Yes, at some point.
Everything I have done has been "epoxy"
Now knowing epoxy is not UV friendly,. after the fact...
And there are some weathered areas on transom, you can see the dark lines if you enlarge pics.
But anyway, I plan to sand the whole thing "clean" again and I have some said "UV" epoxy,. but I need to test it first and see how it does.
Not sure if it is the type that requires a uv light, but the sun gives off uv, but it hasn't got hot enough to try it yet.
Heck its in 50's here this morning and I'm smearing epoxy waiting on it to warm up... I didn't realize I picked coldest day of the week to coat stringers.
we had rain yday and I just knew it was going to be clear a few days and I chose the slow set (face palm) I may have to build a fire in basement and bring them inside tonight. (another face palm)

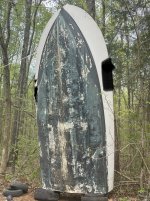
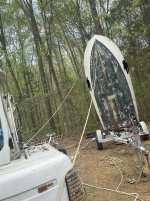
I figured that hull in rocket position would get some replies.
Maybe I'm on ignore list by many.
 

JASinIL2006

Vice Admiral
Joined
Feb 10, 2012
Messages
5,673
I figured that hull in rocket position would get some replies.
Maybe I'm on ignore list by many.

Took me a minute to figure out how/why were hanging your power tools off the transom in the first pic of post #90. Then I remembered you stood your boat on end.
 

gm280

Supreme Mariner
Joined
Jun 26, 2011
Messages
14,604
Yes, at some point.
Everything I have done has been "epoxy"
Now knowing epoxy is not UV friendly,. after the fact...
And there are some weathered areas on transom, you can see the dark lines if you enlarge pics.
But anyway, I plan to sand the whole thing "clean" again and I have some said "UV" epoxy,. but I need to test it first and see how it does.
Not sure if it is the type that requires a uv light, but the sun gives off uv, but it hasn't got hot enough to try it yet.
Heck its in 50's here this morning and I'm smearing epoxy waiting on it to warm up... I didn't realize I picked coldest day of the week to coat stringers.
we had rain yday and I just knew it was going to be clear a few days and I chose the slow set (face palm) I may have to build a fire in basement and bring them inside tonight. (another face palm)

I figured that hull in rocket position would get some replies.
Maybe I'm on ignore list by many.
Ha, where ever it takes go for it. I didn't set my haul up to be launched, but I did turn it over a few times to work the bottom and than the top, and than the bottom etc... I did remember you standing yours up to be rocket launched... Remember, whatever you do to a boat is just new learning experiences. And I can tell you, I learned a ton doing mine... I never worked on a fiberglass boat before. So it all was totally new to me.
 

Lectro88

Petty Officer 1st Class
Joined
Oct 24, 2020
Messages
303
Ha, where ever it takes go for it. I didn't set my haul up to be launched, but I did turn it over a few times to work the bottom and than the top, and than the bottom etc... I did remember you standing yours up to be rocket launched... Remember, whatever you do to a boat is just new learning experiences. And I can tell you, I learned a ton doing mine... I never worked on a fiberglass boat before. So it all was totally new to me.
I too had little epoxy experience except remote airplane building back in the 80’s
And that was apple’s and oranges compared to this.
Another reason why I Over Do everything is I don’t know or this is foreign to my specialty’s. So I choose more rather than less.

I would totally trust “walking” my 8000 lb excavator on that transom in any direction or position… except… while attached to the boat.
No questions.
 
Last edited:

kcassells

Fleet Admiral
Joined
Oct 16, 2012
Messages
8,719
I too had little epoxy experience except remote airplane building back in the 80’s
And that was apple’s and oranges compared to this.
Another reason why I Over Do everything is I don’t know or this is foreign to my specialty’s. So I choose more rather than less.

I would totally trust “walking” my 8000 lb excavator on that transom in any direction or position… except… while attached to the boat.
No questions.
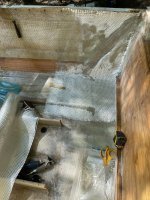
Sorta like this?
1651178878845.png
 

Lectro88
Petty Officer 1st Class
Joined
Oct 24, 2020
Messages
303
No.
I was thinking more like a trailer ramp or bridge.

Prior to install.
 

Lectro88
Petty Officer 1st Class
Joined
Oct 24, 2020
Messages
303
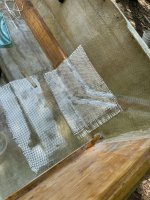
I think I finally finished the transom with exception of a last sanding and final coat.
But the underside fiberglassing is done.

1BAE92C1-92D1-43C8-9492-2730C6AB95E0.jpeg

Below is a second layer I added to help make the under layer stay flat or follow the contours.
Ugh fiberglass 1.O.1. Fiberglass doesn’t like any pointed or non -rounded edges.
Lesson learned.

B8B8D519-8986-4E60-8ED5-52FD622DF3C6.jpeg

You can see the layers underneath that I added last year.
And I put these additional layers for 2 reasons.
Add strength if I end up adding the extra weight or going to 4strokes 1 day.
And 2.
I was pressure washing the other day and saw water rolling under a small area or bubble of glass.
So I sanded everything and added these 2 layers.
There are 4 layers of 24 oz. in this 1st 24” area.
This transom should be pretty tough.
It already was.
4726D863-D851-42D0-9A4A-32134FB583C6.jpeg

At the bottom of the hull around drain plug I added 3 layers 24 oz Yesterday.
And I lost track how many before that. 3-4 maybe.
That area right there should be pretty tough.
BB7FECB7-7FF0-405B-A49C-6CB4293D0C59.jpeg

I don't have pics. of final outcome yet. It was a 1:30-2:00 am window of opportunity and 6am again, I'm Tired. will have some spikes or fingers of fiberglass to knock down.
All this 1st. 24" or 2 feet all the way across the bottom of hull and up the sides was installed while green so it is a good chemical bond.
Going back on Edit; I kinda said that all ready above.
 
Last edited:
Top