1969 Mako cut and gut project by Lectro88

Lectro88

Petty Officer 1st Class
Joined
Oct 24, 2020
Messages
303
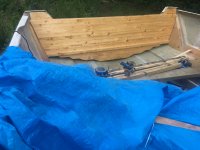
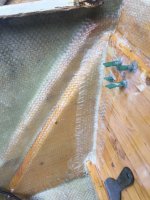
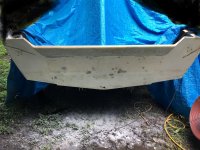
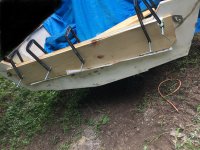
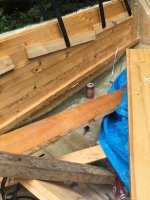
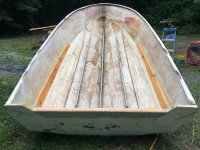
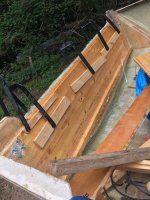
Today I got the transom cut down and dry fit into place.
More tuning to be done. But it’s getting closer.
 

Attachments

  • C421EAD5-1F3A-44D7-AA7C-255BA9358AAB.jpeg
    C421EAD5-1F3A-44D7-AA7C-255BA9358AAB.jpeg
    2.1 MB · Views: 12

Lectro88

Petty Officer 1st Class
Joined
Oct 24, 2020
Messages
303
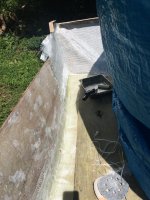
I know these pics seem to look the same..

but I’m getting this settled into place. With all the glass I’ve added in corners and along bottom.
I need to do a little grinding(on the wood)to get it fully fitted.
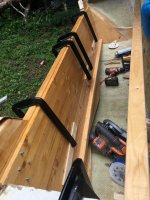
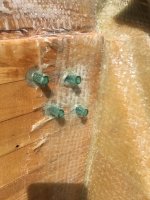
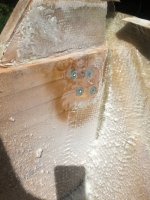
Got ring bolts drilled and threaded ithrough transom wood. Drilled 7/32” and threaded 3”ss or 3.5”(don’t remember)bolts through. Will epoxy threads to seal and even more prevent water from getting to wood.
Will recess and add ss self locking nuts when all is ready and probably epoxy those solid in place to allow removal later as these are unacessable after everything is said and done.
Even just C-clamped in place and the few loop bolts,
this thing is Rock Solid.
 

Attachments

  • 2905D8C0-213E-47BF-91C4-9E40CEDA784B.jpeg
    2905D8C0-213E-47BF-91C4-9E40CEDA784B.jpeg
    2 MB · Views: 9

Lectro88

Petty Officer 1st Class
Joined
Oct 24, 2020
Messages
303
I finally got transom in place and epoxied.
These pics didn't upload in order. so I will explain a little in each one.
Its been a while so I will probably also have some out of order back and forth explaining til I get back oriented. or playing catch up.

The morning of a 24 oz covered backside of transom and wrapped around, under and lipped around to front, that was fun...
E302111B-E253-4250-866F-930FDB108BB6.jpeg

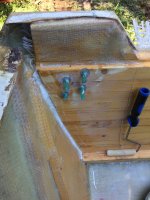
Nothing special here. other than it's fun getting glass over bolt protectors. I guess I will explain those later.
This was 2nd layer of tabbing, overlapping the 1st.
E7D89510-AFDF-4C06-8B91-DEABEFC5A614.jpeg


Below.
This is my version of filleting and it a concoction for sure.
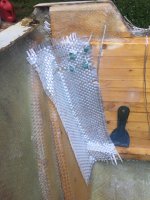
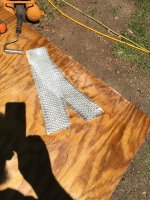
The strips in the 4th. pic were used to fill the gap first, but before that I layed glass around inside hull, (another I will have to add pics of that too)
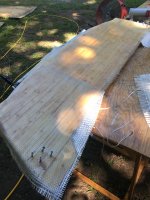
so theres the layer mentioned, then the layer that wrapped the actual transom in first pic then the 2 strips that I folded and worked in with putty knife after I wet out on table with epoxy.
the folded made 4 layers and the other 2 made 6 layers filling the gap.
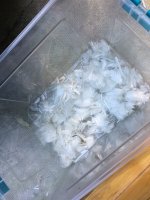
I then take ravels from cutting woven and chop those up fine(5th.pic)and mix with epoxy making a thickened slurry goo that I fill and contour corners for glass to lay on, what most would use PB to do... This takes less epoxy and has more body. and I feel like I'm not throwing as much away and using so much epoxy to make PB.
9EE5A9D4-C3F1-4891-A366-E2F473CB1CA2.jpeg


BAADEEC7-5ED6-42FD-A9E9-495231F2E9A8.jpeg

This is the ravels that I have chopped up to a cotton consistency that I mix in epoxy.
FFD33C57-CF62-4BB2-8D73-C34D7407E0D7.jpeg


Below,.
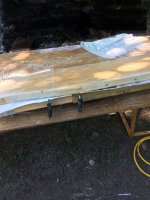
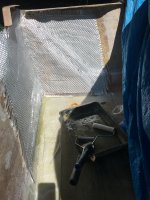
Here I am persuading 24 oz cloth to do close tight back to back turns.
I did this by clamping boards to the ledge board of transom, with cut dog food bags between as a barrier to keep from sticking to the clamping boards.
My idea I didn't mention in 1st. pic was after all this gels and will stay in place it was set in place still green to give a good chemical bond epoxying in place, tabbing and all.
EED62514-88E7-4360-A804-2F77C6476B1F.jpeg
On the back side you can see some of the ravels that I chop up as filler.
I Try to find a use for even scraps. and this seems to do good.
 
Last edited:

Lectro88

Petty Officer 1st Class
Joined
Oct 24, 2020
Messages
303
A few more pics again out of order


This was 1st. layer tabbing after wet out.
The blue hose is bolt protector to keep epoxy off threads of ss tow/tie down bracket bolts that I used to draw transom into place. I have ss 1/4-20 nuts & washers recessed . That was fun epoxy bedding nuts with bolts in. If you didn't know it... PB will crawl or weep threads and mess up several of your days.
98EBADCC-1658-4191-AA87-AA5F864F0FF0.jpeg


Again way out of order.
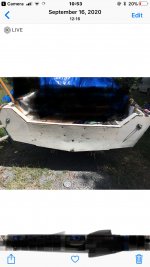
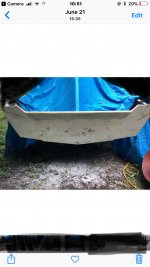
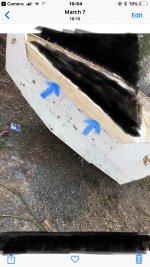
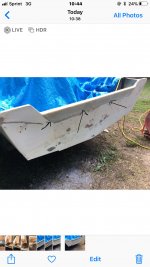
This was what I uncovered.
I had to patch 50+ holes. looked like it survived a skeet shoot
I am in process of blending from 20" transom to a 25" transom.
so theres a lot going on here and much more to be done.
Could have been worse and could have been better.
I'll get it how I want with time, not pretty I know, But it was rough to to start with.
9EDCABFD-5A26-4089-875E-213BC7FB3DDD.jpeg

Here I added what seemed like 20 layers ox 24oz to build 1/4"
again you see dog food bags as anti-stick material.
138A3B2E-7605-45FB-A304-77844361019E.jpeg

A little bit of clamping going on.
9D2A94AA-87FE-4D36-80B7-76ECA38E5442.jpeg

I cut off the bottom of transom for several reasons. DR can for reference.
Mainly to give me room to work and add hardware like speedo, trim tabs(maybe)etc. and not penetrate transom wood.
And it gets transom out of a reasonable amount of water should you get water in area.
There is like 6 layers 24 oz. that I have layed below, behind and around... so this area is heavily built up.
9D2928E9-C654-41C5-BB36-2C6F47127658.jpeg
 
Last edited:

Lectro88

Petty Officer 1st Class
Joined
Oct 24, 2020
Messages
303
It took 2 days of struggling and constant battling to get this transom in place.
The 1st. day was about 15 hours. then it resumed early next morning and it is still a work in process several days later. but this is my 1st install.
And I want this a certain way and that adds time too.
Again something I couldn't buy or afford if it was available.
So I won't complain. but it has been a Real learning curve.

I will also add...
This thing is ROCK SOLID now. with all the thick wood I have added and fiberglass encapsulated.
When you give it the ole fist bump test, its not like fiberglass or foam filled fiberglass.
It's like hitting plate steel.
 

Lectro88

Petty Officer 1st Class
Joined
Oct 24, 2020
Messages
303
Here is 24 oz. glass going in around I call it Cupping or Horse Shoeing the transom area.
Don't have pics but it goes all the way across the back and along other side.
Then I had the layer that I put on the back of transom that you should have seen in earlier posts.
I know this is way over doing things, but remember I plan to hang twin 150's on here.
And hopefully I built enough Mass here that by the time it ever gives trouble I will be long gone.
The transom is solid 3" thick.
The butcher block build I did...
My thinking was epoxy between each board should or if water ever gets in..
It can travel lengthwise but it won't pass layer of epoxy unless it breeches epoxy. somehow
And I am sleeving and pouring all penetrations.

7DFAF332-4578-4052-A8EA-6953A91C4972.jpeg4D868109-4771-4B0B-8A4B-24F36D55F1FE.jpeg
 
Last edited:

tank1949

Lieutenant Commander
Joined
Apr 4, 2013
Messages
1,894
I finally got transom in place and epoxied.
These pics didn't upload in order. so I will explain a little in each one.
Its been a while so I will probably also have some out of order back and forth explaining til I get back oriented. or playing catch up.

The morning of a 24 oz covered backside of transom and wrapped around, under and lipped around to front, that was fun...
View attachment 343645

Nothing special here. other than it's fun getting glass over bolt protectors. I guess I will explain those later.
This was 2nd layer of tabbing, overlapping the 1st.
View attachment 343646


Below.
This is my version of filleting and it a concoction for sure.
The strips in the 4th. pic were used to fill the gap first, but before that I layed glass around inside hull, (another I will have to add pics of that too)
so theres the layer mentioned, then the layer that wrapped the actual transom in first pic then the 2 strips that I folded and worked in with putty knife after I wet out on table with epoxy.
the folded made 4 layers and the other 2 made 6 layers filling the gap.
I then take ravels from cutting woven and chop those up fine(5th.pic)and mix with epoxy making a thickened slurry goo that I fill and contour corners for glass to lay on, what most would use PB to do... This takes less epoxy and has more body. and I feel like I'm not throwing as much away and using so much epoxy to make PB.
View attachment 343647


View attachment 343648

This is the ravels that I have chopped up to a cotton consistency that I mix in epoxy.
View attachment 343655


Below,.
Here I am persuading 24 oz cloth to do close tight back to back turns.
I did this by clamping boards to the ledge board of transom, with cut dog food bags between as a barrier to keep from sticking to the clamping boards.
My idea I didn't mention in 1st. pic was after all this gels and will stay in place it was set in place still green to give a good chemical bond epoxying in place, tabbing and all.
View attachment 343656
On the back side you can see some of the ravels that I chop up as filler.
I Try to find a use for even scraps. and this seems to do good.
I discovered by accident that a 2-3" small nap paint roller works better to roll glass/cloth and forces resin into weave and removes bubbles. I buy the cheapest ones from Home depot. Lowes are more expensive. I discard after use and just clean the roller tool.
 

todhunter

Canoeist
Joined
Sep 15, 2020
Messages
1,311
I discovered by accident that a 2-3" small nap paint roller works better to roll glass/cloth and forces resin into weave and removes bubbles. I buy the cheapest ones from Home depot. Lowes are more expensive. I discard after use and just clean the roller tool.
Same - I haven't used a fin roller at all. Between a 2" chip brush and a 4" mohair nap roller, I've been able to lay all the glass on my boat, nearly bubble free.
 

Lectro88

Petty Officer 1st Class
Joined
Oct 24, 2020
Messages
303
Still learning my way in the glass world.
I only use roller if I have a lot, and these 2 days I had a lot.(to me)
Finish roller is cleanable and I can move or even out epoxy with out adding.
Guess I could do same with nap roller but the solid roller sometimes doesn't lift or pull cloth,
Again with finish roller I can do small applications or repairs and not throw a nap roller away, as finish roller is cleanable.
Each 1 has a different feel, So I mix the 3 or have them on hand. for larger areas.
I just hope all this doesn't fall apart sitting in driveway....
 
Last edited:

Lectro88

Petty Officer 1st Class
Joined
Oct 24, 2020
Messages
303
A week later and I’m still piddling getting the transom how I want things.
I was not going to leave this the way it turned out and like I said I kinda expected some rework in this area.
You can see around the problematic insets that the glass didn’t lay well and I kinda expected such.
Today I ground and sanded the crap section out and will lay 3 more yet wider pieces over these now partial 2 making a halfway 5 layers of tabbing.
I also have to finish sealing bottom of transom and will pour the 2 corners as I have a few hollow sounding places down low. And I could see the gaps when I pryed and peeked down in there, (not now but when I was fitting things)you remember I said I had rubbing to do some before all this went in. That’s what I was referring to. As you know it’s tough getting a Perfect fit. But I did try.
I found a 4” long 1/4-20 tap online and have that coming. Will help clean things out/up after this tabbing.
Do you guys think this will be enough.
And to move on and quit messing in this area. I could kill another week here if I so desired.
But I do have a certain goal or level of expectation.
It's already WAAAAY! stronger than it was when new. But I'm not playing fair either.
Thanks guys for helping get me this far.


9103CADD-F3DB-4B64-A3E6-F2CEDEAD2605.jpeg


DDB3B68A-90AD-4B16-8D21-9ED6F27C8E06.jpeg
 
Last edited:

Lectro88

Petty Officer 1st Class
Joined
Oct 24, 2020
Messages
303
Asking for your thoughts


811A7883-ADB7-4E9A-8B65-B212EA9C8CC4.jpeg
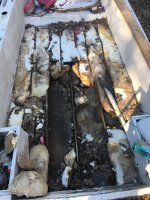
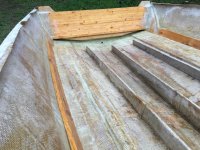
Above you can see what I had to start with. Distorted, caved in and eat up with holes.


F54190BB-3608-4A75-8430-161EB23FC8CE.jpeg
Above started raising height of transom and filling holes, blending fiberglass.
24 oz woven cloth.


This pic below is a very old pic. its the very beginning of transom build,
the transom/boards were glassed before install.
This is just for reference.
749C2298-78FC-46F2-95FB-CCF11E50F5D8.jpeg
This is the point of uncertain concern. where I filled this in is a place to crack at seam, same thing in pic below.


A7E77DB9-792E-4D3A-8DCA-44004590A5D3.jpeg
Right here should I layover entire transom with woven first for strength against cracking.
Or is chopped CSM good enough.
Now I know I have gone off track a little using epoxy, I plan this next layer to be epoxy too, unless you folks convince me otherwise.
So this next layer for strength, let it cure and fume off, then a last layer of poly and CSM so gelcoat will stick.
Or is poly and CSM over this after it cures and fumes off enough.
Its just time, money, effort and weight, But who is counting at this point.
As you hopefully can see in the last 3 weeks this transom has come to a point of almost ready or finish surface, it is smooth and in sunlight I think this is getting very close.(or its way better than it was)
Just asking your advise.
I realize that I have way over-done some things, but thats just how I do.
1 reason is this is new to me so its a safety net or cushion.
2 I don't like things failing for lack of effort or cut corners. I just go extra.

Thank you in advance.
 
Last edited:

Lectro88

Petty Officer 1st Class
Joined
Oct 24, 2020
Messages
303
Ok. A pic from yesteryear.

You all know my boat is way past this point now.
I posted the bare clean hull 6 or more months ago.
Reason I’m showing this. Is..
You see how little foam it would take to finish filling this part of the hull. ?

Why not just fill it Solid.
Is it figured that close that it doesn’t rollover if swamped.
I’d rather have the fluff floatation anyway.
ALLL... the rest of the boat was solid filled, raised platform, both sides filled solid to top front to back,...
What’s so bad about an extra 1/2 gallon of foam.
Less water to get in and out.
No need to pull plug or have it in.
Just kidding on the plug, but you get what I mean.
Just less to fool with and worry about.
Make the floor solid, make the bilge solid.

Wait. I just thought of a problem.
Need a place for fuel tank/s to drain to. From around.
How about just 1 sq. Ft. Section left un-foamed at plug .?
Thanks,


366C1E7D-DAD2-455F-8D8C-2862AF6FBDC1.jpeg
 
Last edited:

alldodge

Moderator
Staff member
Joined
Mar 8, 2009
Messages
42,067
Looks like it use to have a box in the area in pic. If not I would make one

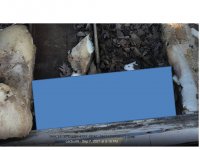
Your stringers are dark, and this has me thinking its moisture. If there is even slight moisture it will continue to rot
Agree I would foam the rest

bilge.jpg
 

Lectro88

Petty Officer 1st Class
Joined
Oct 24, 2020
Messages
303
Looks like it use to have a box in the area in pic. If not I would make one

Your stringers are dark, and this has me thinking its moisture. If there is even slight moisture it will continue to rot
Agree I would foam the rest

View attachment 349394


Thanks alldodge.

There was no box. I (have) kicked around the idea very mildly, and really still undecided, more towards not.. but still open to it. kinda.
What I was thinking was several +100 qt. coolers, that way they are removable just pick it all up and go with it rater than transferring later.
And then if wasn't fishing leave'em out/off.
I have way better room for below deck box at raised platform at the bow.
My thoughts is the original didn't have it.
I know I'm talking out both sides of my mouth with all the other improvements and mods that I plan to do. I just like a clean floor... And no place to collect crap, being mine and nature.
Yes, stringer wood is black and wet but still solid remarkably, But I've already cut 2 new stringers, still in process. This is a 1969 Mako 19' CC.. Full Resto.
I'll post some more recent pics. I have a thread on the build. responses are hit and miss.
Thanks again.8E8ECC82-E511-4D29-9F89-CC1C48A824E8.jpeg76D2C843-9812-408E-B490-0153CB479F8A.jpeg3085878C-25EE-40E6-A066-5319C787FF5B.jpeg76D2C843-9812-408E-B490-0153CB479F8A.jpeg3085878C-25EE-40E6-A066-5319C787FF5B.jpeg
 
Last edited:

kcassells

Fleet Admiral
Joined
Oct 16, 2012
Messages
8,721
Make 1 thread and ask the moderators to combine all your other threads. Its easier for everyone to tag 1 thread and respond better. Happens all the time. Looking good.
Or simply keep this one as your main thread.
 

Lectro88

Petty Officer 1st Class
Joined
Oct 24, 2020
Messages
303
It's been a while.
been 3 months since I did anything, Had surgery and some broken bones and stainless hardware added, So I'm in light mode for a while.
 

Lectro88

Petty Officer 1st Class
Joined
Oct 24, 2020
Messages
303
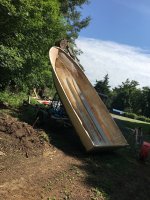
I am going to build an extension for the excavator boom so I can stand the boat straight up.
Reason, I am not going to stand on my head or lay down and try and finish, add or get the fiberglass how I want it on the bottom side of transom.
It's tied in ok, but I want it sealed a little better and a little more meaty in glass since I have that open fiberglass space at bottom rolling to the hull and turning forward.
I added 5-6 layers 24 oz. there before I installed the new transom.
But again The transom bottom glass is a little porous or holey for my liking, since my choice of wood was not marine or treated. I am protecting it from moisture more than building strength.
 

Lectro88

Petty Officer 1st Class
Joined
Oct 24, 2020
Messages
303
It’s been a while but here’s a little update .
I got my hands on yet another brand of epoxy. ProMarine 5:1.
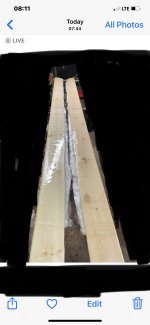
cut a couple of stringers from some “twerked”wood. Had a slight curve and twist.
this is some of the $300. Worth of cull I got for $30. A pretty good bundle.
Anyway I figured what the heck.
let’s try and straighten it a little bit, just see how it turns out for fun.
So I smeared/lathered 2-3 good coats on each side of their slow 5:1. We know how it soaks it in.
Bear in mind I’m working in the basement with a fire going in the wood stove, so I have to keep moving…
So after that I cut 4 pcs 6 oz (I think) and put my gloves on and started pressing it in and working it snug around my rounded top.
then let the fun begin.
started slathering more epoxy on.
After what seemed like another 4 coats flipping the boards over and over and kept getting dry spots, I finally got what seemed to be a good saturation.
3-1/2 hours into it. (I think again)
I wrapped the boards in painters plastic and sandwiched them snuggly together with a clamp or 3 /dozen… lol.
so I’ll give them a few days to cure in a 80 f. Basement.
I think they will hold pretty straight now as they weren’t that bad… but I wouldn’t have tried to bed them bare the way they were.
if I don’t like how they turn out.
I’ll put them aside and maybe use short sections for something else.
Well that’s it for now. Got to pick my battles in this chilly Nc weather that’s 50-70 during the day and 30ish to 40 at night.
Colder is on the way though.
I’ll be ready to set stringers cone Spring.


EDEAAE9C-F245-465F-BB98-0A3CB8EDFC13.jpeg5287859B-6A9F-484E-8144-6C1CA2B74273.jpeg
 

gm280

Supreme Mariner
Joined
Jun 26, 2011
Messages
14,604
Seeing the NUMBER of clamps, I'd say someone is a wood worker as well. Once you apply the epoxy and it soaks in and cures, whatever twist or straightening you applied via the clamps, is how it will end up. So nice work. Keep posting those pictures. You know without pictures, it never happened... lol
 

kcassells

Fleet Admiral
Joined
Oct 16, 2012
Messages
8,721
Why are you using hardwoods vs. ply? What a nightmare you have there.
 
Top