1968 Starcraft Sprint V Rebuild

Status
Not open for further replies.

BigMikey86

Petty Officer 3rd Class
Joined
Apr 3, 2014
Messages
91
Re: 1960's Starcraft Something or other

Re: 1960's Starcraft Something or other

3/16" x 1/2" will cinch down perfectly through 3 pieces of .080 but may be a bit too long for 2 pieces. Not sure what your planning on banging together with those monster 1/4" but I like how you think... :heh:

Oh yeah and those 1100 grade are VERY soft and will turn to mush in a hurry on the bucktail side so do a few practice runs. I used the hard 2117 for the hull stiffeners 3/16" x 3/8" going through 2 pieces of AL and the 1/2" 1100 for the 3 pieces.

Thanks for letting me know watermann!. It's tough being new to the boat restoration process because everything is a learning process. I have a question though, when it comes to the rivet heads and sets. If i cant source the brazier head rivets would universal rivets or round head rivets be sufficent?

Regarding the 1/4 rivets, the PO's masterpiece he left me had those screws throw into the hull and the transom.
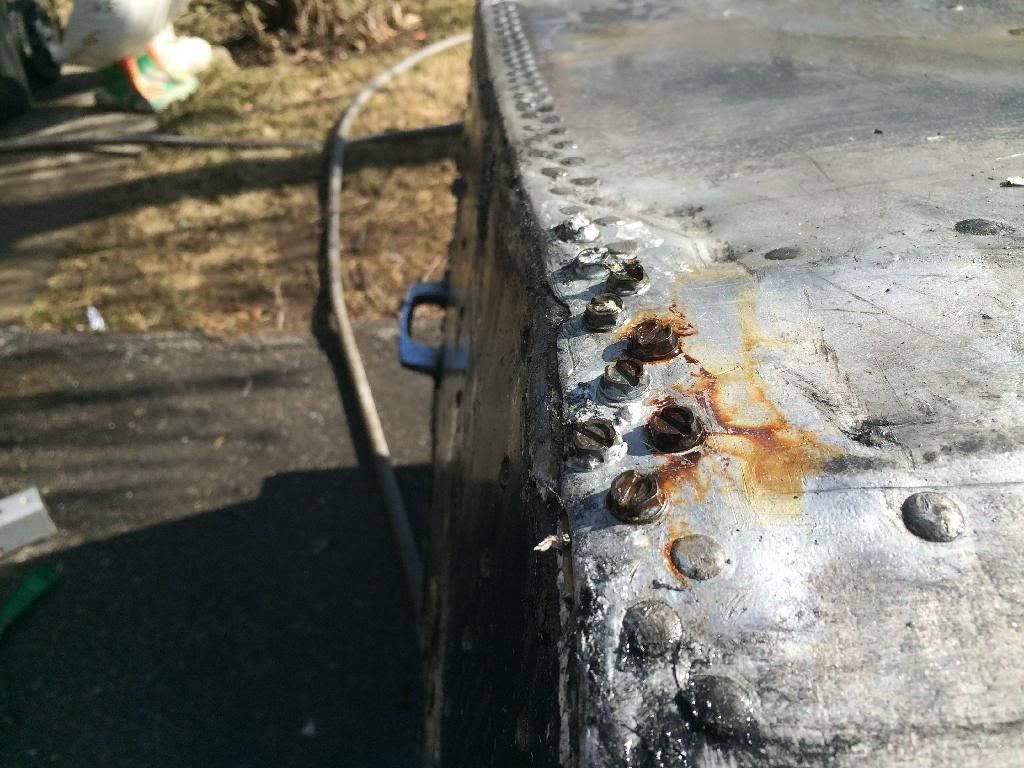
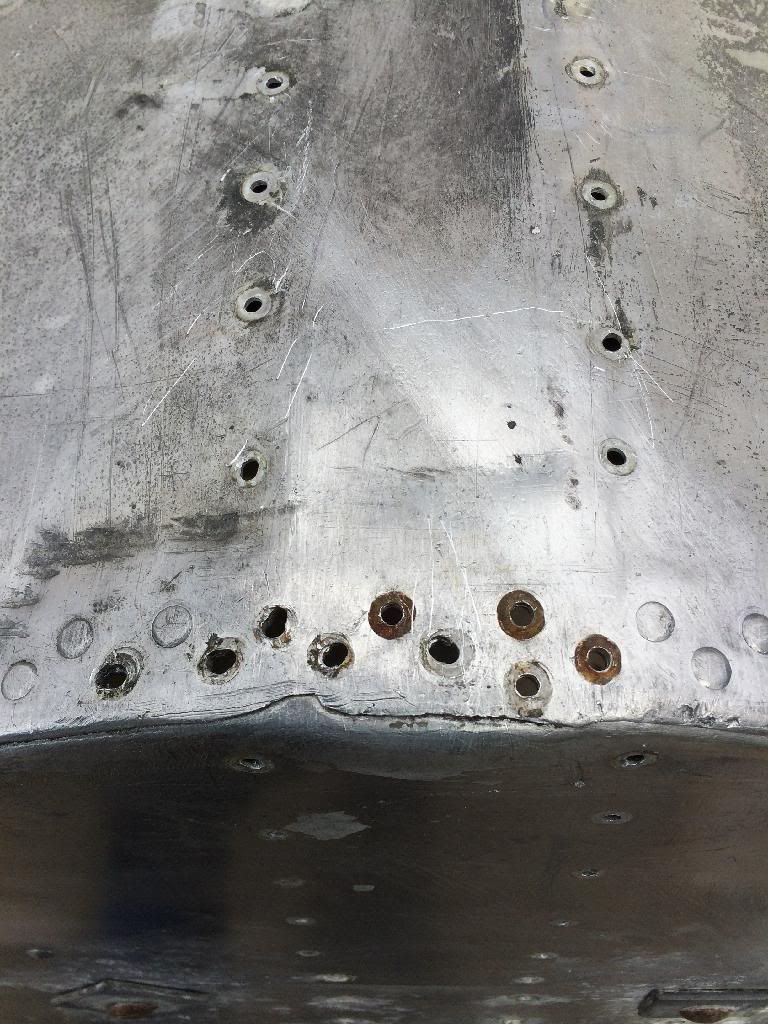


In a picture i haven't taken yet I've drilled out the ovaled holes to 1/4" which is why i'll be needing the 1/4" rivets. I found a air hammer with a nice sensitive trigger and a bpm of 1900. I'm hoping it will be able to set the 1/4".
 
Last edited:

Watermann

Starmada Splash of the Year 2014
Joined
Jan 12, 2013
Messages
13,787
Re: 1960's Starcraft Something or other

Re: 1960's Starcraft Something or other

You won't have any trouble making a big ole bucktail on the 1100 rivets even at 1/4" dia. The rivet sets are designed according to the head type, the domed and brazier should be the same set, the universal heads have a flat spot in the center, the brazier have a little dimple and the domed are just that with nothing on the head center.

Also I would replace any of those rivets that show wear and are flattened off just to be on the safe side and it's fun! Well except for putting that 5200 seagull poop on them first, that's not so great. :lol:
 

BigMikey86

Petty Officer 3rd Class
Joined
Apr 3, 2014
Messages
91
Well after quite sometime, and the passing of two grandparents (one from my side, one from the wife) as well as my dog needing to be put down, the project had taken a spot on the back burner.

Finally though things have settled, and time is available again.

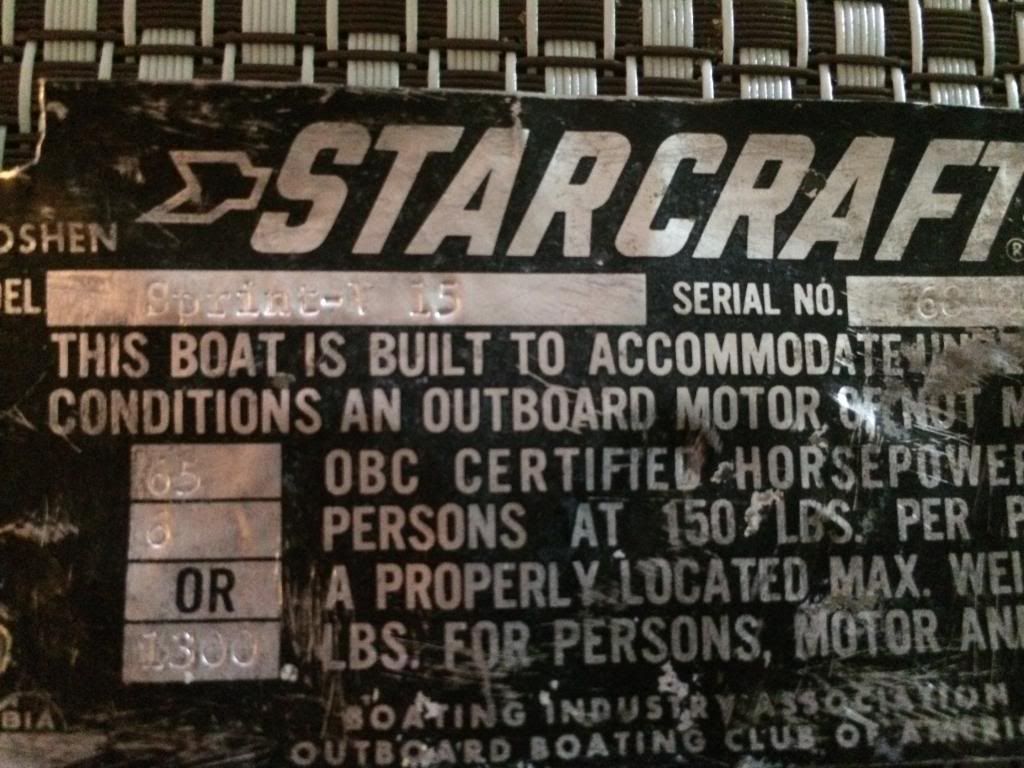
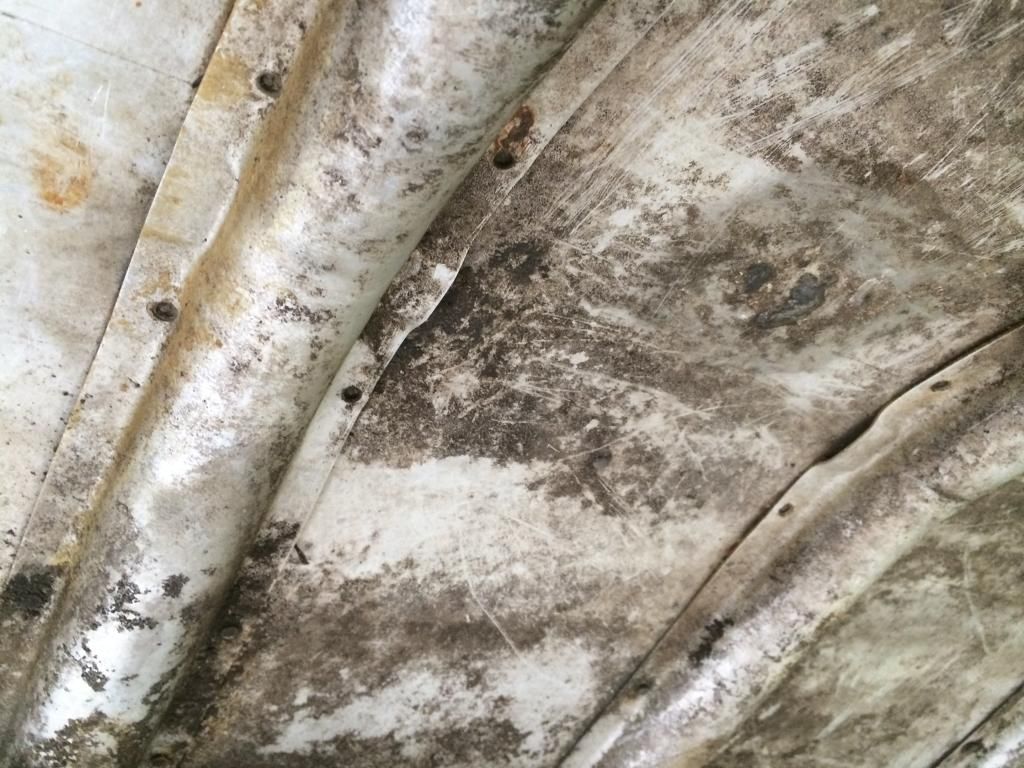
First off lets get things straight. She finally revealed her true identity, after i removed a couple layers of crap camo paint from the interior. Maybe if a mod. reads this he/she can re title this thread as "1968 Starcraft Sprint-V rebuild"


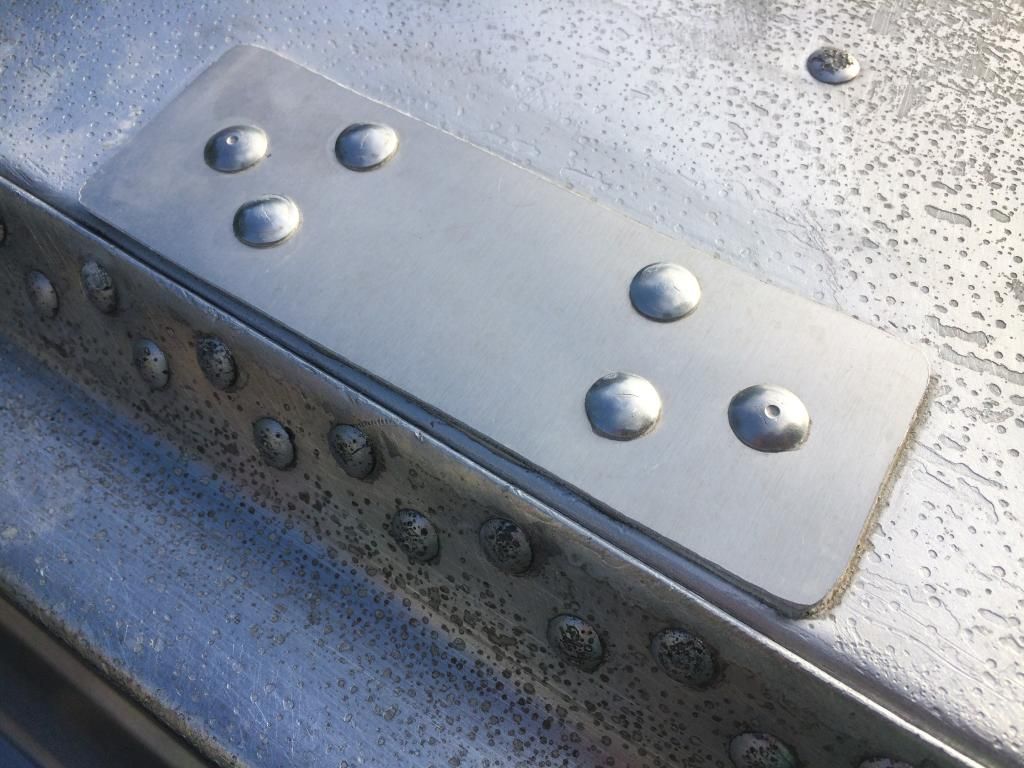
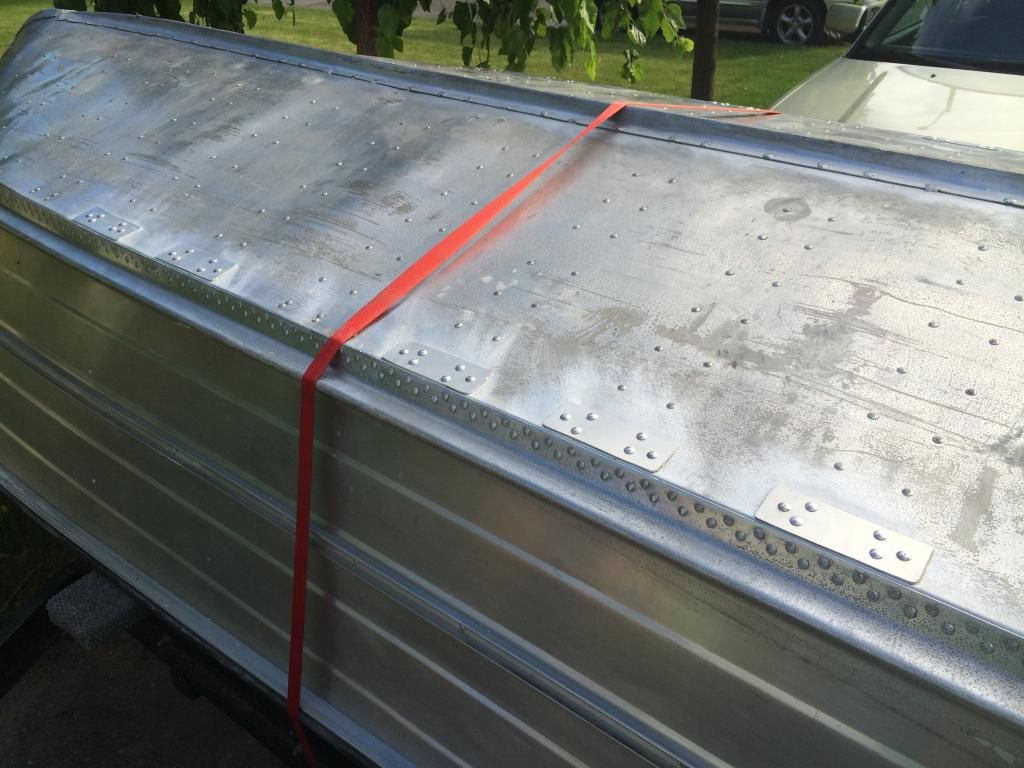
Its nice to actually know what boat your working on :joyous: Regarding the stress cracks I had on the hull at the rib ends, i managed to make plates and call a buddy over to get those solid rivets set. They seem to be going well and you guys were right, solid rivets are fun to set, but the seagull poop haunts me in my dreams.


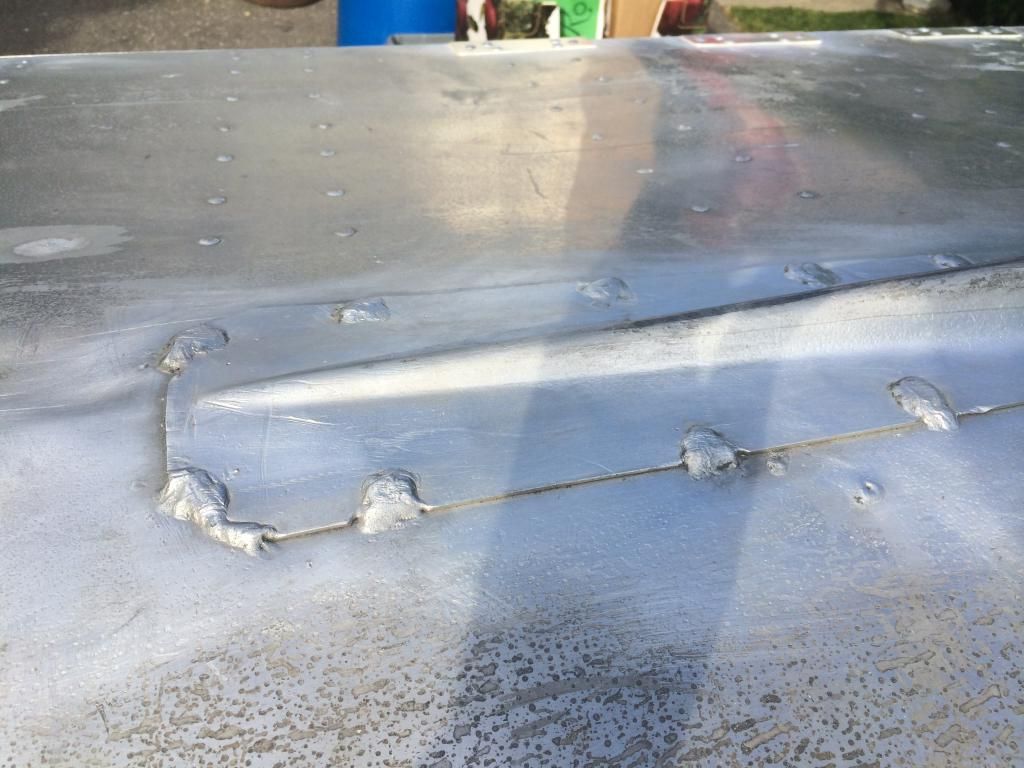
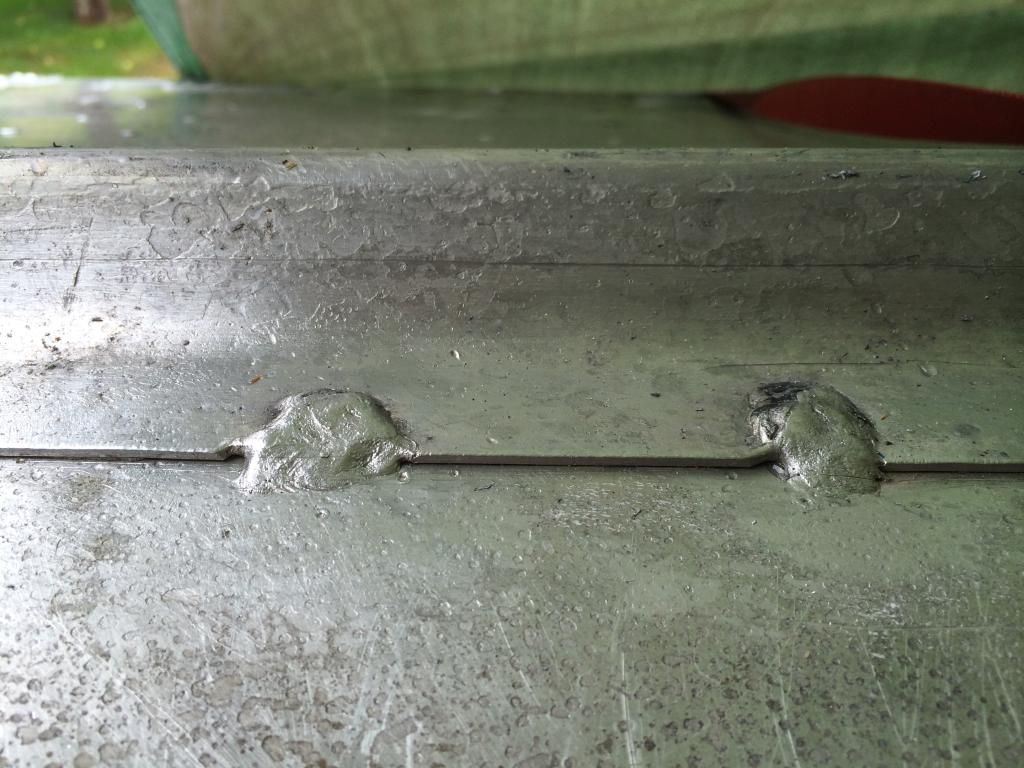
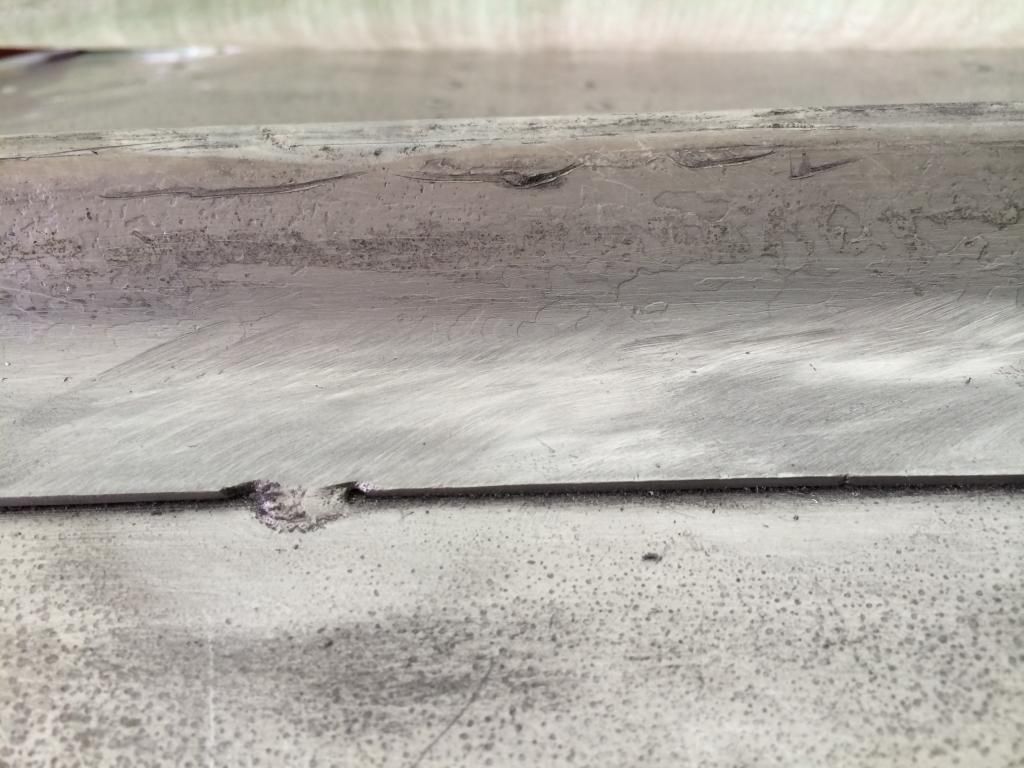
My dilemma now is the horror show i've been left with along the chine.


I have a pretty steady hand and ive been contemplating grind the weld flat and drilling through from the inside and setting a solid rivet in the hole with a nice gob of 5200. My reasoning behind drilling through is this


I'm worried that with the lack of rivets holding down the ribs will crack this weld job on the first big roller. Suggestions anyone? pleeeeease? haha.
 

Watermann

Starmada Splash of the Year 2014
Joined
Jan 12, 2013
Messages
13,787
Welcome back to the tin fest Mikey, sorry to hear about your family losses, I've been there too.

Patches look great and I agree with the need for mushing in some solid in those ribs, that's not going to hold up the way it is.

You need to send a PM to GA_Boater and have him move your Sprint thread to the Starcraft forum with the rest of us. Also you can rename your own thread, a MOD doesn't have to. You will get a bunch more visits in the SC forum.
 

GA_Boater

Honorary Moderator Emeritus
Joined
May 24, 2011
Messages
49,038
Sorry to hear about the Grandparents, Mike. My condolences.
You have to go to the first post, #1, to change the title. I'll let you try after the move, which any second now. If it won't change, send me a PM.
 

GA_Boater

Honorary Moderator Emeritus
Joined
May 24, 2011
Messages
49,038
Mikey - You're home from the dusty wastelands. :lol:
 
Last edited:
Watermann

Starmada Splash of the Year 2014
Joined
Jan 12, 2013
Messages
13,787
No more sharing itchy space with the Rottenliners!
 

GA_Boater

Honorary Moderator Emeritus
Joined
May 24, 2011
Messages
49,038
Now for a technical comment. I would grind the welds and stick some rivets in. Ribs need to be secured to the hull and it doesn't look like yours are. Mike. Sorry to say, there is more pelican poo in the future.
 

Bwana Don

Lieutenant Commander
Joined
Oct 20, 2009
Messages
1,951
I bought the bigger Harbor Freight pneumatic rivet gun. Works great! Get some closed end pop rivets and start riveting.

I agree with GA on the ribs. Cut the welds and rivet back together. I brazed a bunch of misc holes in the Sea Nymph, riveted the ribs back where the had cracked on the ends. I need to post pictures in my thread.

http://www.harborfreight.com/media/c...mage_12026.jpg
 
Last edited:
BigMikey86

Petty Officer 3rd Class
Joined
Apr 3, 2014
Messages
91
Thanks for all the help you guys!.I'm glad to be home where this thread belongs. Well I'm going to give grinding the welds and drilling through a shot. I don't think I'll be able to cut the welds and take the chine off. Too risky with lots of potential to cut through. I'm going to grind, drill, and rivet. Would there be more chance for the weld to crack though if I don't take the chine clean off first?.
 

Watermann

Starmada Splash of the Year 2014
Joined
Jan 12, 2013
Messages
13,787
Mikey I don't know what the better outcome would be but I know it's going to be way better than it was with the repairs and those solids mushed in there. If it were me I would do exactly what your planning.
 

BigMikey86

Petty Officer 3rd Class
Joined
Apr 3, 2014
Messages
91
Big 10 4 there Watermann. I'm hoping it works out and all goes to plan, but we all know where else it could go haha. I'll start the dirty work Monday and show you guys how far I get!
 

BigMikey86

Petty Officer 3rd Class
Joined
Apr 3, 2014
Messages
91
Bwana don, I opted out to just stick with the solid rivets just to be safe, and also to learn something new :)
 

GA_Boater

Honorary Moderator Emeritus
Joined
May 24, 2011
Messages
49,038
I would only grind to make a flat surface on the chine/keel for the rivet head, Mikey. The temptation is there to try to grind off all the weld, but the hull AL is so thin compared to the rest. An oops there and you'll be like the guys you just left who made so much dust they ran grinders through their hulls. :eek:
 

BigMikey86

Petty Officer 3rd Class
Joined
Apr 3, 2014
Messages
91
Fair enough GA, fair enough haha. I might even get a chance to get at her tomorrow, but either way I'll keep all you wonderful gents informed on the process.
 

BigMikey86

Petty Officer 3rd Class
Joined
Apr 3, 2014
Messages
91
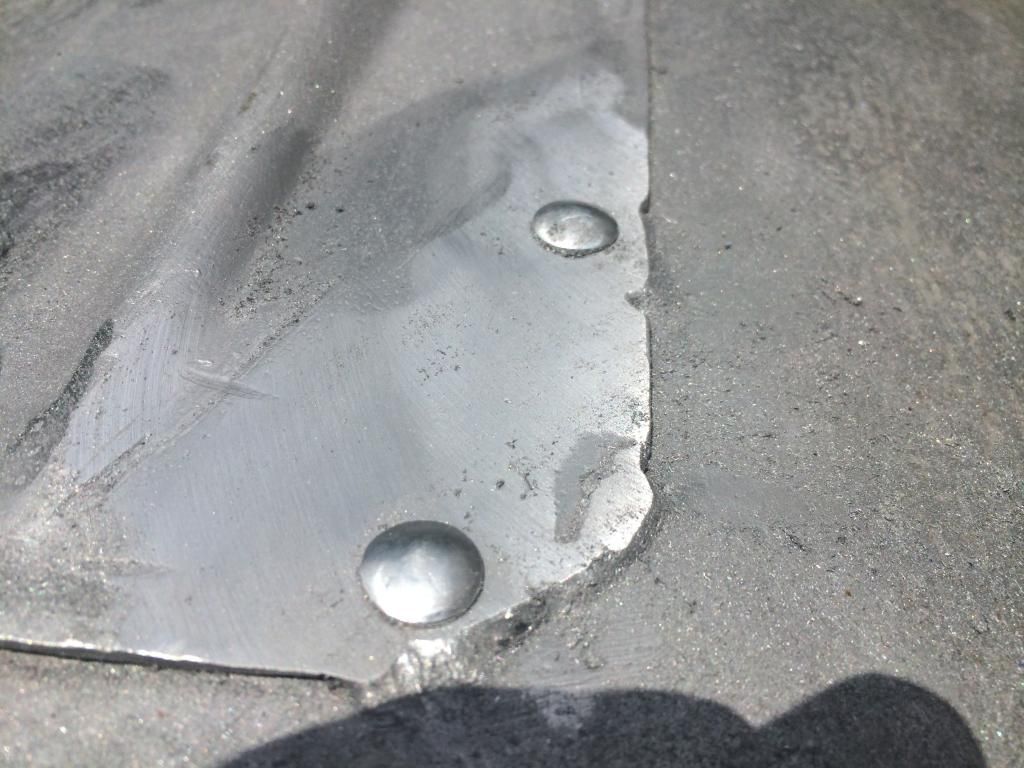
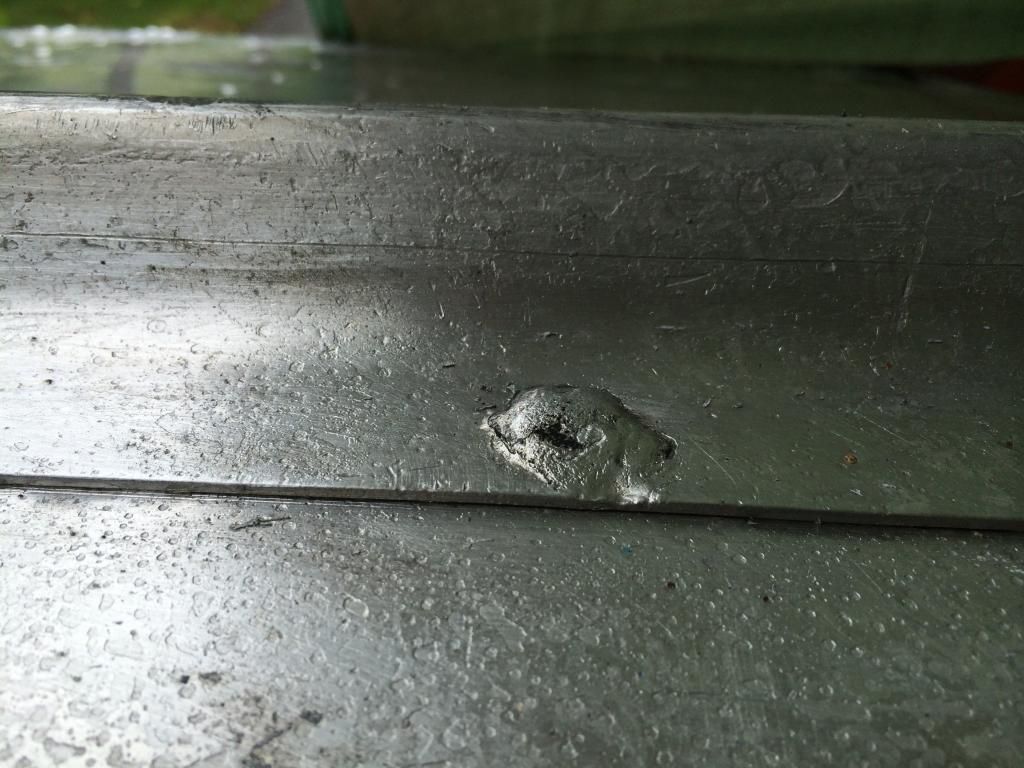
Well unfortunately mother nature has decided to make it rain on me, and not in the form of $20's. I managed to get a bit done while under a tarp. Here's the before and after.

Before:


After:


I have a question for you guys though. The welds that are not associated with the ribs, should i just leave be? or grind down as well and 5200 butter the backside of the weld in the hull.


Any suggestions would be greatly appreciated. Thanks again!
 

GA_Boater

Honorary Moderator Emeritus
Joined
May 24, 2011
Messages
49,038
Nice surface to stick rivets through, Mike. Good job!
On the other welds, look inside. If there used to be rivets, I would put rivets back in. My reasoning is the rivets clamp the keel and hull together while the weld holds the keel onto the hull. A subtle difference, but as the hull twists and flexes, the weld could eventually break the thin hull at the weld because the hull will give up before the thicker keel.
 

BigMikey86

Petty Officer 3rd Class
Joined
Apr 3, 2014
Messages
91
Sounds good, looks like i'll be doing some more grinding, I'll just have to be super careful grinding the inside to make sure not to take the hull down at all.
 

Watermann

Starmada Splash of the Year 2014
Joined
Jan 12, 2013
Messages
13,787
I agree with GAB and I would only put rivets back where they belong. Be sure to go buy a nice new 3/16" pilot point drill bit too, it will make life a lot easier when it comes time to punch those holes.
 

BigMikey86

Petty Officer 3rd Class
Joined
Apr 3, 2014
Messages
91
Well gentlemen, I manged to do a bit of work but unfortunately the weather up these ways has been quite the heavy bit of crap lately. Couldn't set any rivets as I was solo but next week I'll be getting covered in bird poop and one step closer to finishing. Sorry for the wd 40 and aluminum dust, it cleans up well. I'm off camping for the next week or so but have to buckle down on her when I'm back. Big king season is soon upon us!.
 
Status
Not open for further replies.
Top