1968 Starcraft Jupiter - Rebuild

Status
Not open for further replies.

InMotion

Commander
Joined
Nov 3, 2011
Messages
2,080
Re: 1968 Starcraft Jupiter - Rebuild

Please don't paint the boat in fake wood grain. LOL

Be looking for some pics, IM

Oh good grief no!!! I have trouble getting spar varnish to not run on a vertical surface... fake wood... mine would come out looking like a deranged zebra!!!:eek: For the sides, I just got some carpet that is what I guess you would call a darker taupe ... hopefully it looks alright with the wood, dek master floor and white gunwales and bow!!

GA_Boater
Re: 1968 Starcraft Jupiter - Rebuild
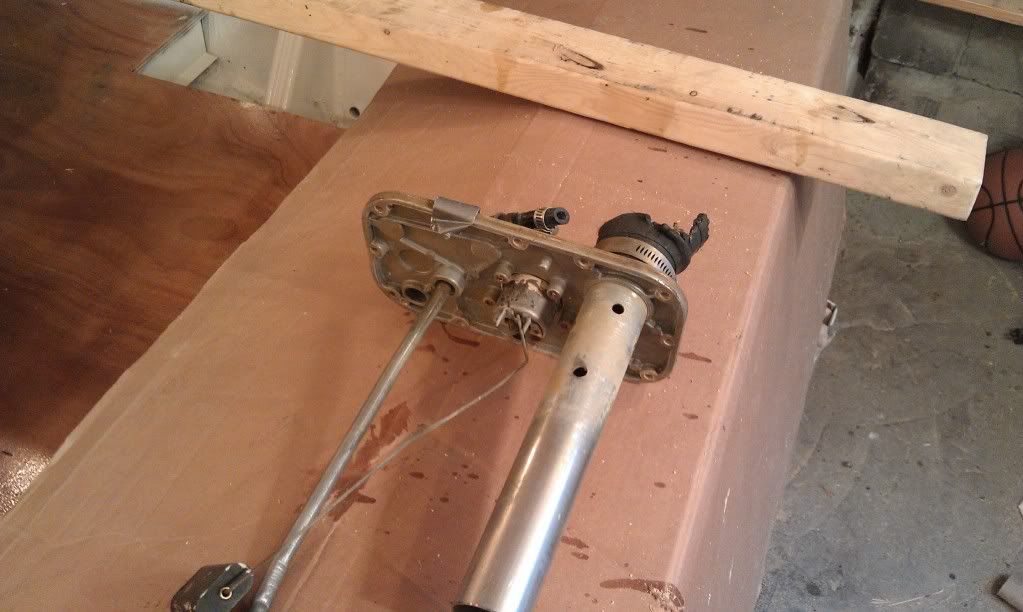
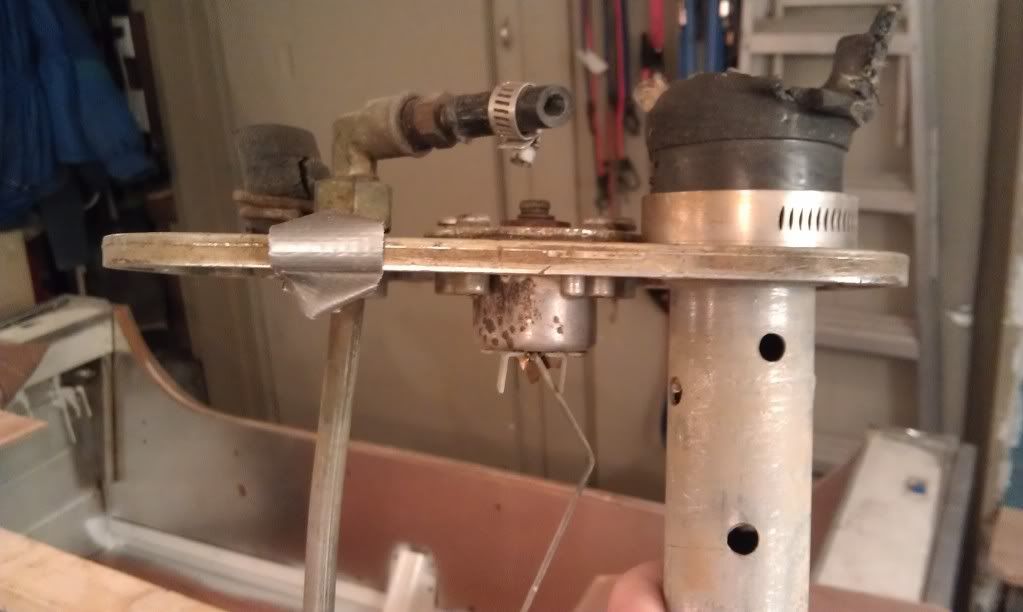
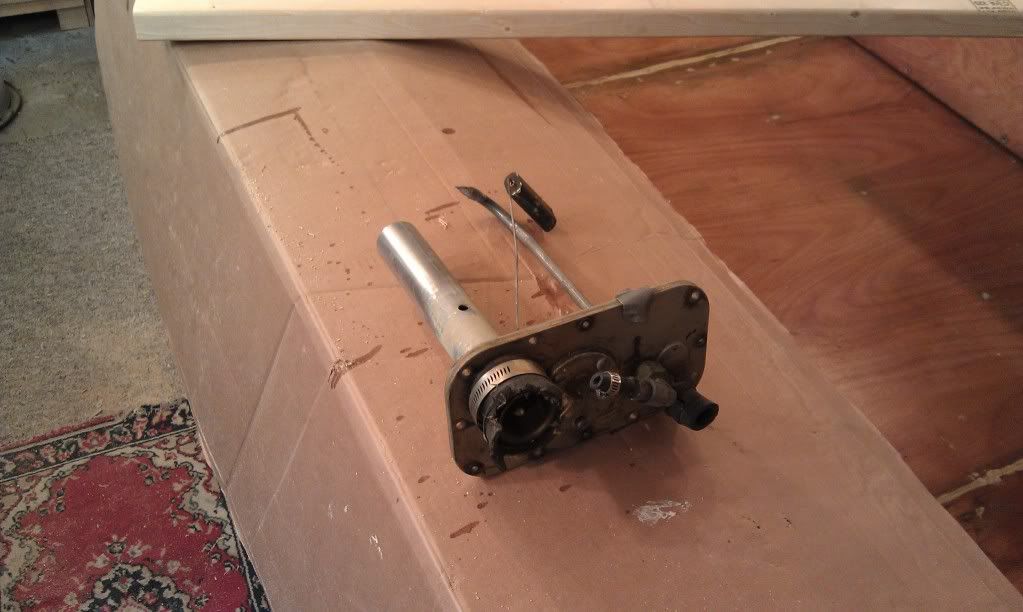
IM - got a pic of the tank and piece you removed? Depending what it looks like, I might have an idea for a gasket.

Some shots here...
IMAG0286.jpg

IMAG0287.jpg

IMAG0288.jpg


dozerII
Hey Jim Good talking with you again the other night. How did you make out with the Dek Master? I went to the Ducan site and according to that all the Home Depots are supposed to carry it. I checked acouple in Missasuaga and they did.
Glen

Great chattin' as well Glen. Yes! I was able to order it from Home Hardware locally. Should be here best case scenario tomorrow... but most likely next Friday. Ya... they say that Home Depot carries it... but they don't.... at least the 3 I went to.
 

GA_Boater

Honorary Moderator Emeritus
Joined
May 24, 2011
Messages
49,038
Re: 1968 Starcraft Jupiter - Rebuild

Hey. IM. This will work. http://www.summitracing.com/parts/MRG-9612

It's more than large enough. I always got it at an auto parts store and I've used it to make large gaskets. Just cut the stuff to size and use a thin coat of fuel proof sealer on the tank side, then you can remove the plate if you have to. Oh, just snug it down, not gorilla tight cause it will cut and squish out the sides. Cheap and won't leak.

The carpet/dek master/ white paint sounds great. Just keep pluggin' away and it won't be long 'til the splash. :D
 

InMotion

Commander
Joined
Nov 3, 2011
Messages
2,080
Re: 1968 Starcraft Jupiter - Rebuild

Hey. IM. This will work. http://www.summitracing.com/parts/MRG-9612

It's more than large enough. I always got it at an auto parts store and I've used it to make large gaskets. Just cut the stuff to size and use a thin coat of fuel proof sealer on the tank side, then you can remove the plate if you have to. Oh, just snug it down, not gorilla tight cause it will cut and squish out the sides. Cheap and won't leak.

The carpet/dek master/ white paint sounds great. Just keep pluggin' away and it won't be long 'til the splash. :D

Thanks man! I will look at it this weekend.

Just chewin' away... little by little.
 

InMotion

Commander
Joined
Nov 3, 2011
Messages
2,080
Re: 1968 Starcraft Jupiter - Rebuild

Gas question: as you may know I will have a 24 gal tank at the front. I am putting a wooden carpeted wall of sorts in front of it to not see it. I have a 14 x 10 in. grate in it and it is not sealed tight at the top. The tank is vented outside as well. Is that enough air flow? Do I need a blower? Opinions welcomed.

Thanks guys.
 

jasoutside

Supreme Mariner
Joined
Dec 20, 2009
Messages
13,269
Re: 1968 Starcraft Jupiter - Rebuild

I don't think I see a need for a blower, eh.
 

GA_Boater

Honorary Moderator Emeritus
Joined
May 24, 2011
Messages
49,038
Re: 1968 Starcraft Jupiter - Rebuild

IM - If you didn't plan on closing the bow with the bulkhead I wouldn't think a blower is needed. BUT since the filler was leaking some already and I'm sure that happened over time a blower might be safe insurance. All you need is a vent cap, blower and some hose to fit under the deck - these aren't too pricy. Under the deck because gas fumes are heavier than air. Does the Jup have a bow vent? My Nassau has one for some reason. If you don't use a blower make sure double clamps are used on all the hoses as a precaution, actually a good idea - blower or not. Just my thoughts, buddy.
 

InMotion

Commander
Joined
Nov 3, 2011
Messages
2,080
Re: 1968 Starcraft Jupiter - Rebuild

IM - If you didn't plan on closing the bow with the bulkhead I wouldn't think a blower is needed. BUT since the filler was leaking some already and I'm sure that happened over time a blower might be safe insurance. All you need is a vent cap, blower and some hose to fit under the deck - these aren't too pricy. Under the deck because gas fumes are heavier than air. Does the Jup have a bow vent? My Nassau has one for some reason. If you don't use a blower make sure double clamps are used on all the hoses as a precaution, actually a good idea - blower or not. Just my thoughts, buddy.

Thanks man!!!

Ya, there's going to be a bulk head --- but it has a grill. Its not sealed tight at the top... Which I suppose doesn't do much... I am fixing the gasket leak and putting in a new filler and vent hose. I'll take some pics tonight...prolly help more than words.
 

FishNmemories

Petty Officer 1st Class
Joined
Apr 24, 2012
Messages
272
Re: 1968 Starcraft Jupiter - Rebuild

Wow, InMotion, this quite a thread you got going here. I just spent part of the morning and part of the afternoon getting through it.

I am very glad that you re-cycled your first hull...my 14 ft springbok had the same pitting/corrosion problems. Surprisingly the worst of the pitting was where the hull contacted the bunks. It just kept progressing over time, I used a product called Sikaflex 291 to patch the worst areas...every year.

The new hull is absolutely fantastic...your moving along very well.
 

InMotion

Commander
Joined
Nov 3, 2011
Messages
2,080
Re: 1968 Starcraft Jupiter - Rebuild

Wow, InMotion, this quite a thread you got going here. I just spent part of the morning and part of the afternoon getting through it.

I am very glad that you re-cycled your first hull...my 14 ft springbok had the same pitting/corrosion problems. Surprisingly the worst of the pitting was where the hull contacted the bunks. It just kept progressing over time, I used a product called Sikaflex 291 to patch the worst areas...every year.

The new hull is absolutely fantastic...your moving along very well.

Thanks fNm!!! Welcome to the madness!! By no means the longest thread out there... but I impressed and humbled that your took the time to read threw it! Hope you stay with it... more good stuff to come, eh!

Jim
 

InMotion

Commander
Joined
Nov 3, 2011
Messages
2,080
Re: 1968 Starcraft Jupiter - Rebuild

Me thinks I should get the starcraft builders dummy award not once or twice but thrice!! Lemme sussplane... Stay with me here because it's a bit hard to see from the photo's below.

Dummy award # 1:

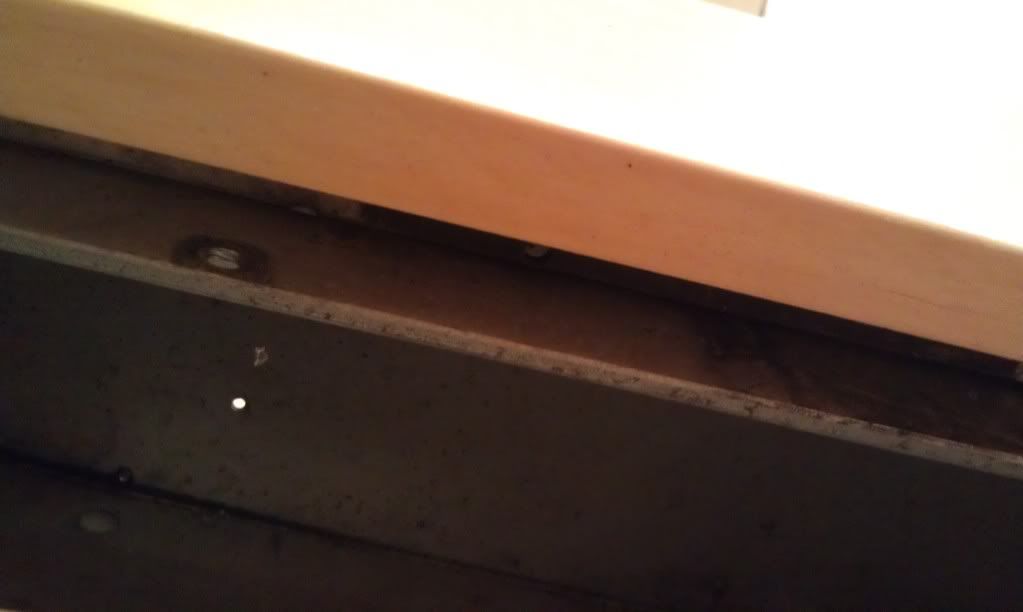
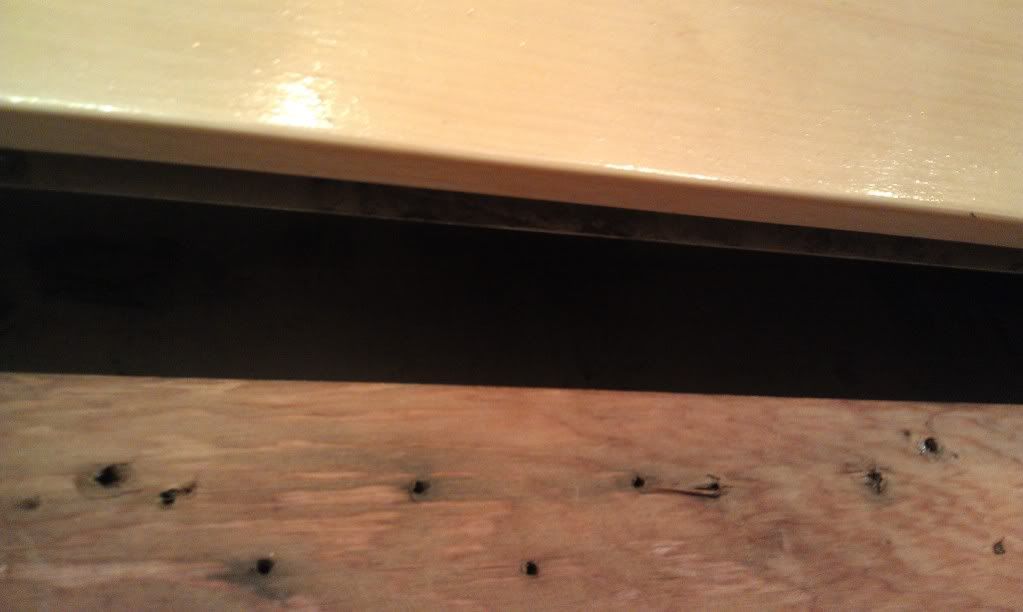
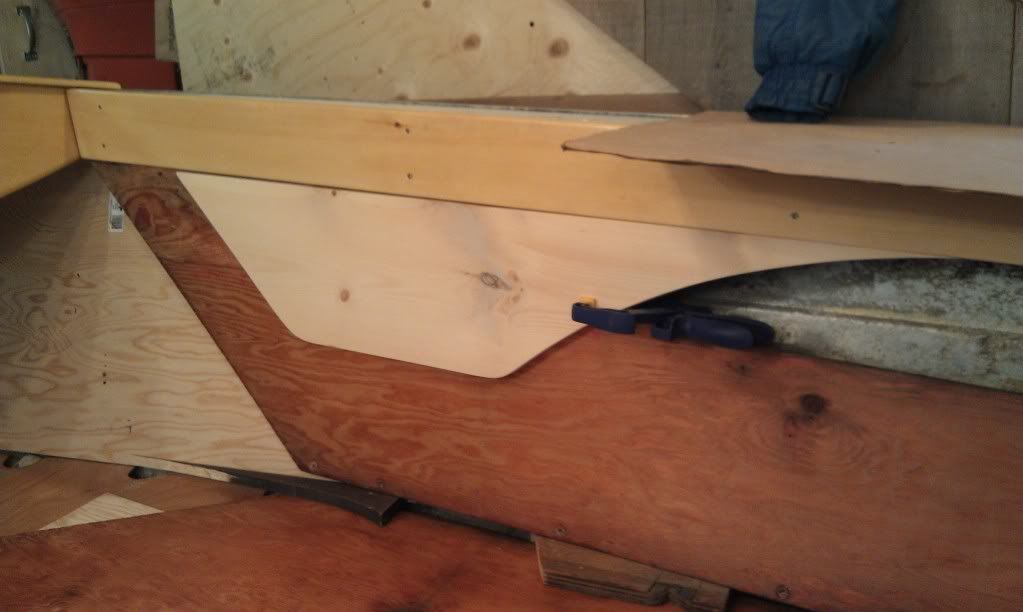
So I added the wood along the gunwale sides. Fine. No biggy. Cept... I's forgot bout the fact that the top of the side boards attach using bolts to the gunwale AND to the top of the side boards. Oops. So after alot of experimentation this is what I came up with:

IMAG0289.jpg

IMAG0290.jpg


Basically, I took the aluminum L piece that normally bolts to the gunwale and the side piece, flipped it over and spun it around (figured why not!)... drilled some holes in it and riveted it to the gunwale to create a trough if you will. Thus the side board is no longer bolted into the gunwale but wedged between the alum piece and the wood on the side of the gunwale.

Dummy award # 2:

Continuing the unintented consequences theme here... so adding the wood to gunwales, also created another issue: When it comes time to attach the controls to the original side boards, the controls would smack into the wood on the gunwale as of course, they jut out 3/4 of an inch! Oops. So, I decided to add these pieces to either side (to balance things out):

IMAG0293.jpg


Adding to the fun, I put some spar varnish on an yup, Glen, the limit of how long Spar varnish will sit was found... lots of gloops and globs. So... after a bit I was able to salvage the sparring and got it to actually look pretty good for a first coat. Will need to pick a quart tomorrow am.

Dummy award # 3:

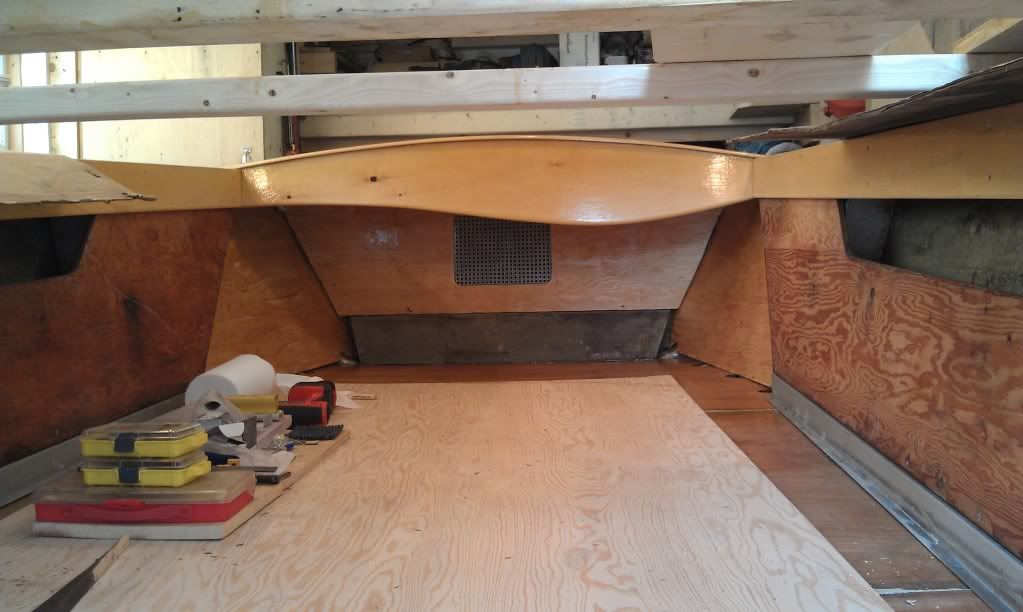
So I added a bulk head board to conceal the big honkin gas tank under the bow. I salvaged the metal screen from Jupiter 1, cleaned it up and cut the appropriate size hole in the board. Notice I said only appropriate sized hole... I guess my head was a bit sore from all the banging it took from earlier... I forgot to center the dang thing!!! Oops # 3. So with a little luck, I was able to center it within a 1/2" as that was as wide as the metal piece was.

IMAG0295.jpg


So overall, decent progress despite some silliness on my part of not thinking quite far ahead enough. Weirdly, I kept feeling that the side wood pieces would cause issues some time ago... now I now why. Ahhh well. There you go. Update so far this weekend.

Hope the last photo also helps illustrate the bulkhead ventilation.... is it enough???? Don't really fancy a kabooom!

Later eh!
 

ezmobee

Supreme Mariner
Joined
Mar 26, 2007
Messages
23,767
Re: 1968 Starcraft Jupiter - Rebuild

I really like the added piece for the controls. Super cool design element now.
 

rheagler

Senior Chief Petty Officer
Joined
Jul 14, 2007
Messages
662
Re: 1968 Starcraft Jupiter - Rebuild

They aren't oops if you fixed 'em! Nice ingenuity on the overcoming of the issues. And that piece for the controls definitely looks sleek and classy!
 

cj8mule

Senior Chief Petty Officer
Joined
Apr 7, 2012
Messages
660
Re: 1968 Starcraft Jupiter - Rebuild

Nice work IM!

I've enjoyed reading through your thread the last few days. Maybe I missed it but could you clarify how you put the 2 transom wood pieces together?
 

InMotion

Commander
Joined
Nov 3, 2011
Messages
2,080
Re: 1968 Starcraft Jupiter - Rebuild

Thanks guys!

Cj - thanks for spending the time to read it through!!!!

I used pl premium and a least a dozen clamps to squish the two pieces together. Once it dried, I covered the seams in 4200... 5200 would be better... I had some 4200 open.
 

InMotion

Commander
Joined
Nov 3, 2011
Messages
2,080

lakelover

Rear Admiral
Joined
Mar 26, 2003
Messages
4,386
Re: 1968 Starcraft Jupiter - Rebuild

I originally duplicated my control board for the Jet Star, but with the new control's different design, I also had a thickness problem and had to add a second layer of 3/4" ply. Those sorts of things seem simple when you look at the original setup and it works, but as soon as you change one thing....:p Kind of like ripples in the water from a pebble.

That's going to be one heavy tinny, but it will sure look great! I love the wood look.
 

InMotion

Commander
Joined
Nov 3, 2011
Messages
2,080
Re: 1968 Starcraft Jupiter - Rebuild

I originally duplicated my control board for the Jet Star, but with the new control's different design, I also had a thickness problem and had to add a second layer of 3/4" ply. Those sorts of things seem simple when you look at the original setup and it works, but as soon as you change one thing....:p Kind of like ripples in the water from a pebble.

That's going to be one heavy tinny, but it will sure look great! I love the wood look.

Thanks LL... That's it... Ripple effect!!!

Surprisingly, the wood is super light... I would guess there is less than 40 lbs in extra wood. The ply for the bulkhead and extra side bits is 1/4" fir. The pine bits are heavy looking... But super light compared with say oak. So ya, some extra weight... But not too much!!
 

lakelover

Rear Admiral
Joined
Mar 26, 2003
Messages
4,386
Re: 1968 Starcraft Jupiter - Rebuild

40 lbs.-- not too bad! Wood that looks heavy but isn't= elegant and practical.

Please please please don't put in any of that wood grained plastic that seems to dominate car interiors these days!!!!:D:D:D:D
 
Status
Not open for further replies.
Top