1968 Starcraft Jupiter - Rebuild

Status
Not open for further replies.

GA_Boater

Honorary Moderator Emeritus
Joined
May 24, 2011
Messages
49,038
Re: 1968 Starcraft Jupiter - Rebuild

Real progress going on there, IM. J2 is gonna be solid as a rock.
 

Gibbles

Commander
Joined
Nov 14, 2009
Messages
2,027
Re: 1968 Starcraft Jupiter - Rebuild

Nice work so far!


Do my eyes deceive me or do I see a transom with an aluminum skin on it?!
 

InMotion

Commander
Joined
Nov 3, 2011
Messages
2,080
Re: 1968 Starcraft Jupiter - Rebuild

Nice work so far!


Do my eyes deceive me or do I see a transom with an aluminum skin on it?!

Thanks Gibbs!!

Well yes you do... sorta!!! I have actually sandwiched the plywood better some aluminum. Then the transom cap will go over the whole shebang. No exposed wood at least reduces the eventual rotting. The back skin is on the inside of the boat's transom. I do have a piece of alum that I will Pl to the boats transom just for aesthetics purposes.
 

InMotion

Commander
Joined
Nov 3, 2011
Messages
2,080
Re: 1968 Starcraft Jupiter - Rebuild

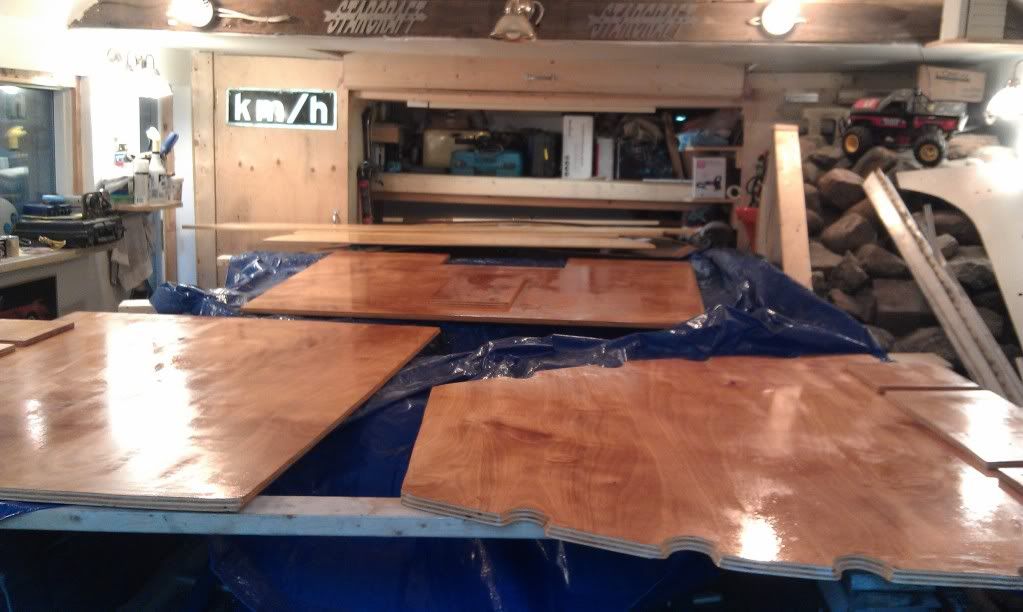
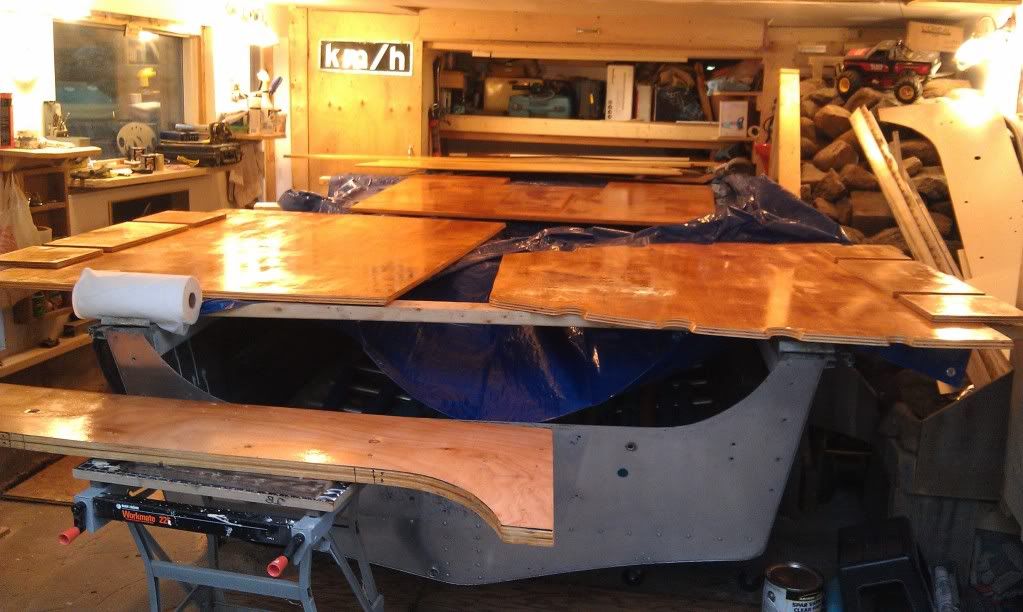
Loads of little things done yesterday am and today am. Tomorrow before picking up J3, I will put a first coat of Spar varnish on... floors, dash pad, dash, side pieces and original lower side pieces.

Got the ss gauge cluster pieces yesterday. My buddy Tom was able to kindly run the dash pad through a planner at his work to bring the thickness down to 3/8ths so it will bend to the curvature of the bow. I also cut a new transom piece where the motor mounts out of thicker material.

All good stuff. Have a great weekend fellas.
 

InMotion

Commander
Joined
Nov 3, 2011
Messages
2,080
Re: 1968 Starcraft Jupiter - Rebuild

Quick Progress Update:

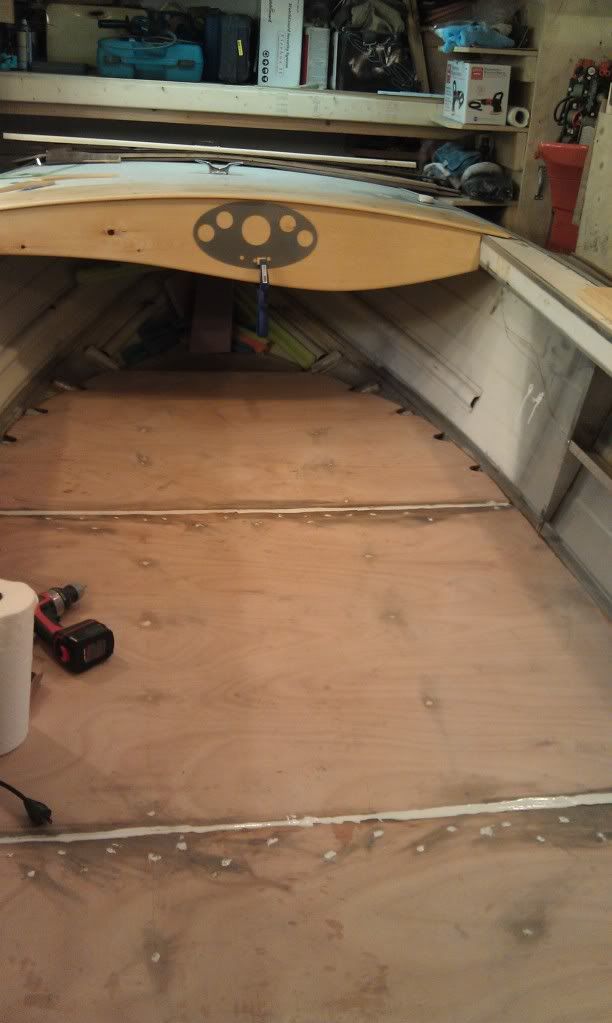
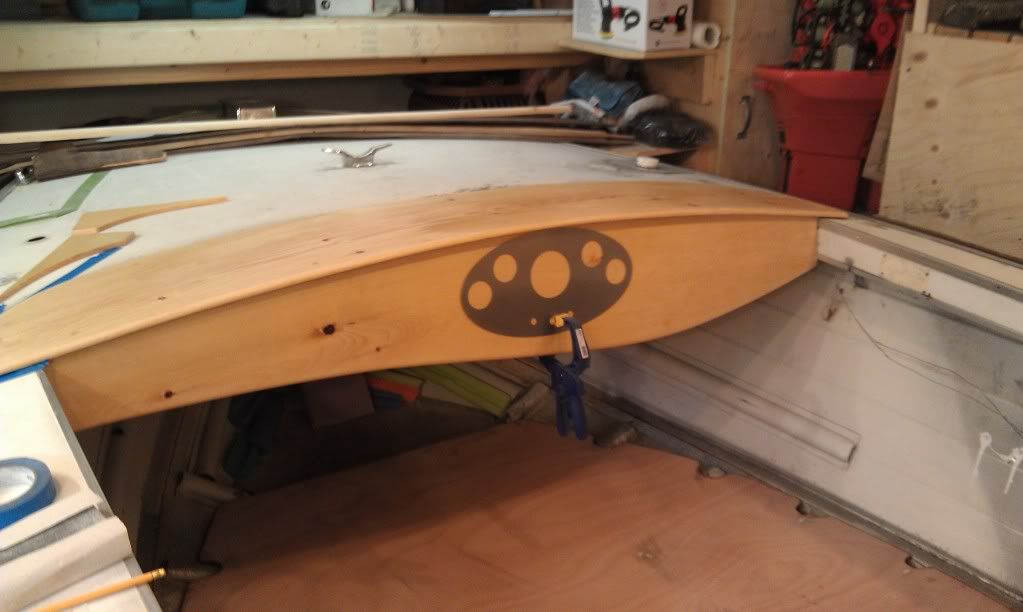
Spar Varnished underside of floor and dash pad. Floor is now in and screwed together using the doublers. Dash pad is now screwed to bow and the other bits (dash, sides, transom) are getting their share of varnish as well. Moving forward...

IMAG0270.jpg


IMAG0271.jpg
 

lakelover

Rear Admiral
Joined
Mar 26, 2003
Messages
4,386
Re: 1968 Starcraft Jupiter - Rebuild

It must smell good in there! ;) Hope you wore your respirator.:p

Looks great. Painting, varnishing or applying epoxy to something always gives a feeling of great accomplishment. Enjoy!
 

GA_Boater

Honorary Moderator Emeritus
Joined
May 24, 2011
Messages
49,038
Re: 1968 Starcraft Jupiter - Rebuild

Boy IM, you make all this wood look good and then you're gonna cover it up. LOL Good thing is when you get it all in place you will feel like that's the end of the tunnel and not a train. It all looks good.
 

barato2

Commander
Joined
Dec 7, 2010
Messages
2,956
Re: 1968 Starcraft Jupiter - Rebuild

nice! i can hardly wait til i see that glossy wood ready to go back in on mine
 

dozerII

Admiral
Joined
Oct 25, 2009
Messages
6,527
Re: 1968 Starcraft Jupiter - Rebuild

Great progress, Jim, like evryone says it is almost a shame to cover up the wood. But it will last for a good many years.
Glen
 

InMotion

Commander
Joined
Nov 3, 2011
Messages
2,080
Re: 1968 Starcraft Jupiter - Rebuild

Guys, I messed up... a bit. I had a daft moment and just grabbed what I had near... 3M 3000 --- fire and water proofing caulking. I just didn't read the fine print close enough (in fairness it was 4:30am and my eyes were still just opening up!). Anyway, there were two important bits in the fine print --- for indoor use and silcone based. Ugggh and oooops. I had already used it to dip the floor screws in and covered the screw indents with. Worse though, I had used it to cover 90 % of the two seams between the floor panels! Sooooo, since I wasn't 100% sure this was going to work out, I bit the bullet, grabbed a roll of paper towel and stripped off everything I could. Then I used 4200 last night to seal up the seams and fill in the screw hole indents. Good news, that seamed to work well and the screws are now fire proof!!

This morning I sanded the floor areas where the 3m 3000 would not immediately wipe up. I will finish tonight as the 4200 had not completely hardened. As I said, don't know if it was necessary... but I felt is was better than being sorry!

IMAG0274.jpg


Other progress notes: The dash is now screwed into the original dash from the back and I filled in the tiny crack at the top where the dash pad and dash meet... I was a 32nd off on my cutting... so it needed a tiny bit of filling. Spar varnish time now for both. I also polished up the metal gauge cluster piece and clamped it on roughly just to see how it would look. I also marked where the steering wheel drill hole will be as I will drill from the front so as to not splinter the front.

IMAG0273.jpg


A little more progress.... nothing huge... but some progress.

Have a great day fellas!

Jim
 

lakelover

Rear Admiral
Joined
Mar 26, 2003
Messages
4,386
Re: 1968 Starcraft Jupiter - Rebuild

That wasn't too bad a screw up, and like you said, now you know your screws are fireproof. I think you'll find that the 4200 will not completely harden, but will remain somewhat pliable.

I'd consider it a stellar day if I was a 32nd off on my cutting!!:) In fact I'd leave the gap there to remind myself of what a good day it was. That dash is going to look fantastic.

Everything's looking good, and my eyes were still very tightly shut at 4:30. Nice work.
 

Gibbles

Commander
Joined
Nov 14, 2009
Messages
2,027
Re: 1968 Starcraft Jupiter - Rebuild

looks great!

I would only be worried about direct sunlight on the "indoor" stuff
prob just is missing the uv protection needed for outdoor ;)

Planning on covering the floor? :)
 

InMotion

Commander
Joined
Nov 3, 2011
Messages
2,080
Re: 1968 Starcraft Jupiter - Rebuild

Thanks guys --- you made my day!!!

Yup... covering it with Dek Master --- wash and wear! Fish guts or kids dirty shoes... no problem. I was going to originally go with carpet, but there is always dirt and/or mud on the kiddies shoes or flip flops... so I'll spend a bit more here... also helps keep as much moisture away from the floor as possible.

Oh ya, one more thing... I kept bustin' the heads off the ss screws... I read I think in Glen's thread that he lubed the screws... I tried just drilling the pilot hole at about a 10-15 degree angle and voila... no more busted heads.

LL -- yah ok truth be told it was a 32nd for about half the length of the dash (I could just get a tiny bit of filler in with my knife) --- the other half was much more --- more like an 1/8th -- about the width of a flat head screwdriver end :)
 

Gibbles

Commander
Joined
Nov 14, 2009
Messages
2,027
Re: 1968 Starcraft Jupiter - Rebuild

I have never tried putting in the screws dry, but I always drill pilot holes, and then fill with epoxy or inject 5200 then coat the screw with the stuff.

If the wood is thick and I can get away with it, I counter sink the hole and then fill the top full of epoxy to seal it off. :)

I also sealed up the seam in my jetstar flooring with 5200, allowed to dry, then sealed over the top with epoxy

So far it's been working well, but that epoxy gets $$
 

InMotion

Commander
Joined
Nov 3, 2011
Messages
2,080
Re: 1968 Starcraft Jupiter - Rebuild

I have never tried putting in the screws dry, but I always drill pilot holes, and then fill with epoxy or inject 5200 then coat the screw with the stuff.

If the wood is thick and I can get away with it, I counter sink the hole and then fill the top full of epoxy to seal it off. :)

I also sealed up the seam in my jetstar flooring with 5200, allowed to dry, then sealed over the top with epoxy

So far it's been working well, but that epoxy gets $$

Yah... sorry I may not have been clear... I drilled the pilot hole at an angle, gooped up the screw with the fireproof caulking and then screwed the screw in a at a bit of an angle, countersinking it a bit. Then, put a bit of 4200 over the screw to make it flush with the floor. I plan on coating the top of the floor with 3 coats of Spar varnish. Bottom of the floor and edges have two good coats of spar varnish.

Can of Spar Varnish -- $41.00 Canadian a gallon. Coverage: 538 sq ft. I will have gone through roughly 1/2 a gallon by the time I'm done. Glen swears by the stuff. I have used it before on other projects with great success.

As a point of reference, my BIL put 3 coats of spar varnish on the outside transom board on one the alum boats at the cottage 7 years ago. The board sits partially in water 3 months of the year. The other 9 it is exposed to the elements. Looks like new today. It's pretty tough stuff.

Spar or epoxy --- lots of debate on it. I just figure that with the Spar varnish and the dek master it should be good for a long while.
 

barato2

Commander
Joined
Dec 7, 2010
Messages
2,956
Re: 1968 Starcraft Jupiter - Rebuild

no debate at all when it comes to UV exposure....epoxy will rot fast unless it's coated with something, like spar varnish
 

dozerII

Admiral
Joined
Oct 25, 2009
Messages
6,527
Re: 1968 Starcraft Jupiter - Rebuild

Great work Jim, The only problem I have found with spar varnish, is if you don't use it all it goes bad in the can real fast. I'm going to try storing it with the can upside down to see if that helps.
Glen
 

barato2

Commander
Joined
Dec 7, 2010
Messages
2,956
Re: 1968 Starcraft Jupiter - Rebuild

Glen, that's why i've started just buying quarts....the amount that would go bad from a gallon negated the savings of buying larger qty. and that way, i can mix the gloss and satin flavors to get the right gloss....the satin is too dull and the gloss looks like plastic, but a 50-50 mix looks good. i've also started filtering it before i thin and use with the filters you'd use for spray gun, and it seems to get some of the chunks out, esp if can is getting old.
 
Status
Not open for further replies.
Top