1968 Starcraft Jupiter - Rebuild

Status
Not open for further replies.

InMotion

Commander
Joined
Nov 3, 2011
Messages
2,080
Re: 1968 Starcraft Jupiter - Rebuild

We used 1x1/2 jugs of it on the 87 16SS, it had origional paint, so only a couple coats.
Glen

Thanks Glen. Gives me a good approximation of how much I will need. I'll start with 1 jug and see from there. Enjoy your weekend.... rather windy hear this morn!
 

InMotion

Commander
Joined
Nov 3, 2011
Messages
2,080
Re: 1968 Starcraft Jupiter - Rebuild

I am Happy to Say...The Boat is In the Garage!!!! No paint or sanding done... that can wait for the summer... but 2 coats of mud and everything cleaned up. Good enough for now. It took a few weeks but it was well worth it from my perspective!!!

Ya know, I was thinking about the journey so far... it started with a trailer purchace that game with a ummmm glasser. :facepalm: It needed a motor so I bought the first starcraft with the thought that I would just junk it. :(. Then i just sort a fell for it, met everyone here and well... junked it anyway, but bought another one... just in much better shape! Then I thought, it would be a lotttttttt more comfortable to work in the garage by turning it into a man cave / shop.... so off I went. And here we are 5 months later with the starcraft back in the garage ready to be rebuilt!! A bit of reminiscing i know... but it just seemed to be the thing to do today.

Soooooooooooooo..... some shots for ya all!!!! Proof 101...

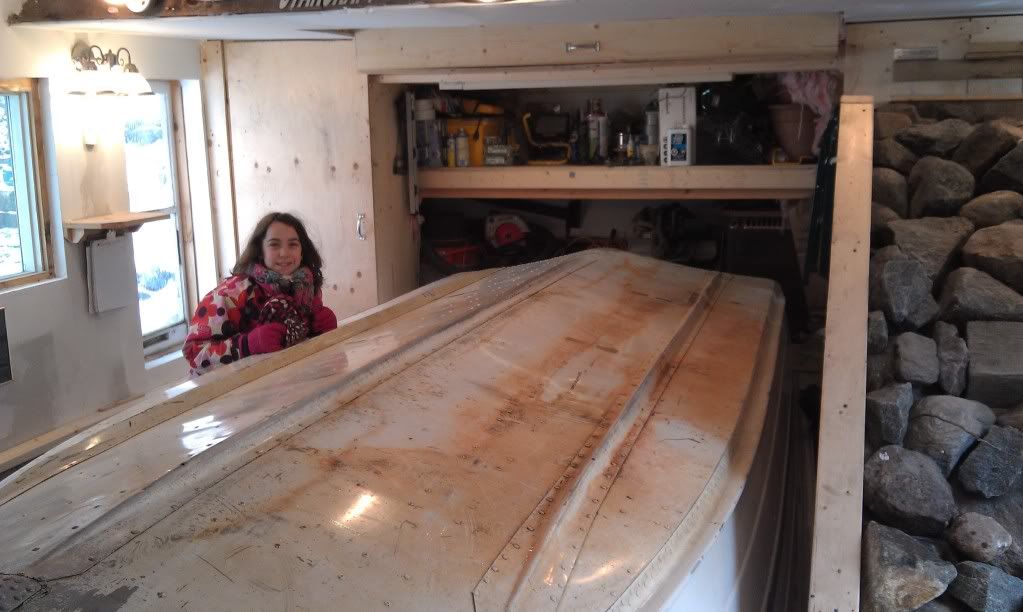
Boat in garage with my little helper.... actually without my daughter there to help, I am pretty certain I would not have got the boat in the garage. A wheel on one of the dollies had a chunk of frozen ice attached to it and was in no mood to let go!!! With her help, we got the boat in!

IMAG0150.jpg


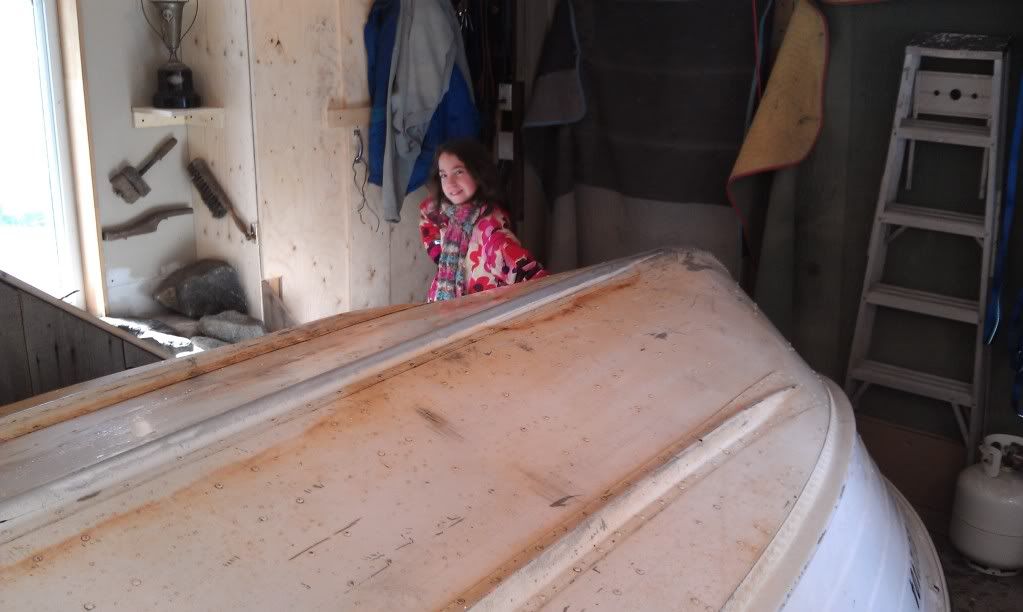
Front Shot:

IMAG0151.jpg


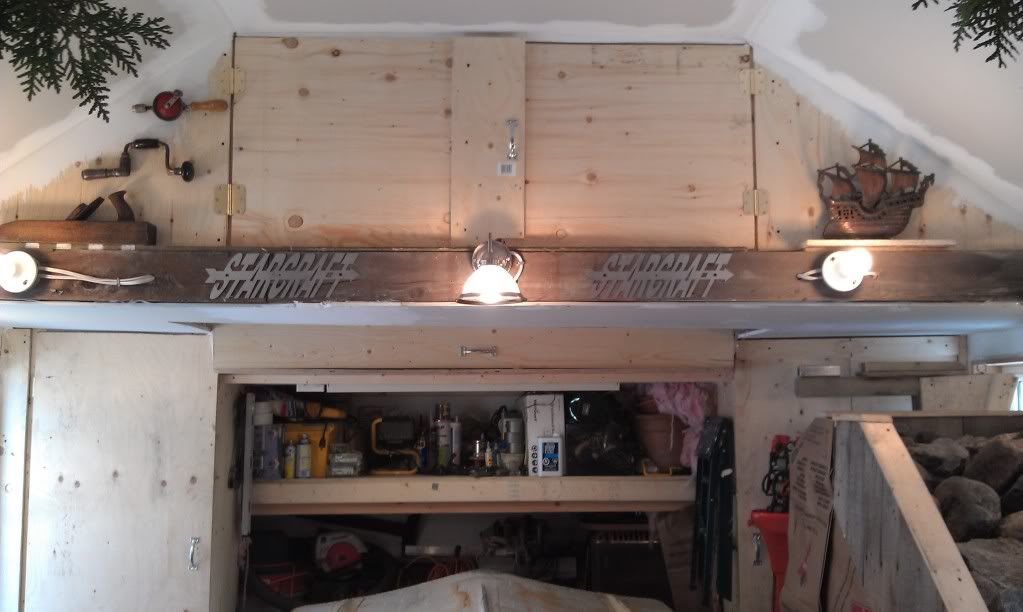
A tribute to Starmada... Custom Starcraft signs prominently placed in line of site upon entering man cave!!!!!!

IMAG0152.jpg


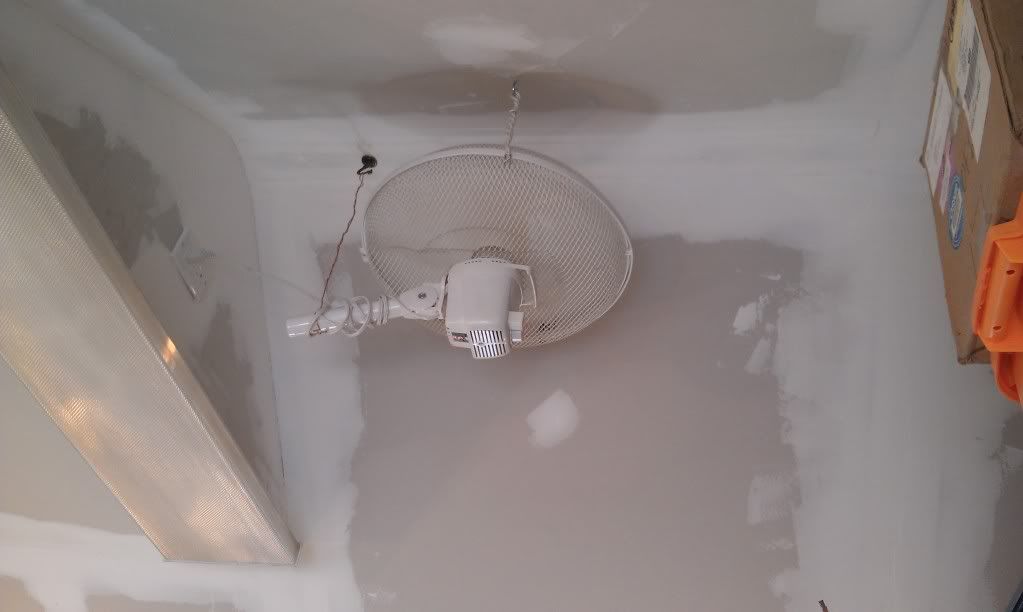
Vaulted ceiling with $2 fan hung with scrap 14/2 wire stripped apart... outside temp 15F inside temp 82F!!! What a difference. Took all of 20 minutes to go from inside temp of 35F to 75F. Nice convection. So much more comfortable.

IMAG0154.jpg


Now I can get back to business... boat business that is. Next week: Work on the boat!!! Feels nice to say that again!!!!!
Have a great weekend fella's!!!!
 

jasoutside

Supreme Mariner
Joined
Dec 20, 2009
Messages
13,269
Re: 1968 Starcraft Jupiter - Rebuild

It'll be so much nicer to work in that warm shop:)
 

GA_Boater

Honorary Moderator Emeritus
Joined
May 24, 2011
Messages
49,038
Re: 1968 Starcraft Jupiter - Rebuild

Nice Man Cave, IM. Warm and dry! Nice touch with the SC logos.
 

Gibbles

Commander
Joined
Nov 14, 2009
Messages
2,027
Re: 1968 Starcraft Jupiter - Rebuild

Very nice :D

Having a warm place to work makes all the difference.
 

rheagler

Senior Chief Petty Officer
Joined
Jul 14, 2007
Messages
662
Re: 1968 Starcraft Jupiter - Rebuild

Nice shop! Makes me want to raise the roof on my garage....but too many other projects. Looking forward to seeing some boat work!
 

dozerII

Admiral
Joined
Oct 25, 2009
Messages
6,527
Re: 1968 Starcraft Jupiter - Rebuild

Way to go IM, you stuck to your plan, boat in the garage by Sunday. It looks like a nice cosy place to work on it.
Glen
 

InMotion

Commander
Joined
Nov 3, 2011
Messages
2,080
Re: 1968 Starcraft Jupiter - Rebuild

Nice Man Cave, IM. Warm and dry! Nice touch with the SC logos.

Very nice. Having a warm place to work makes all the difference.

Nice shop! Makes me want to raise the roof on my garage....but too many other projects. Looking forward to seeing some boat work!

Way to go IM, you stuck to your plan, boat in the garage by Sunday. It looks like a nice cosy place to work on it.
Glen

Thanks so much guys! Really appreciate the support!

It's on now!!! Gotta git er dun!! :D
 

InMotion

Commander
Joined
Nov 3, 2011
Messages
2,080
Re: 1968 Starcraft Jupiter - Rebuild

Anyone ever done an unpainted deck? Sides --- yes. But deck?

Would it be blinding in the sun I wonder?

Satin deck... polished hull and sides? or Polished deck, sides and hull?

Just fishing for ideas here.

Part of the reason is that I understand that rustoleum is not good at all with fuel... and I have a fuel fill on the deck! There is a good chance that at some point, a small spill will occur.
 

Gibbles

Commander
Joined
Nov 14, 2009
Messages
2,027
Re: 1968 Starcraft Jupiter - Rebuild

I saw a guy that did his deck in diamond plate, it looked great but I have to wonder if it would blind the crap out of ya...
 

InMotion

Commander
Joined
Nov 3, 2011
Messages
2,080
Re: 1968 Starcraft Jupiter - Rebuild

I saw a guy that did his deck in diamond plate, it looked great but I have to wonder if it would blind the crap out of ya...

I wondering if what I am calling the deck is wrong... but what I am refering too would be the car equivalent of the hood! Diamond plating that I would think as well would be rather blinding...cool though!
 

Gibbles

Commander
Joined
Nov 14, 2009
Messages
2,027
Re: 1968 Starcraft Jupiter - Rebuild

The nose on my nova was orig just silver apparently, there is a bit of a dull finish coating on it, along with the top of the gunwales.
 

InMotion

Commander
Joined
Nov 3, 2011
Messages
2,080
Re: 1968 Starcraft Jupiter - Rebuild

The nose on my nova was orig just silver apparently, there is a bit of a dull finish coating on it, along with the top of the gunwales.

That does seem like a lot of silver grey actually. Cool in some regards.

Is there paint that is OK with the occasional gas spill?
 

rheagler

Senior Chief Petty Officer
Joined
Jul 14, 2007
Messages
662
Re: 1968 Starcraft Jupiter - Rebuild

That does seem like a lot of silver grey actually. Cool in some regards.

Is there paint that is OK with the occasional gas spill?

I painted my floor with Muralo "Super Tred" industrial coating. Actually I painted the whole boat with it, but only the floor has been "tested". It's pretty much an oil based industrial floor paint. I had a leaky fuel tank that did not do it any harm. I'm not sure if it is available in Canada though, but maybe worth checking into.
 
Last edited:

InMotion

Commander
Joined
Nov 3, 2011
Messages
2,080
Re: 1968 Starcraft Jupiter - Rebuild

I painted my floor with Muralo "Super Tred" industrial coating. Actually I painted the whole boat with it, but only the floor has been "tested". It's pretty much an oil based industrial floor paint. I had a leaky fuel tank that did not do it any harm. I'm not sure if it is available in Canada though, but maybe worth checking into.

Thanks RH... if I recall your sides are bare metal and you went with a white/green for gunnels and front bow section. Did you consider leaving it them bare alum as well? If so, what was your reasoning against it.

Thanks. Jim
 

rheagler

Senior Chief Petty Officer
Joined
Jul 14, 2007
Messages
662
Re: 1968 Starcraft Jupiter - Rebuild

Hi Jim. I did think about leaving the gunnels and bow section bare, but didn't for a couple reasons. I wanted to add some color to the boat so it didn't look too industrial. Also I was concerned about sunglare, mostly on the cabin roof. So I guess for me it was just wanting color more than bare aluminum. I do think it would look really cool ALL aluminum with a flat black bow deck and/or cabin roof. I also tend to change my mind a lot. Before deciding on the green/sandstone I considered blue with white, red with white, green with white, green with gray and also bottom painted sides bare, bottom bare sides painted. Just about every combination. The main reason I had for leaving the sides and bottom bare is that I feared prepping well enough to get a lasting paint job. I hope this is helpful info without being too much:)
-Rich
 

InMotion

Commander
Joined
Nov 3, 2011
Messages
2,080
Re: 1968 Starcraft Jupiter - Rebuild

Hi Jim. I did think about leaving the gunnels and bow section bare, but didn't for a couple reasons. I wanted to add some color to the boat so it didn't look too industrial. Also I was concerned about sunglare, mostly on the cabin roof. So I guess for me it was just wanting color more than bare aluminum. I do think it would look really cool ALL aluminum with a flat black bow deck and/or cabin roof. I also tend to change my mind a lot. Before deciding on the green/sandstone I considered blue with white, red with white, green with white, green with gray and also bottom painted sides bare, bottom bare sides painted. Just about every combination. The main reason I had for leaving the sides and bottom bare is that I feared prepping well enough to get a lasting paint job. I hope this is helpful info without being too much:)
-Rich

Thanks Rich!! Super helpful. I think many (including myself) him and ha at what we are going to do until it just feels right. Nothing wrong with that at all IMHO. Part of the process really. Bare aluminum would look cool... I too think that there would be a lot of glare. I was hoping someone out there who has done bare alum bow and gunnel tops might comment and shed some light on the pro's and con's. Thanks again for your thoughts here.
 

InMotion

Commander
Joined
Nov 3, 2011
Messages
2,080
Re: 1968 Starcraft Jupiter - Rebuild

Picked up Sure Strip last night along with a couple of bristle brushes --- no wire. Sure strip is supposed to be as good as aircraft aluminum stripper and comes in a gallon format. I was going to get the aircraft stuff, but it is now only available here in quarts at $30 bucks a pop. The Napa rep said the sure strip was just as good and is safe to use on aluminum --- also not flammable. I think I'll give it a go tomorrow early am and see how the stuff works. Also not supposed to require any wash down --- the dried stuff can be just swept up. We'll see!
 

InMotion

Commander
Joined
Nov 3, 2011
Messages
2,080
Re: 1968 Starcraft Jupiter - Rebuild

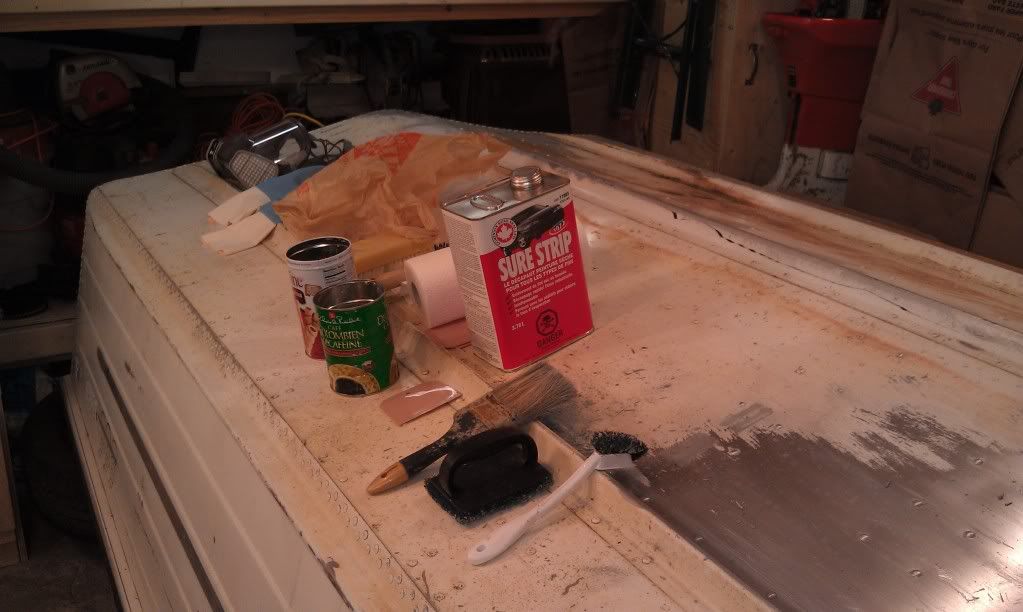
Ok. So, in a strange way both Jas and DII were right... lemme susplane... It is both some what easy and a pita at the same time to remove the paint on the hull using paint stripper. I had a hour or so after dinner before my wife headed out to do an assessment... so I thought I'd give the paint removal a go. At first it didn't go at all... nothing. Nada. Zip Zilch. Here's what I had...

IMAG0157.jpg


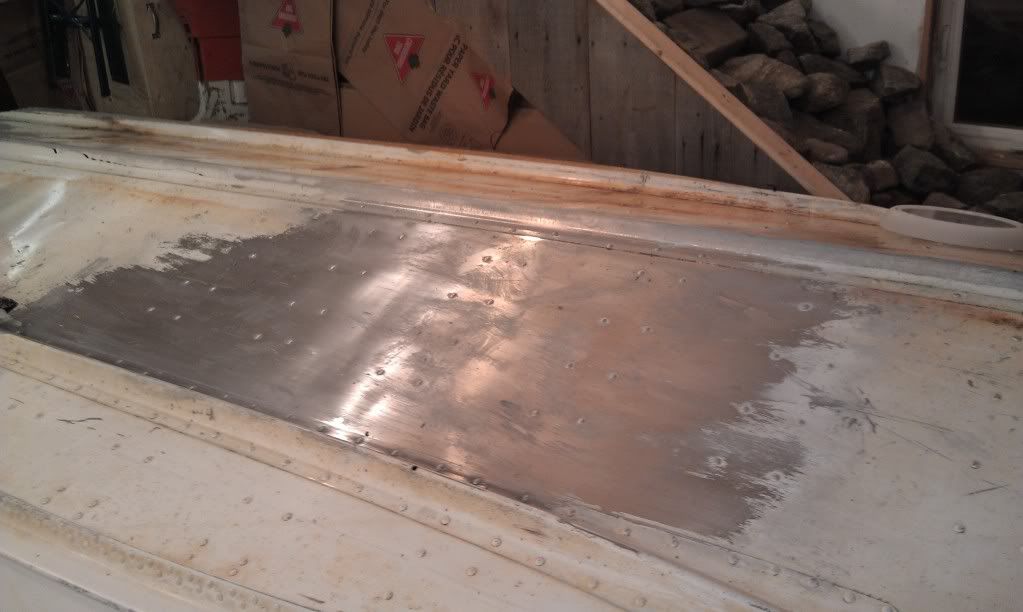
So, after painting on the goop 3 times and waiting a couple of minutes, I decided to not follow Einstein's definition of insanity of doing something over and over and expecting a different result --- I tried scuffing the paint up with a wire brush first and then painted the goop on. Bingo. Got some removal action. But... as Glen said, it will be hard to buff out. So I painted the goop on, and then immeditely used the scrubber brush thing and bingo!! i got some removal action. It worked... but is a lot of work -- just like Jas said --- kind of a pita... but a lot cleaner than sanding for sure!!

Results of about 30 minutes:

IMAG0156.jpg


If anyone has a better technique... don't be shy!!!:) I'll try anything at this point!

Thanks guys. Have a great evening.
 
Status
Not open for further replies.
Top