1968 15' Starcraft Jet Star Rebuild

GA_Boater

Honorary Moderator Emeritus
Joined
May 24, 2011
Messages
49,038
Re: 1968 15' Starcraft Jet Star Rebuild

Well I've heard about the hole in the water that you throw money in but you have a hole in the ground too. :eek: Hope they finish up soon.
Sorry about the arrow, but I figure you know the way by now. :)
 
Last edited:
Golden Arrow II

Petty Officer 3rd Class
Joined
Mar 20, 2010
Messages
91
Re: 1968 15' Starcraft Jet Star Rebuild

The boat is looking good. Glad that you got the well situation figured out. Now you should be able to run all of your fixtures at the same time and not notice a big pressure drop.
 

rrumba

Ensign
Joined
May 31, 2011
Messages
901
Re: 1968 15' Starcraft Jet Star Rebuild

looking good JO..... with the OB hanging above the SC it looks like a Halloween picture or one i can post beside my SC as a threat to it should it even think about stepping out of line.... then it will have reference to what is in store for it :D
 

jasoutside

Supreme Mariner
Joined
Dec 20, 2009
Messages
13,269
Re: 1968 15' Starcraft Jet Star Rebuild

Go to Wal-Mart and Get some Mothers Mag and Aluminum Polish Cost is about 3 bucks. Wipe it on your tarnished aluminum and rub till it turns black. Wipe off with a clean rag and buff a bit and it will shine like chrome. It is Amazing!!! I did my Windshield frame and it absolutely looks brand new.

I am actually after the "brushed" or "satin" alum look wood. The chrome is just a bit fancy for the route I am taking.;)

Yup, well, I'm about to take my Fall shower....

Well that is good to hear lake. Sure the wife appreciates that;)

She looks fantastic Jas, love the colour combo!

Right back at ya TII:)

Well I've heard about the hole in the water that you throw money in but you have a hole in the ground too. Hope they finish up soon.

The boat is looking good. Glad that you got the well situation figured out. Now you should be able to run all of your fixtures at the same time and not notice a big pressure drop.

Yup, well is done. 115 feet worth, all hooked up ready for action. They did a really great job, my water pressure went from 38 to 60 lbs. and the water seems much colder and cleaner. Very nice. And, I am all washed up today. (I used water instead of solvent):D

looking good JO..... with the OB hanging above the SC it looks like a Halloween picture or one i can post beside my SC as a threat to it should it even think about stepping out of line.... then it will have reference to what is in store for it :D

Hoping to have that Johnson all bolted up in the next couple of days anyway:)
 

jasoutside

Supreme Mariner
Joined
Dec 20, 2009
Messages
13,269
Re: 1968 15' Starcraft Jet Star Rebuild

A.M. progress...

Another coat of epoxy down on the deck...
P1070135.jpg


I thought Yoop would appreciate this - so remember that area right in front of the first rib, eh. When I was done with epoxy on the deck I had some left over in the container. I couldn't just step on the deck and pour it in so, a bit of yooper engineering with my long clamp...
P1070134.jpg


I also got the transom cap on. I liked ez's suggestion of just running 5200 and skipping the fasteners, but, I kept thinking about the possibility of my boys having to someday replace the transom and cursing my name. So, I decided to go with these little stainless steel screws and 5200...
P1070130.jpg


I was a little nervous that the screws wouldn't look as finished as the spiral nails but I think it turned out just fine, eh...
P1070131.jpg


P1070133.jpg
 

maddiedog

Petty Officer 2nd Class
Joined
Apr 16, 2011
Messages
117
Re: 1968 15' Starcraft Jet Star Rebuild

What are you putting in for flooring? Just keep in mind worm dirt, leaves, mud, minnows, pike crap, fish blood...I have that textured vinyl and I really like it. It can get a little slick. Just curious.
 

jasoutside

Supreme Mariner
Joined
Dec 20, 2009
Messages
13,269
Re: 1968 15' Starcraft Jet Star Rebuild

What are you putting in for flooring? Just keep in mind worm dirt, leaves, mud, minnows, pike crap, fish blood...I have that textured vinyl and I really like it. It can get a little slick. Just curious.

With the final coat of epoxy I'll be adding sand for texture and then painting over all that.
 

paparoof

Senior Chief Petty Officer
Joined
Apr 22, 2010
Messages
730
Re: 1968 15' Starcraft Jet Star Rebuild

Jas - on the subject of painted floors.

As I think you know my floor is ply > glass > paint. I used Valspar porch paint. It's not as tough as I hoped it would be. Just stuff like sliding heavy coolers around on the floor was enough to scrape all the way through the paint so you can see the wood grain through the glass. The epoxy is holding up just fine. I don't know if the paint should be harder or just thicker (more coats) or what, but what's on there now is not holding up well and I've only been out like four times.

I've been thinking about laying down a fresh coat of paint, then a layer of epoxy over that to protect the paint.

Just thinking out loud here....
 

jasoutside

Supreme Mariner
Joined
Dec 20, 2009
Messages
13,269
Re: 1968 15' Starcraft Jet Star Rebuild

Good feedback there PR!

Yah I have eyeballed the Valspar before but avoided it as it's latex which makes me nervous for heavy traffic and weather stuff.

I have used Glidden porch and floor before and it has held up really well. I actually have it painted on a set of stairs at one of my college rental properties. Those students hammer it and the finish is still looking excellent after just about 3 years.

photo-product-034.jpg


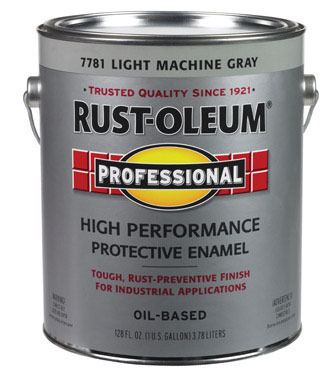
My current plan for both the Jet and Islander decks is to use...
g1396308.jpg
 

GA_Boater

Honorary Moderator Emeritus
Joined
May 24, 2011
Messages
49,038
Re: 1968 15' Starcraft Jet Star Rebuild

Latex paint is for walls. I have never had much luck on floors - ever! And easy soap & water clean-up - DOH - isn't a selling point for a boat in my opinion. Oil-based deck paint is a better choice. Your hand looks nice and clean now, soap & water is better than solvent. :p
 

jasoutside

Supreme Mariner
Joined
Dec 20, 2009
Messages
13,269
Re: 1968 15' Starcraft Jet Star Rebuild

I smell better today too;)


(some may argue that I still stink though:p)
 

Bwana Don

Lieutenant Commander
Joined
Oct 20, 2009
Messages
1,951
Re: 1968 15' Starcraft Jet Star Rebuild

My $45 a month water bill is starting to look pretty good.

Mine's $70/month if I don't water the lawn, of course water is more scarce in my neck of the woods. I'm only smack dab in the middle of the world's largest freshwater system. I'm also on City of Detroit Water System. Detroit is the most corrupt city in north america.

Leave it to PR to make you feel better eh jas.
 

jasoutside

Supreme Mariner
Joined
Dec 20, 2009
Messages
13,269
Re: 1968 15' Starcraft Jet Star Rebuild

The Johnson 50 SPL is home...
P1070142.jpg


P1070143.jpg


P1070144.jpg


P1070145.jpg


P1070147.jpg


Excellent:D
 

lakelover

Rear Admiral
Joined
Mar 26, 2003
Messages
4,386
Re: 1968 15' Starcraft Jet Star Rebuild

Great job on that splashwell & transom cap. I was thinking along the same lines as you when I decided to use SS screws to mount the cap. I tried to think that way through the whole project, that what if someday I have to undo this. I did enough cursing for two lives over what the PO did, so I let that be my guide. The only thing I still wonder about is my dashboard lamination, will have to see how it holds up over time.

Also like your Red Green arm extender for pouring the epoxy, but where's the duct tape? :)
 

boatnut74

Lieutenant Commander
Joined
Aug 29, 2010
Messages
1,835
Re: 1968 15' Starcraft Jet Star Rebuild

Great to see the motor installed!! You know if that was a tiller you could be on the water today, right?
 

Teamster

Lieutenant Commander
Joined
Nov 8, 2010
Messages
1,923
Re: 1968 15' Starcraft Jet Star Rebuild

Great to see the motor installed!! You know if that was a tiller you could be on the water today, right?

Tiller??,...............Tiller????,...................Did I hear someone say Tiller???????


Looks good dude!!!!!!!!!!!!!!!!!!!!!!
 

jasoutside

Supreme Mariner
Joined
Dec 20, 2009
Messages
13,269
Re: 1968 15' Starcraft Jet Star Rebuild

Looks like a real professional job all around, congrats!!

Thanks lake! I prolly should have provided some info along with those photos huh?

Quick and dirty...

1/2" stainless carriage bolts with nylon lock nuts, 5200 gooped everywhere. The fender washers for the top bolts are actually doubled for extra strength. I mounted at the second peg from the top to raise it just a bit. You can see in the second photo up there ^^^^^ the anti-ventilation plate is right on the money with the bottom of the hull. Maaaaaybe I'll need to come up one more peg but we'll run this a bit to see how it goes.

Great to see the motor installed!! You know if that was a tiller you could be on the water today, right?

Oh man, and today would have been a beauty to take er out. I snapped this photo in my back yard this morning...
P1070141.jpg


I sure do love fall in Michigan. Man, would have been a great day to be boating!

Looks good dude!!!!!!!!!!!!!!!!!!!!!!

Thanks Teamster!

Nope, nobody was talking about tillers:p
 

rrumba

Ensign
Joined
May 31, 2011
Messages
901
Re: 1968 15' Starcraft Jet Star Rebuild

looks like it was always meant to be that way. Excellent job JO. Shiny boat, shiny motor, shiny pro........

did you put a new seal on the cover if so where do you get one from????????????? i need one for my 140. did you degrease the outside of the motor with anything and sand it for the prep?
 

jasoutside

Supreme Mariner
Joined
Dec 20, 2009
Messages
13,269
Re: 1968 15' Starcraft Jet Star Rebuild

looks like it was always meant to be that way. Excellent job JO. Shiny boat, shiny motor, shiny pro........

did you put a new seal on the cover if so where do you get one from????????????? i need one for my 140. did you degrease the outside of the motor with anything and sand it for the prep?

Nope just reused my original one, it was in great shape, just cleaned it up some. It was originally stapled in place I just used adhesive to glue it back on to the cowl.

Yup, used degreaser on everything then gave everything a light sanding with 220 through 400.

That OB looks a little bare though, I'll need to see about ordering some new decals purdy quick here.

Cheers!:)
 
Top