1963 16' Star Dust I believe

Watermann

Starmada Splash of the Year 2014
Joined
Jan 12, 2013
Messages
13,796
You'll need to do a dry fit first once the holes are all transferred to the new skin, drain tubes, motor, side brackets and if your model has a Z bracket at the bottom. Then most of your questions about fastening should be answered.

For the surface area, I would clean both with AL brightener and use a 3M scrub pad to make sure the surface is ready to accept the 5200. Sand any raised areas smooth too. I wouldn't prime the metal it would only add a source for bonding failure.
 

oldhaven

Chief Petty Officer
Joined
Aug 30, 2015
Messages
576
We are about at the same point on the transom re-skin, though I expect you will go by me pretty soon, and yours will have a bit more coverage . If you look at my thread (see link below) you will see how the bottom will be well secured by the Z channel rivets, and between the splash well tubes, the motor mountings, and the transom eyes, I will not have to add many more fasteners. I plan to put SS #8 or #10 screws into the transom material about every 4 inches through the skin anywhere it looks like there is no ready made fastener, but will not put any more holes in than I feel necessary. The Z bracket rivet spacing looks about right. Really, once the 5200 sets up, that plate will never come off again without a torch. WM is right about the dry fit, and aside from a couple of holes at the bottom to get started, I did almost all the holes through the skin from the inside after securing it in place. I had laid out a lot of them before hand, but they did not all match up exactly with the layout I did, so using the boat as a drill jig is best.

Ron
 
Last edited:

StarTed

Senior Chief Petty Officer
Joined
Jul 14, 2015
Messages
694
Thanks Watermann and oldhaven for your input. I think I'll use #10 SS screws and nuts. Flat head should be just fine with the proper countersink. That'll all be done dry.

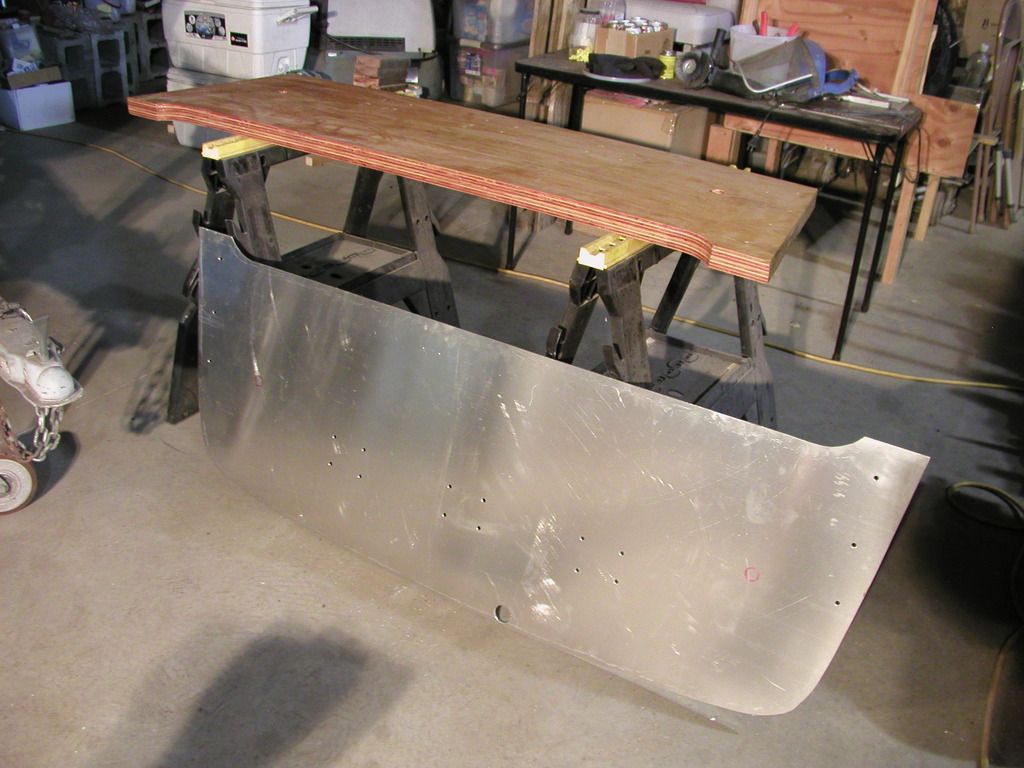
I still have the splash well drain holes to drill/saw/cut and fill some more holes in the existing transom skin that I'll no longer need to use. Here is a picture of the new plate that I'll be using.


This morning I took a little break and poured some fishing sinkers. I'll start a new post for that job and pictures.

I still need to get the 5/16 X 2 1/2" truss head SS screws to secure the transom to the brackets and the #10 SS screws. I'll probably order them since I couldn't find any locally when I looked a few months ago.
 

StarTed

Senior Chief Petty Officer
Joined
Jul 14, 2015
Messages
694
A little more progress. The transom is in and the 5200 is curing.

Here are a couple of pictures.


The bolts through at the motor mount plate location are temporary. Permanent 1/2" SS bolts will hold on the plate and motor mounts.

Next I'll mount the SS motor plate. I'm planning to attach it with 5200 on the back of the new aluminum sheet. That way if there is any scratching it'll be on the stainless plate and the painted aluminum plate should hold up better. At least that's my thoughts.

I plan to paint the sides white before covering them to keep down any corosion. The original sides only had a little over-spray on them and were showing a little corrosion starting. That was from over 50 years service that I have no idea about the history. It must have spent most of its life inside since the original floor was still in it although very rotten 1/4" plywood.

My plan is to build aluminum consoles. I'm still thinking about attaching them to the 1/2" floor. Should I epoxy on another 1/2" strip to fasten them down with 1" sheet metal screws or will something else work better? The seats will also need to be attached to the floor in some manner.
 

oldhaven

Chief Petty Officer
Joined
Aug 30, 2015
Messages
576
So how was it attaching the new transom skin? Judging from the white splashes on things you must have used 5200 over the whole plate, and I think I can see that the bottom was riveted. Any good after action advice? I will be doing the same thing within a week.

Ron
 

StarTed

Senior Chief Petty Officer
Joined
Jul 14, 2015
Messages
694
I used over a tube of 5200 and spread it all over as thin as I could on both pieces with a fine toothed plastic spreader spatula. I'm happy with how it turned out so far. Next I'll attach the SS plate the same way where the motor mounts.

Got side tracked this morning because my wife was complaining that her lap top doesn't work. It turned out that the Windows 10 upgrade made our 365 subscription to need repair on her machine. In this house I'm stuck with the task of making our computers work and I try to avoid that part of them. I understand machine language but I don't think like a programmer. Their terminology and what it includes is not part of my language. Hey, I'm still learning American English. Been doing that since about 4.

Now back to my wife's car's charging system then on to my boat. So many distractions.
 

StarTed

Senior Chief Petty Officer
Joined
Jul 14, 2015
Messages
694
Got the outboard plate mounted.


The outboard mounting plate holes are used temporarily to clamp the plate on.

Question - Should I remove the bolts daily to keep them from becoming permanently attached or is there a recommended time to do that?
 

Watermann

Starmada Splash of the Year 2014
Joined
Jan 12, 2013
Messages
13,796
You could give the bolts a turn a couple times a day but there's no way they would become permanently attached, the torque applied by a 1/2 drive ratchet will break them loose after the seagull poop hardens.
 

StarTed

Senior Chief Petty Officer
Joined
Jul 14, 2015
Messages
694
Thanks Watermann. I've not used 5200 before so don't know what to expect. Spreading wasn't the problem, it's moving around it later when the stuff gets all over me. Thank goodness someone mentioned keeping a rag soaked in mineral spirits handy. It sure helped keeping small spots from spreading all over.

I brought this question forward from entry 104.

My plan is to build aluminum consoles. I'm still thinking about attaching them to the 1/2" floor. Should I epoxy on another 1/2" strip to fasten them down with 1" sheet metal screws or will something else work better? The seats will also need to be attached to the floor in some manner.
 

Watermann

Starmada Splash of the Year 2014
Joined
Jan 12, 2013
Messages
13,796
Screws will hold pretty good and a bead of 5200 under the mounting surface, then the sides bolted or riveted to side of the hull should be real strong. The side console in my SN is just screwed to the 1/2" decking.with ss machine screws and nylocs to the side and I have no problems with it being solid.
 

StarTed

Senior Chief Petty Officer
Joined
Jul 14, 2015
Messages
694
Thanks again for the feedback. It looks like I'll continue on.

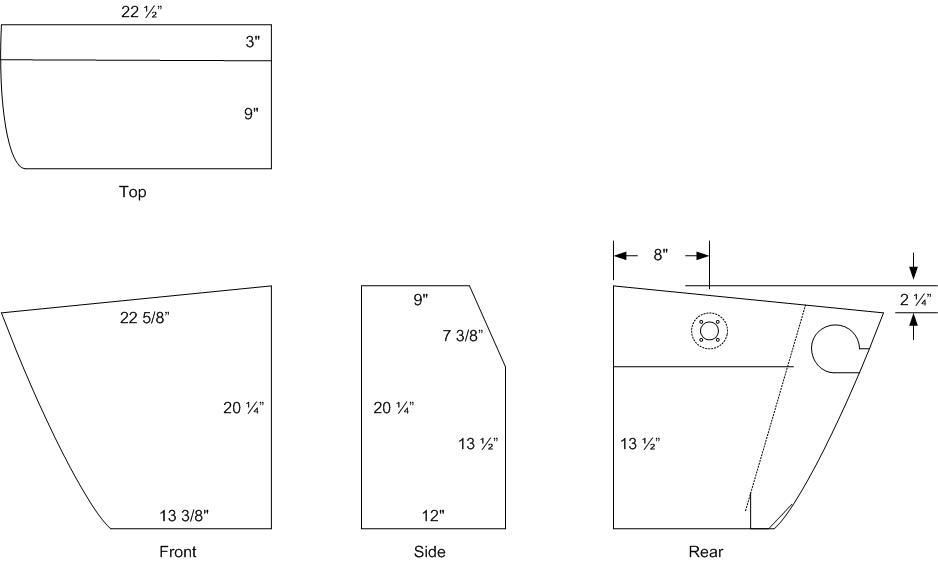
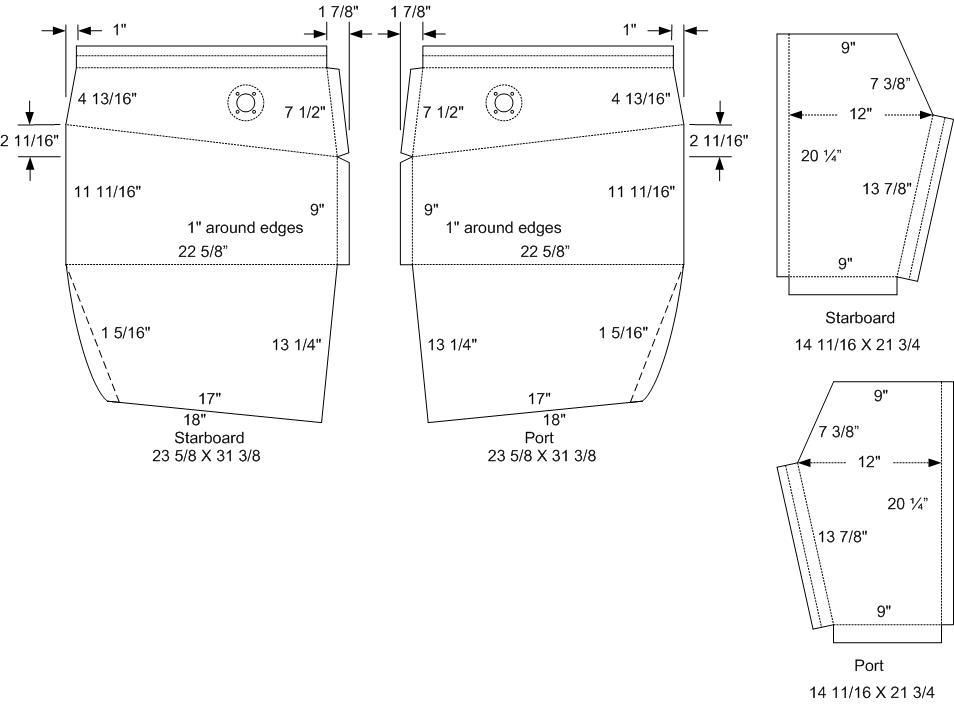
Here are a couple of plans I have for my aluminum consoles.


This shows the various views of the starboard console.


This shows the panels and breaks for the pieces.

Still have the gunwales to finish cleaning, adding angles, priming and painting inside. Then I can mount them.

After that comes the bottom channels that I plan to mount using 4000 adhesive unless someone thinks it isn't the right one to use.

Following that I'll be working on the consoles.

Then it'll be back to a new splash well. Still have to design it.
 

oldhaven

Chief Petty Officer
Joined
Aug 30, 2015
Messages
576
You are a very good draftsman, or have a sheet metal add on for your CAD system, or both. The ability to create those sheet metal templates is really great. Plus you have the brake now so you can do whatever you want without having to resort to heavier plywood. Wow.
 

StarTed

Senior Chief Petty Officer
Joined
Jul 14, 2015
Messages
694
Thanks oldhaven. I use the Microsoft (now) program Visio that I used to use when I work for a living. It is so easy to use and drawings will drop right into their other products like Word. If I sent you a document with it in Word and you had the program then you could take it and continue making changes. If I say it's easy then you know that it doesn't take much computer skills.

Yes, I like the brake and plan to make use of it. It's a beast but for around $300 out of pocket and my time I could afford it.
 

StarTed

Senior Chief Petty Officer
Joined
Jul 14, 2015
Messages
694
Just an update.

I've been plugging away on the aluminum around the edges. Just about ready to start dry fitting and make the splash well and consoles.

The splash well will be 2 pieces seamed at the bottom with 5200 in the seam. That way it'll be easier to bend the aluminum. The front edge will be rolled over if I can make that work out on the brake. I'm thinking that maybe some kind of curtain could be hung off it to cover the area behind.

Some pictures will follow later.

I have another distraction, a grain bin on the farm is falling off the concrete foundation.

Life sometimes gets a little extra interesting.

Update you later.
 

StarTed

Senior Chief Petty Officer
Joined
Jul 14, 2015
Messages
694
Didn't do much yesterday. Just a little fitting and checking.

I got a person interested in the grain bins and leg so I hope that follows through. Another thing I'm hoping to have off the plate. They're advertised in the Moses Lake CL.

Another month has gone by. It's the first Thursday of the month and that means tonight is the another and hopefully final planning meeting for our Trail Blazers high lakes stocking program. Then it'll be sent to the wildlife department for their review and approvals. Sometimes they'll add some lakes to the list for us to stock.

Hopefully I'll be back early enough on Friday to get a little more work done on the boat.
 

StarTed

Senior Chief Petty Officer
Joined
Jul 14, 2015
Messages
694
I'm working on the consoles today. I found a couple of errors in the plans. One will be easy enough to fix and the other I've already fixed since the error left too much material.

I look on the web and it was recommended to smoke the aluminum with soot and then heat it until the soot all went away before quenching it with water.

I tried that and it worked well enough to straighten out a bend, cut off some material and rebend it where it should have been done in the first place.

Now to clean the aluminum with some acetone to remove my dirty finger markings and give it a quick white vinegar wash before applying Rustoleum self etching primer. That should work well enough for a top coat.

I'll leave the contact areas bare so the 4000 will stick.

The gutters along the sides also need installation with 4000 and SS screws.

Hopefully I'll get some pictures taken and posted tonight.

Tomorrow we plan to visit a brother-in-law in the hospital in Missoula.

Back to work!
 

Decker83

Commander
Joined
Apr 5, 2011
Messages
2,593
Looks like your making some progress.. Looking forward to seeing the pics.. How is the brake press working for ya?
 

StarTed

Senior Chief Petty Officer
Joined
Jul 14, 2015
Messages
694
Here is my changed plan for the consoles.


I had one bend in the wrong direction. It was out instead of inward as needed.

Pictures are being loaded so they will follow.

The brake works well but I was unable to get the parts back in it due to all the other bends. It's important to make the bends in the proper order. Otherwise the bent up unit will no longer fit into the brake.
 

StarTed

Senior Chief Petty Officer
Joined
Jul 14, 2015
Messages
694
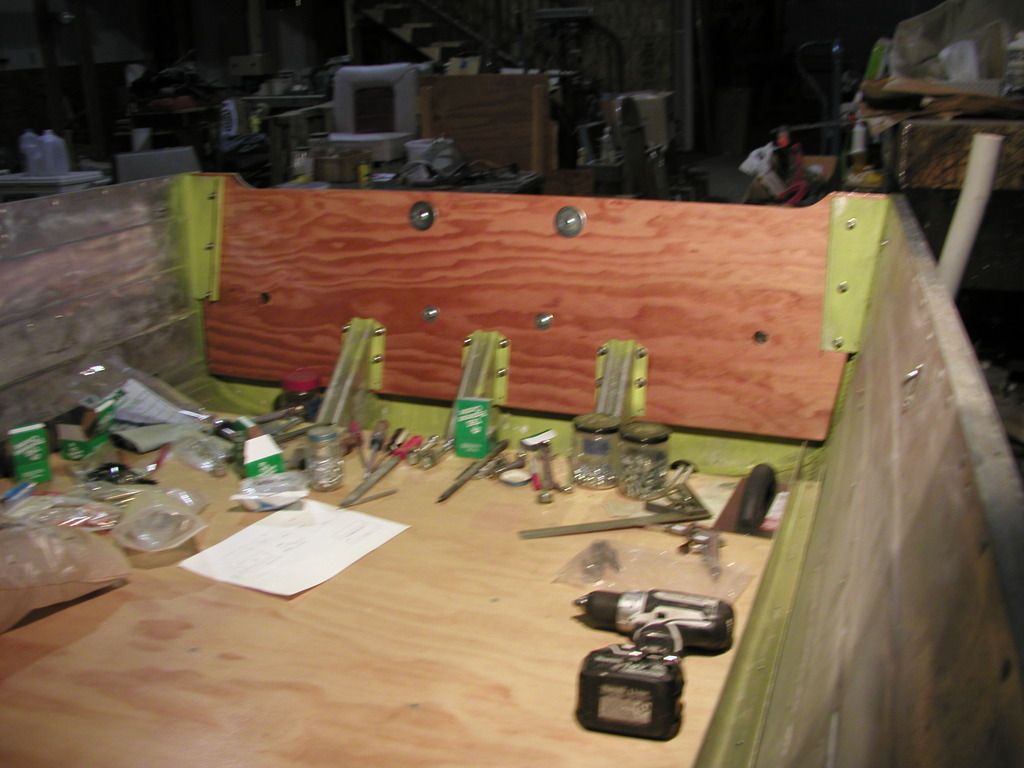
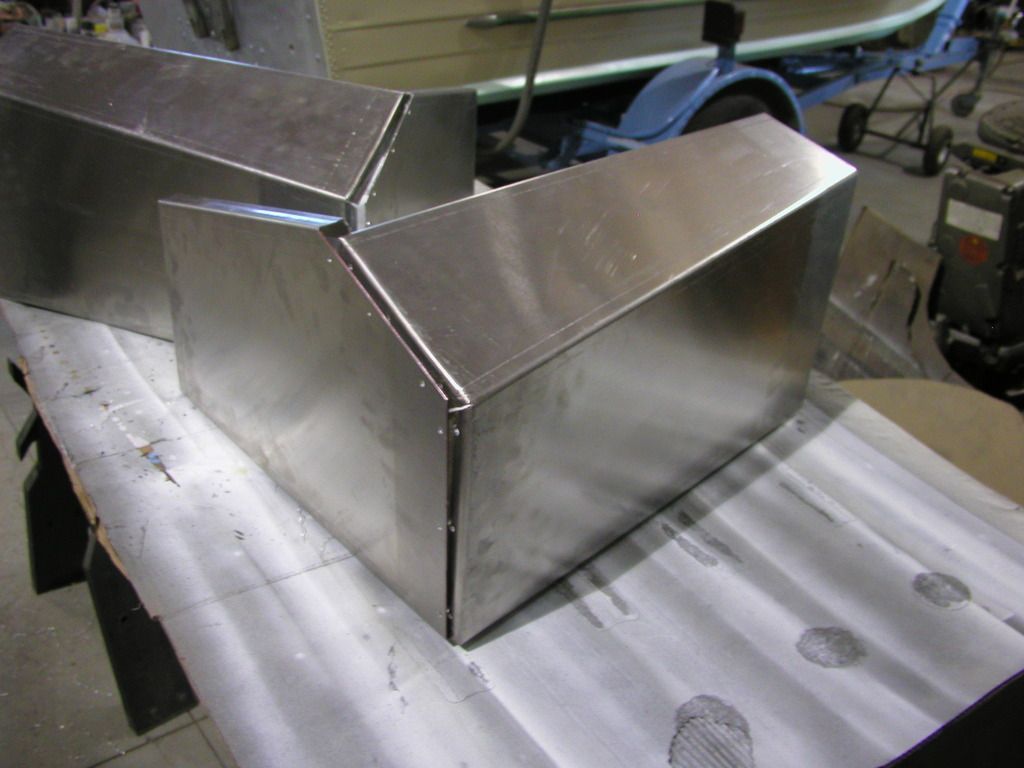
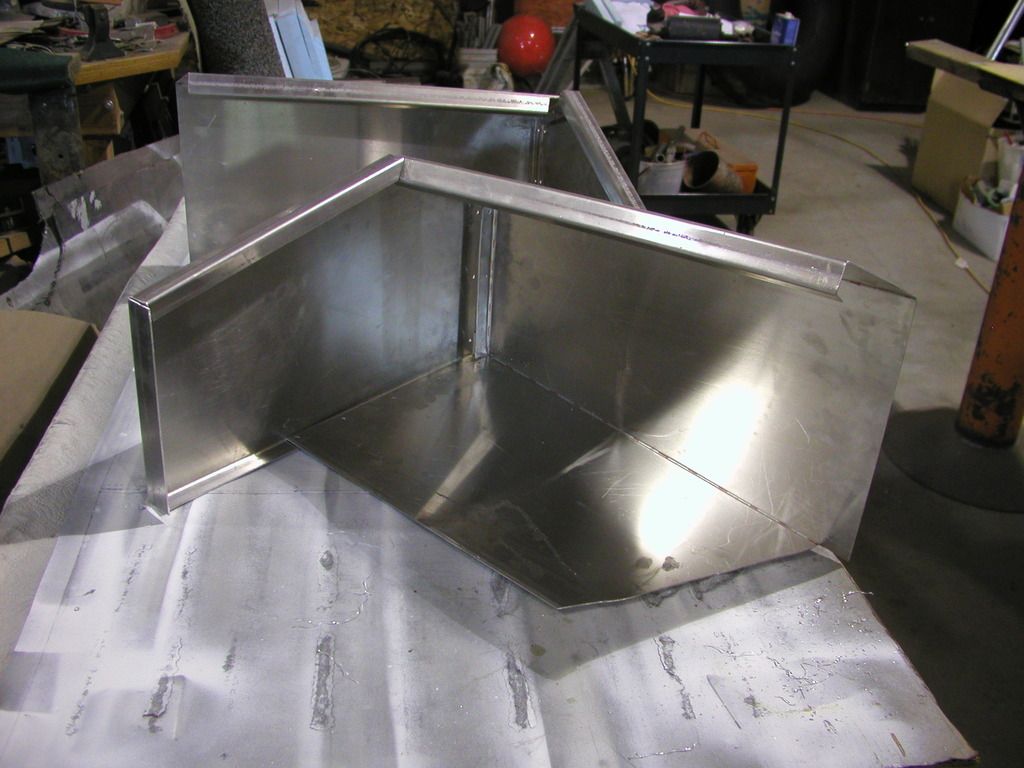
Here are a couple of pictures of the consoles. They're in 2 pieces not fastened together yet because I plan to fasten them in place to the aluminum bulkhead installed in the bow area and the gunnels.


The windshields will be fastened on top of the consoles and gunnels. I still need to get or make some kind of fasteners. The windshield channels look like some kind of "T" bolt is needed in the #10 size range.
 
Top