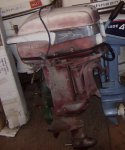
Re: 1956 Johnson Javelin Water flow question
OK, I found the thing I wrote back in 2005 on impeller replacement on Big Twins. I'm pasting it in below. On your Javelin, ignore the steps that mention an outer housing or cover on the leg. Yours doesn't have that housing.
=====================================
Impeller Replacement for OMC Big Twins (30-40hp, 1950s and early 1960s)
OK. Here's the basic drill. It would help if you had the manual, though, and I make no guarantees that I didn't miss something. Give yourself a couple of hours for this job, the first time you do it, and work slowly and methodically. Have a good place to put parts and keep parts from different assemblies separate:
1. If your model has the outer cover on the back of the midsection, remove the phillips head screws and remove the cover.
2. Shift the outboard into Forward gear. Turn the prop clockwise, if necessary, to shift. On the starboard (right) side of the midsection, you'll find a small cover with two screws. Remove the screws and the cover. On most of these, another cover is inside. If so, remove the TOP screw only, then loosen the bottom one and let the cover swing down. NOTE: Be careful here. You don't want to drop the screw down the exhaust tube. What I do is use a socket and keep it up against the cover as I unscrew. When it's out, I carefully put a finger under the socket and make sure the screw comes out and doesn't drop.Inside this cover you'll see a brass clamp fitting, rectangular in cross-section. A small bolt goes through it at the top. CAREFULLY...remove that bolt, using the technique described above. The upper shift rod is held by this clamp.
3. Tilt the motor up, as if for trailering, using the screw-in bolt or pin to hold it in position. Remove the bolts/screws which hold the lower unit onto the midsection, including the one revealed by removing the cover, if one exists. If they don't want to come out, tap the bolt heads lightly with a hammer to break up the corrosion. Do not force these. Twist one off and you'll complicate the job.
4. Carefully remove the lower unit from the midsection. You may have to bump it lightly with a rubber hammer or other soft tool to free it. It will come off, complete with the driveshaft, lower shift rod and clamp.In most case the water tube(s) will remain in the midsection. If they come out, reassembly will be a bit more difficult, but still doable. Remove the o-ring from the top of the driveshaft. You will want to replace this on re-assembly. DO NOT REMOVE THE DRIVESHAFT FROM THE LOWER UNIT!
5. Locate the impeller housing on the lower unit. The driveshaft extends through it. Remove the screws holding the cover in place, then slide the cover up and off the driveshaft. Remove the rubber impeller, noting the direction the arms bend. A small woodruff key is there to drive the impeller. Do not lose this!
6. Place the new impeller over the drive shaft and slide it down, positioning the woodruff key, then sliding the impeller over it, matching the groove in the impeller with the key. Take your time.
7. Give the inside of the impeller housing a thin coat of undiluted liquid dishwashing detergent, then slide the impeller cover over the drive shaft and down to the impeller. Carefully bend the arms of the impeller in the same direction as the old one and work the cover over the impeller slowly and gently. This is the trickiest bit of the whole thing. (Note: if you can't remember the direction, turn the prop clockwise (looking from back of the motor)). It also helps to turn the prop as you work the cover down over the impeller. Once it's seated, reinstall the screws. If you forgot to shift into Forward at the beginning, you can do that now by pulling up on the shift rod.
8. Look at the top of the water pump. You will see one or two rubber grommets. The water tube(s) fit into these. If they are damaged, replace them. Otherwise, smear some liquid dish soap on and in them to lubricate them for easier insertion.
9. Place a new o-ring in the groove at the top of the driveshaft, at the base of the splines. Use some marine grease to lightly grease the splines.
10. Slowly and gently...slide the driveshaft and shift rod back into the engine as you replace the lower unit. As the lower unit gets close to the midsection, align the water tube(s) with the grommets in the water pump. Most engines have these tubes cut at an angle to assist you in getting them in place. If necessary, turn the prop clockwise just a little to get the driveshaft splines aligned. You may well have to wiggle things around to get all the parts in alignment. When the lower unit is fully flush with the midsection, re-install the bolts that hold it to the midsection.(NOTE: if the water tubes have come out with the lower unit, remove them from the water pump and fit them into the upper unit. It ain't easy, but you can do it if necessary. This doesn't usually happen, though)
11. On the midsection, make sure that the upper shift rod is in place in the brass clamp. You can manipulate the shift lever and move the clamp down into neutral, if necessary. Note the groove around the shift rod. That groove MUST align with the bolt hole in the clamp. Re-insert the clamping screw, with star washer. (Here, I put some grease in the socket I use to help hold the screw. If necessary, put a nut in the socket to have the screw protruding from the socket, far enought to engage the threads. Don't drop it down the exhaust tube, please. Tighten the screw firmly, but don't overtighten...you can strip the threads fairly easily.
12. Replace the inner cover, again being careful not to drop the screw inside the exhaust housing. Don't forget to tighten the lower screw on this cover. Replace the outer cover, if any.
13. Replace the external midsection cover, if it exists on your model, and you're done. When replacing this cover, make sure the hose with the little bellows for the idle relief fits into the hole in the cover.
14. With the lower unit submerged in water, well over the water intakes, start the engine (in neutral) and check for some water coming out the idle relief hole.That's it. Take your time and pay attention to where things are. Don't forget the new o-ring on the driveshaft and the grease. Don't lose any parts. The first time's a little scary, but it gets easier after that.If I forgot something, I apologize. Pay attention as you work.


") the only thing that is messed up is the thing that cuts the choke off... not the lever on the front but the D batteries sized thing that bolts to the bottom of the carb..it has a cylinder in it and a dust boot but it is not functioning properly...
the only thing that is messed up is the thing that cuts the choke off... not the lever on the front but the D batteries sized thing that bolts to the bottom of the carb..it has a cylinder in it and a dust boot but it is not functioning properly...