Starcraft Holiday senior project: Convert to twin Jetski drives

TruckDrivingFool

Lieutenant Commander
Joined
Jul 30, 2007
Messages
1,818
SW = Splash well.

Looking at your design plan and what you've cut looks like you're planing on leaving it in. I was thinking you'd have a more finished look and more room by removing it completely and going to a cap of sorts (like on a I/O boat) to replace the lost structural member the SW provides.

I don't have any pics from the inside with the seats out to show exactly what I'm talking about but maybe these will help


drev500

Seaman
Joined
Aug 31, 2015
Messages
61
SW = Splash well.

Looking at your design plan and what you've cut looks like you're planing on leaving it in. I was thinking you'd have a more finished look and more room by removing it completely and going to a cap of sorts (like on a I/O boat) to replace the lost structural member the SW provides.

I don't have any pics from the inside with the seats out to show exactly what I'm talking about but maybe these will help


Truck,

Ahh yes, now I see. It is our intention to do that. Time is of the essence at the moment and we are just trying to get it floating. Although if we stick to the current pace, we should be getting it all together
 

Tnstratofam

Commander
Joined
Aug 18, 2013
Messages
2,679
Are you going to install a wood structure for the transom? Part of the strenght the sides and bottom get come from the wood core of the transom, along with the splash well. Eliminating the splashwell makes sense as you are basically turning her into an inboard/sterndrive of sorts, but even a sterndrive has to have some structural rigidity at the transom otherwise it would peel the transom skin back like a tin can. Not to mention the flex that would occur through the sides as well as the hull.

Just curious as to your plan and not trrying to jump ahead.
 

Woodonglass

Supreme Mariner
Joined
Dec 29, 2009
Messages
25,927
One of my "Bucket List" boats is a Glen-L build of a boat called a "Squirt" Some builders of this boat have converted it to a Jet ski drive. Here's a video..


Willyclay

Captain
Joined
Sep 8, 2006
Messages
3,258
One of my "Bucket List" boats is a Glen-L build of a boat called a "Squirt" Some builders of this boat have converted it to a Jet ski drive. Here's a video.

Mike, if you do check this one off your "Bucket List", please build it with soft chines or only turn when you are going slowly. Be safe, Bill
 

Woodonglass

Supreme Mariner
Joined
Dec 29, 2009
Messages
25,927
When I build mine it WON'T be a jet Drive. It'll have aVintage 18hp Merc' or Evinrude hanging off the back end!!!!
 

jbcurt00

Moderator
Staff member
Joined
Oct 25, 2011
Messages
25,044
Fellas, not relevant to Drevs project.

Back to our regular programming. Thanks
 

Stumpalump

Chief Petty Officer
Joined
Dec 5, 2013
Messages
413
I like the way you are mounting the drives. My buddy is buying a jet Jon that has the bottom of the ski graphed to the aluminum. The install takes up half of the boat and of course to keep up with the Jones I'm shopping as well. I'm curious how those wood boats did the install but in a controlled jet install thread here It can't be discussed. Dare I ask where I can find it?
 

drev500

Seaman
Joined
Aug 31, 2015
Messages
61
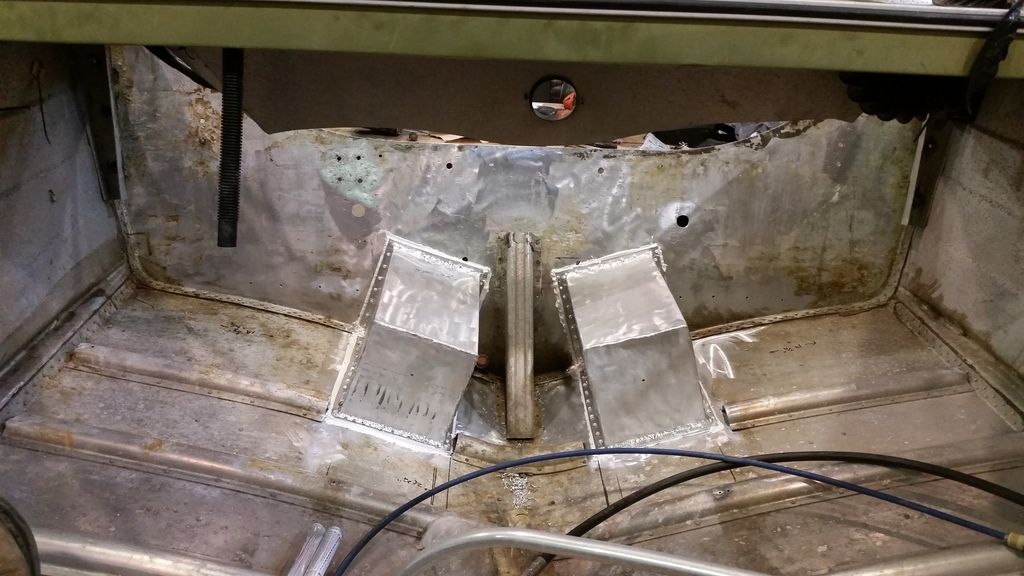
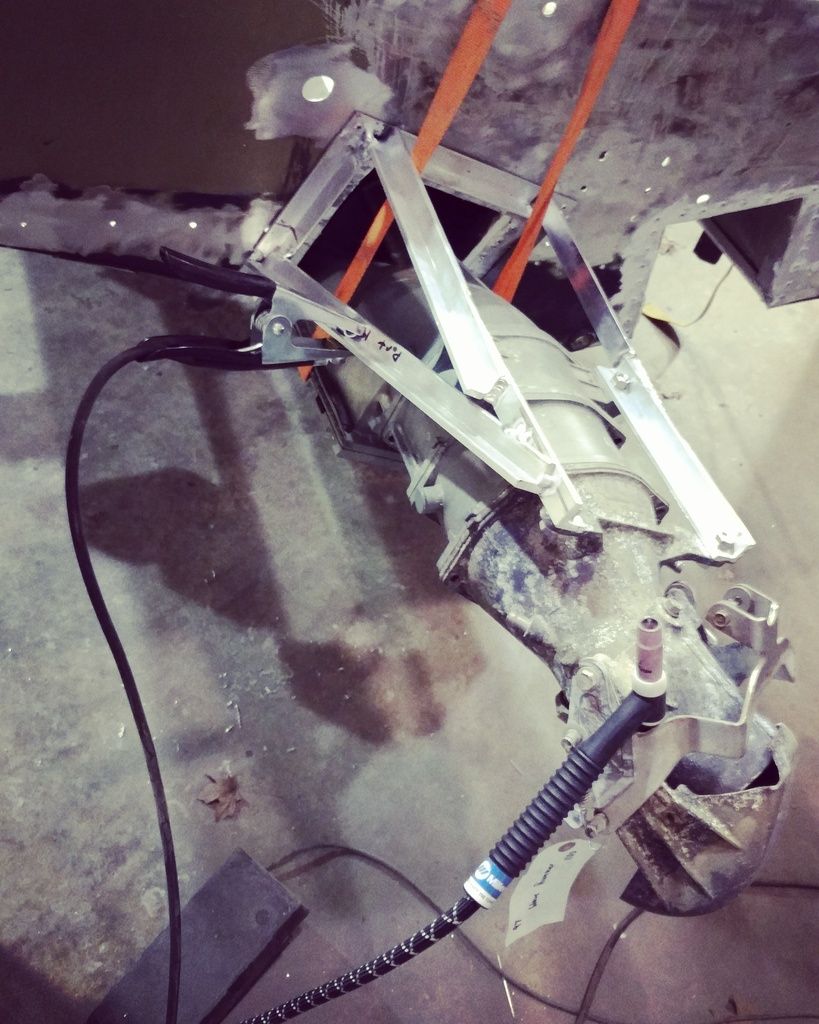
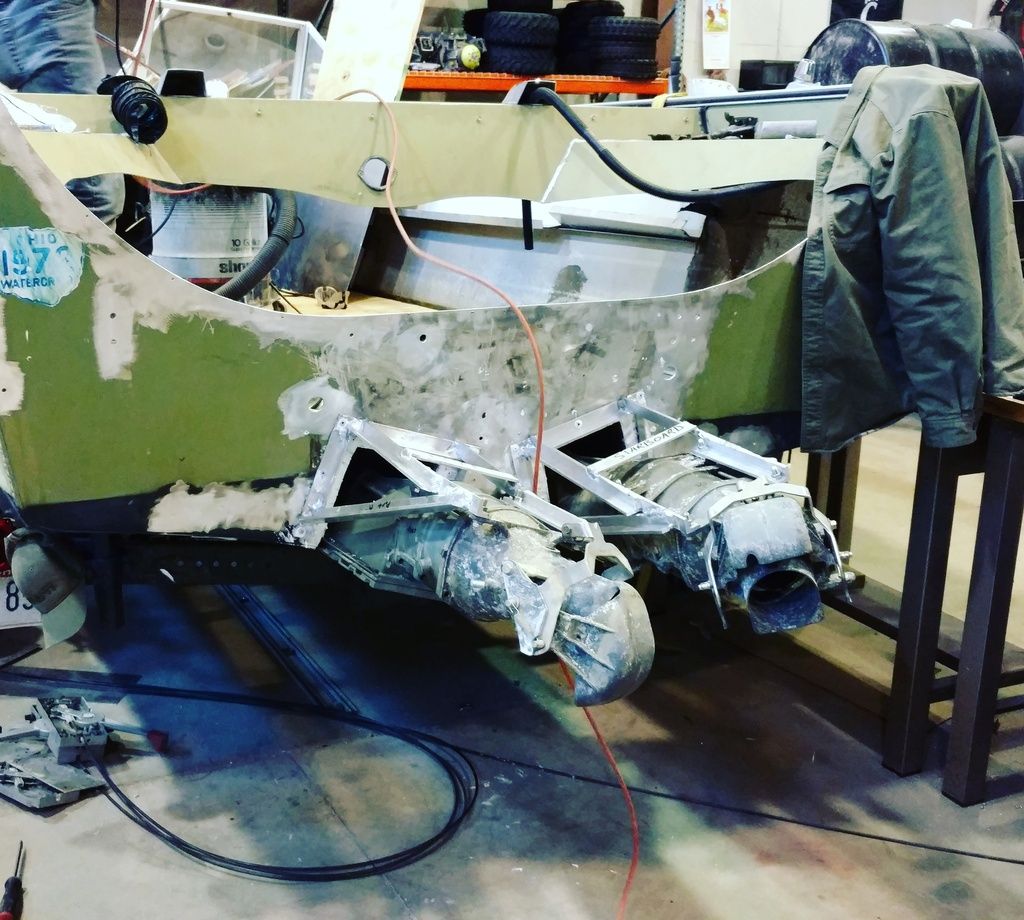
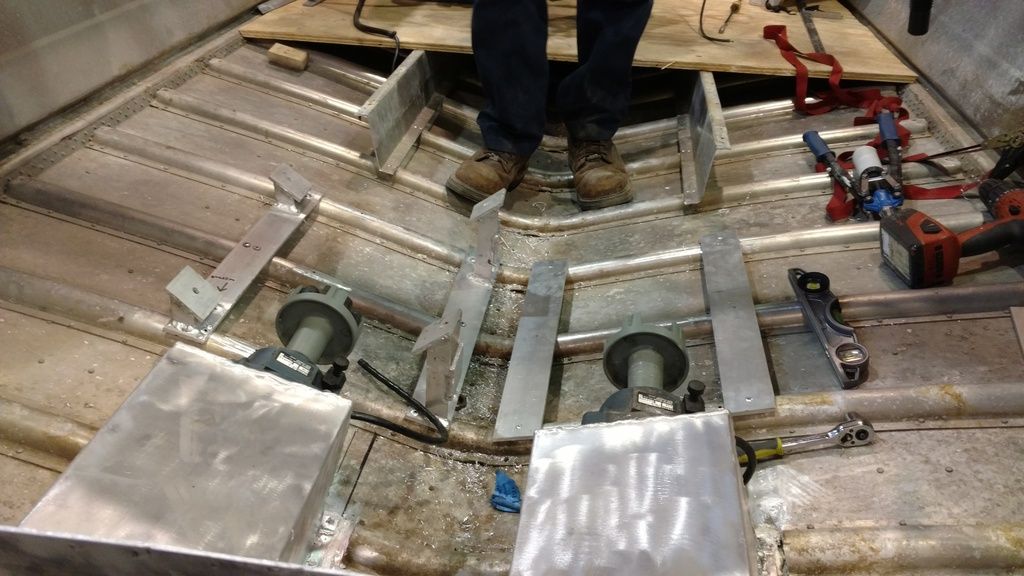
Hey y'all. So we got the pumps installed with the brackets I had welded up. Came out great!


We made a run to our local metal supplier that sells drop material at scrap cost. Picked up some 1/4inch material to make the motor mounts. Hoping to have one motor installed Monday. We have a gantry crane in our school shop making the mock up supppppeeerrr slick.
 

drev500

Seaman
Joined
Aug 31, 2015
Messages
61
Are you going to install a wood structure for the transom? Part of the strenght the sides and bottom get come from the wood core of the transom, along with the splash well. Eliminating the splashwell makes sense as you are basically turning her into an inboard/sterndrive of sorts, but even a sterndrive has to have some structural rigidity at the transom otherwise it would peel the transom skin back like a tin can. Not to mention the flex that would occur through the sides as well as the hull.

Just curious as to your plan and not trrying to jump ahead.

Hey tnstratofam,

Yes we plan on adding wood back in the transom to add rigidness. With the pump brackets and boxes we added so far, it has really tied everything in. I can comfortably sit on one of the jet pump brackets with very little distortion. It's very secure but since we adding a swim platform, we will need more structure.
 

Tnstratofam

Commander
Joined
Aug 18, 2013
Messages
2,679
The work looks good so far. I wish I were closer so I could see it first hand. Keep up the good work, and if you haven't already noticed most of us Love pictures. One of the things that helps with these threads is good documentation, and good pictures is a big part of that. Along with good explanations on what is being done. You're doing good on both counts.
 

drev500

Seaman
Joined
Aug 31, 2015
Messages
61
The work looks good so far. I wish I were closer so I could see it first hand. Keep up the good work, and if you haven't already noticed most of us Love pictures. One of the things that helps with these threads is good documentation, and good pictures is a big part of that. Along with good explanations on what is being done. You're doing good on both counts.

Dave,

Haha I'm glad to hear I am doing well. I could definitely do better at and it is still a learning experience for me. I will plan to document a little better when we work on the motor mounts. Just promise not to knock my tig welds :). That's toughest part for me to be consistent with. Sometimes they lay very well and others, ehh lets not go there. Thanks for the encouragment! If you're ever in the area, feel free to reach out. I love showing people what we are doing and love to pick the brains of those who have done this before. It has definitely been a learning experience for all of us in the group.
 

Bayou Dave

Lieutenant Commander
Joined
Dec 13, 2012
Messages
1,780
Will you have time to finish and launch her before your semester ends this year?
 

g0nef1sshn

Lieutenant
Joined
Feb 24, 2015
Messages
1,291
Id love to be a beer drinking fly on the wall watching your project getting done. checking in often, keep it up. Although everything your accomplishing is beyond my skill level, it is interesting to follow along.
 

drev500

Seaman
Joined
Aug 31, 2015
Messages
61
Will you have time to finish and launch her before your semester ends this year?


Part of the project is to make a splash ;)

I really hope to have it most of the way if not, completely finished by the end of April. It will be getting painted my over Spring break. The time is flying but we are keeping the progress up.
 

drev500

Seaman
Joined
Aug 31, 2015
Messages
61
Id love to be a beer drinking fly on the wall watching your project getting done. checking in often, keep it up. Although everything your accomplishing is beyond my skill level, it is interesting to follow along.


Haha thanks for the support! Its definitely a learning process for all of us that are participating. Nothing is impossible, just need to have the right resources and mind set to accomplish what you want.
 

drev500

Seaman
Joined
Aug 31, 2015
Messages
61
Even though it was a Monday, it was a productive day!

Got into the shop a little later than I had planned due to some needy dogs I am dog sitting for the week. They kind of make you feel bad leaving for the day so I took them for a nice walk before heading out.

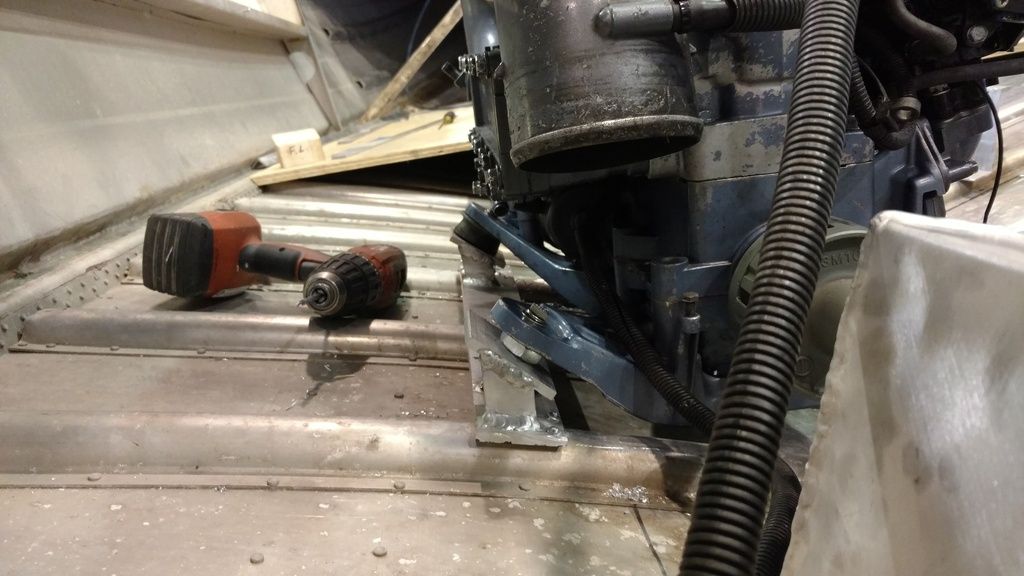
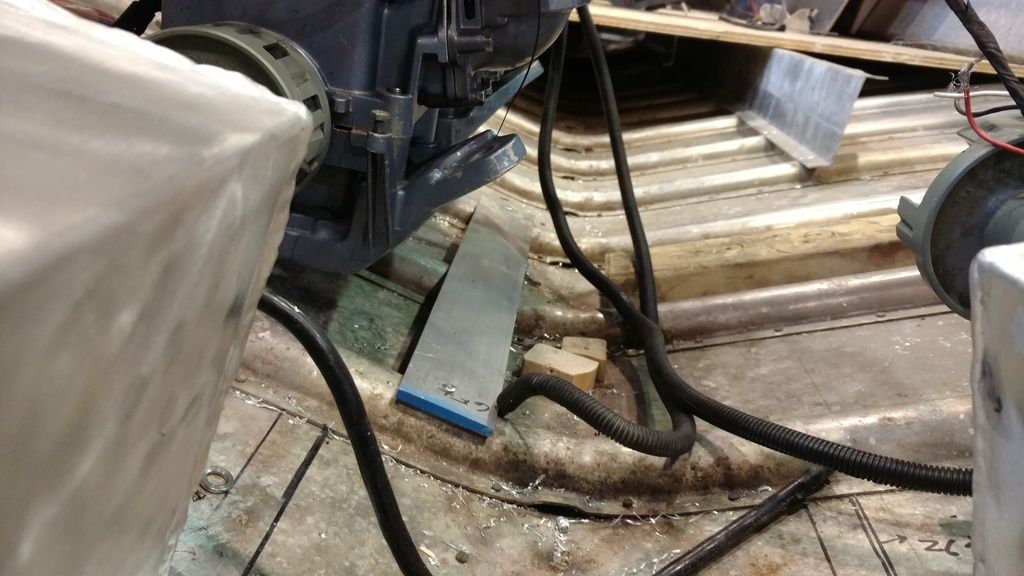
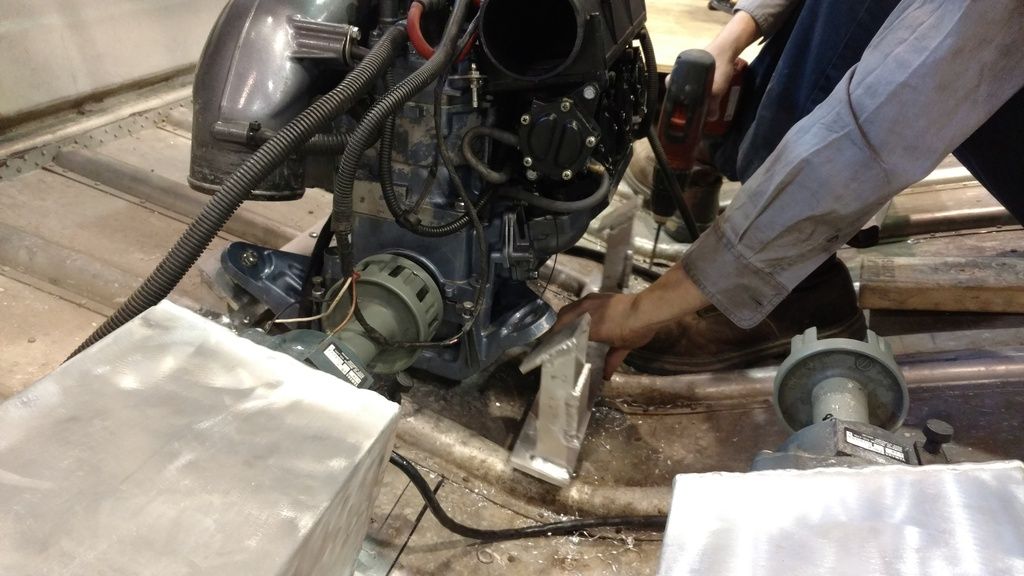
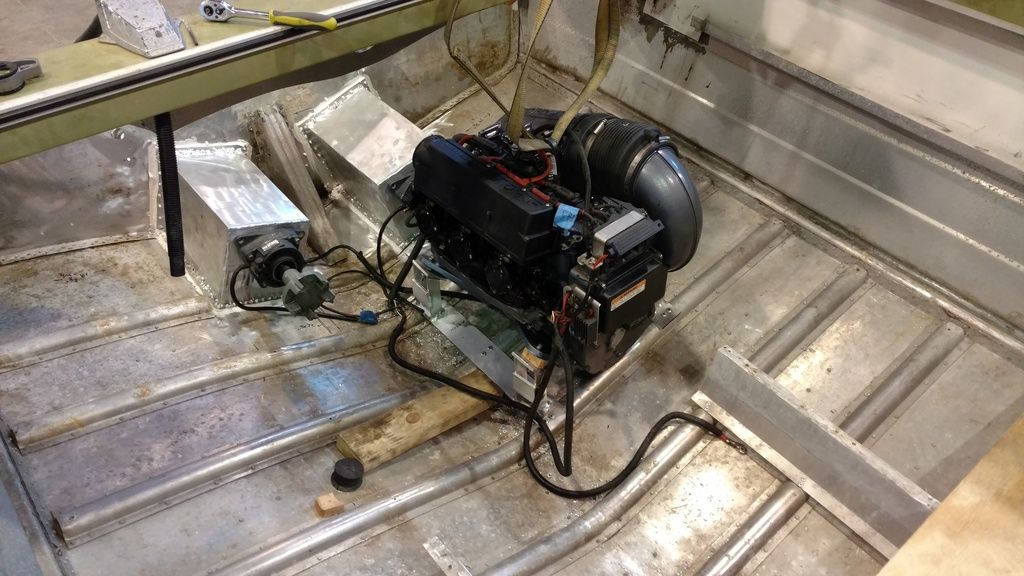
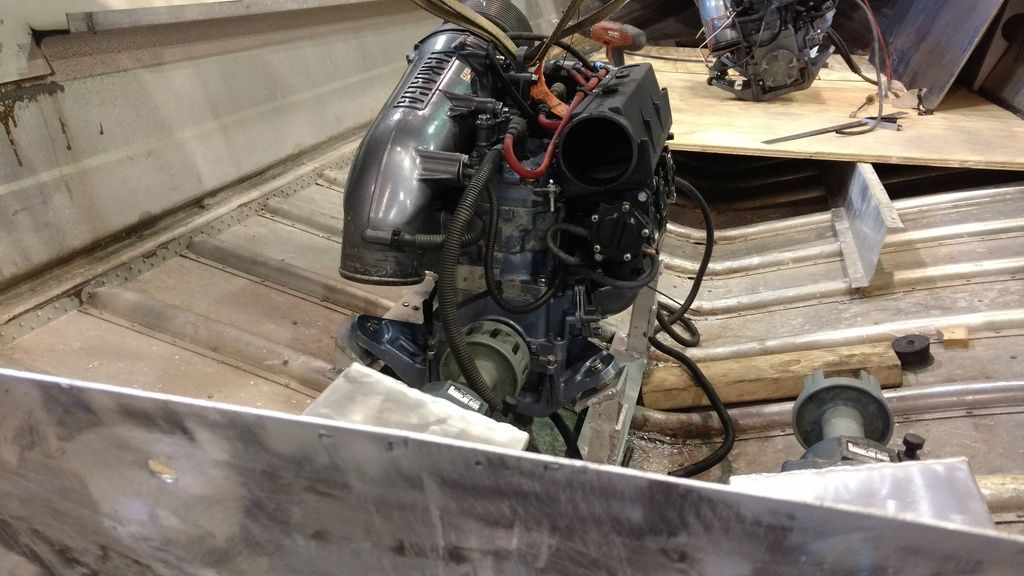
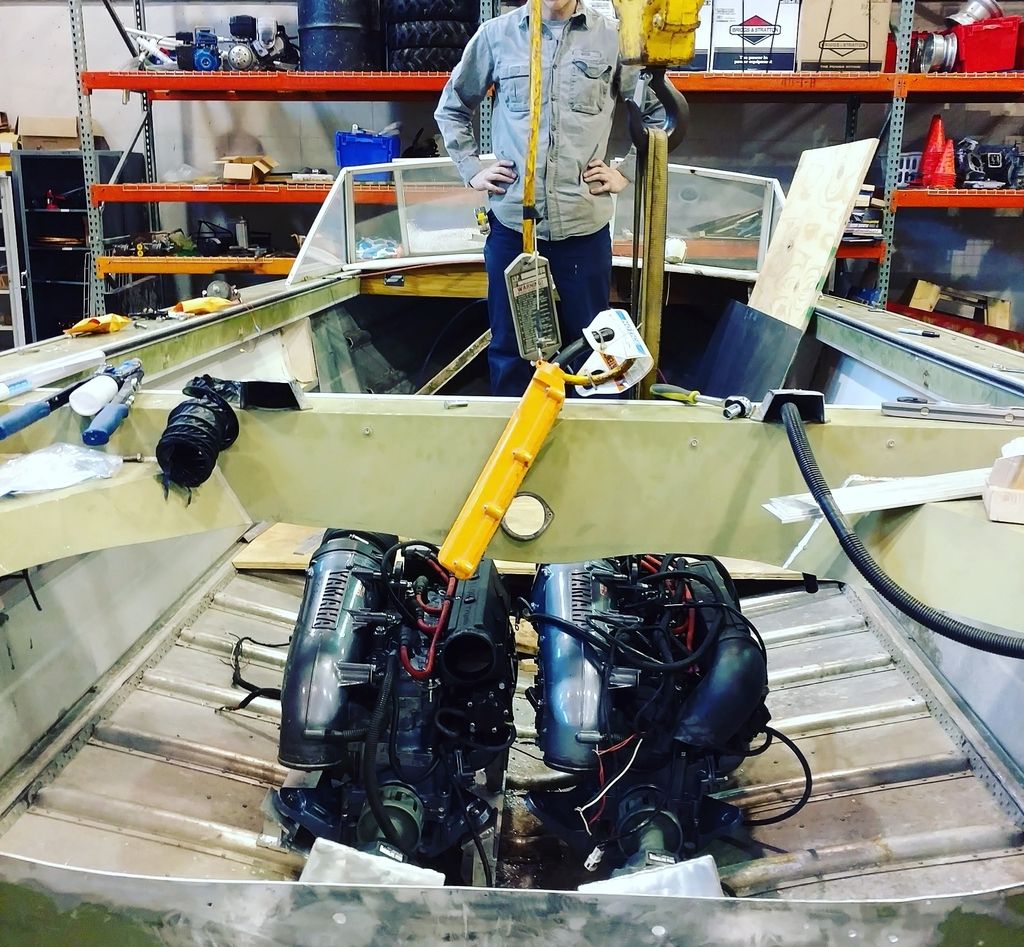
One to the good stuff. My buddy and I had planned on getting some of the motor mounting done today. I will go into more detail about the mounting than I have been doing so for those interested. During last week's run to the metal supplier, we picked up a 6ft piece of 5inch wide by 1/4" thick in a 6063 alloy. Got it for scrap price since it was "drop". We ripped this in half to make 2 2.5" (excluding cutting blade width) wide pieces. We 4 pieces to roughly 20" long which allowed us to connect to 3 ribs and each mount off the engines cradle.

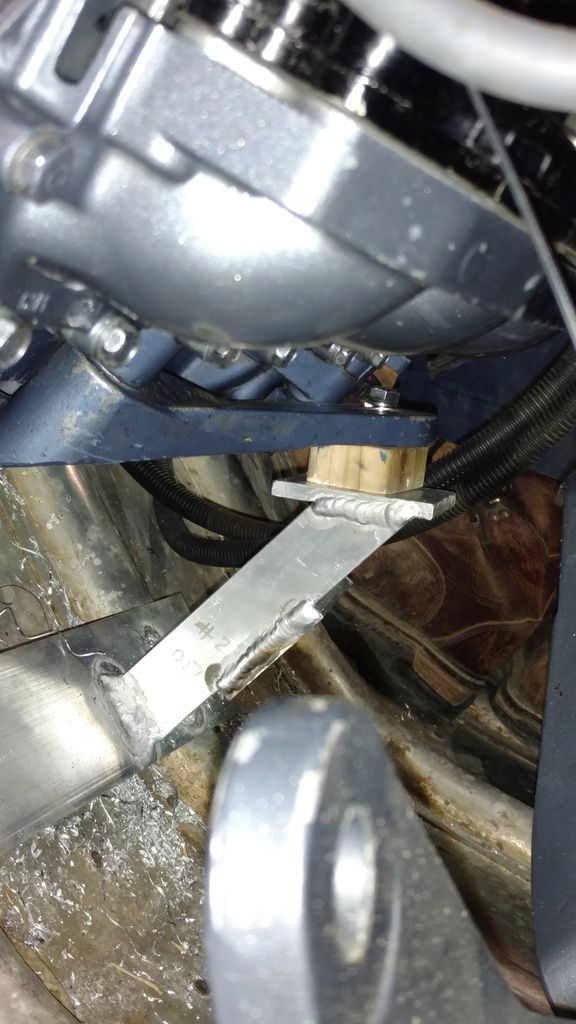
Trying to keep the motors as close to the keel as possible was essential to ensure the jet pumps receive plenty of "clean" water. Because of this, the original motor mounts from the jet skis could not be used so we made some out of some 1.25" flat stock we got as drop from the same supplier. The motors are close together which is good but will make maintenance on the port carbs a pain but oh well. We obviously plan to never have to service this thing since it will run without a single problem ;)

For those interested, all the aluminum used thus far is 6063 alloy and the Tig filler wire is 4043. Note the picture with a piece of wood as filler... that is just a temporary spacer until we get some rubber padding and shims in there but we did engineer the heck out of that piece wood hehe. All of the engine mounts were made to fit with about 3/8" of slop to allow for a ribber pad for vibration dampening and shimming for proper alignment. This part of the build is definitely the most challenging.


Port engine sitting on the mount without the crane's help. The 2x4 is doing nothing. We had used it as a pry bar prior to the picture.


Last edited:
Top