Starcraft Holiday senior project: Convert to twin Jetski drives

Suprathepeg

Petty Officer 1st Class
Joined
May 25, 2015
Messages
259
Considering what you're planning to do and the fact that you are probably going to be testing and rebuilding the hull a few times I would just make 3/4" panels, seal them with paint and then screw them in. Once you have the hull functioning the way you want it then worry about foam etc. Honestly finishing the interior before you have the hull working will probably be a waste of time.
 

Corjen1

Lieutenant Junior Grade
Joined
Aug 24, 2013
Messages
1,237
Cool Idea, cool build!! Ill be tagging along if you dont mind...
 

TruckDrivingFool

Lieutenant Commander
Joined
Jul 30, 2007
Messages
1,818
drev said:
I would rather be able to remove the floor with easy instead of having to cut epoxy and drill rivets. Do you have a recommendation for fasteners that people normally use that sit relatively flush with the floor and will allow for easy removal?

Drilling out rivets really isn't that bad now is it? Pop rivets are what most use as screws seem to loosen fairly quickly.

Neat project you got going can't wait to see how it come out, guess I'll have to though. :)
 

drev500

Seaman
Joined
Aug 31, 2015
Messages
61
Considering what you're planning to do and the fact that you are probably going to be testing and rebuilding the hull a few times I would just make 3/4" panels, seal them with paint and then screw them in. Once you have the hull functioning the way you want it then worry about foam etc. Honestly finishing the interior before you have the hull working will probably be a waste of time.

Totally understand your last statement. First major build so I will that urge to be impatient. I was just looking to do things while we are designing (there are 3 of us in the group). My anxiousness is getting the best of me.
 

drev500

Seaman
Joined
Aug 31, 2015
Messages
61
Haha, rivets aren't that bad. But glad to see more followers. I hope we are able to keep y'all entertained.
 

Suprathepeg

Petty Officer 1st Class
Joined
May 25, 2015
Messages
259
Just make enough of a deck to mount your controls and stand, don't bother painting it etc. Screw it down with stainless steel screws. The rest is a waste of time this early on. You have a LOT of hull work to do. Make the boat run first.
 
Last edited:

drev500

Seaman
Joined
Aug 31, 2015
Messages
61
So it has been a very long time since I last updated and I apologize for the delay. With the semesters ending during the last posts, there was lots of finals and projects to finish up. Also, I spent time back up north with the family over the holidays.

Well, school started back up last Monday and it is the last semester. Lucky for me, I only have 3 days of classes giving me Mondays and Fridays off. Last week I spent a good 25 hours on the boat and just got back today working a few. A lot has happened since the last time I updated. Most of the designs have been completed and fabrication has started.

I will pick up from where I last left the project... We are using 2 1100cc Yamaha Waveraider Engines (110hp each) and jet pump assemblies. Each engine is capable of producing roughly 800 lbf of thrust for a total of 1600lbf of forward thrust... plenty to get this old girl going. Some people have asked why not go with a Berkeley Jet Pump and a Small Block V8. I sometimes wish I would have gone that route but really weight was a big factor. A SBC and Berkeley Jet pump weight roughly 700 give or take a few pounds. The engines and pumps we have weight a total of 300lbs. That's almost 3 more people I can have on board the boat. It also would have been tough find an engine and pump for the same price that I got the ski's for. There's alwayy time after I graduate to build another boat with a bigger engine. I don't see this being my first and only build ;)

Alright, on to the good stuff. Here is the layout of the engines and pumps in the boat:
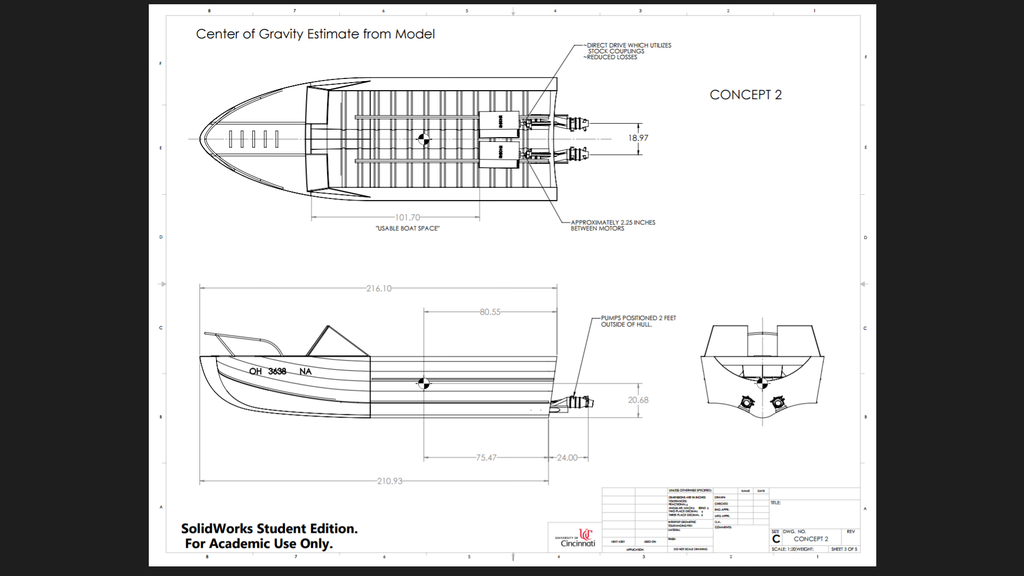


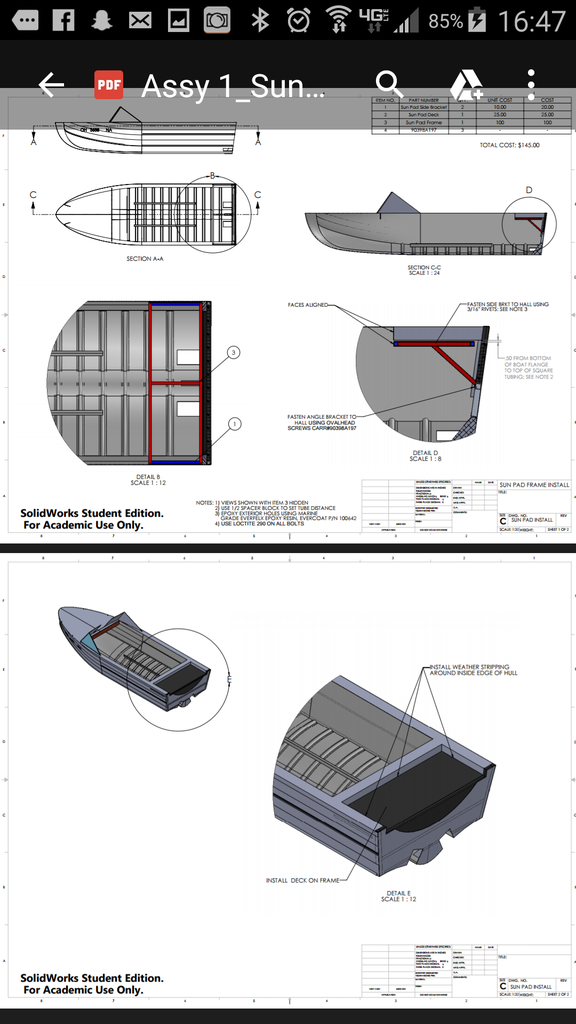
Since the engine and pump assemble is roughly 5 feet long, we going to stick 2 feet of the pump assembly out the back then build a Sun pad over top the engine bay where the splash well used to be.


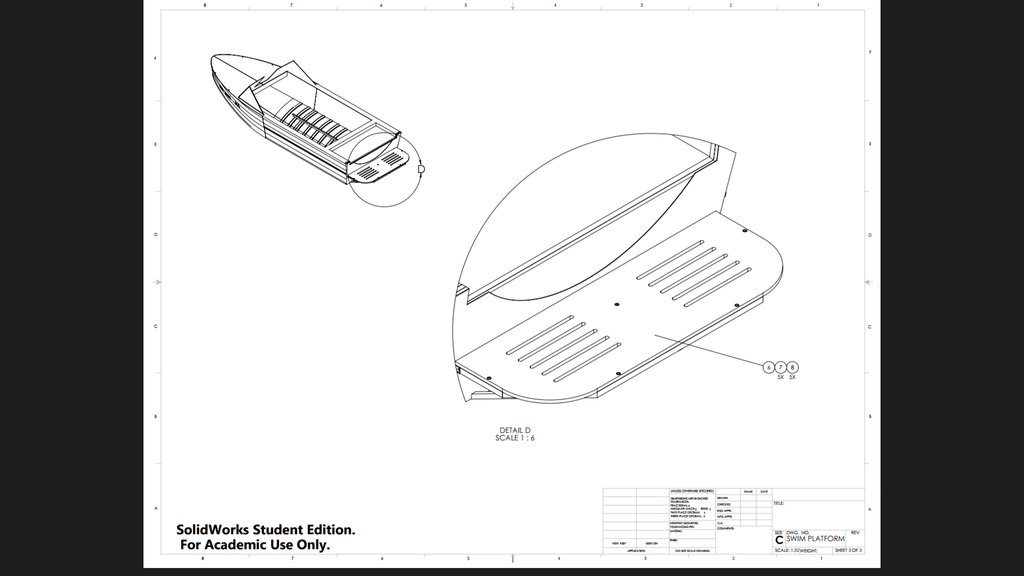
We also decided to build a swim platform to protect the pumps and to also allow swimmers easier access to and from the water.
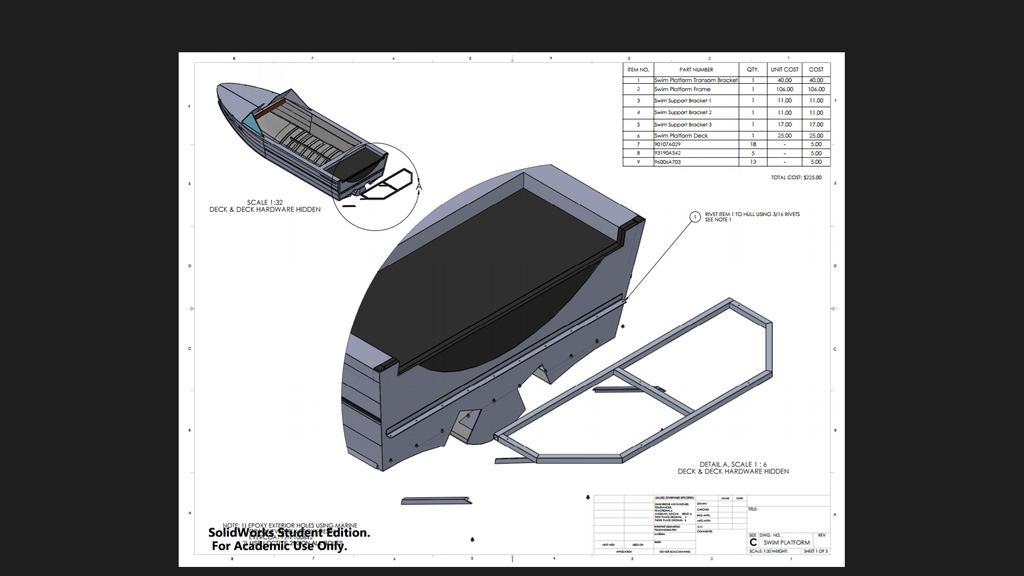
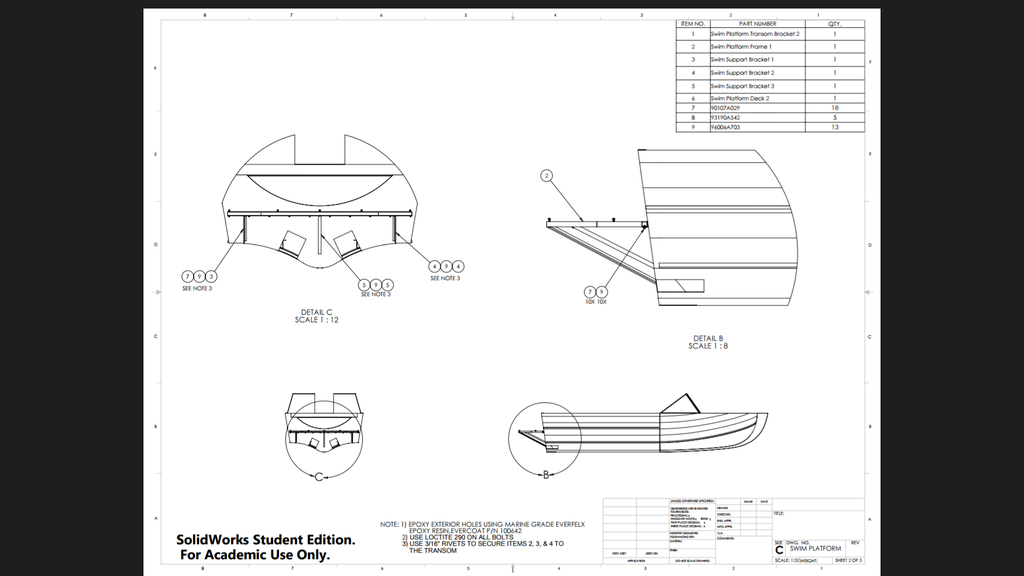


Last edited:

drev500

Seaman
Joined
Aug 31, 2015
Messages
61
My biggest challenge the last week was relearning how to tig weld. Aluminum is tricky due to the oxide layer that forms on the surface. This layer melts at a much higher temperate (3000+ degrees) where as aluminum will melt at 1200 degrees. You must burn through the oxide layer first before you starting applying filler. I haven't done this in 6 years so I watched many youtube videos to relearn but I finally got it back. They are not pretty by any means but the welds will definitely hold.

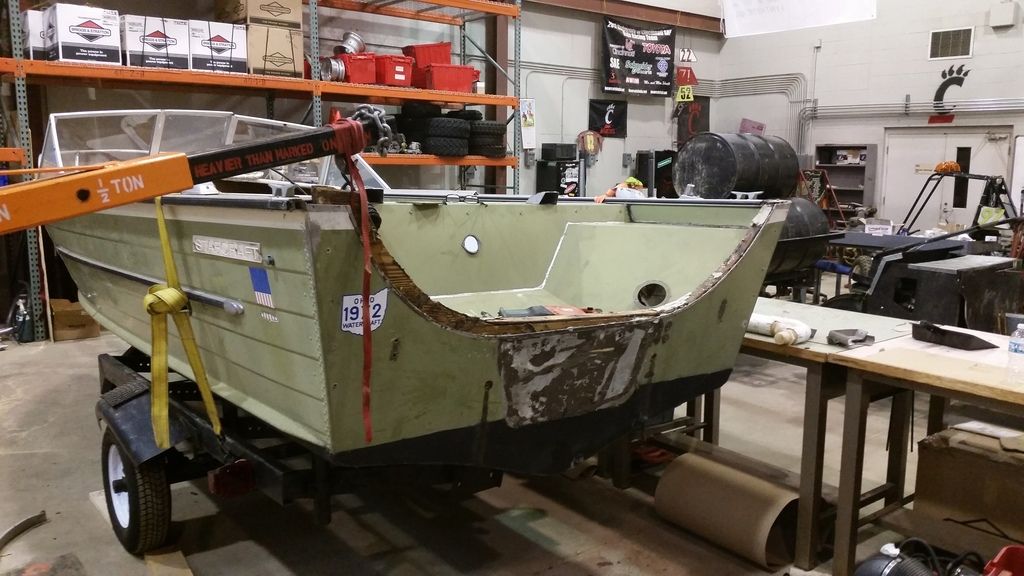
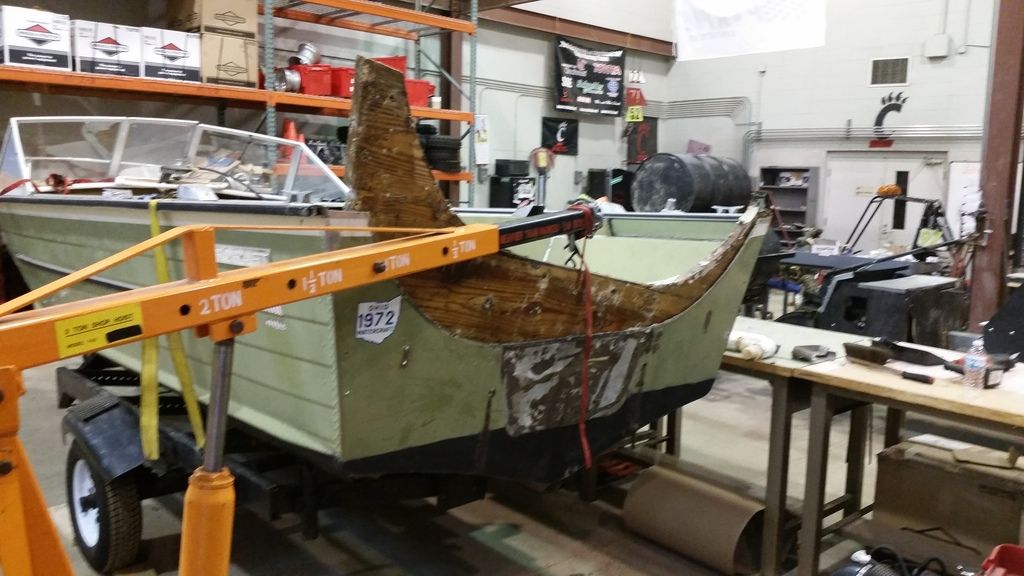
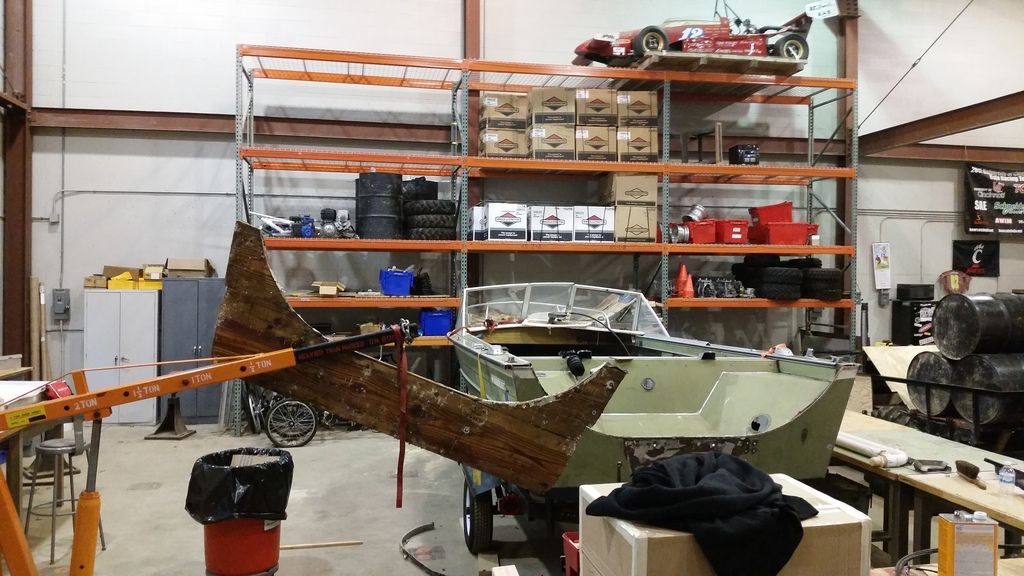
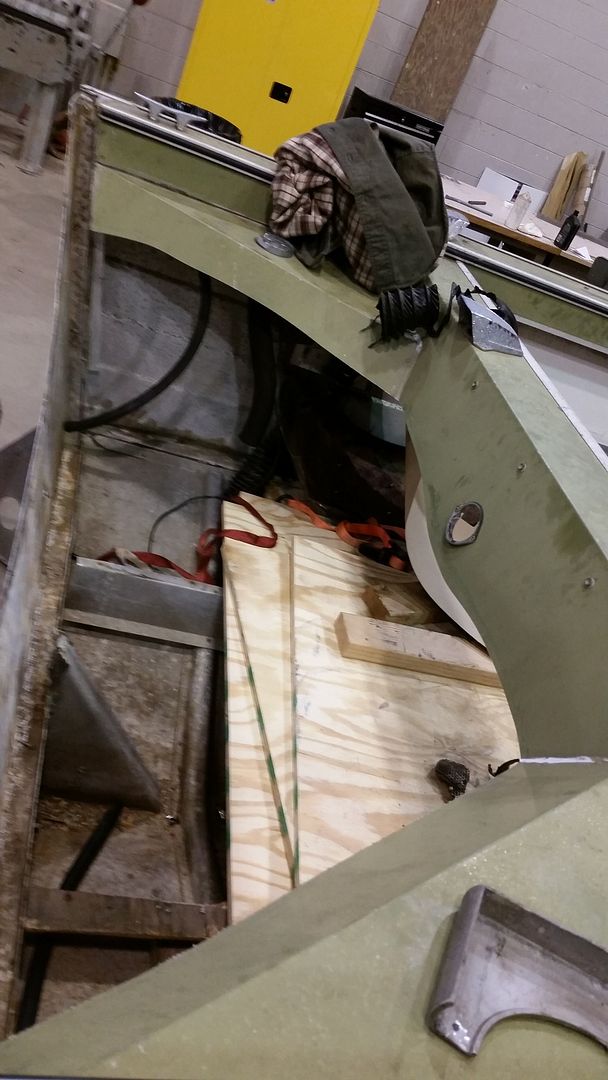
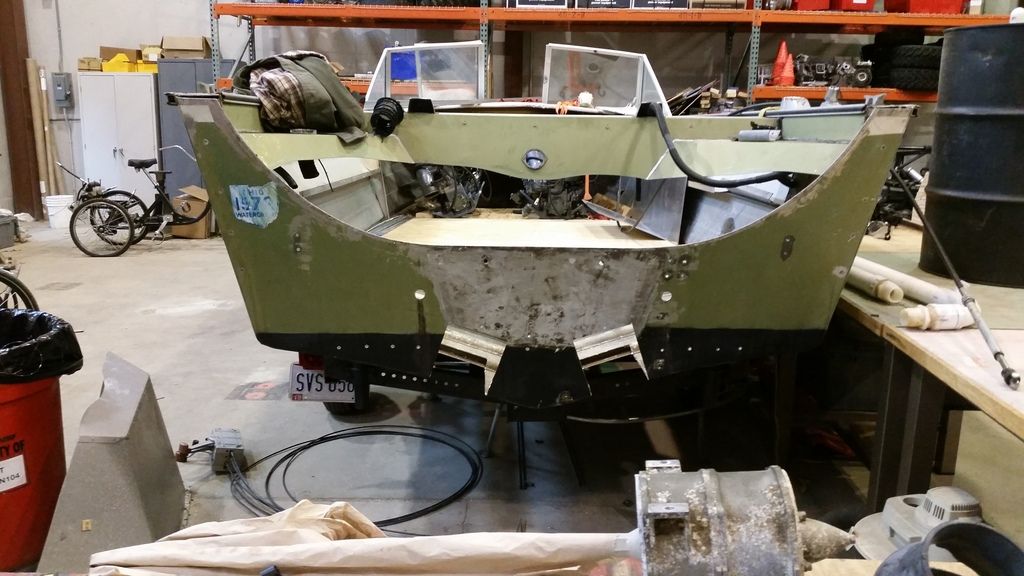
My first order of business to was to clean up the transom. Took me a few hours and a sawzall but I was able to remove the transom board, that little booger was in there good....


drev500

Seaman
Joined
Aug 31, 2015
Messages
61
You'll notice from the pictures that the shop I am working in is the senior lab that is used by other teams. I was lucky to secure a spot because I really had no where else to go and they have all sorts of nice Miller machines and CNC machines we can use.

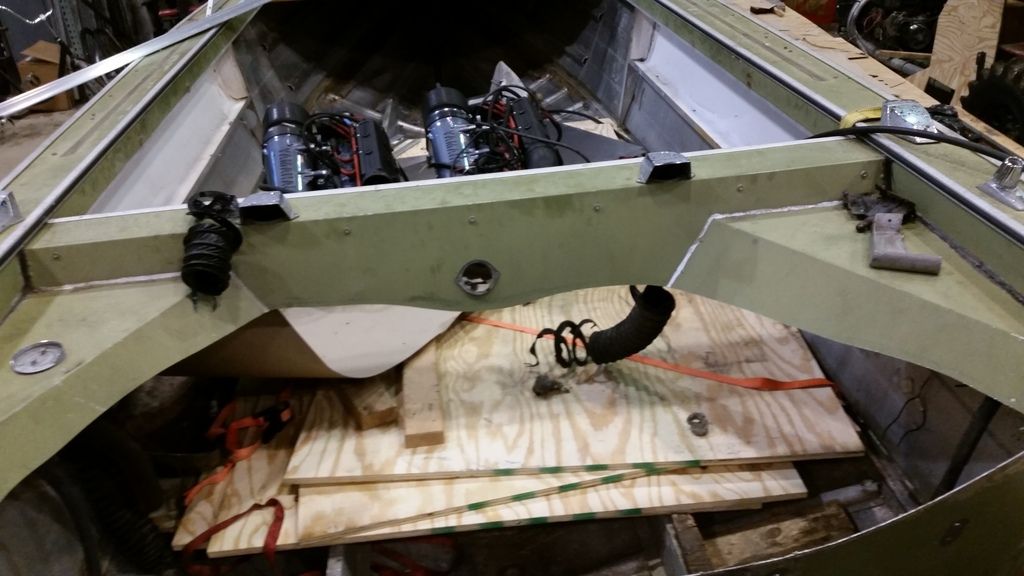
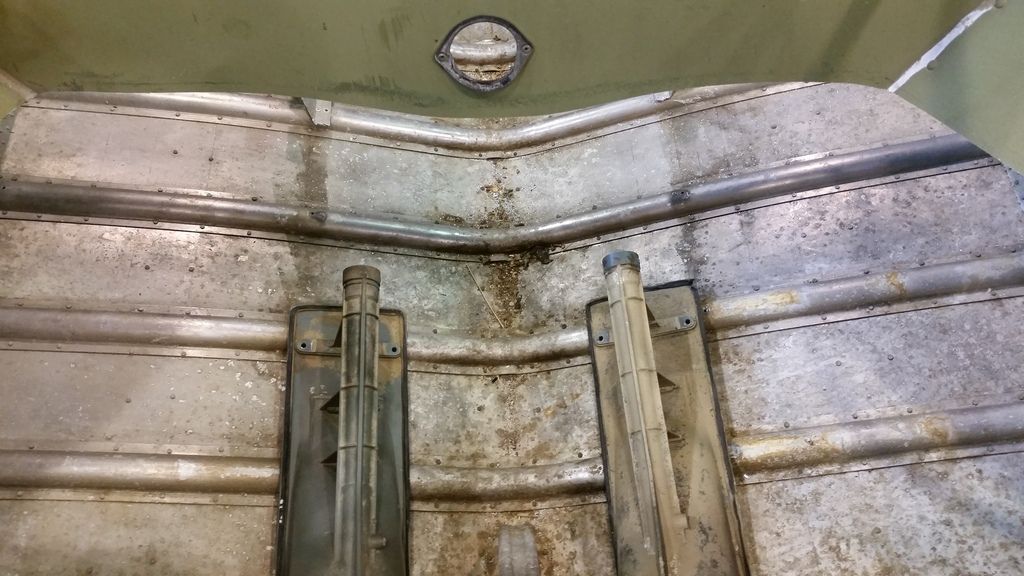
Well, with the transom board out, I set off to making a few slices...this was nerve racking. First, I made room by roughly cutting out the splash well. Boy was that loud. You can also see the two motors we will be using and some of the floor we cut to make walking around a little easier.


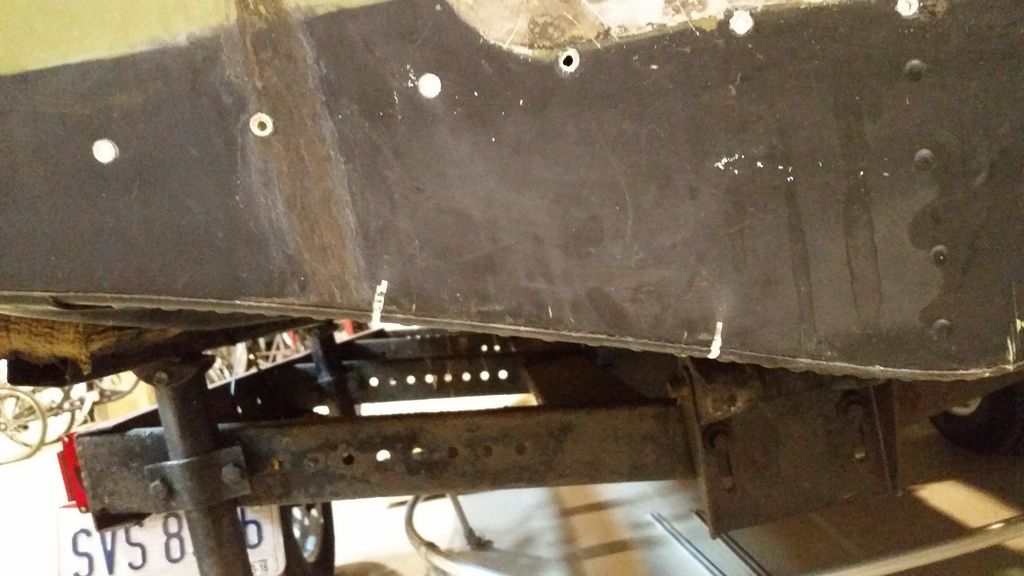
Next came marking the hull cut lines. I took the old measure twice, cut once and went with measure 15 times and make many little cuts....

Here I am using the pump intakes (shoe is what they are really called) to see how things look:


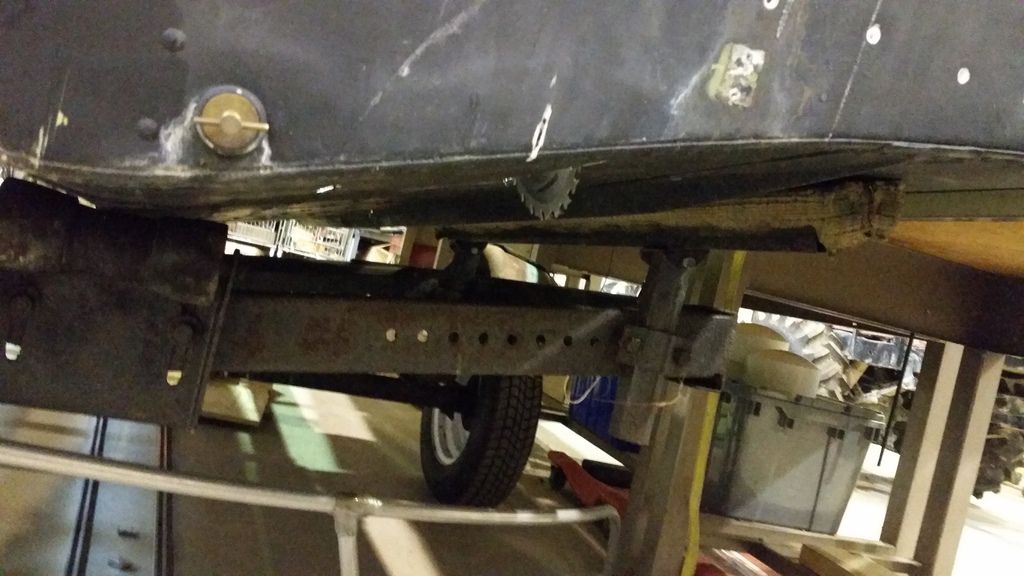
Now for the cutting... Baby steps


I didn't take too many pictures but it was a slow and messy process. Here is the final outcome


The holes were cut small so I could come back with a flap disc and shape them to the exact dimensions.
 

drev500

Seaman
Joined
Aug 31, 2015
Messages
61
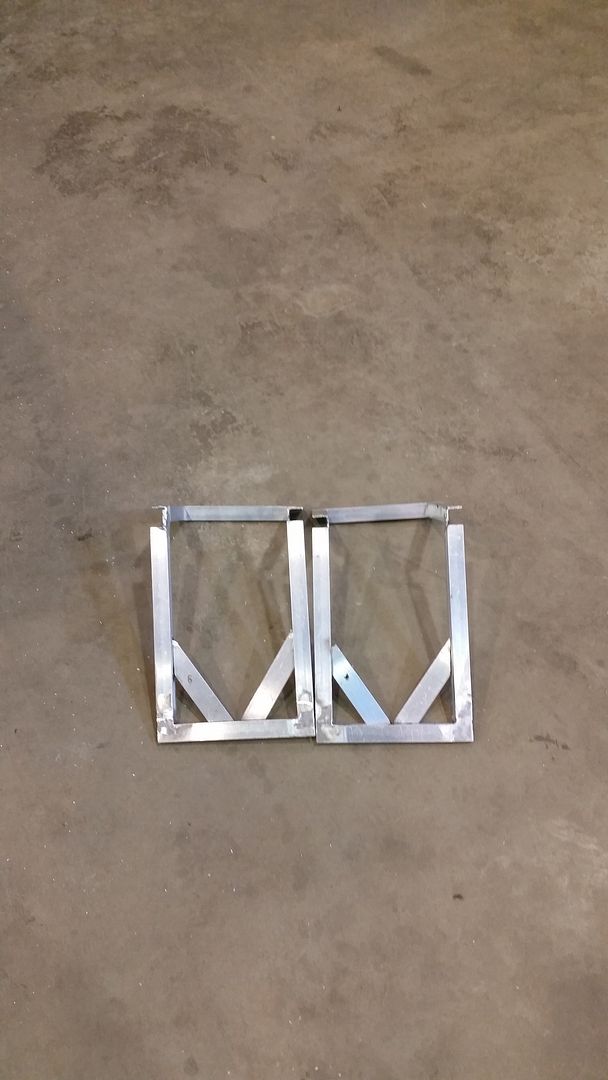
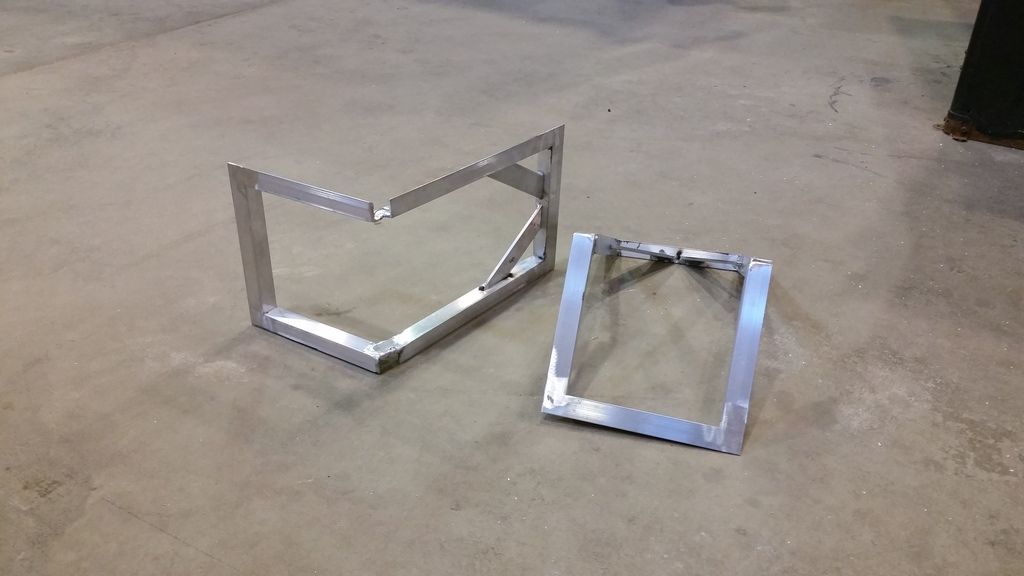
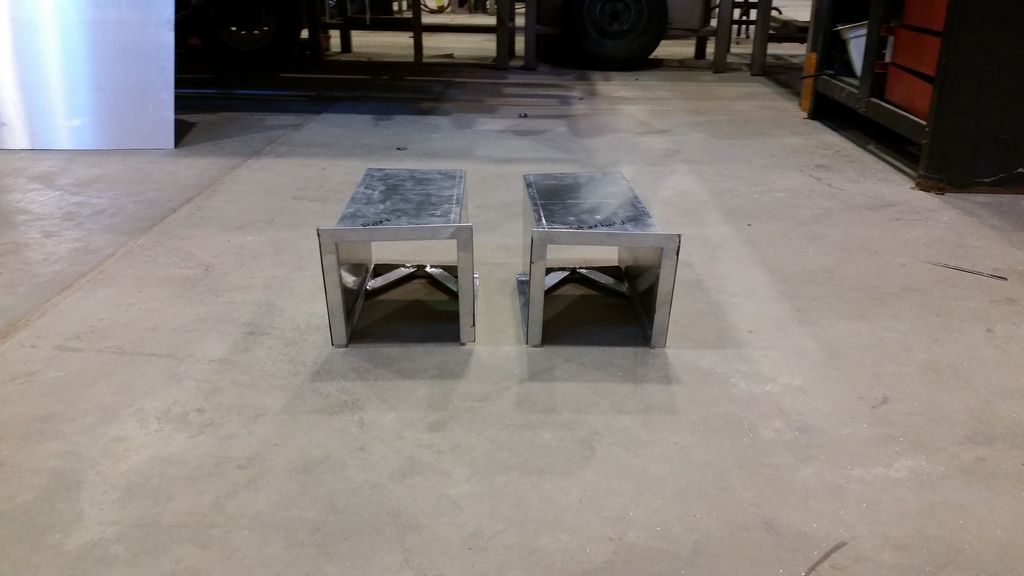
With the holes cut, today I set out to making the boxes which will house the pumps. These boxes will serve a few purposes. First, they will be responsible for keeping the water out. They will also hold the midshaft which connect the engine to the pump. This shaft is very critical because it seals out the water and is also what all the thrust is transmitted to. I was able to complete the angled aluminum perimeter and aluminum sheet exterior. The boxes should be completed Wednesday.


This is the end that will be joined to the transom.


drev500

Seaman
Joined
Aug 31, 2015
Messages
61
Once the boxes are complete, we will focus on making the exterior brackets that will connect the portion of jet pump that extend aft of the transom.

I am hoping to not allow more than a week in between updates. These next few months will have lots of progress as I have lots of time to devote to the project. Stay tuned. Thanks everybody!
 

Tnstratofam

Commander
Joined
Aug 18, 2013
Messages
2,679
Wow that's quite a lot of work. Looks like your plan is well thought out, and with the weight of the two drives compared to a SBC and Berkley combo I understand why you went that way. Keep up the good work, and keep,us posted on your progress.
 

drev500

Seaman
Joined
Aug 31, 2015
Messages
61
Wow that's quite a lot of work. Looks like your plan is well thought out, and with the weight of the two drives compared to a SBC and Berkley combo I understand why you went that way. Keep up the good work, and keep,us posted on your progress.


Thanks Dave! I will definitely keep progress up to date! Thanks for tagging along
 

drev500

Seaman
Joined
Aug 31, 2015
Messages
61
I also meant to mention, anyone interested in a bow railing that is in this picture? I wasn't too much of a fan of it so I removed it. Its straight and complete, would just need some touch up from weathering.

Mod EDIT: No offers in the open forum

 
Last edited by a moderator:

TruckDrivingFool

Lieutenant Commander
Joined
Jul 30, 2007
Messages
1,818
Other than the extra work with access to and the skills for TIG why not ditch the SW all together, weld in a filler to the OB cutout, and give her a more finished I/O aft with a sunpad/doghouse?

Just curious and I know baby steps work out the glamour after you make it work mechanically, thanks for the update. :)
 
Last edited:

Suprathepeg

Petty Officer 1st Class
Joined
May 25, 2015
Messages
259
So are you orienting the jets so that they are level coming out of the back of the boat? I'm thinking about how you will be able to turn.
 

drev500

Seaman
Joined
Aug 31, 2015
Messages
61
Other than the extra work with access to and the skills for TIG why not ditch the SW all together, weld in a filler to the OB cutout, and give her a more finished I/O aft with a sunpad/doghouse?

Just curious and I know baby steps work out the glamour after you make it work mechanically, thanks for the update. :)

I'm a little confused as to what you mean? What is SW?

We intend to fill in the O/B cut out. Thanks!

-Evan
 

drev500

Seaman
Joined
Aug 31, 2015
Messages
61
So are you orienting the jets so that they are level coming out of the back of the boat? I'm thinking about how you will be able to turn.

Hey Supra! I don't see turning being an issue. With the thrust vector of the nozzles, the boat will actually have a more aggressive turning style (so I assume). For example, if we were making a left turn, the port nozzle would be at the 10 o'clock position (look at the transom). This would push the boat down and the stern to the right, turning us left. The starboard nozzle would be at the 8 o'clock position whoch would push the stern right and up. This would in theory make the boat lean into the turn assuming we are under full power.

There is a company that makes jet drive boat using this style of nozzle position and the handling is excellent.
 

Attachments

  • standard.jpg
    standard.jpg
    55 KB · Views: 0
Top