Starcraft Holiday Reno and Hull Repair

Grandad

Lieutenant Commander
Joined
Jun 7, 2011
Messages
1,504
Re: Starcraft Holiday Reno and Hull Repair

A question please from your patch work.

Did you put a rivet into the stop crack holes you drilled or just leave them?

Thank you.
Hi Streetgang. Yes. I drilled holes slightly beyond where I could see the ends of the cracks to ensure the crack didn't propagate beyond the hole. You can see 3 pictures of the same crack in posts 8, 9 & 10. One from the inside and two from outside, one of those showing the 5200 oozing through the holes. - Grandad
 

Grandad

Lieutenant Commander
Joined
Jun 7, 2011
Messages
1,504
Re: Starcraft Holiday Reno and Hull Repair

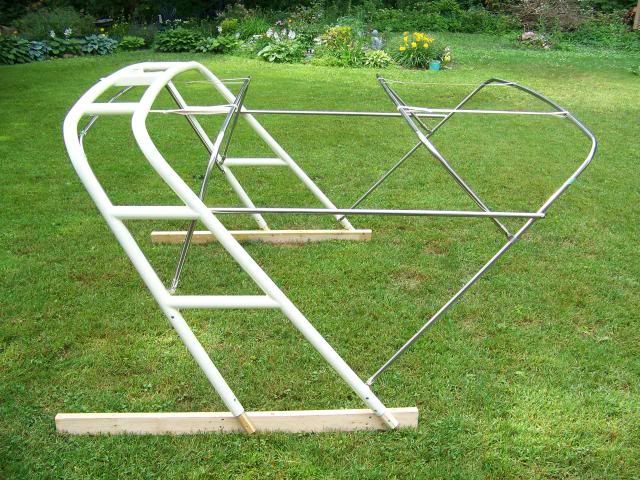
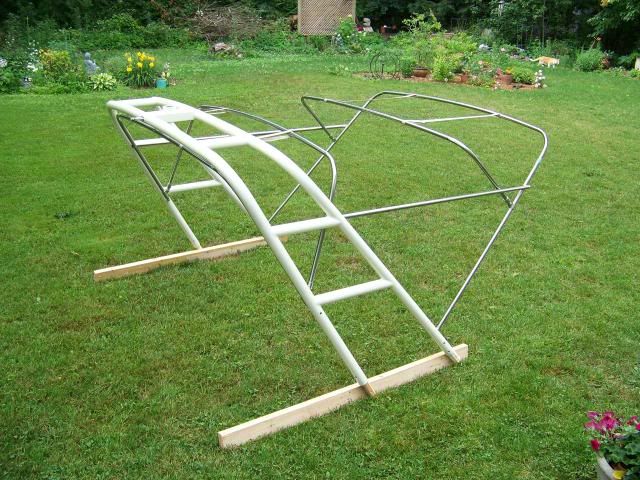
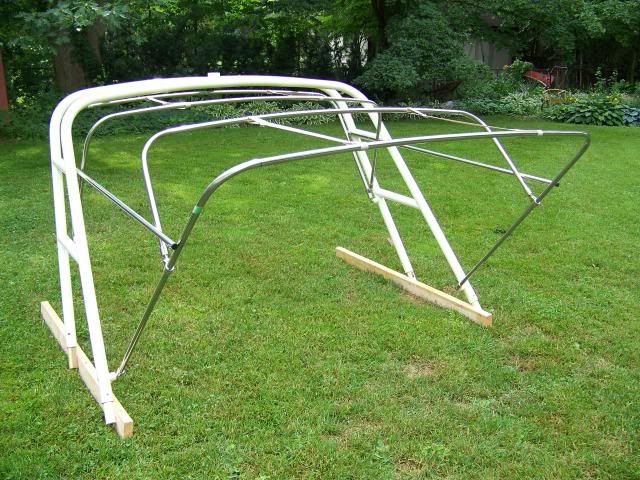
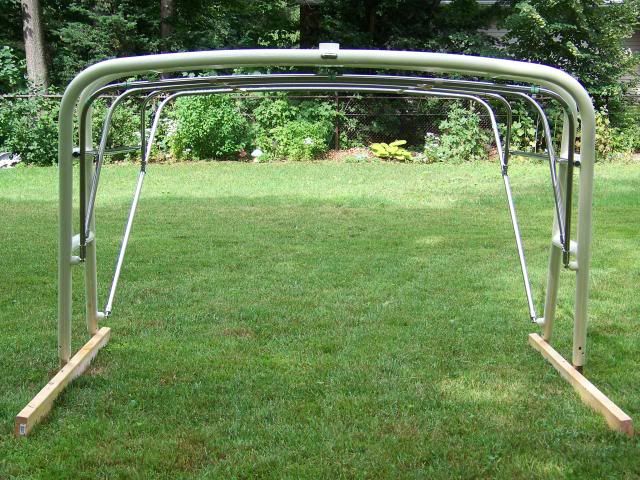
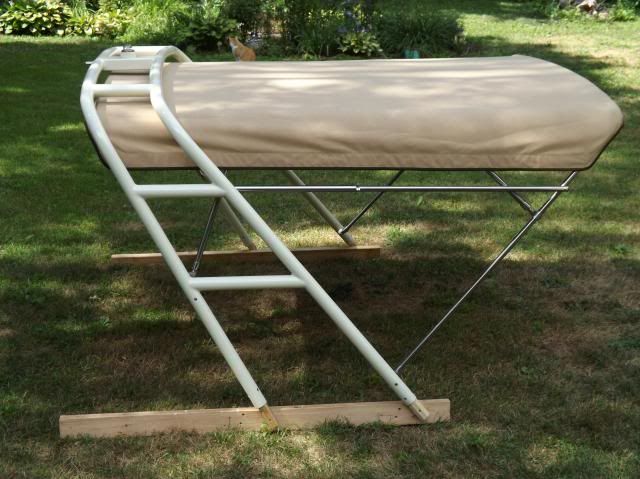
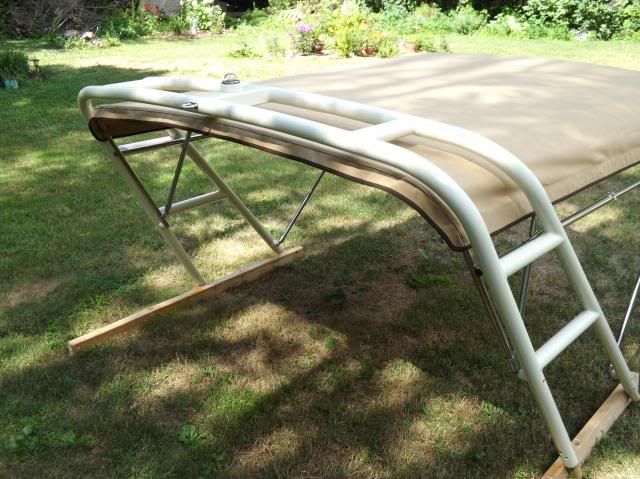
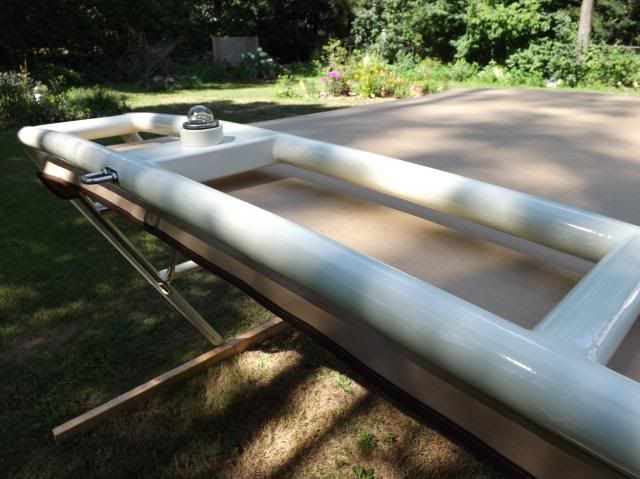
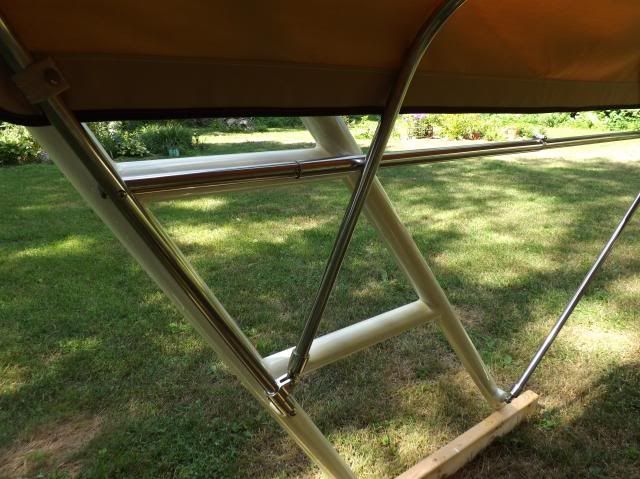
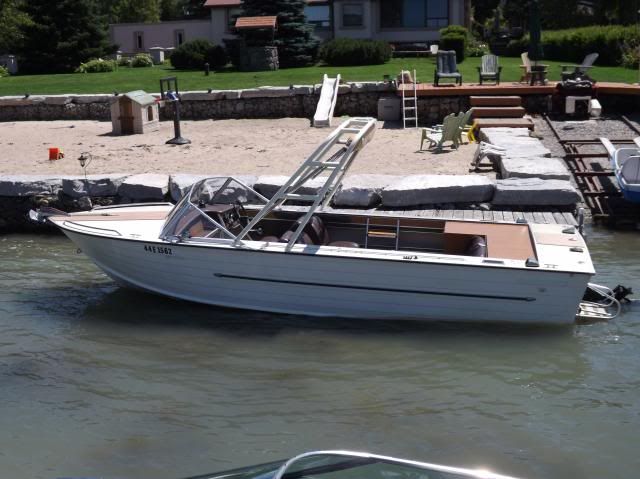
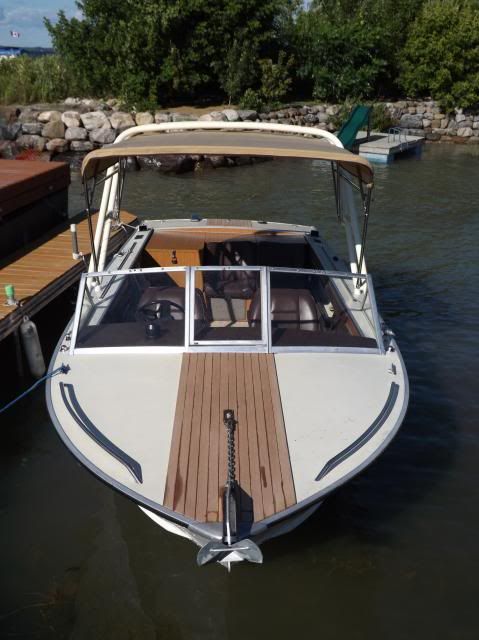
Hi guys. I've been progressing slower than I hoped on finishing the tower and top. I got the tower slathered in Tremclad (Rustoleum in US) as best I could by brush. Although I have a good compressor, I don't have spray equipment, so after this coat hardens in a month or so, I'll sand out the paint runs and rattlecan spray a top coat. I also considered the benefit of using hardener, but that sounds kinda hazardous to my health unless I also invest in some sophisticated PPE. I used a rattlecan to spray the mounting fittings and then baked them in the barbeque. Their paint came out great; hard and smooth baked enamel.

The tubing for the top is 7/8" stainless steel. I made a plywood jig to bend the crown in the tubes before bending the corners with a 3/4" EMT bender. It produced about a 6" radius bend which is less than I would have liked, but a larger, stiffer radius such as 10" would not have the bends concentric with the tower's bends. I like things suitably proportioned and I think the tubing bends pretty well match the tower. I've received an order of Sunbrella and all the notions to sew the top, so that's the next hurdle. - Grandad


jbcurt00

Moderator
Staff member
Joined
Oct 25, 2011
Messages
25,070
Re: Starcraft Holiday Reno and Hull Repair

Looks great Grandad
 

Grandad

Lieutenant Commander
Joined
Jun 7, 2011
Messages
1,504
Re: Starcraft Holiday Reno and Hull Repair

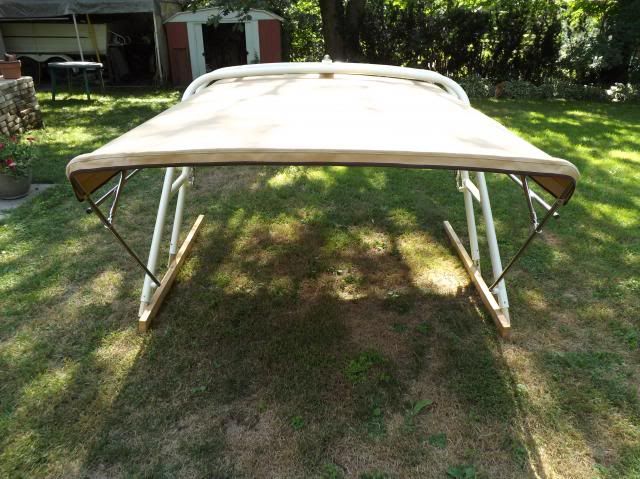
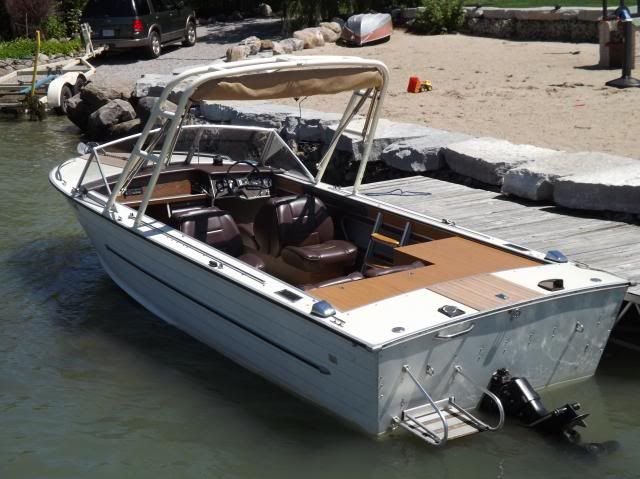
Some progress to report. Nana and I got the top sewn. Actually Nana did most of the sewing. I did the pattern designing and most of the worrying about the fit. It fits! We managed to get it done on a domestic machine, a Janome Memory Craft 8000. We tried to find a used industrial machine, but they were too pricey for one project. Anyway, the Janome struggled on up to 7 layers of Sunbrella, but it worked. We blew an internal overload fuse that was real fun to replace, buried in the heart of the beast. In the end, we managed, using a #18 Klasse needle for the V92 thread. When the going got tough, I applied a silicone lube product to the thread as Nana sewed. That seemed to make all the difference.


I don't like how most tops are fitted to the tubing using a zippered pocket because the tensioned canvas tends to center up on the circumference of the tubing such that it dimples at the bows. I used only snaps that pull the fabric smoothly on the topside of the bows and there's very little dimpling. I made a little stamping tool to curl the studs for the snaps so that they wrap snuggly on the stainless tubing when riveted in place. The most challenging part was trying to get the fore and aft visors patterned so that they will mate with a future forward windscreen and aft bimini and side curtains.


The top and tower are on temporary skids to provide easy access for building the stainless steel bows and fitting the top. Once assembled on the boat, I'll be able to make final adjustments to the length of the struts providing tension for the canvas. I'll be installing stainless Valco pushbuttons to pin the struts to length. For now, the length of the struts is maintained using gear clamps on the tubing. I pulled her out of winter storage yesterday to get ready for a splash soon. Feel the excitement. - Grandad


Watermann

Starmada Splash of the Year 2014
Joined
Jan 12, 2013
Messages
13,804
Re: Starcraft Holiday Reno and Hull Repair

That is just plain awe inspiring. Talk about some top notch workmanship, should last many years to come!
 

jbcurt00

Moderator
Staff member
Joined
Oct 25, 2011
Messages
25,070
Re: Starcraft Holiday Reno and Hull Repair

Truly awesome setup. Very well done!

I know at least 1 Holiday owner who'd love to be able to add a similar set up :rolleyes:
 

64osby

Admiral
Joined
Jul 28, 2009
Messages
6,826
Re: Starcraft Holiday Reno and Hull Repair

Very Sharp and awesome planning as usual.
 

low277

Petty Officer 2nd Class
Joined
May 23, 2011
Messages
117
Re: Starcraft Holiday Reno and Hull Repair

You are a man with many skills! Looks great!
 

Bubba_ct

Recruit
Joined
Jul 28, 2013
Messages
4
Re: Starcraft Holiday Reno and Hull Repair

I have lurked for a while, but this is actually my first post. I am in the middle of a restoration myself. I must agree with everyone else who has replied to this thread. I am in awe by the quality of the craftsmanship you have put into this. Inspiring to say the least.

Saying fantastic job doesn't even come close to the compliment you deserve. Keep up the good work!
 

Grandad

Lieutenant Commander
Joined
Jun 7, 2011
Messages
1,504
Re: Starcraft Holiday Reno and Hull Repair

Aw shucks guys. Yer embarrassing me! Thanks for the kind words.

Welcome to Iboats Bubba. Get yourself a thread going and post some pics. OK, I got the tower mounted and the top re-mounted to the tower. It's looking good on the trailer (no pics yet). I had the engine running on muffs today, for the first time this year. She was purring like a kitten. I was hoping for a splash tomorrow, but there's a strong wind warning in the marine forecast for Georgian Bay, so maybe not, or maybe elsewhere. The weather is also unusually cool, so may have to put it off, but it's a shame cuz it's getting late in the season already. - Grandad
 

jigngrub

Fleet Admiral
Joined
Mar 19, 2011
Messages
8,155
Re: Starcraft Holiday Reno and Hull Repair

That is a very good job on the top! We wanna see the installation.

Haven't had the boat out this year???... you're just wasting that thing! It's going to be snowing up there next month, then what're you gonna do?;)

Hope you get out soon... don't forget the camera when you do get'er on the water!
 

Grandad

Lieutenant Commander
Joined
Jun 7, 2011
Messages
1,504
Re: Starcraft Holiday Reno and Hull Repair

SPLASH !!!
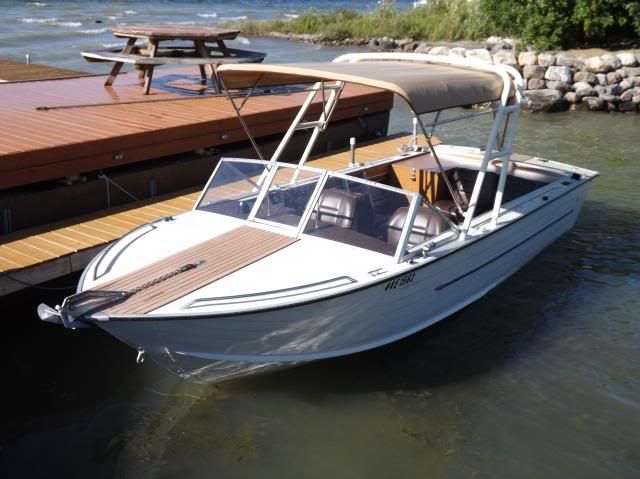
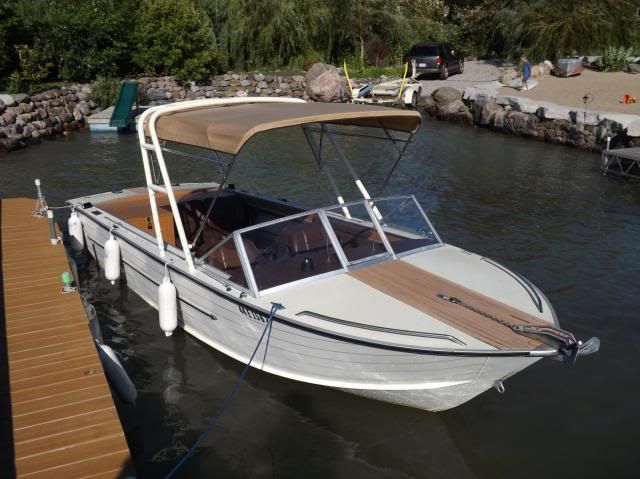
OK, we got her back in the water yesterday. It was a rough water day on Georgian Bay, wave average about 1 metre. Rafted for shelter at Sandpiper Bay on Beausoleil Island. We had a great day, but I was reminded of why I don't want an open bow boat. Even an 18' boat with less freeboard might have brought solid water over the deck. Picture taking offshore was not so easy, but I got some pics while tied inside a relative's protective breakwall. It's a beautiful location with it's own private launch ramp.


Everything went according to plan with the old Iron Duke running and shifting smoothly. The bilge accumulated a quart of water that I'm sure was only from spray. It was hard to see through the windshield most of the time. The port and starboard windshield panes are tempered glass that had water sheeting on them most of the time. It was actually easier to see through the center section that's plexi-glass because the water tended to bead. I have a pair of inoperative windshield wipers that came with the boat that I'm gonna refurb. I still have to wire the all-around light on the tower and replace one of the stern vents that's lost a stainless scoop.


I scrounged a pair of 12" square (maybe Bennet) stainless steel trim tabs from a scrap bin that I'd like to get mounted. I bought a pair of Smart Tab actuators through Iboats to smarten the install. I've also got a stern bimini top still to mount and figure how to mate with the new top. After yesterday's experience, I'd like to add a windscreen above the windshield so we can stay a little drier. Maybe some side curtains. The admiralty has requested some grab bars. I'd like twin trumpet air horns. Oh ya, the trailer needs paint. The list is endless. Ain't it great?


So I guess we'll say she's splashed, but I'll have a few more posts as these details are addressed. I'm afraid this boat refurb project may be the last for this old man. - Grandad
 

Willyclay

Captain
Joined
Sep 8, 2006
Messages
3,260
Re: Starcraft Holiday Reno and Hull Repair

Spectacular by any standards! Thanks for the update. Good luck with the list!
 

Watermann

Starmada Splash of the Year 2014
Joined
Jan 12, 2013
Messages
13,804
Re: Starcraft Holiday Reno and Hull Repair

What a shake down cruise! Lake Huron is some big water and is not for the faint of heart. May as well be out to sea when boating on those monster bodies of water. Glad to hear she did well with the tough conditions.
 

GWPSR

Senior Chief Petty Officer
Joined
Jul 25, 2012
Messages
758
Re: Starcraft Holiday Reno and Hull Repair

Absolutely gorgeous! That top (and tower) rivals anything available commercially by a long shot. Excellent work!
 

Huron Angler

Admiral
Joined
Apr 7, 2009
Messages
6,025
Re: Starcraft Holiday Reno and Hull Repair

Great project you've got there:)

The attention to detail is impressive. Having spent a great deal of time on Lake Huron I agree that it's good to have a place to tie up for a while and let the lake calm down. Nice work!
 

Pmccraney

Lieutenant Commander
Joined
Jul 26, 2011
Messages
1,734
Re: Starcraft Holiday Reno and Hull Repair

Wow....great work.. Turned out superb!
 

pckeen

Commander
Joined
Jun 20, 2012
Messages
2,067
Re: Starcraft Holiday Reno and Hull Repair

I'm afraid this boat refurb project may be the last for this old man. - Grandad

Don't worry - I've got one you can work on. You should bring this up to lake of the woods next year.
 

Grandad

Lieutenant Commander
Joined
Jun 7, 2011
Messages
1,504
Re: Starcraft Holiday Reno and Hull Repair

Hi Guys, I'm still progressing, but slowly. I got the FREE stainless trim tabs installed. They're 12" x 12" with a 1" deep fin on one side. I think they're Bennet's, but I bought the Smart Tabs 60 lb actuator conversion kit. Bennet says to install tabs as large as possible for your boat to get maximum benefit, whereas Nauticus seems to provide a smaller tab when you buy their complete package. Anyway, I had to choose either 60 or 80 lb actuators. Being a relatively light boat with modest horsepower and speed, I figured I'd err on the light side. I figure that the large surface area tab could be well suited to the 80 lb actuator on a heavier boat. I resolved that the actuator had to match the boat, not the tab. The extra surface area should just make for higher efficiency. I don't want to lose top end performance by adding drag that might happen with excess pressure on the tabs.

It was a fairly straight forward installation process. I was concerned about dissimilar metals, this being an aluminum boat. Anyway, I felt better after reading Tabman's 2 or 3 year old post on another website that it's common for Bennet to supply ss tabs to aluminum boat manufacturers. He recommended isolating the tabs from the hull, so I chose to mount them using 1/4"-20 wellnuts that are of neoprene construction, isolating the ss bolts and threaded brass inserts from touching aluminum. I also mounted the tab hinge plate on a heavy rubber pad for isolation and to accommodate the uneven transom surface as they bridged several rivets. The tabs came with zinc anodes attached that had corroded somewhat, so I spun them on the 100 year old lathe that I have and they cleaned up like new. I'm not sure they serve much purpose, mounted directly on the tabs, but maybe keep the stainless entertained rather than creating a circuit somehow with the hull.
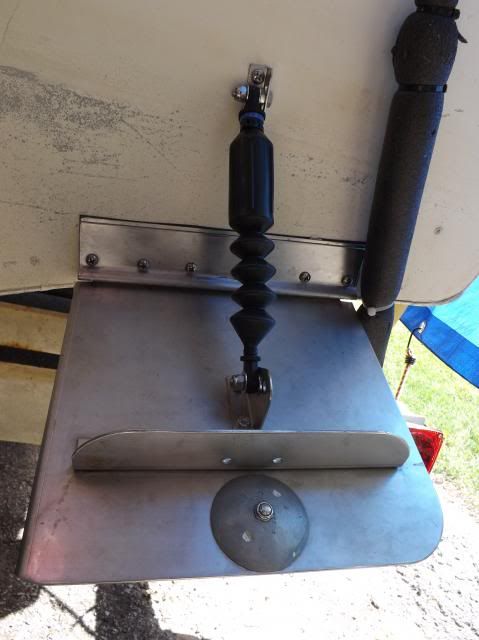


A couple of things that Smart Tabs might note:
- I had to replace a couple of the supplied 1/4"-20 assembly bolts that were too short to engage the nylon in the Nylock nuts. This might account for the occasional lost tab.
- There seemed to be a shortage of washers to ensure free movement on both sides of both ends of the actuators.
- There are 5 bolt holes for adjusting the tab mounting angle, but the hole closest to the tab can't be used since the actuator end mount is larger than the available space on the bracket.
- The instructions don't provide a preferred mounting location dimension for the brackets that mount to the trim tabs. This would not be necessary if you are using a pre-drilled Smart Tabs tab kit, but this is supposed to be a "conversion" kit for all makes. I just approximated their pictures.

The jury's still out on what performance improvements there might be. I've only had her out once with the tabs on and I had a somewhat heavier passenger load on relatively rough water. My top end dropped from a "normal" max 4200 to about 3800 RPM. I'm sure that we planed sooner without much bow rise and I think planed at lower RPM. I'll need another trip on calmer water with a lighter load before I'll even consider making the available adjustments to the tab position.

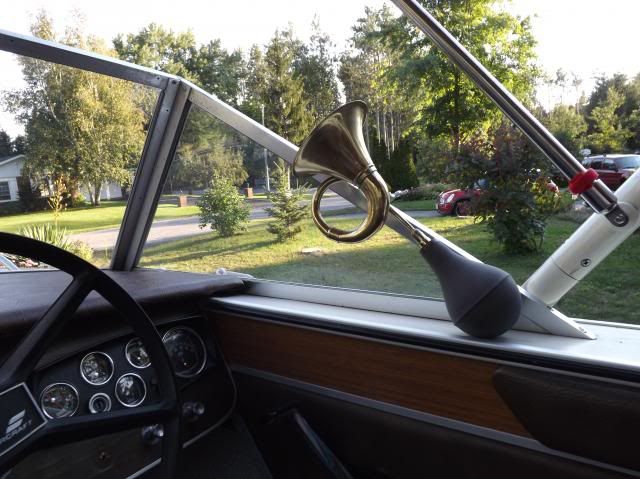
I had a flat and tread separation on a trailer tire on the last trip out and had to drop close to $500 on 4 new tires. My daughter heard that I wanted an air horn for the boat, so she bought me one. Well I guess it is an air horn. Whadya think? Should I mount it inside where I can reach it or mount it jauntily on the bow somewhere and reach over the windshield to use it?
Do you suppose it's a regulation sounding device? - Grandad
 

dozerII

Admiral
Joined
Oct 25, 2009
Messages
6,527
Re: Starcraft Holiday Reno and Hull Repair

Boy do you do awesome work Grandad, the top and everything is 1st class. If you have an Acklands Granger in your area you can buy Rustoleum Pro from them at a better price than Tremclad. I have used both and there is a big difference between the two. They carry the large industrial size spray cans as well as Gallons, even if you are brushing or rolling thin with acetone and it will speed your dry time by at least 20%. Once again great job.
 
Top