Shoestring Starcraft SS160 Resto-mod - let the long slow road begin

ShoestringMariner

Lieutenant Commander
Joined
Apr 18, 2015
Messages
1,600
Yeah the console fitment by SC was very, shall I say sloppy to say the least. My SS got 1/2" base decking with the raised decking fore and aft being 5/8". Still my console on the port side had to be shimmed to make for that perfect fit I was looking for. I used 2 pieces stacked of .080 AL wrapped in deck vinyl on the port side. So do what you have to in order to get them right, it may be that you have to shim the WS brackets where they attach to the gunnels.
Mine looked like...

y4mj14XhUkjlrOz_fWs0REBEHExHuuGdP49Nxm2jQZLczPApNlvv122FR26iGrrTlf8xpiYgcH-J4Ci42NbbEq2tZYli_wMXX031Ap0S00BDwTJjSOt7bXU9x7sojb85QJoujG6Bw4brg4zWQoWKrK-NEcjBMbzDmQkWcZEtiyPyL6s0VgE7YbKXjgzxepixBCJ
Thanks, another great build...and effective tweak. I like how you wrapped it.
 

mattsteg

Petty Officer 2nd Class
Joined
Mar 25, 2019
Messages
177
Yeah the console fitment by SC was very, shall I say sloppy to say the least. My SS got 1/2" base decking with the raised decking fore and aft being 5/8". Still my console on the port side had to be shimmed to make for that perfect fit I was looking for. I used 2 pieces stacked of .080 AL wrapped in deck vinyl on the port side. So do what you have to in order to get them right, it may be that you have to shim the WS brackets where they attach to the gunnels.
Mine looked like...

y4mj14XhUkjlrOz_fWs0REBEHExHuuGdP49Nxm2jQZLczPApNlvv122FR26iGrrTlf8xpiYgcH-J4Ci42NbbEq2tZYli_wMXX031Ap0S00BDwTJjSOt7bXU9x7sojb85QJoujG6Bw4brg4zWQoWKrK-NEcjBMbzDmQkWcZEtiyPyL6s0VgE7YbKXjgzxepixBCJ
Lol my entire boat was assembled quite asymmetrically.
 

ShoestringMariner

Lieutenant Commander
Joined
Apr 18, 2015
Messages
1,600
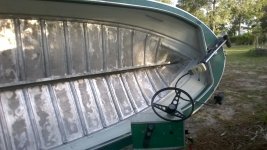
How nuts do you think it is to do a rebuild without rebucking my rivets and using gluvit before the floors go in?

I really don’t have any time to muck around with “just in case” processes. My boat is and will always be trailer stored. Any time I leave it in the water for a few days, it doesn’t seem to take on any water. I’m early 50’s and I’ll realistically be done boating in 20 years. If I even keep this boat more than 10 before wanting something else anyway.
Anyone think it’s a mistake for my intended use?
 

Watermann

Starmada Splash of the Year 2014
Joined
Jan 12, 2013
Messages
13,794
Just inspect the rivets for obviously damaged solids that have a tipped, ground down or missing heads that might become an issue later on. Some boats were never abused in a manner that you would have to re-buck any.

My SS needed about 300 replaced not from abuse, just for reasons I can't explain only guess about where the heads would fall off easily. Then my Chief only a few needed replaced and a few more that were needing re-bucked. I didn't do them all only those that needed it. In all reality only the seams should need the epoxy sealer on them especially the keel area. You can put a dab on the rivet bucktails "in the field" but don't worry about the ones in the ribs, the product will not be able to seal them between the rib and the hull.
 

SHSU

Lieutenant Junior+Starmada Splash Of The Year 2019
Joined
Mar 8, 2017
Messages
1,741
Are you going to check for leaks or not bother?

Gluvit seems like cheap peace of mind/insurance since you already have the flooring out and only takes 30 minutes to apply.

Just my 2 cents...

SHSU
 

ShoestringMariner

Lieutenant Commander
Joined
Apr 18, 2015
Messages
1,600
Just inspect the rivets for obviously damaged solids that have a tipped, ground down or missing heads that might become an issue later on. Some boats were never abused in a manner that you would have to re-buck any.

My SS needed about 300 replaced not from abuse, just for reasons I can't explain only guess about where the heads would fall off easily. Then my Chief only a few needed replaced and a few more that were needing re-bucked. I didn't do them all only those that needed it. In all reality only the seams should need the epoxy sealer on them especially the keel area. You can put a dab on the rivet bucktails "in the field" but don't worry about the ones in the ribs, the product will not be able to seal them between the rib and the hull.
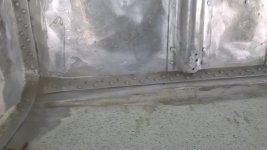
There’s some corroded looking ones along the chine that I will be replacing. The ones underneath look good and the thought of having to try and rebuck these while on the trailer, or propped up on the lawn etc seems like a big process and a hassle getting others involved.
 

ShoestringMariner

Lieutenant Commander
Joined
Apr 18, 2015
Messages
1,600
Are you going to check for leaks or not bother?

Gluvit seems like cheap peace of mind/insurance since you already have the flooring out and only takes 30 minutes to apply.

Just my 2 cents...

SHSU

We’re in yet another covid lockdown. Launches and marinas are closed. If they are open when I’ve replaced the chine rivets, I’ll do a float test and check.

questions about gluvit; do I need to do a chemical wash inside? Do I need to roll the hull around this way and that when applying?
If not, then yes, I’ll probably do it.
 

ShoestringMariner

Lieutenant Commander
Joined
Apr 18, 2015
Messages
1,600
Just inspect the rivets for obviously damaged solids that have a tipped, ground down or missing heads that might become an issue later on. Some boats were never abused in a manner that you would have to re-buck any.

My SS needed about 300 replaced not from abuse, just for reasons I can't explain only guess about where the heads would fall off easily.
I found 2 on the transom rebuild where the head had popped off, but the stem was still firmly embedded. Should I for a light tap test them all with a cold chisel and small hammer? The only ones I had planned on replacing are any that are deeply pitted. I wasn’t going to bother with any with tiny pitting.

In all reality only the seams should need the epoxy sealer on them especially the keel area.

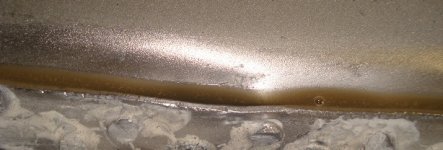
I had a little tin boat that had a dried keel plug. It let in a ton of water quickly. I fixed it with a tube of 5200. Figured I’d put a bedding of 5200 in the keel area on this one just in case
 

BWR1953

Admiral
Joined
Jan 23, 2009
Messages
6,195
We’re in yet another covid lockdown. Launches and marinas are closed. If they are open when I’ve replaced the chine rivets, I’ll do a float test and check.

questions about gluvit; do I need to do a chemical wash inside? Do I need to roll the hull around this way and that when applying?
If not, then yes, I’ll probably do it.
If you want the Gluvit to do its goodness, then yes you need to maneuver the hull around so that the Gluvit can seep down deep into all of the crevices. I moved my boat around quite a bit during application, but the end result was a bone dry hull. Period. 😎

I could have used only a quart of Gluvit for my 16' Kingfisher if I hadn't been so sloppy. 🙃

At the time, I had nowhere other than outside in the yard to apply the Gluvit. So I did that.
starboard down2.jpg


The Gluvit is about the consistency of skim milk, so it really gets down deep to seal things up. 👍🤓
gluvit starboard stern2.jpg
 

ShoestringMariner

Lieutenant Commander
Joined
Apr 18, 2015
Messages
1,600
Oh well, Gluvit it is. I found more groups of bad rivets. Seam separated slightly once rivets drilled and punched. Front keel strip is bad. Missing lots of rivet heads.
 

SHSU

Lieutenant Junior+Starmada Splash Of The Year 2019
Joined
Mar 8, 2017
Messages
1,741
how much do you think I will need for my 16’?
A 2lb kit is enough to do the seems and rivet tails.

I suggest using a syringe to lay a nice bead along the top of the seems so it can seep in between and do what its supposed to. DSC03618.JPG

Then you can come back along with a brush to hit the rivet tails.

Also, I would recommend doing the math and figure out how to make small batches like I did. You will find others talking about the Gluvit kicking and starting to harden while people are still applying since they mixed it all in one go. Doing a couple small batches eliminates that problem and makes it less stressful

SHSU
 

Michigan Lakes

Petty Officer 3rd Class
Joined
Dec 20, 2018
Messages
86
I suggest using a syringe to lay a nice bead along the top of the seems so it can seep in between and do what its supposed to.
I'd highly recommend this. My SS16 has very minimal leakage when light cruising etc, however I can easily build up several gallons in the bilge (if the pump's off) when running hard. I suspect this water intrusion is coming from the seam along the chine area. I used the vast majority of my Gluvit quart on rivet heads. This was a mistake.
 

ShoestringMariner

Lieutenant Commander
Joined
Apr 18, 2015
Messages
1,600
No photos to show but spent 3-4 hours replacing rivets yesterday. We couldn’t get a few tight at the rib end locations. I’m going to have to make a bucking bar. My poor neighbours. I’m sure they were ready to shoot me from all the noise. I wore earplugs and my ears are still ringing.

I still have a few dozen to do at the bow plate at bottom by the keel. Totally eroded and hard to find like they were never there.
I picked up my Gluvit too.
 

SHSU

Lieutenant Junior+Starmada Splash Of The Year 2019
Joined
Mar 8, 2017
Messages
1,741
No photos to show but spent 3-4 hours replacing rivets yesterday. We couldn’t get a few tight at the rib end locations. I’m going to have to make a bucking bar. My poor neighbours. I’m sure they were ready to shoot me from all the noise. I wore earplugs and my ears are still ringing.

I still have a few dozen to do at the bow plate at bottom by the keel. Totally eroded and hard to find like they were never there.
I picked up my Gluvit too.

What our neighbors hear. lol

I know how that goes. We had to do all of our work in a garage with the door closed. We used earplugs with earmuffs on top. That help keep it reasonable.

As for the eroded and hard to find, we used the tails to identify if we had missed any. All that brown sealant from the factory really hides some of them, but doing it now will help keep a leak free boat in the future.

SHSU
 

ShoestringMariner

Lieutenant Commander
Joined
Apr 18, 2015
Messages
1,600
Frustrating weekend.
Spent more time replacing rivets, laying on my back on a creeper. Had issues buttoning up those that didn’t go through cleanly. Had to remove a batch. I also found that the 7/16 weren’t long enough In some cases. I think I’ll have to look for some longer ones. Had issues with a setting tool. More rivets than I care to admit have nasty smiles. Good enough though, I’m not drilling those out AGAIN.

I couldn’t get a bucking tool down to set the bottom row chine at the rib ends. what did you guys do for a bucking tool in these areas?
for the random number of rivets at these locations I might actually use soft alloy

Feeling rather disenchanted with this project today. Time for a nap
 

SHSU

Lieutenant Junior+Starmada Splash Of The Year 2019
Joined
Mar 8, 2017
Messages
1,741
Frustrating weekend.
Spent more time replacing rivets, laying on my back on a creeper. Had issues buttoning up those that didn’t go through cleanly. Had to remove a batch.
Admiral and I know how that goes. It took us over 2 months to redo all the rivets. We had our fair share of rivets that had to be drilled and new ones put in. We had weekends that we seem'd to fly and everything was working great. Other weekends seemed like we only made it a foot.....

I couldn’t get a bucking tool down to set the bottom row chine at the rib ends. what did you guys do for a bucking tool in these areas?
for the random number of rivets at these locations I might actually use soft alloy
We were fortunate we saw that when we were doing the other areas. You have to do it with the ribs removed. Then install the rib over the top.

Feeling rather disenchanted with this project today. Time for a nap
You got this!!!! If the admiral stuck it out, you can too!!!!

SHSU
 

ShoestringMariner

Lieutenant Commander
Joined
Apr 18, 2015
Messages
1,600
Thanks for the good words of encouragement. I hope to have the rivets done and sealed by next weekend. I’m not putting chine braces in, only replacing corroded rivets. I thought about slicing a small bit of rib off to get a thicker bucking tool in but was worried about compromising the rib end strength and hull support.
 

SHSU

Lieutenant Junior+Starmada Splash Of The Year 2019
Joined
Mar 8, 2017
Messages
1,741
I thought about slicing a small bit of rib off to get a thicker bucking tool in but was worried about compromising the rib end strength and hull support.

Question I would ask is which is more of a concern, the corroded rivets or the edge of the rib? I don't have the answer, but would think it through if I wasn't planning on doing a whole rib removal/reinstall.

SHSU
 

ShoestringMariner

Lieutenant Commander
Joined
Apr 18, 2015
Messages
1,600
Question I would ask is which is more of a concern, the corroded rivets or the edge of the rib? I don't have the answer, but would think it through if I wasn't planning on doing a whole rib removal/reinstall.

SHSU
I’ve decided to use closed end blind rivets for these random locations. 5-6 places maybe. I have to get this thing moving if I want to use it this year. I’m not restoring a 1969 Charger on a rotisserie...I just need it to work and plug the holes I just put in it lol. I’m not trimming rib ends.

I’m also not replacing every rivet that has a little crater in it. This boat will never be water stored except for maybe a few weeks a year plus day use. I’m sure a touch of Marine Tex and a coat of paint will prevent them from getting much worse in the next 10-15 years of use. If they do, the next guy can figure it out.
 
Last edited:
Top