Replacing my 16ft SS Starcrafts Transom

Tnstratofam

Commander
Joined
Aug 18, 2013
Messages
2,679
Re: Replacing my 16ft SS Starcrafts Transom

Thanks Jb that is the diagram of the tool I needed. Also I am going to put a backing plate on the tow hooks. I think I saw in Sig's thread on his 18ss some round plates he had for his. I'm going to find something or make something. That's why I hadn't drilled the holes for them yet so I can do my leak test on Thursday even If I don't have them yet.
 

GA_Boater

Honorary Moderator Emeritus
Joined
May 24, 2011
Messages
49,038
Re: Replacing my 16ft SS Starcrafts Transom

Happy Anniversary!

Stainless can be brittle. And if those are the original, work hardened, which adds to the brittleness.

I stayed with nails, found some bronze nails at a big box. Most of the originals were bent like pretzels.
 

Tnstratofam

Commander
Joined
Aug 18, 2013
Messages
2,679
Re: Replacing my 16ft SS Starcrafts Transom

Thanks GA. Almost all the nails came out pretty straight, but they were a little rusty. I figured It I could find some bronze nails or small stainless screws that would be okay. Yep the bolts were original. They all looked good even that one. I think I just got a little to excited with that one. Of course it was the last one I installed.:mad-new:
 

jbcurt00

Moderator
Staff member
Joined
Oct 25, 2011
Messages
25,070
Re: Replacing my 16ft SS Starcrafts Transom

I think EZ skipped nails & screws entirely & just attached the transom cap w/ 5200 & taped it down until cured.

If you don't mind making the cap holes a little bit bigger, and pre-drilling the rest of the hole, aluminum carpet tack nails are very similar but (if I remember correctly) just a little larger in diameter. Same twisted screw-nail look as the original w/ a slightly domed head.
 

dozerII

Admiral
Joined
Oct 25, 2009
Messages
6,527
Re: Replacing my 16ft SS Starcrafts Transom

Great job your doing on the transom, I use #6 x3/4 Stainless steel screws to reinstall the transom caps and all the aluminum trim that StarCraft used nails for. I find they don't back out like the nails did and it allows you to seal the holes with 3m when your installing the screws.
 

lakelover

Rear Admiral
Joined
Mar 26, 2003
Messages
4,386
Re: Replacing my 16ft SS Starcrafts Transom

Quite a difference! It might not be a bad idea to just go with 5200 for gluing the cap back on. That cuts way down on chances for water intrusion through the surface of your sealed wood over time through the nail or screw holes. Nice drill guide, I'll have to look into that, kind of like a portable drill press. It's looking real good!!
 

duke33

Petty Officer 1st Class
Joined
Apr 2, 2012
Messages
353
Re: Replacing my 16ft SS Starcrafts Transom

Purdy Transom!
 

GA_Boater

Honorary Moderator Emeritus
Joined
May 24, 2011
Messages
49,038
Re: Replacing my 16ft SS Starcrafts Transom

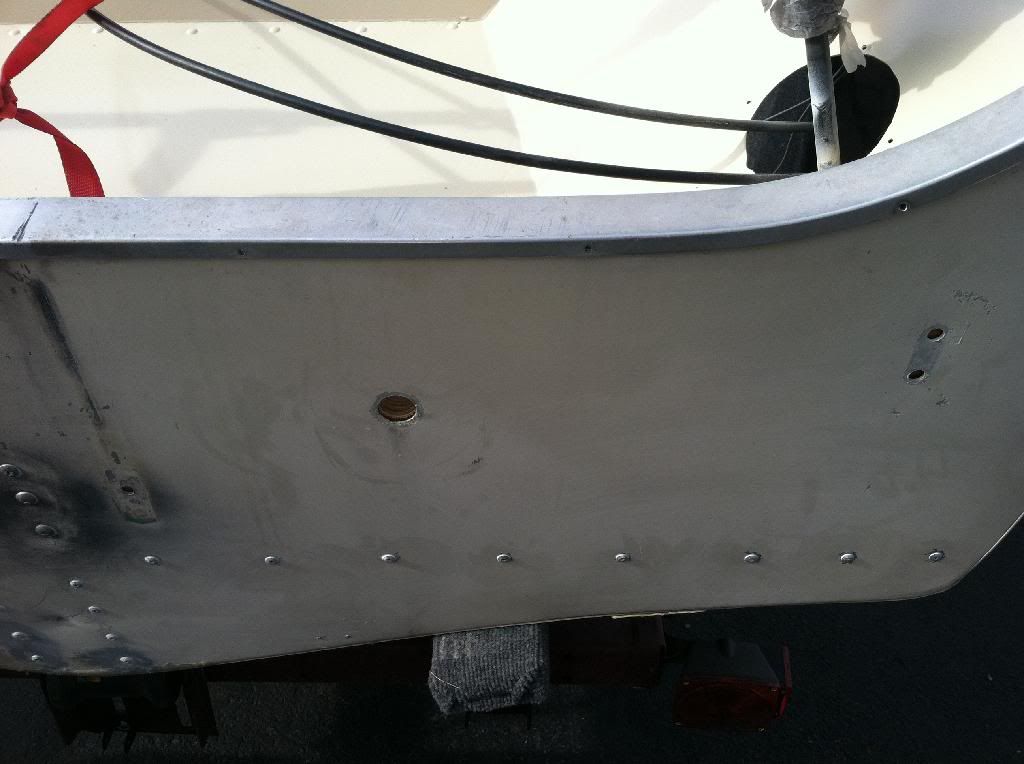
Hey Tn - I meant to say this the other day and it slipped my mind. On the rivets put a smear of 5200 in the shank hole. If the mandrels are steel it might stop rust stains from coming through. You can never slop enough 5200 on any hole. And it makes great whitening toothpaste, too. :D
 

Tnstratofam

Commander
Joined
Aug 18, 2013
Messages
2,679
Re: Replacing my 16ft SS Starcrafts Transom

I found a replacement bolt for the one I broke, and installed it this morning. I'm wondering if the 5200 will be cured out enough by 5:00 or 6:00 so I could leak test her at the lake tonight. If I need to wait a full 24 hours for it to cure that's okay. I have plenty of other stuff to work on in the meantime.

GA you read my mind. I am going to fill in all the rivet shank holes when I'm sure I have no leaks. The rivets I got have an aluminum mandrel so no rust, but I don't want any holes showing either. When I got finished the other night the Admiral wanted to know how I managed to get the 5200 all over everything. She helped me install some of the bolts, and realized the stuff sticks to everything. The first mate said the mek used to clean it up smelled horrible. I told him it's better than going to bed with sticky fingers like Clark from Christmas Vacation.:laugh:
 

GA_Boater

Honorary Moderator Emeritus
Joined
May 24, 2011
Messages
49,038
Re: Replacing my 16ft SS Starcrafts Transom

You are BAD! Getting the Admiral to smear 5200. Too much! But now she knows. :D

Did you use the fast cure 5200? The slow cure takes about a week to fully cure. But water helps speed up the cure supposedly.
 

Tnstratofam

Commander
Joined
Aug 18, 2013
Messages
2,679
Re: Replacing my 16ft SS Starcrafts Transom

I think it's the regular type. Are you serious it takes a week to cure. That sucks, but it would figure. Everything with this transom has taken me twice as long as I planed.
 
Last edited:

lakelover

Rear Admiral
Joined
Mar 26, 2003
Messages
4,386
Re: Replacing my 16ft SS Starcrafts Transom

I think you could do your leak test today, that 5200 ins't going to go anywhere, and it will only be wet for a short time during your test anyway. I'd say go for it! It's either going to have some leaks or it's not, putting it in the water won't make any difference.
 

Tnstratofam

Commander
Joined
Aug 18, 2013
Messages
2,679
Re: Replacing my 16ft SS Starcrafts Transom

I just came by my house and checked it is the regular 5200 not the fast cure :facepalm: I checked on the bolts I installed Tuesday night and the sealant is still a little tacky, but not coming off on my finger. If the bolt I installed this morning is just tacky this afternoon then I will probably go ahead and take her to the lake for a quick dip. Now I'm only putting her in the water to check for leaks at the knee brace and anywhere below the water line where I replaced rivets. I won't have the outboard mounted on her, and I'm not leaving the little dock at the launch. Just put her in the water, and wait about 10 minutes or so walking around inside the boat to see if any water shows up in the bilge. If the 5200 is still real tacky I may wait until Saturday as it's supposed to rain here all day tomorrow.

Told you this process was taking to long.:mad-new:

Oh well what ya gonna do.:watermelon:
 

GA_Boater

Honorary Moderator Emeritus
Joined
May 24, 2011
Messages
49,038
Re: Replacing my 16ft SS Starcrafts Transom

Since you're just dunking and by Sat. the stuff will be skimmed over good, you'll be OK. It does really take a week, Tn.
 

Tnstratofam

Commander
Joined
Aug 18, 2013
Messages
2,679
Re: Replacing my 16ft SS Starcrafts Transom

As Yoda would say " Patience one must learn!" I know it doesn't do me any good to be in a hurry. It is early spring, and we've got plenty of good lake weather ahead of us. Besides like I said there are other things to keep me busy till it's ready.
 
Last edited:

Woodonglass

Supreme Mariner
Joined
Dec 29, 2009
Messages
25,928
Re: Replacing my 16ft SS Starcrafts Transom

Uhmm 5200 cures underwater!!! In fact it actually likes water to fully cure!;)
 
Last edited:

Tnstratofam

Commander
Joined
Aug 18, 2013
Messages
2,679
Re: Replacing my 16ft SS Starcrafts Transom

Really. Cool then I can leak test her tonight. Thanks WOG !! I'm glad you help us tin guys out from time to time. Although technically I have both a glasser, and a tin baby.

Split personality, or the Gemini coming out in me.
 

Tnstratofam

Commander
Joined
Aug 18, 2013
Messages
2,679
Re: Replacing my 16ft SS Starcrafts Transom

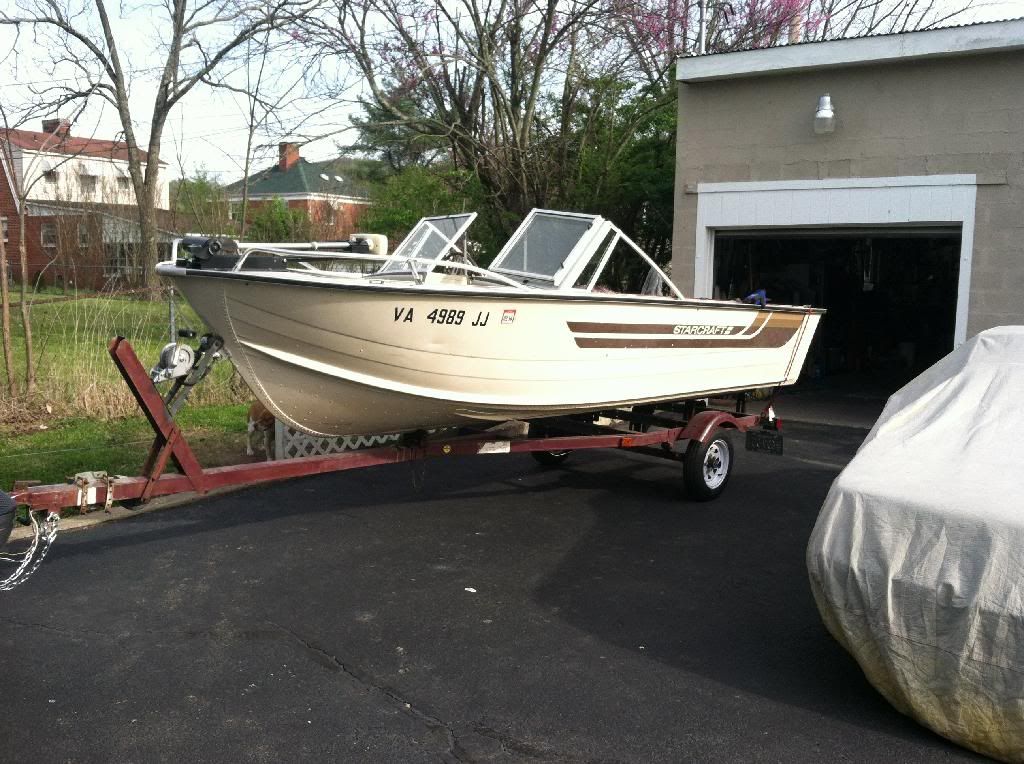
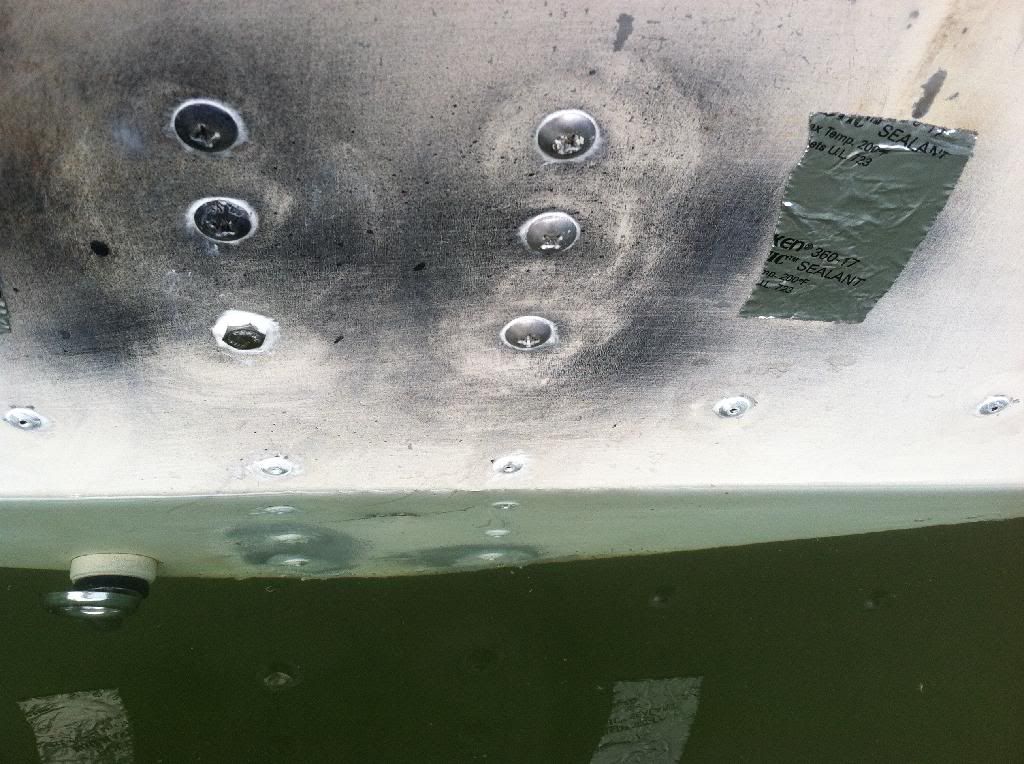
First time she's been out of the garage since last November.


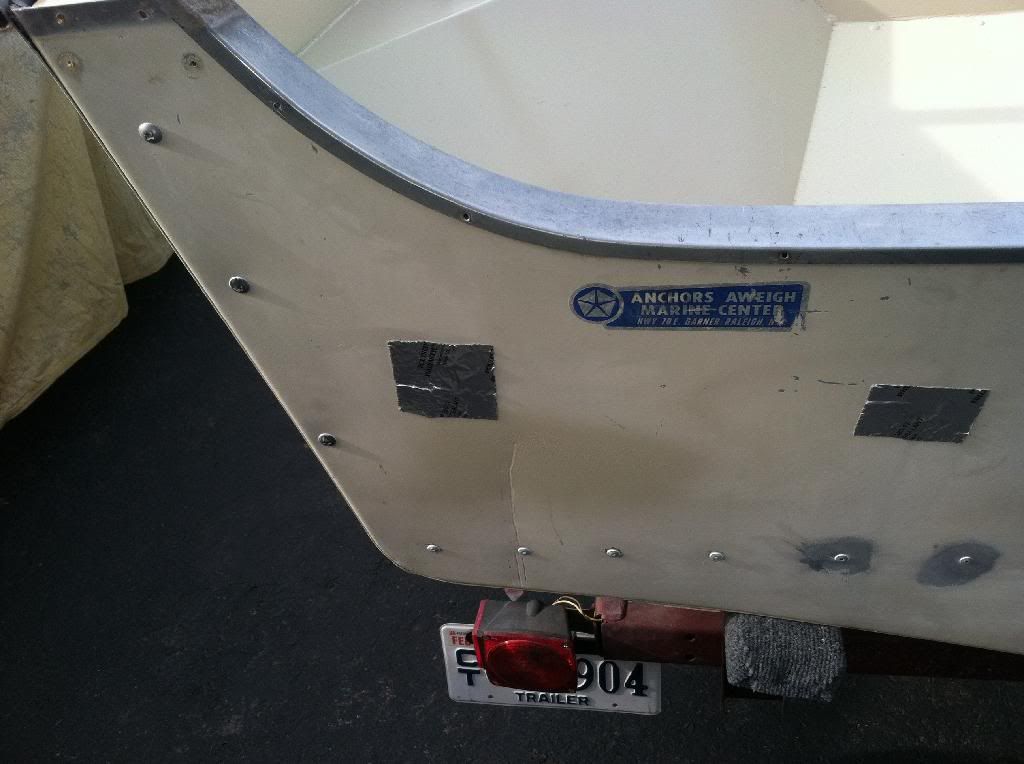
I covered these holes with tape just in case.


Tnstratofam

Commander
Joined
Aug 18, 2013
Messages
2,679
Re: Replacing my 16ft SS Starcrafts Transom

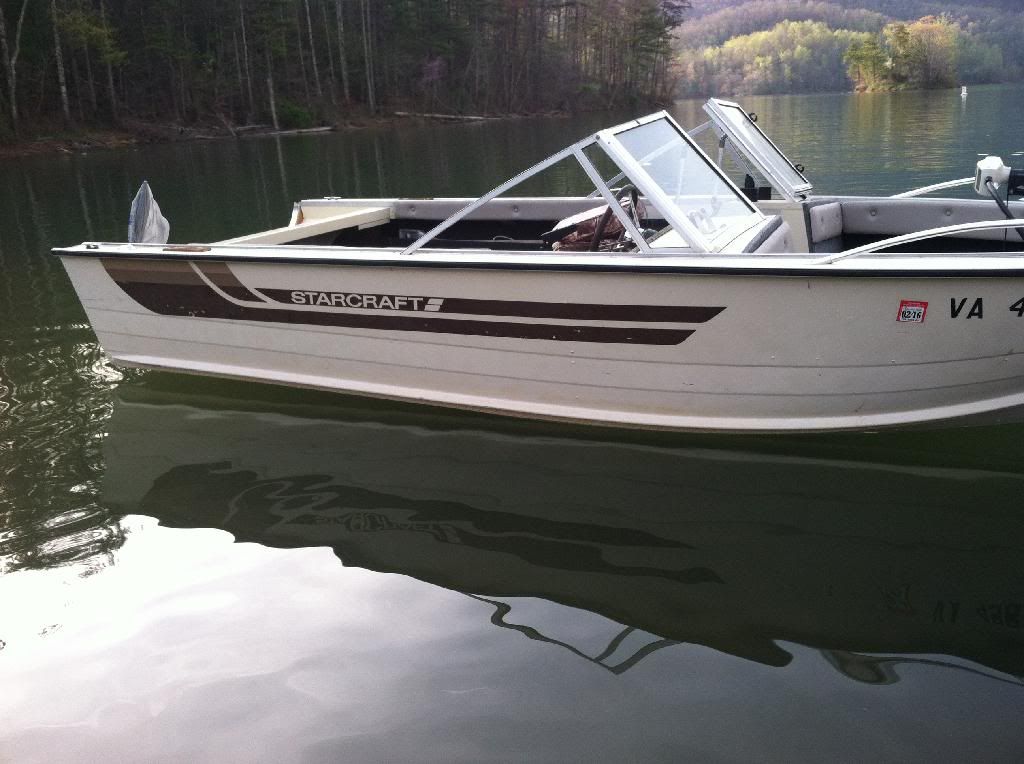
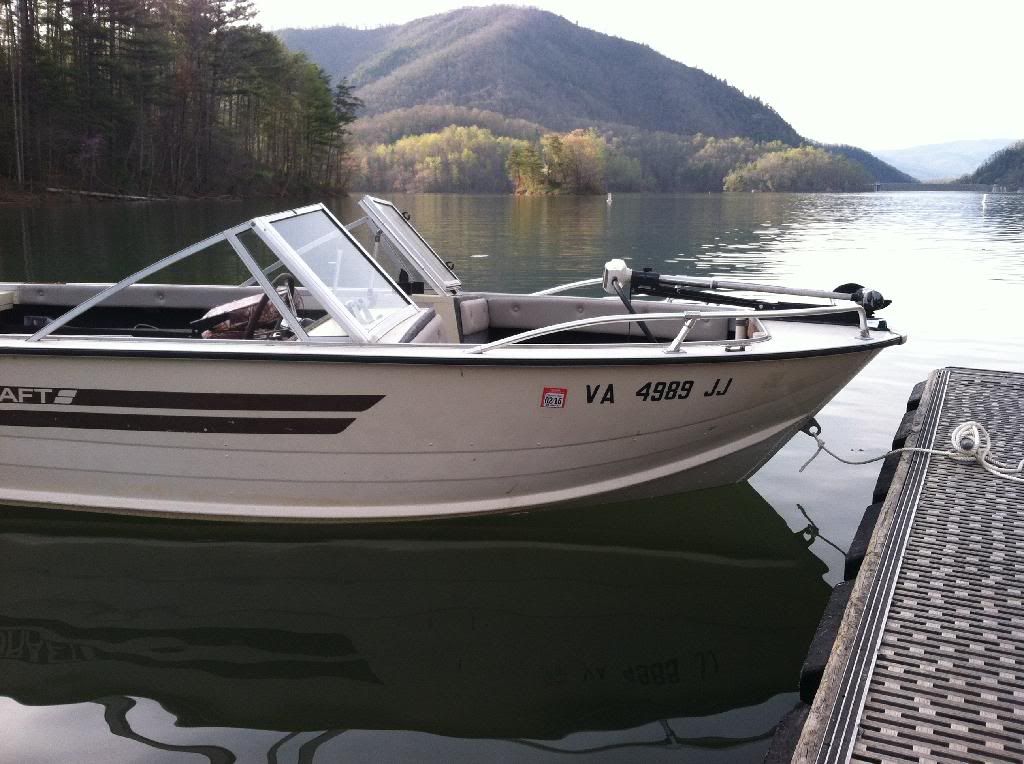
Here she is boys and girls first time in the water since the new transom was installed.


She's awful purdy I think!!!


The funny thing is the bolt I was worried about not having the 5200 cured enough wasn't even below the waterline.


NO leaks.......


Tnstratofam

Commander
Joined
Aug 18, 2013
Messages
2,679
Re: Replacing my 16ft SS Starcrafts Transom

I'm going to have to get some new rollers for my trailer. They gave me a fit today trying to load.

This one is actually not even held in place anymore.


If the weather holds I will mount the outboard on Saturday, and see if we can get her fired off. I'll also be repainting the stern. Hopefully it will turn out okay. I'll post more pics as I get her finished up.
 
Last edited:
Top