PlayDoh’s 16 SS resto underway

PlayD0h

Petty Officer 1st Class
Joined
Apr 23, 2009
Messages
326
I also spent a fortune on materials. Mainly paint and 'varnish'. I went in to the Industrial plastics and paints store just looking for self etching primer, and to ask about Spar varnish vs epoxy. He recommended a "system 3 epoxy sealer", which would have cost me $200 to do the deck, transom, and apparently I could have primed the boat if there was enough left.

I ended up getting 2 quarts of Rustoleum Marine bare metal primer, and the same Rusto Marine 'TopSide" paint. Yet after thinking about it, I'm not sure it was the best route, and I might try and return them. There for Above waterline, and the thought of doing a 2 part paint job isn't appealing.

I am wondering if it would work below the waterline, since at the very most I could see me using a marina slip for say 2-3 days, yet I could also easily not use one. Its hard to imagine a "Marine" paint that would be effected by being underwater for at most 8-10 hours at a time, say 2 dozen times a year. Thoughts?

I've found the threads asking the same, and have read that some say its ok for 2-3 days at most, some say its ok for 12 hours at most, and others who say don't do it. Going against the manufactures directions is not a chance I really want to do, without good assurance its been done before.

That, and the fact, its probably more expensive then the "tractor" rustoleum. I'm just unsure of what to do at all regarding paint, since theres a few methods recommended, and finding the suggested paint here in Canada isn't easy. They sell Rustoleum here in Canada, yet also Tremclad, which I'm sure is the same thing, as its made by the same company. Yet why the name change here, I have no idea.

Its either a $500 epoxy paint job, with or without the extra $200 for Alodine, and alumiprep. Or the sand, acetone, vinegar, etching primer, Rustoleum bare metal primer, then either another coat of regular rusto primer, or rusto paint. In that order, if I'm right. Yet buying the Rustoleum paint here is for one, not as its described in the states, or I'm not understanding the whole paint terminology quite enough yet. It seems theres 2 or 3 words to describe the same thing. Like, Oil-based, lacquer, enamel, Acrylic, etc.

The more I read and learn, the less confidence I have in any one method or product. Theres always 2 opposing opinions, and quite possibly one is wrong. Potentially very wrong, and following that 'wrong way' could cost a great deal of work and money.

Soft solid aluminum rivets, vs Hard
Spar varnish vs epoxy
Epoxy type x vs type y

I'm happy with OEM materials and tractor paint, yet the fancy, expensive coating and materials are appealing. I mean, spend $300-$500 on a transom that will last 50 years, vs 10-20 years with proper care, for $150-$200 (Canadian $ remember). Do I care if my son has to redo my transom in 20 years? or will a properly cared for transom last a hundred years?

Do I Really need a Polyurethane epoxy primer and paint? Will it matter if I prep with sanding and vinegar vs Alumiprep and Alodine?
 

PlayD0h

Petty Officer 1st Class
Joined
Apr 23, 2009
Messages
326
The transom should be 1-3/4" but it's delaminating and growing in size and it's the 3 piece style which means not completely solid. Also see that white on the old wood all around the holes? That's where water leaked in and started corroding the inner AL transom skin. Wire wheel that stinky stuff off the skin, clean well, fill pitting with Marine tex, sand if needed, then prime and paint it to prevent any further damage.

You can buy replacement rub rail insert, I have for both my SC boats, yours should be the same profile. Post a pic of the insert end.

[IMG2=JSON]{"data-align":"none","data-size":"full","src":"https:\/\/forums.iboats.com\/filedata\/fetch?id=10654136&d=1536956677"**[/IMG2]

Yup, that the plan, thanks to yours and others great advice. And its great to hear a replacement can be had.

I'm certain I've seen a few people, if not lots of people use 2 pieces of 3/4" ply for the transom. I did have to use a decent amount of force to get the transom out, and I honestly cant imagine a 1 3/4" transom fitting in to there. There is signs of the transom getting wet, for sure, and it doesn't even look like it was coated or treated with anything. Nor does it look like marine ply, as theres quite a few voids on the edges. The top of the starboard edge has massive voids, which at first I thought was rot, but its solid and not rotten.
 

PlayD0h

Petty Officer 1st Class
Joined
Apr 23, 2009
Messages
326
photo301153.jpg Its not easy to tell with this pic being straight above, but large voids in OEM transom. I'll try to get a better pic.
 

Watermann

Starmada Splash of the Year 2014
Joined
Jan 12, 2013
Messages
13,753
Yeah it's supposed to be 1-3/4", my SS transom wasn't sealed either.

IMAG2112.jpg
 

PlayD0h

Petty Officer 1st Class
Joined
Apr 23, 2009
Messages
326
photo301155.jpg
 

Attachments

  • photo301156.jpg
    photo301156.jpg
    500.5 KB · Views: 11
  • photo301157.jpg
    photo301157.jpg
    1 MB · Views: 3

Watermann

Starmada Splash of the Year 2014
Joined
Jan 12, 2013
Messages
13,753
Maybe the 18' ers are 1 3/4" and 16' 1 5/8" ?

No, now get to work cleaning that corrosion off there and repairing that cracked knee brace :lol:

fetch
 

PlayD0h

Petty Officer 1st Class
Joined
Apr 23, 2009
Messages
326
Click image for larger version  Name:	 Views:	1 Size:	509.4 KB ID:	10654605Click image for larger version  Name:	 Views:	1 Size:	486.0 KB ID:	10654606Click image for larger version  Name:	 Views:	1 Size:	676.5 KB ID:	10654607Click image for larger version  Name:	 Views:	1 Size:	913.3 KB ID:	10654608Click image for larger version  Name:	 Views:	1 Size:	714.5 KB ID:	10654609
No, now get to work cleaning that corrosion off there and repairing that cracked knee brace :lol:

[IMG2=JSON]{"data-align":"none","data-size":"full","height":"1520","width":"1637","src":"https:\/\/forums.iboats.com\/filedata\/fetch?photoid=10654212"**[/IMG2]

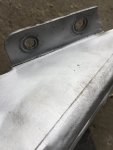
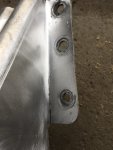
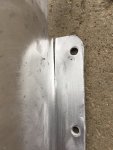
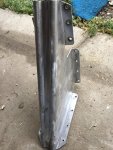
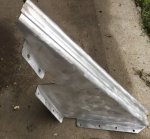
I'm seriously considering tossing the entire knee brace in the trash. of the 6 fastening tabs, 3 of them have cracks. I've seen repairs with extra supports, and I'm not against that yet, but I'm thinking it might be easier to just build one, rather than try to beef one up.
One flaw in this design, other than strength is that it traps debris in and under it. When I pulled the transom, a decent pile of crap fell out of the knee brace innards.
Qq5zkkhSpcYdpdCc9
 

PlayD0h

Petty Officer 1st Class
Joined
Apr 23, 2009
Messages
326
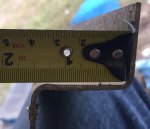
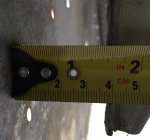
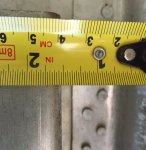
I’m now wondering to what extent the knee brace provides structural support. It’s foot print on the hull is 2 tabs roughly 2” x 7”, held by 8 rivets. I can tell by the miss-alignment of the rivet holes, that the holes were drilled while being installed and by eyeball. A couple are too close to the edge for sure.
From my impression before seeing the brace and hull up close, was that a fractured knee brace was partially responsible for transom damage, yet the vice versa more prevalent.
My 35 year old transom was rock solid, yet the knee brace had only 2 or 3 rivets left through the hull, and only 1 of those was secure. Point being is that the knee brace doesn’t need the major redesign I’ve been fabbing up in my head.
I would think welding supports to the brace would be best, yet I’m no tig welder. So I’ll likely go the a rivet or bolt job, unless I can source someone to do it for me.

Im likely going to glue the 2 halves of the transom together tomorrow. I got like 2 dozen clamps and some 1/4” angle and 2x6’s for clamping across. I personally don’t like the idea of screwing some spiral to add calmpping, although I will screw through in the location of the holes that will be later drilled out anyways. I’ve laminated enough times to know lots of clamps and weights will be enough to make a strong bond.
 

BWR1953

Vice Admiral
Joined
Jan 23, 2009
Messages
5,864
I'm not a welder at all but that knee brace looks like it could be successfully re-welded by someone who knows what they're doing.

As for transom clamps, this is what I did. Didn't need any screws. :D

4.jpg
 

PlayD0h

Petty Officer 1st Class
Joined
Apr 23, 2009
Messages
326
I'm not a welder at all but that knee brace looks like it could be successfully re-welded by someone who knows what they're doing.

As for transom clamps, this is what I did. Didn't need any screws. :D


Nice, I have a wack of paving stones that I might use. I have lots of clamps, yet clamps aren’t as good at even pressure as weights.
I’ve caught a cold/flu and it’s sucked the life out of me, so not sure how much energy I’m going to have for the next few days.
 

BWR1953

Vice Admiral
Joined
Jan 23, 2009
Messages
5,864
Nice, I have a wack of paving stones that I might use. I have lots of clamps, yet clamps aren’t as good at even pressure as weights.
I’ve caught a cold/flu and it’s sucked the life out of me, so not sure how much energy I’m going to have for the next few days.

Take care of your health. It's important. That boat and transom will still be there waiting when you're feeling better. ;)
 

PlayD0h

Petty Officer 1st Class
Joined
Apr 23, 2009
Messages
326
So transom is laminated. Did the pile of brick/blocks/batteries/anything heavy. I’ve been going at the transom skin and what’s left of the hull that isn’t 100% bare with the nylon brush, here and there. Other than that all I’ve been doing is spending money and tracking down supplies. I sold some stuff I didn’t need and got some funds for supplies.
I got a gallon of Spar from Lowe’s for $70. A quart of Boiled linseed, and extra mineral spirits and was going to do the ‘Old timers’ wood sealer method shared by WOG. Yet for the extra $100 I’m pretty sure I’m going to return the gallon of spar and just get that System Three ‘S-1’ epoxy sealer. For the $230 I can do the transom and deck and possibly use some as primer. Most notably on the inside of the transom skin.
I grabbed some West ‘Aluminum repair kit’ expoxy, and going to use it to fill the very minor corrosion pitting on the transom skin, and possibly fill what’s left of a decent dent/crease on the hull side, after I bang it around trying to level it out. I watched some paintless dent repair work on YouTube so now I’m an expert, lol, but I think I can possibly work the dent out quite well if it cooperates.
Im picking up some Alumiprep and Alodine next week, and my solid rivets are finally in the mail from Aircraft Spruce. Looks like the weather might give me a window to prime and paint at least the hull bottom next weekend. If so I’ll be set for the winter, and just need to get the boat in my garage, upright and stable.

Then the fun can begin. I’ll wait till then to fit the transom wood, and all that which goes with it. I got a butt load of 2” polystyrene sheets from a neighbor who was moving and trying to clear out 30 years of clutter from their acreage. aka fire sale. $15 for around 30 sheets. So the floatant will be a near freebie. I’m thinking of 5/8” G1S exterior fir for the deck, sealed with the S-1 and covered with vinyl. Yet I have time to think that over more.

Ill take some some pics of my dent tomorrow. The light, almond color the boat was, hid the dent very good. And I’m not trying to achieve showroom paint, but this dent is worth the effort. I’ve banged out enough dents before enough to know the ‘don’t do’s’ like bash away at them, so I have some confidence I can do it.
 

classiccat

"Captain" + Starmada Splash Of The Year 2020
Joined
Dec 20, 2010
Messages
3,405
Wow... that's an eye-full right there! :lol:

Before you dump the plans for the OT formula for epoxy, you should consider what the additional cost would be to order some fiberglass cloth. Epoxy without cloth on the plywood we use is prone to cracking from wood grain checking. West Systems has alot of literature available on this online now (I had to buy books a few years ago). See page 69.

Regarding "priming" the aluminum transom skin with epoxy, i recommend against that; anywhere that you have poor adhesion will trap water and lead to more corrosion.

Regarding the West Systems G-flex (repair kit), that has a very low viscosity; you won't be able to fill corrosion on a vertical surface without adding fillers. I've used it recently on my outer-seam while the boat is "turtled". Most of us use JBWeld or Marine Tex for filling corrosion holes once they're cleaned-out.

now lets see some pics of those battle scars! :hungry:
 

PlayD0h

Petty Officer 1st Class
Joined
Apr 23, 2009
Messages
326
It sounds like this S-1 is not a normal epoxy, and cloth isn’t reccomended or potentially not possible with it.
Heres the description
S-1 is a two-part Clear Penetrating Epoxy Sealer. Mixed at a simple 1:1 ratio S-1 is extremely effective at prolonging the service life of all woods, concrete, metals and fiberglass reinforced polyester.

S-1 is ready to use with no thinning required. It displays excellent wetting properties on most surfaces. S-1 has a long pot life and can be applied with a brush, roller or spray equipment. It is completely waterproof and suitable for use above or below the waterline. S-1 is a superb undercoat primer for most paints and clear finishes featuring strong adhesion to most substrates with minimal surface preparation.

S-1 does not require sanding between coats if recoat time is less than 24 hours. It is resistant to salt air, mild acids, alkalis, chemicals and solvents. S-1 is not recommended for gas tanks containing unleaded gasoline.
  • Simple 1:1 mix ratio
  • Ready-to-use viscosity, no thinning required
  • Excellent wetting properties on most surfaces
  • Applies by brush, roller, or spray
  • Long pot life
  • Waterproof
  • Strong adhesion to most substrates with minimal surface preparation
  • Non-brittle even at extremely low temperatures
  • No sanding required between coats up to 24 hours
  • Resistant to salt air and water, and mild acids, alkalis, chemicals and solvents (Not unleaded gasoline-proof).

I was told it penetrates the wood much wood much more than a regular epoxy, which I’m thinking would sit on top of the wood more than S-1. The guy sounded like he really knew his ‘ship’ and said there was nothing better than this to use. I didn’t initially like the idea of it as a primer, although it looks like the epoxy primers and paints are considered and priced as the top tier products vs alkyds.
 

Watermann

Starmada Splash of the Year 2014
Joined
Jan 12, 2013
Messages
13,753
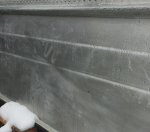
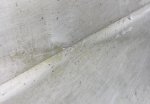
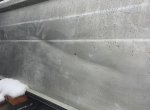
A crease through a lap bend, that'll be a challenge to push out.
 

MTboatguy

Fleet Admiral
Joined
Jul 8, 2010
Messages
8,988
I have done a lot of body work on cars as well as RV's over the years and on aluminum, that is going to be a difficult one to push out. I will be interested to see how you approach it.
 

BWR1953

Vice Admiral
Joined
Jan 23, 2009
Messages
5,864
Maybe that crease could be hidden with some fancy paint striping? :noidea:
 

PlayD0h

Petty Officer 1st Class
Joined
Apr 23, 2009
Messages
326
I have done a lot of body work on cars as well as RV's over the years and on aluminum, that is going to be a difficult one to push out. I will be interested to see how you approach it.

I was thinking about shaping / moulding a dolly to the same contour or profile as the bend. An angle grinder and a decent chunk of steel, and match it to the bend just beside the crease. Warm the aluminum, but not heat it, and tap it out.
The rest will be easy in comparison. I plan on most likely needing some g-flex epoxy to make it near perfect, since I’m not sure how this metal will take a shape. And I don’t want to do too much and risk making things worse.
I have another dent just above the rub rail, that has left a 1/4” gap between the rail and hull. I’m not sure if I’ll need to remove the rail to get the hull back out to acceptable standards.
It will all depend on the metal of course. A good portion of the hull is in tension and shaping it is a whole different beast. Yet this crease is in a ‘flimsy’ part and I’m hoping cooperates.
I don’t recall putting this crease in it, yet I have had a few rodeo retrievals and my trailer has essentially no guides. Someone put what looks like bow roller guides at the rear of the trailer, which makes them useless and only capable of damaging the hull. Which is what I suspect caused the crease.
When im done with this trailer, my 6 year old will be able to drive it on. I have some inventive ideas for guides that I hope to build and test also.
 
Top