New Journey

MNhunter1

Lieutenant Junior Grade
Joined
May 12, 2014
Messages
1,053
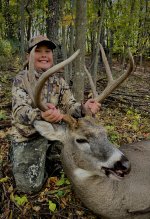
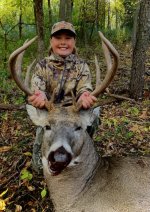
Still trying to get out and lay down one more doe with my bow, but the hunting season is about wrapped up for the year and I can turn my focus back to the boat. Season was good with numbers, but not so much in the way of trophies. I picked up a new grinder, stuffer, and smoker to start doing more of my own processing, so harvested a bunch of does, ducks, and geese to fill the freezer. My 12 year old shot a dandy during early archery, so that was really the highlight of my season. 11yds with his bow!
IMG_4615.jpegIMG_4618.jpg

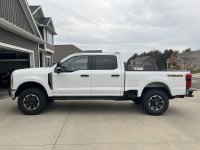
Also picked up a new tow rig last week. A little overkill for my needs, but after driving a minivan for the past 11 years while the kids were young, its time to overcompensate:)
IMG_4963.jpg

Hope you all are well and looking forward to getting back in the grind again!
 

Watermann

Starmada Splash of the Year 2014
Joined
Jan 12, 2013
Messages
13,787
Oh yeah that was a dandy buck, bigger than any I've ever taken. No such thing as overkill for a truck.
 

MNhunter1

Lieutenant Junior Grade
Joined
May 12, 2014
Messages
1,053
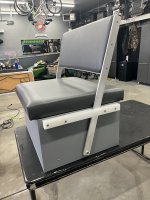
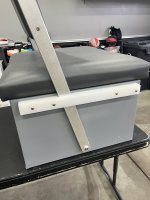
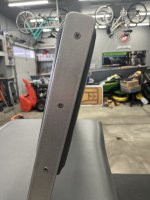
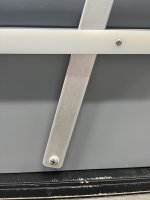
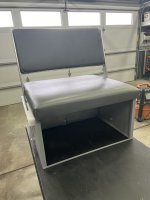
Got my flip/flop seat all finished up. Left the seat cushion unscrewed until I actually mount it in the boat so I can remove it if I need more room to secure it to the deck. This will house the 12 gallon tank and I may try to hinge the seat portion for easier access rather than just screw it in place like it was originally. Replaced the wood uprights with stainless flat bar and the wood side supports with starboard. All new stainless hardware and nylon washers and spacers.

IMG_5119.jpgIMG_5120.jpgIMG_5121.jpgIMG_5122.jpgIMG_5124.jpg
 

MNhunter1

Lieutenant Junior Grade
Joined
May 12, 2014
Messages
1,053
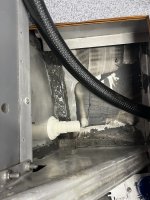
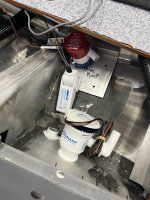
Got all the thru hull fittings secured and sealed with 3M5200, bilge pump and float switch mounted, livewell pump installed, and all livewell fittings installed and sealed in the center console as well. After a 7+ day cure, I'll get the Shields 149 hoses cut to length and attached. Will finish up with the splashwell installation after getting all my hose, cables, etc. pulled from the console. Much easier to work in the bilge with the splashwell off, but staying mindful of the fact I may need to work on stuff in the future and planning accordingly.

IMG_5125.jpgIMG_5127.jpg
 

MNhunter1

Lieutenant Junior Grade
Joined
May 12, 2014
Messages
1,053
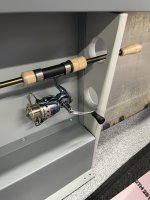
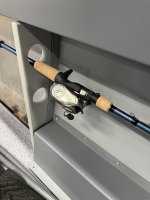
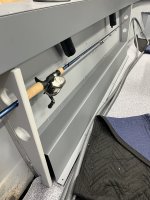
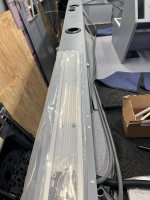
Gunnels mocked up with some Folbe rod holders, Mate Series cup/rod holders, and Cisco tracks. Still plan to lay down another coat of paint with the Epifanes beads on the gunnel tops, so nothing is attached yet, nor has the trim been put back on. Swapped out the wooden side support/rod holders with some new ones cut from grey Starboard. A little nerve wracking cutting and routing on such expensive material, but everything worked out great. I had actually cut some out of 3/4" ACX and had them all coated in epoxy, but ultimately decided to try the Starboard and I'm glad I did.
IMG_5130.jpgIMG_5131.jpgIMG_5132.jpgIMG_5133.jpgIMG_5134.jpgIMG_5135.jpg
 

BWR1953

Admiral
Joined
Jan 23, 2009
Messages
6,177
Got my flip/flop seat all finished up. Left the seat cushion unscrewed until I actually mount it in the boat so I can remove it if I need more room to secure it to the deck. This will house the 12 gallon tank and I may try to hinge the seat portion for easier access rather than just screw it in place like it was originally. Replaced the wood uprights with stainless flat bar and the wood side supports with starboard. All new stainless hardware and nylon washers and spacers.

View attachment 393803View attachment 393804View attachment 393805View attachment 393806View attachment 393807
Nice job! (y)
 

SHSU

Lieutenant Junior+Starmada Splash Of The Year 2019
Joined
Mar 8, 2017
Messages
1,722
Looking good!!!

Like the rod holders. Was that by original design or something you came up with in that dead space?

SHSU
 

MNhunter1

Lieutenant Junior Grade
Joined
May 12, 2014
Messages
1,053
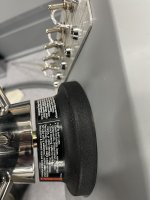
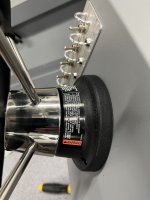
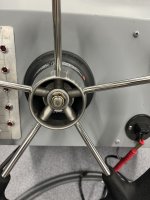
Posted this is the steering forum as well, but is the gap between the bezel and steering wheel normal? Seastar rotary NFB, no play in the wheel.IMG_5276.jpegIMG_5275.jpegIMG_5274.jpeg
 

MNhunter1

Lieutenant Junior Grade
Joined
May 12, 2014
Messages
1,053
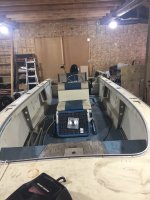
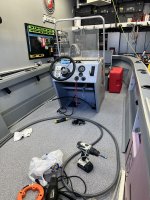
Just some updates... Been plugging away here and there as time allows. Got all the plumbing for the livewell and bilge all wrapped up and the center console secured in place. Steering installed(Seastar NFB 4.2 rotary) and cable ran, just waiting to feed it through the helm until I get all my dash work done to leave me some space. Throttle and control cables ran to the console, but still need to secure to the top mount controls, then onto wiring. Still need to coat my switch plate too. Gunnels received another coat of paint with the Epifanes beads added for a bit of non-skid and to help hide the imperfections for all the holes patching that was done. Rod holders, cleats, tracks, light mounts all secured down with backers. Cut all the floatation to squeeze behind the side panels and getting those all mocked up and ready to secure in place. Had to pivot and leave some space for the rod handles and steering cable routing, as well as extend my wires for the anchor light so I still have access when I wire it all up. Also need to run any wiring needed for the bow up through the gunnels before I close off that access with the rear side panels. New Moeller 12 gallon low profile tank arrived for under the flip flop seat, which is all ready to secure into place, but I'm waiting until after all my console work is complete so I don't restrict my workspace/access. Next steps will involve finishing up the fitment and securing of the side panels, then installation of the spalshwell. The splashwell on this Mariner/MR180 is a bit different than my previous Starcrafts(16SS and 15' Nova). Once that's installed, she should be pretty well buttoned up and ready to float. I still need to cut and install the front casting deck, and may add a small casting deck in the aft as well, but still debating on configuration, hatches, pedestal mount, etc. Also trying to restrain myself from picking up a new trolling motor for the bow, but I'm sure at some point there will be a 24v 80lb Terrova finding a home there. Some good sales going on for the outgoing '23s...so tempting.
Then its on to trailer and motor work, but those can almost warrant their own posts and focus we'll save for another day.
Baby steps!
IMG_5277.jpgIMG_5278.jpg
 

Gibbles

Commander
Joined
Nov 14, 2009
Messages
2,027
I wouldn't give that space a second thought if it were me.
as long as it's engaged nice and solid, I would assume it's especially good if it's not rubbing!
 

Moserkr

Chief Officer + Starmada Splash Of The Year 2021
Joined
Nov 23, 2020
Messages
869
Man that boats looking good. Clean and professional.
 

MNhunter1

Lieutenant Junior Grade
Joined
May 12, 2014
Messages
1,053
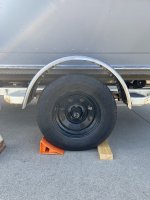
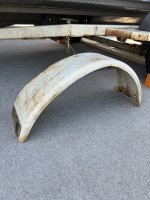
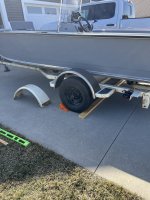
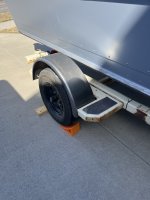
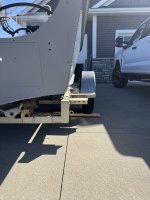
Making small progress. Took advantage of the unseasonable weather we are having here in MN and pulled the boat out of the hangar(garage) to get the new fenders all mocked up and mounted. One of the original fenders was all dented up and too far out of whack for me to want to attempt to straighten it up, so grabbed a couple new ones. Looked hard for a salvage early/mid-80s Shoreland'r donor, but ended up going with the new tin. Still need to prime, paint, and add some carpeted backers, but happy with the results. I'm planning to upsize the tires from the 13's to a 14 or 15 in order to gain a little additional ground clearance at the transom. Trailer sits pretty low, and I want to make sure I can lower my motor all the way during storage in order to fit it in the garage. I really wish I would have tackled the trailer resto prior to the hull, but it is what it is and I'm still deciding whether to try to knock it out still this spring before, or just use it as is for the season and tackle it next winter. Likely be much easier to get the hull onto some sort of cradle prior to mounting the motor, but one way or another I'll figure out a means:)
IMG_5348.jpgIMG_5349.jpgIMG_5350.jpgIMG_5351.jpgIMG_5352.jpg
 

MNhunter1

Lieutenant Junior Grade
Joined
May 12, 2014
Messages
1,053
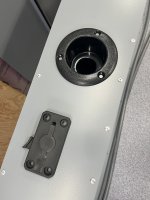
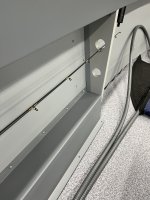
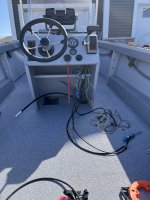
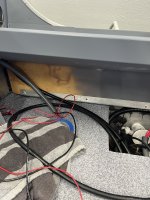
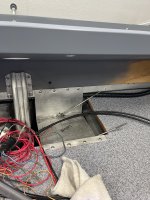
The joys of a center console... Finally got all my wires/cables pulled to the transom, and I can now finish up the splashwell installation. This MR180 model has all sorts of side panels and a unique splashweel configuration that requires some planning to reduce the amount of effort needed to run all the wiring, cables, controls, and install the bilge pump, float switch, livewell pump and plumbing. I should be good now, and ran an extra length of 16g to both the bow and the transom in case I might want to use them in the future. Trolling motor will eventually live up in the bow with the 24V system up there.
IMG_5353.jpgIMG_5354.jpg
 

SHSU

Lieutenant Junior+Starmada Splash Of The Year 2019
Joined
Mar 8, 2017
Messages
1,722
Man, running it through conduit is serious.

SHSU
 

Gibbles

Commander
Joined
Nov 14, 2009
Messages
2,027
Damn good idea is what that is.
Also makes it easy to run new wires later if needed.
 

MNhunter1

Lieutenant Junior Grade
Joined
May 12, 2014
Messages
1,053
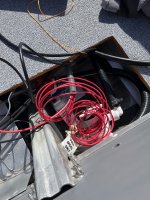
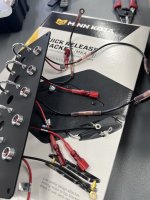
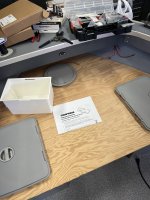
Update time: Was trucking along and then lost a little steam after the weather turned again. Got a few deliveries in, with another one arriving tomorrow containing the remaining terminal blocks and bus bars I need for the wiring. I know you all like pictures, and nothing too exciting to share, but I'll attach a few teasers:
IMG_5454.jpgIMG_5455.jpgIMG_5456.jpgIMG_5457.jpgIMG_5458.jpg
IMG_5459.jpg
Questions:
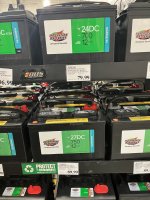
1) Any issue with the Interstate batteries from the local Costco? I'll be running a group 24 for the starting/house (would need to do some modifications to fit anything bigger), and then a pair of group 27's dedicated to the 80lb Ulterra. Sounds like many recommend going to group 29's, but not sure what/where to find them for a dependable/reasonable price.
2) 6 AWG tinned recommended for joining the two 12v together and running to the trolling motor plug? Easy enough to make my own, or just buy some custom? My ratcheting crimper only goes to 10 AWG, but have a friend I could likely borrow a larger crimper from.
3) Plan on picking up a Noco 2 bank onboard charger (5amp per bank) for the trolling motor batteries. Any benefit in adding a single bank for the starter/house battery as well, or will the motor keep it pretty well charged? I'm also planning on carrying a Noco GB40 Boost for IF I ever find myself needing a jump for the main. Not much on the house aside from lights, bilge, livewell pump, and a Garmin 93SV.
3) Any issue with securing bus bar and/or terminal block directly to the inside of the transom under the splashwell? It would be easiest to screw it right into the wood, and will be completely covered/enclosed, so don't really see much opportunity for it to get wet there aside from a fully swamped hull.
4) Trailer fenders - the originals had the carpet backers, are they necessary, or any concern with leaving them off/fenders opened on the back?

Thanks Mob! Hope everyone is well!
 
Last edited:

dingbat

Supreme Mariner
Joined
Nov 20, 2001
Messages
16,071
I run a pair of DC27 (not Costco) in my boat. Put 10 years on them before switching out. Both batteries tested good but felt guilty for not replacing them as PM

Cant make cables for the cost you can buy them anymore.
Cant think of their name off the top of the head, but one company does a great job making custom cables at very reasonable prices. Delivered to your door no less

Put a couple of flat washers to minimize contact with the transom. Need to keep the bar “dry” to minimize corrosion and paths to alternative ground sources. Multiple grounds points are problematic from a corrosion standpoint and can be tricky to diagnosis
 
Top